Extract
Foam board has become a common material for scratch building RC aircraft and is the basis for all the Flitetest designs. The problem is that the foam board available outside the USA is significantly heavier than that on which the designs are based. This leads to heavy fast flying planes that are not beginner friendly. This article looks at two enlarged FT designs that restore the good flying qualities of the original designs.
Background
The main FliteTest build material is foam board which consists of a polystyrene core sandwiched between two layers of paper. You will see it referred to by names like Dollar Tree foam board or DTFB, Bazics foam board and Adams Ready-Board which is the American manufacturer. Other makes of foam board are available, but tend to be significantly heavier. Adams Ready-Board is not freely available outside the United States, so the rest of the world has to be content with the heavy stuff.
To give some idea of the problem Adams Ready-Board weights 297 g/m². The lightest foam board I have found in the United Kingdom weighs 450 g/m² with some sheets reaching almost 600 g/m².
Before I was aware of this, I bought two 10 sheet boxes of A1 foam board: one in black the other white. I used the black to build an FT Nutball and the white to build an FT Flyer. both are beginner designs. Having used the recommended electronics, with a 2S 500 mAh battery, I was surprised to find both designs exceedingly tail heavy. By using a bigger motor and heavier 3S 1300 mAh battery, I was able to get the centre of gravity (CofG) in the right place, but the models were now twice the design weight. They did fly, but were very fast and not really suitable for a beginner.
There was no way I could reduce the weight using the same foam board, but having only used two sheets out of twenty I didn't want to buy anything else. Heavy models are not necessarily bad. The problem is the weight in relation to the model's size or more specifically the wing area. This is expressed mathematically as the wing loading, defined as the models weight divided by its wing area.
The total weight is made up from two parts. There is the airframe weight which will increase with the wing area. Then there is the battery, motor and control electronics. As I was already using a bigger battery and motor to get the heavy foam model to balance, this could stay the same. As the fixed component is a large part of the total, the wing loading will decrease with increasing wing area.
Nutball
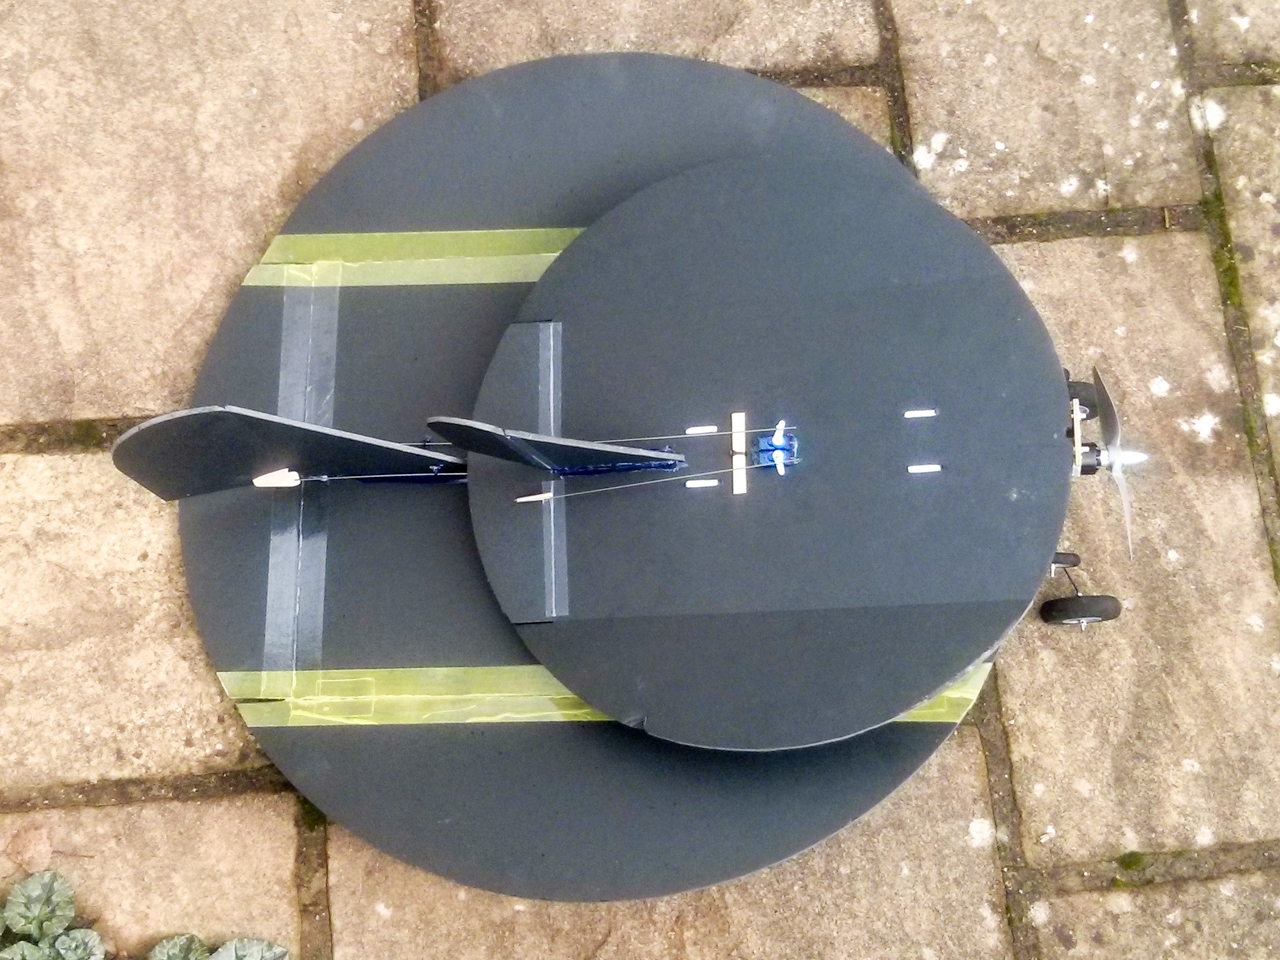
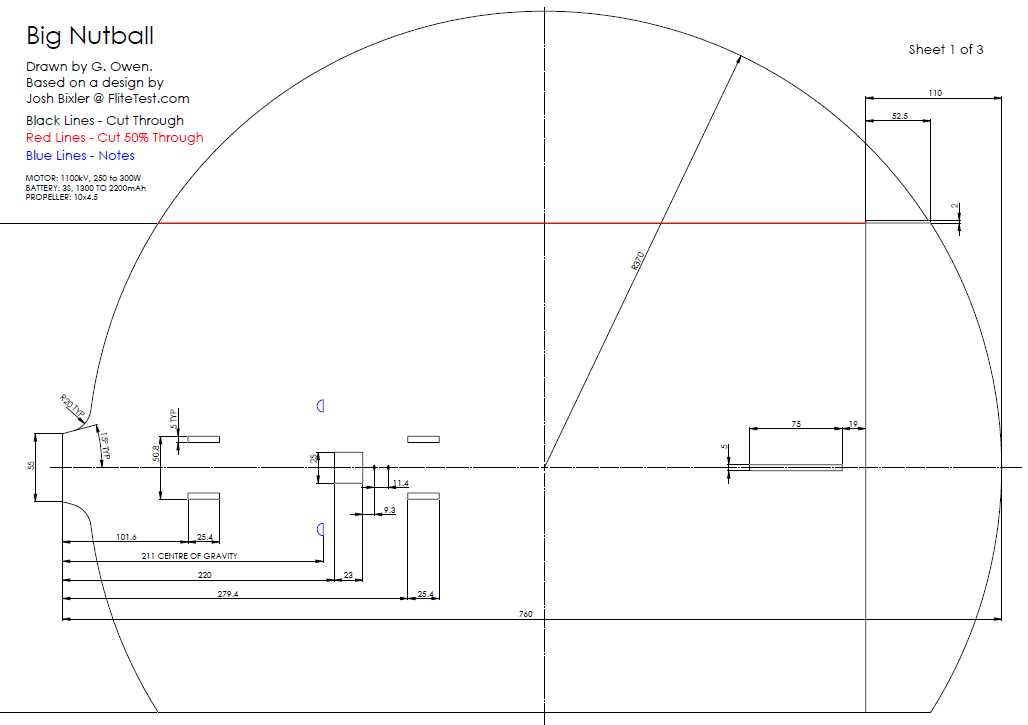
The design weight of the FT Nutball is 212g plus 30.5g for the battery. The wing is 490mm diameter. Therefore the wing loading is (212 + 30.5 ) / (3.142 x 490² / 4) = 0.00128 g/mm² or 1.28 kg/m².
It turned out for the Nutball that increasing the diameter to 740mm reduced the wing loading back to 1.28 kg/m² using the same electronics. This was also a good size for cutting the model from two A1 sheets. I kept the power pod the original size, but moved it forward slightly to help maintain the CofG position.
Big Nutball Full Size PDF Download
Big Nutball A3 Tiled Download
The plans have dimensions for those without access to an A1 plotter or don't want to stick together the tiled A3 prints. Construction follows the original video. You just need to tape on the port wingtip before gluing and use the included gauge instead of the power pod for setting the dihedral.
The push rods are long so use three zip ties to keep them straight.


Flyer
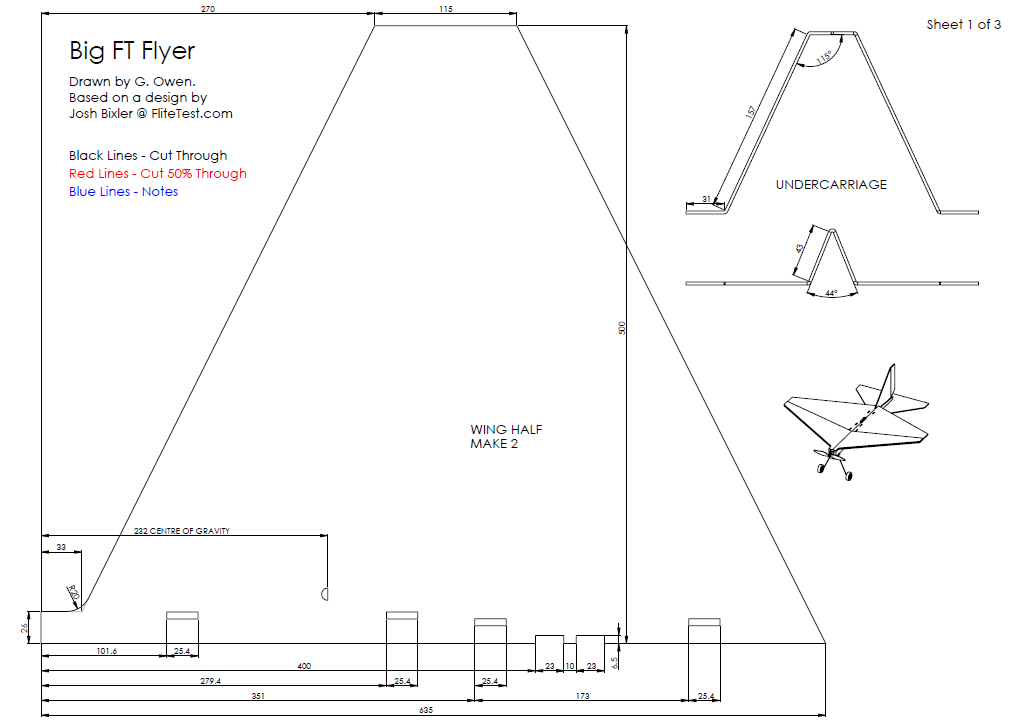
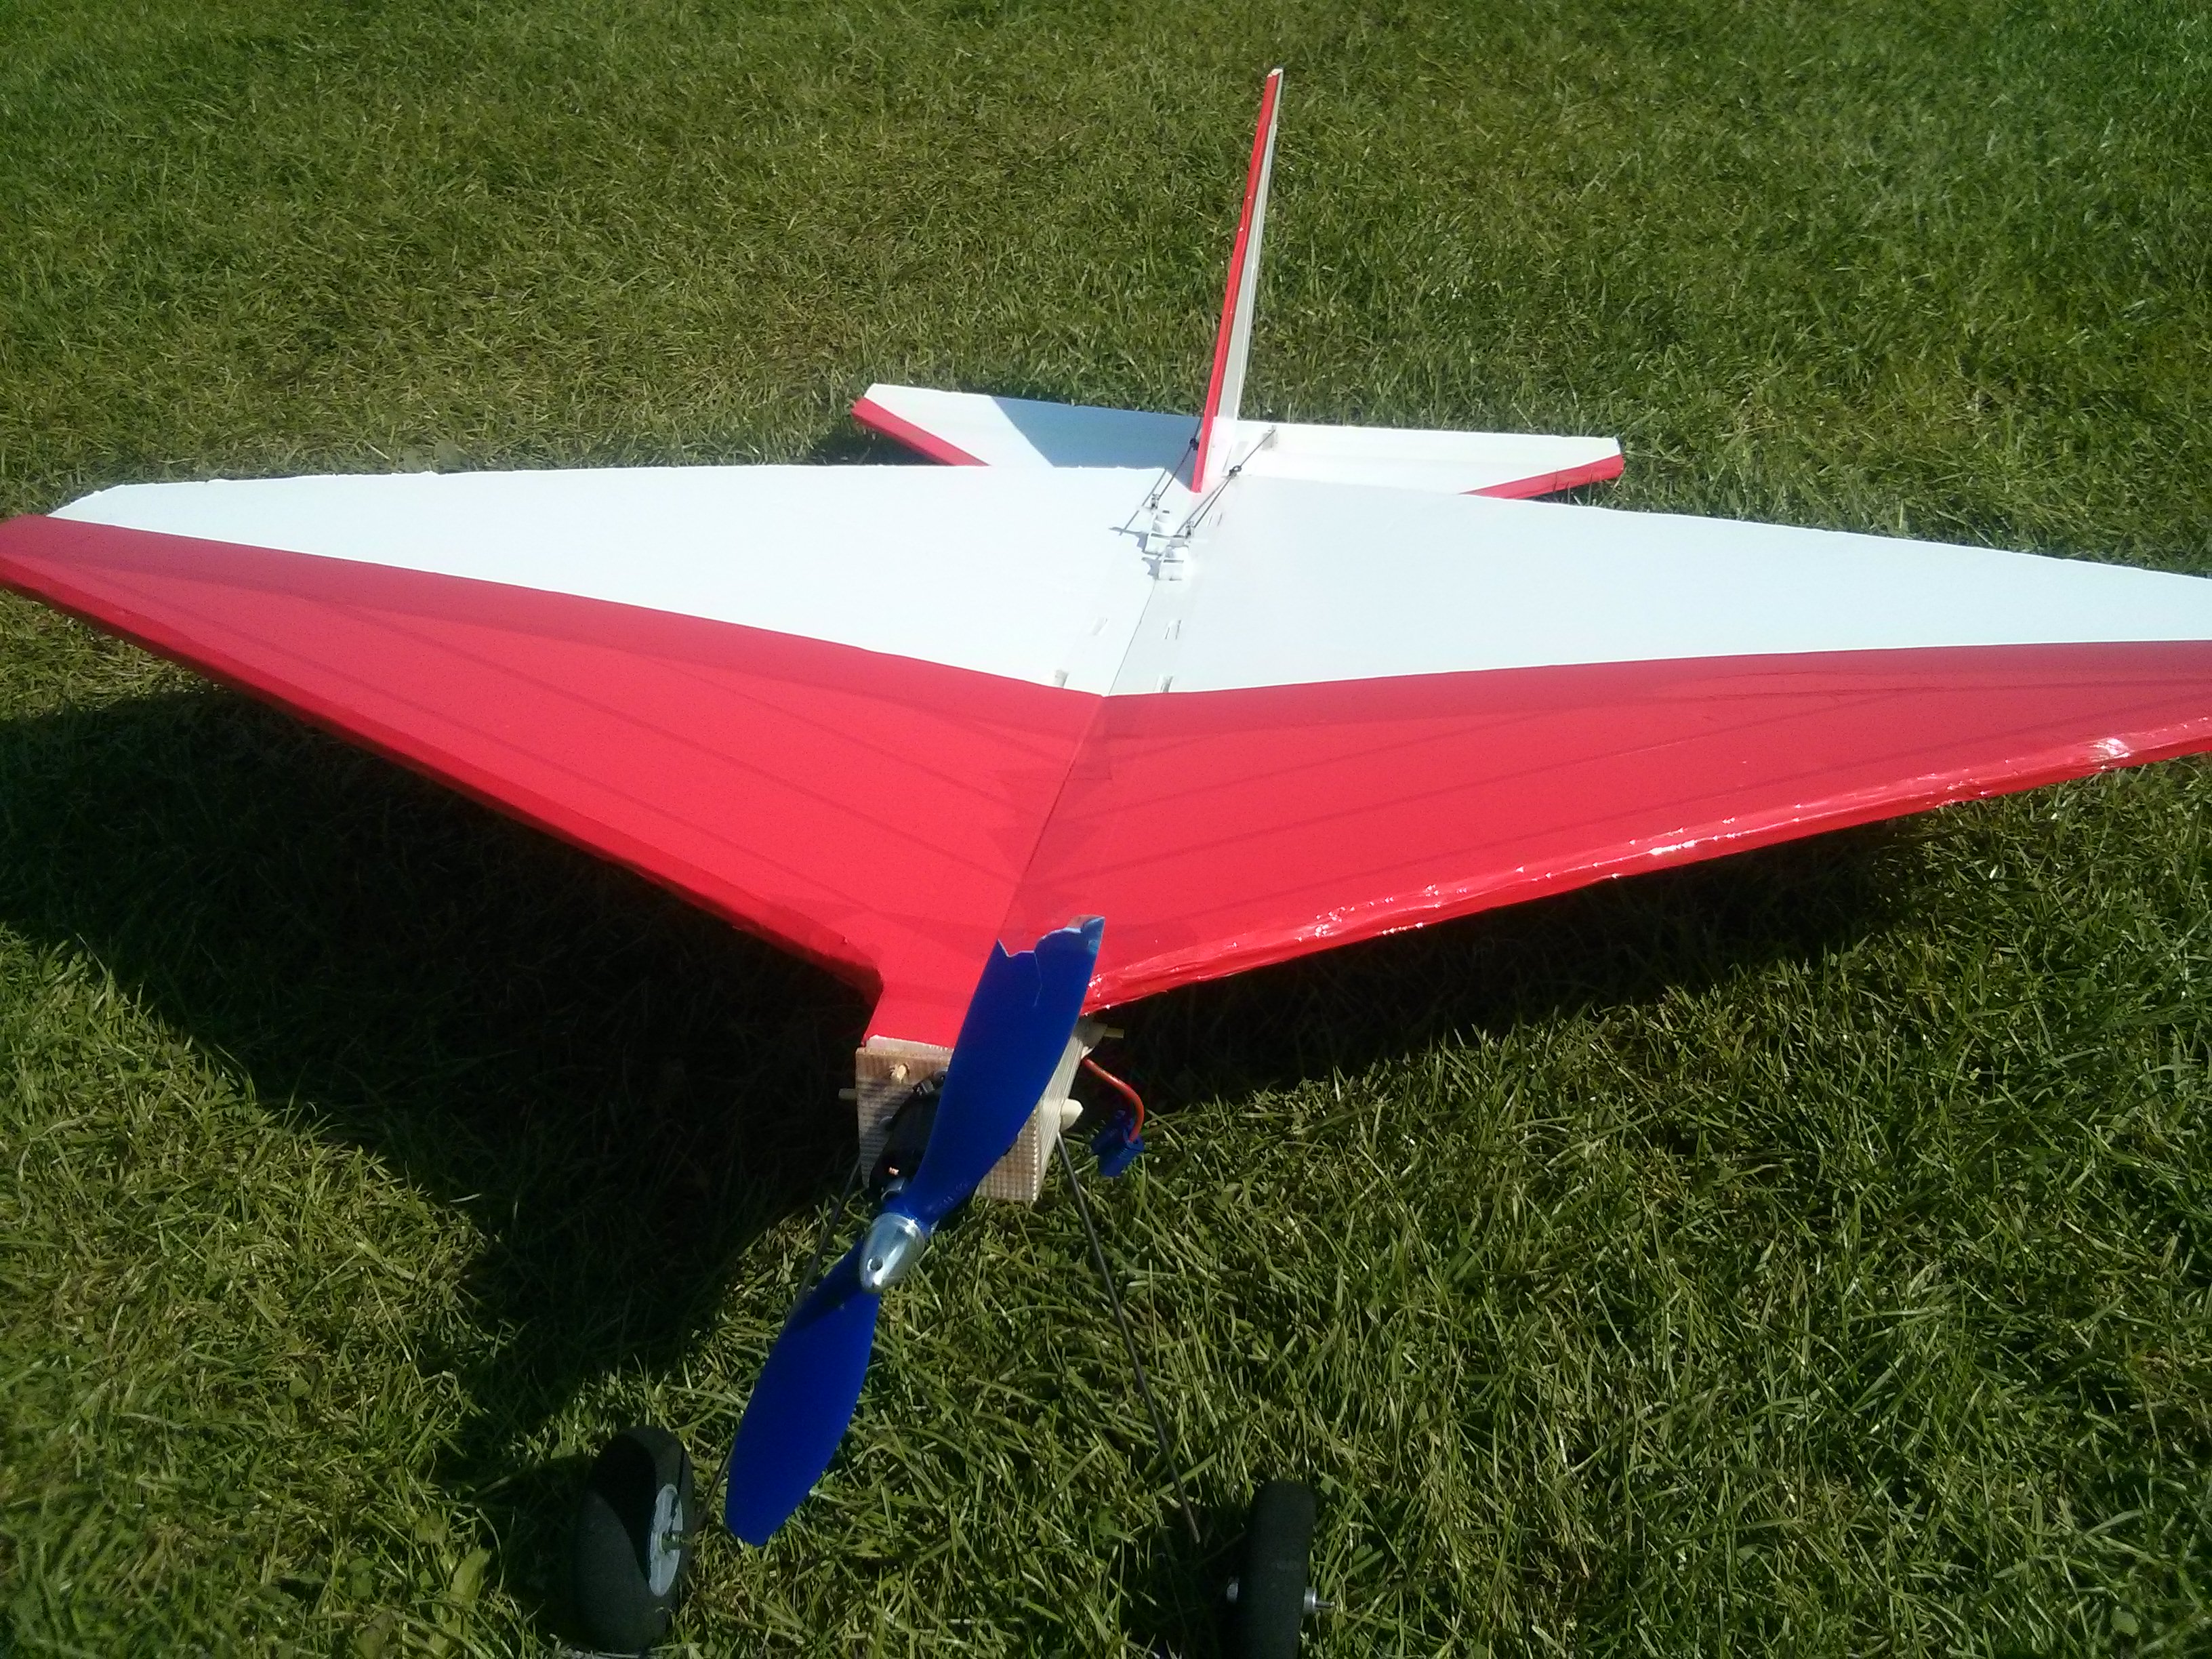
The big Flyer design followed the same procedure. The original target wing loading was 1.69 kg/m² with its 660mm span. Increasing the span to 1000mm got the wing loading down to 1.65 kg/m² with the heavy foam board. Again I extended the nose to ease the CofG placement.
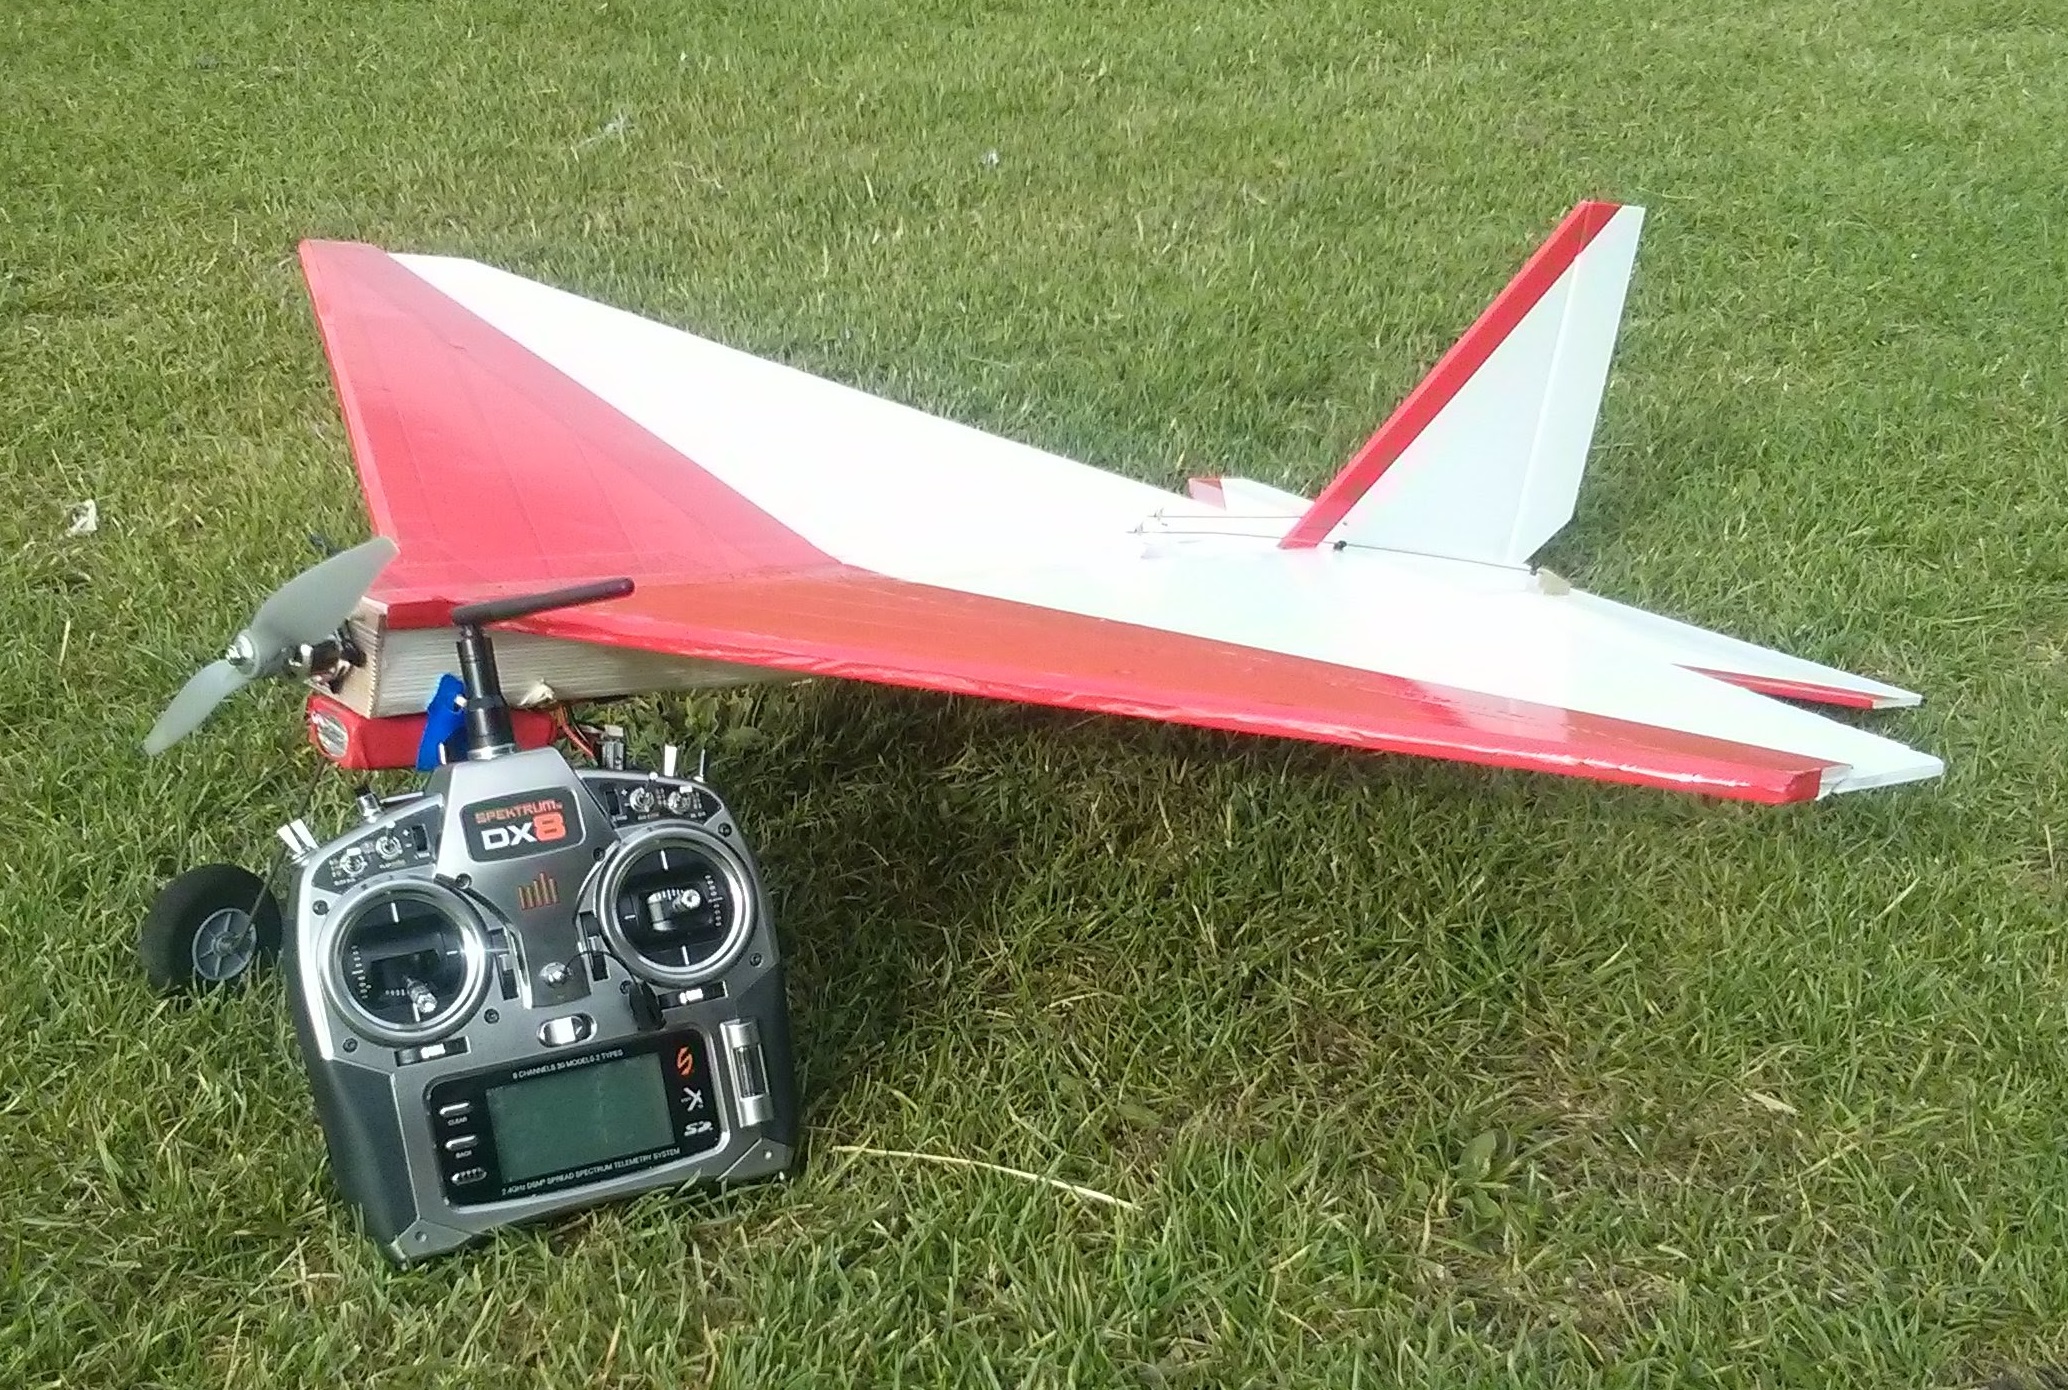
In a departure from the original, I added a KF step. This is an extra thickness of foam added to the front 40% of the wing. An air bubble forms behind the step, causing the wing to more act like a proper airfoil with more lift and smoother pitch response. I chamfered the leading edge of this extra piece 45° to improve the profile further. The KF step is optional, but I have been very pleased with its performance and deem it worth the weight. The extra thickness also makes the wing stiffer.
Big Flyer PDF Download
As the Flyer is all straight cuts, I haven't bothered with a tiled plan. You can always use a PDF viewer to create a tiled print.


Suggested Power System
Motor : 2836/08 1120KV Brushless
Battery : 1300 mAh to 2200 mAh
Propeller : 10 x 4.5
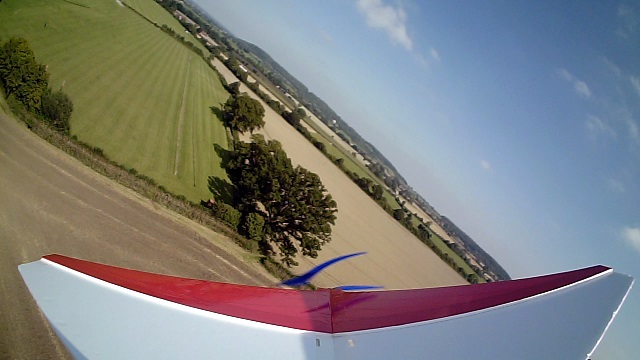
I wanted to add an 808 Key-chain camera on top of the fin to record some flight video so I made a small platform from foam board and taped it in place. The extra tail weight was balanced by replacing the 3S 1300 mAh battery with a 2200 mAh. There was no noticeable change to the flight behaviour, but the resulting video showed continuous wing wobble. This was actually an illusion of relative motion as it was the fin that was wobbling. I braced the fin with some diagonal BBQ skewers to the horizontal stabilizer and the wobble disappeared.

Conclusion
I've been very pleased with these two models. They fly well and have proven very resilient. The Flyer survived two tree landings and extractions with only a broken prop. The only problem has been summer heat. It turned out the black foam board's paper was attached with hot melt glue. After sitting in the car for a morning it all detached. The white foam board doesn't have this problem and is still going strong.


I have since managed to obtain some Bazic branded Adams Ready-Board from which I have built an FT Bloody Wonder (Mk3), another great flyer. I'm thinking of scaling it up for the heavy foam board, possibly with twin engines so I can use it as an FPV platform.


Log In to reply
Log In to reply
Log In to reply
Thank you.
Log In to reply