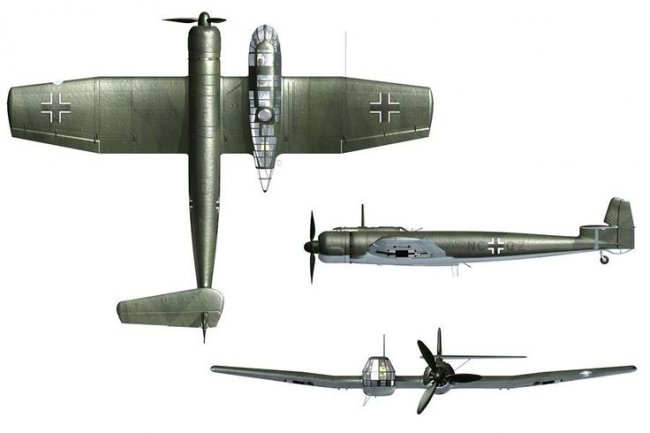
The Blohm-Voss BV-141B, a World War II German tactical reconnaissance aircraft. A notibly asymmetrical design for the time; however, it performed really well. The BV-141 never entered full production. A total of 20 were built and all were delivered, but lost to its competition the Focke-Wulf Fw 189.
Three prototypes and an evaluation batch of five BV 141As were produced. The rest of the BV-141s came with improvements and emhanced performance.
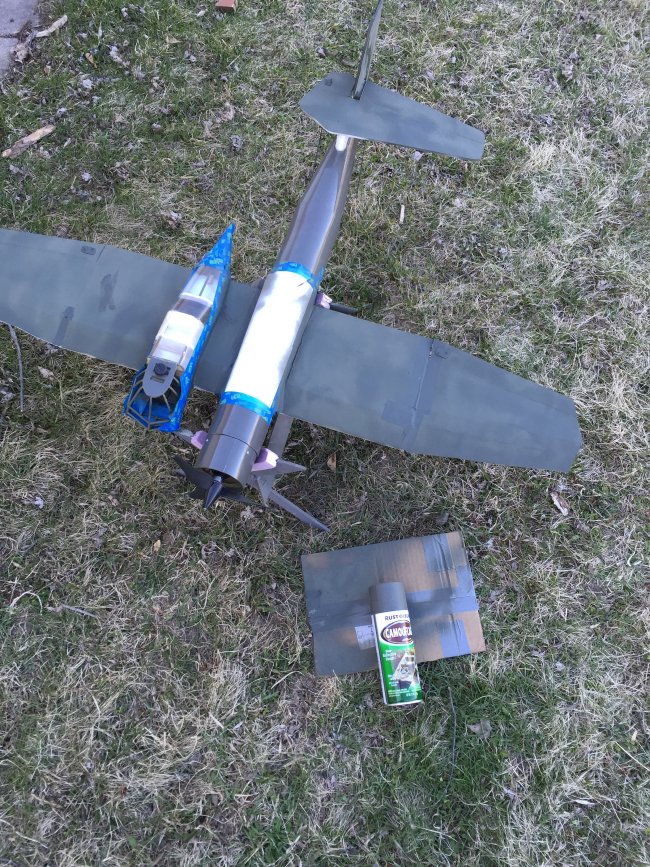
I decided to build the Blohm-Voss Bv-141 because I wanted to try building an aircraft with balsa wood, foam board and that was a unique. The build wasn't as difficult to work with as I thought. I time lapsed most of the build. This aircraft isn't 100% accurate. (Scale, and Decals)
BUILD:
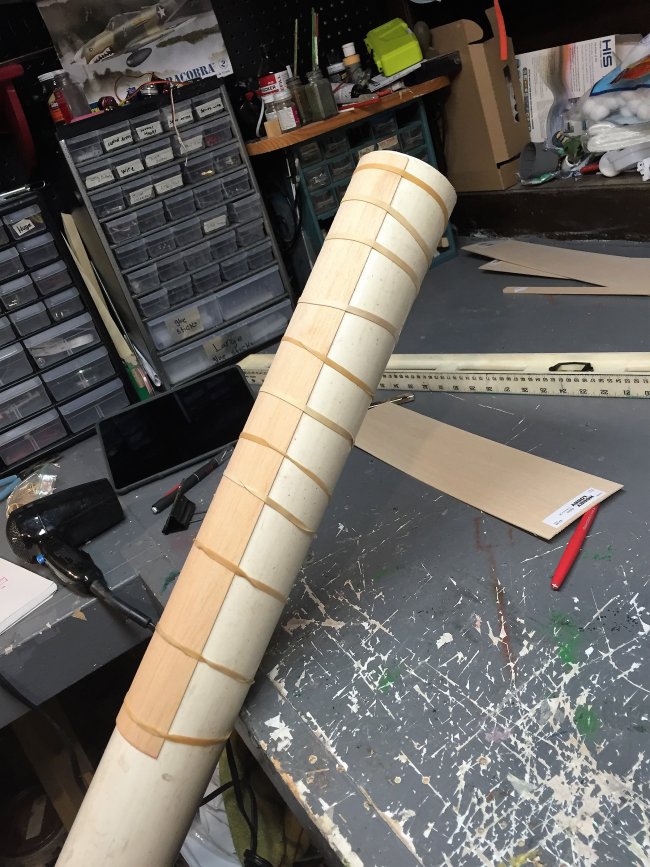
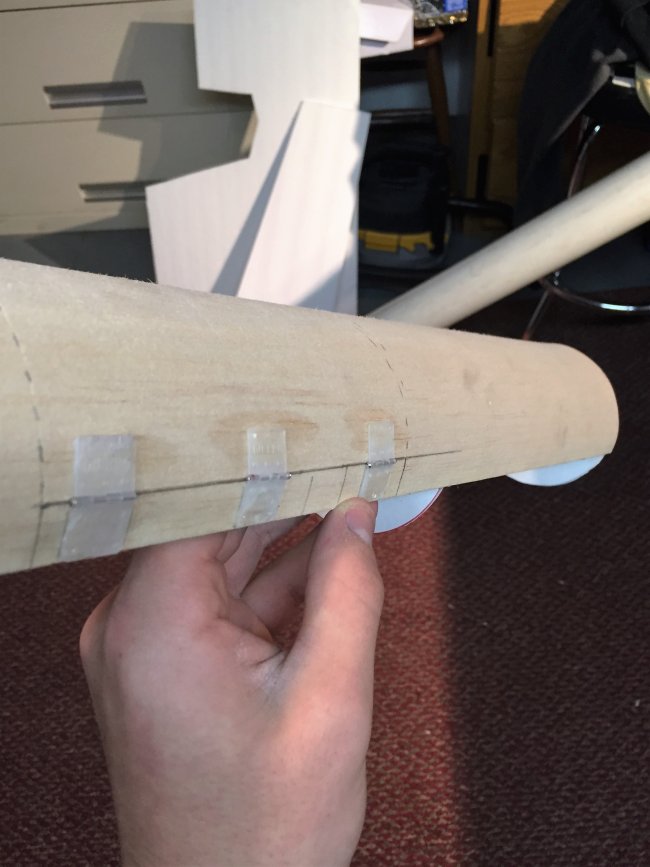
To start the build I began with the engine nacell. I cut 3 1/4 in. circles from the foam board, which would later become the shape of the front section of the nacell. To cover the nacell I took 1/16 in. balsa sheets, soaked them in water then rubber banded them over a pvc pipe and let them dry. After the wood was dry it held its shape nicely, easily allowing me to glue it on the nacell.
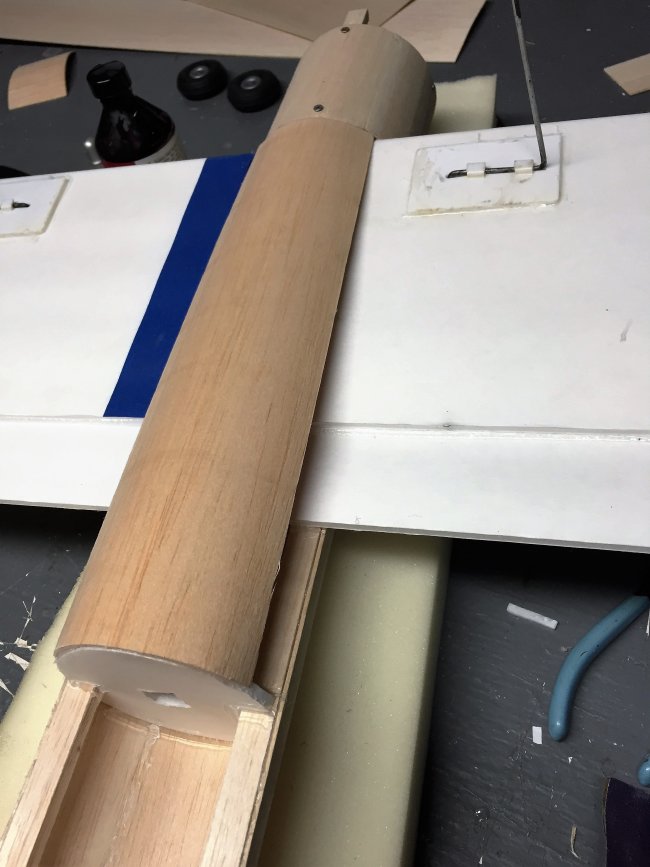
After the wings were finished I glued the nacell on the wings but with the abnormal design of the BV-141, the nacell wasn't glued on the center of the wing. I knew this would lead to some CG balance later in the build.
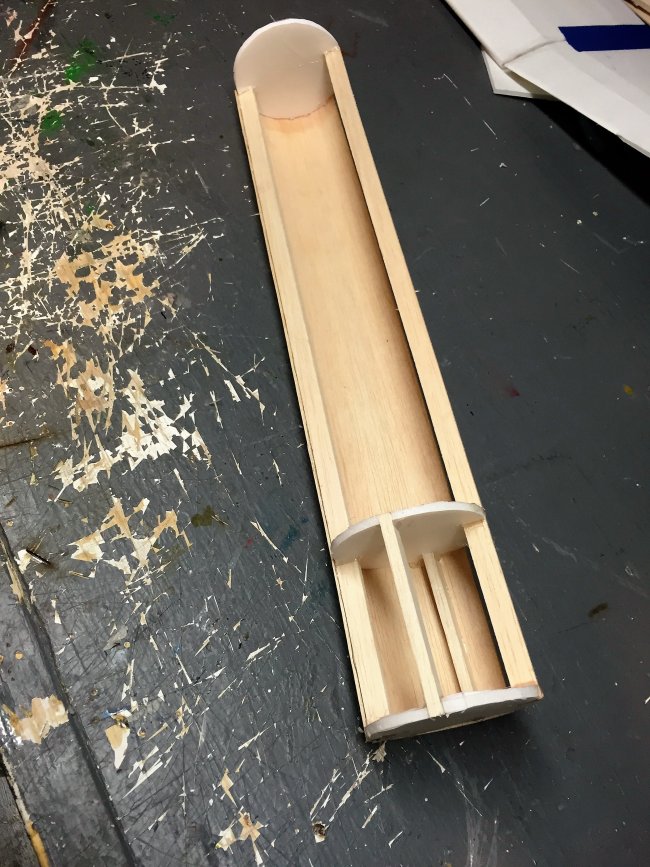
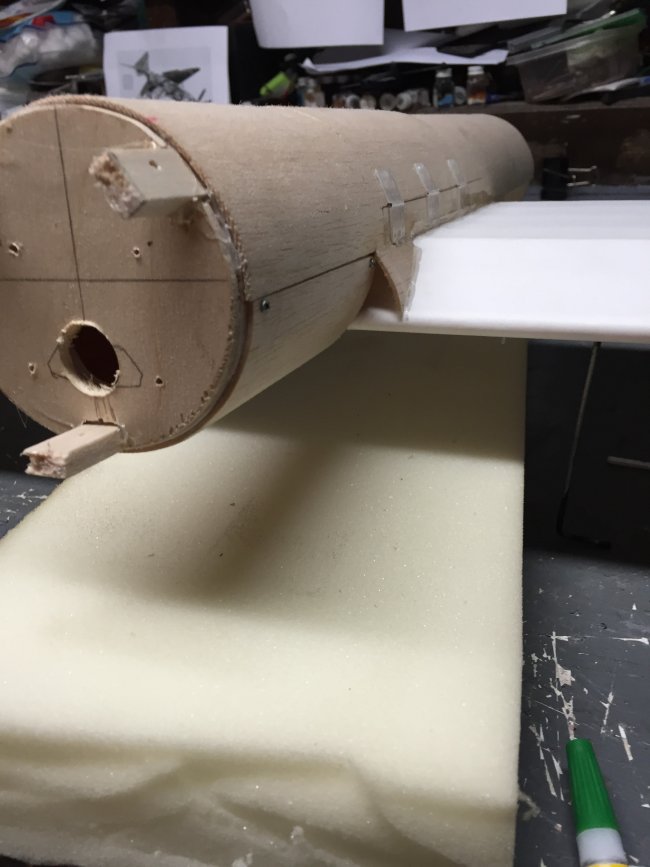
The tail section of the nacell was challenging because this was my first balsa airplane and I wasn't using any formers for the tail. I decided on going with the three wood booms coming back to an ovel shaped piece of foam in the back. Then covered it with the balsa wood sheets. The tail wheel is from a Parkzone Bf-109.
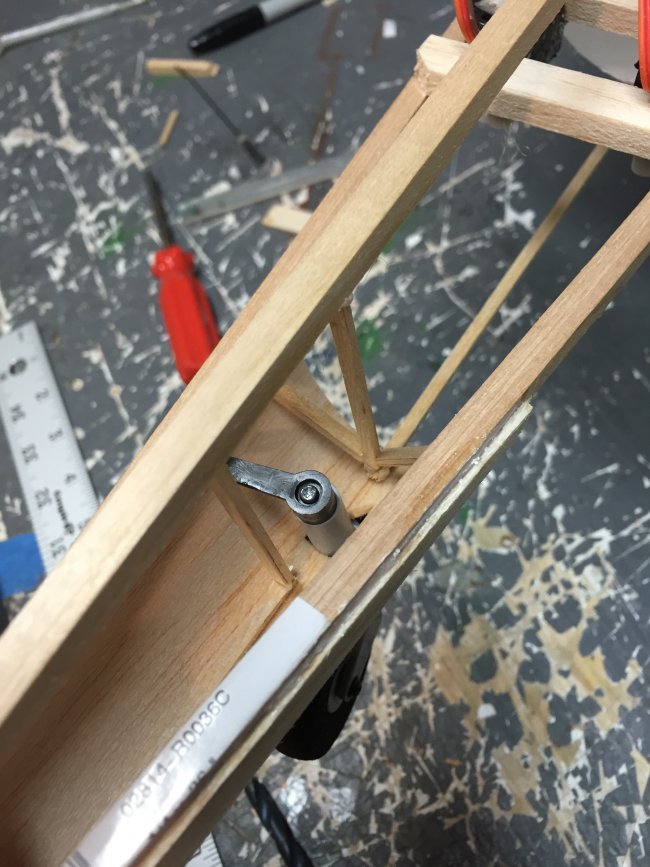
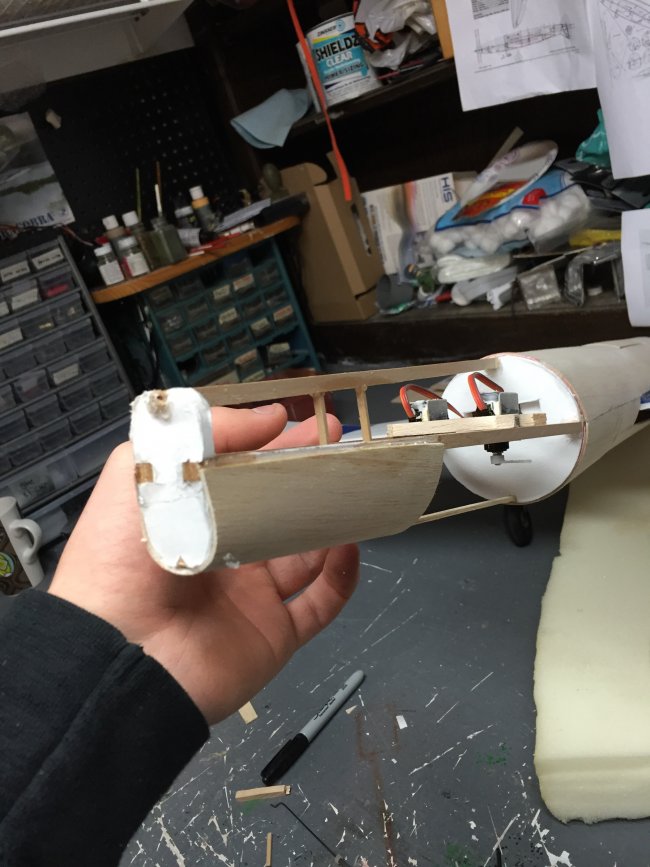

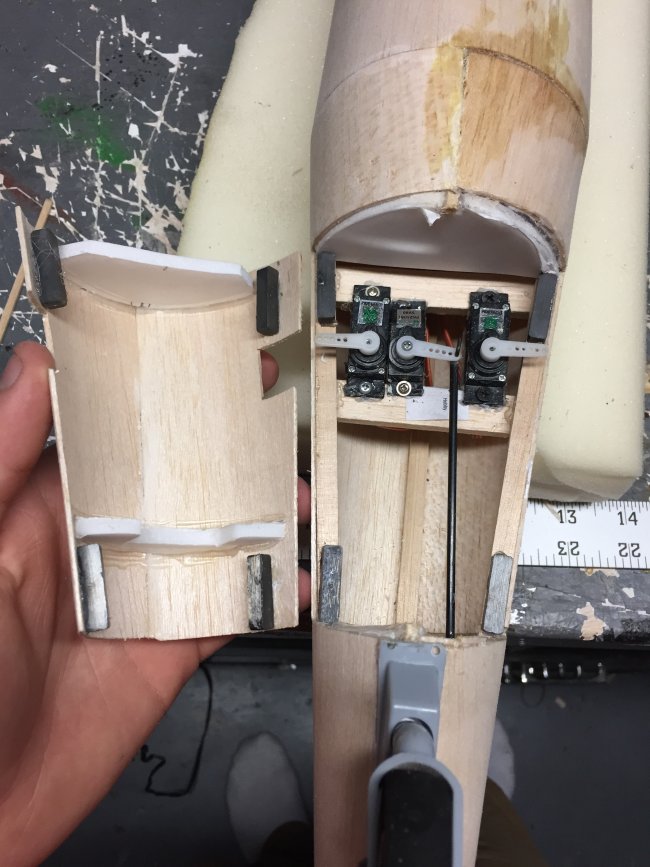
I wanted to keep my servos accessible, so I didn't cover the bottom of the nacell completely. I then cut some foam to the shape of the area I want to cover, then used that foam as formers for the balsa wood and attached the latch with 8 magnets, which worked great, but also made the plane tail heavy.
To balance the plane I purchased some pine wood derby car weights. Most of the weights were placed in the nose of the nacell to achieve greater nose weight. The first flight was done before the cockpit was finished, so when it was finished weigths needed to be added to the left end wing to bring the CG back into balance.
For the battery compartment I cut a rectangle in the side of the nacell over the wing and used three dubro hinges to create a latch, held in place by 4 rectangle magnets.
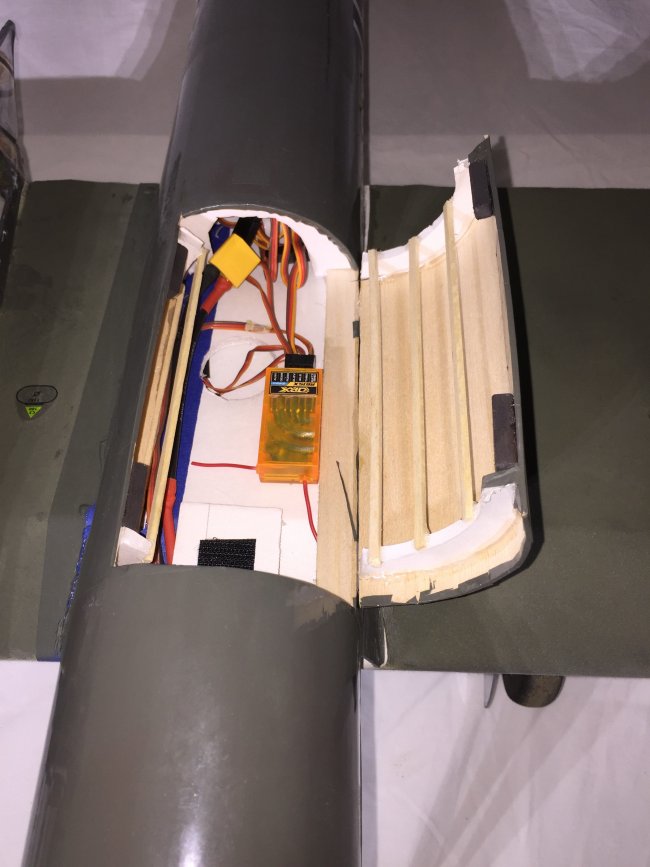
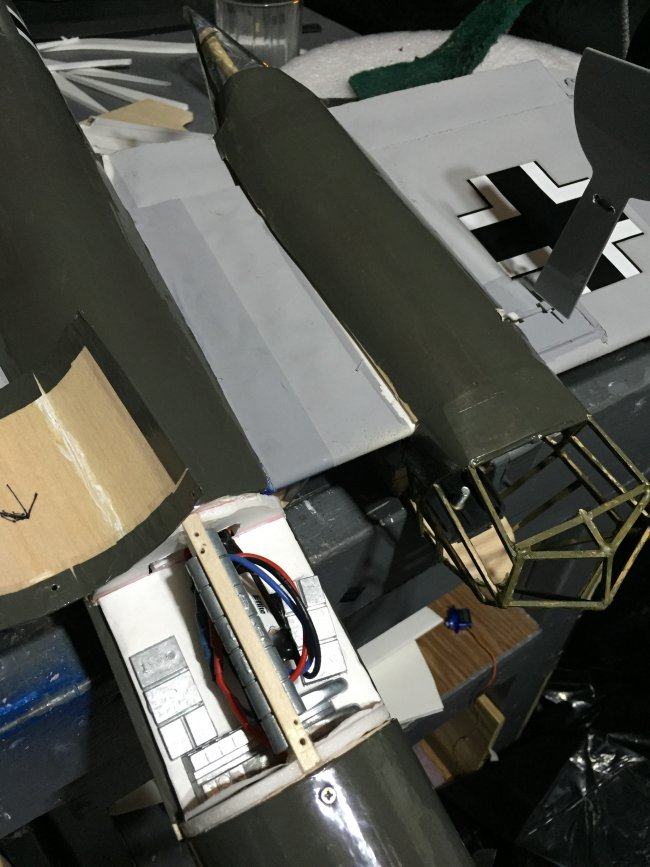
The firewall is made from 1/4 in. ply and hot glued to the nacell. The ESC compartment is on the lower half of the front of the nacell and screwed into place; this is also where most of the nose weights were placed.
The cockpit of my BV-141B was created using balsa wood stringers to immitate the windo structure, then painted with aolive drab paint.
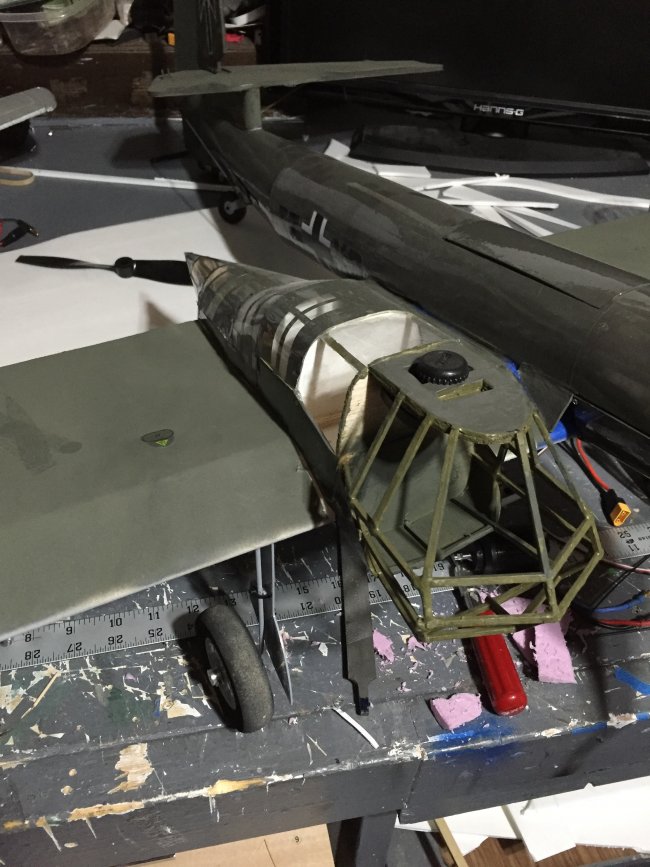
To cover the plane I used olive drab monokote, olive drab spray paint, and gray spray paint for the underside of the wing. The cockpit was not covered with a transparent plastic because I wanted the camera to have a better picture; however, the rear part of the the cockpit fuselage is covered. The parts that were not windows on the real plane I covered with monokote. I added an extra space right behind the camera that I didn't cover with any monokote just in case I decide to put in FPV gear. Not covering the front of the cockpit gave me more drag, but it didn't seem to affect performance.
SPECS:
wingspan- 48 in.
length- 40 in.
height- (nose) 9.5 in. (tail) 17 in.
weight- 2 lb. (no battery)
power plant- parkzone 480 BL outrunner; 960 Kv, Swinging 3 blade parkzone Icon prop & spinner
esc- Eflite 30A brushless speed control

VIDEOS:
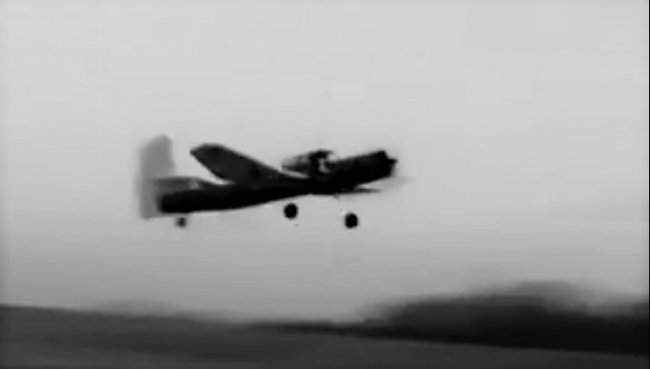
The first flight was surprisingly uneventful, however; the plane needed completion. And a result the second flight post completion required some CG balancing.
Despite how it looks, to my surprise, this plane flies adequately and performs well in the sky.
In coclusion, the BV-141B was a great plane to build. Although I do wish I had spent more time paying attention to the detail; however, the plane still looks great and is super fun to fly. The balsa wood covered gave the plane a really cool finish and reduced drag, so I would highly recommend using balsa wood for your future build.


5 stars
Log In to reply
Log In to reply
Log In to reply
Log In to reply
Log In to reply
Great build!
Log In to reply
Log In to reply
Log In to reply