Church Camp G(lider)-51 Project
I was recently blessed with the opportunity to come up with a project for about 60 of our boys at church youth camp. The camp is split between Juniors and Seniors, but on Wednesday we have a mixed activity which usually consists of the boys splitting up into teams to compete in a challenge. Since our camp theme was “THINK,” I wanted to make something that would challenge them to learn a new skill and work together to construct something… something that flies, of course! With only a week or two to come up with something, this was going to be a challenge.
A few months ago I ran across this article on FT https://www.flitetest.com/articles/7-planes-in-1-blow , and it intrigued me. Specifically, about ways to mass produce kits for events just like this. Unfortunately, I wasn’t for sure I would be in charge of the activity until about 13 days before camp was supposed to start.
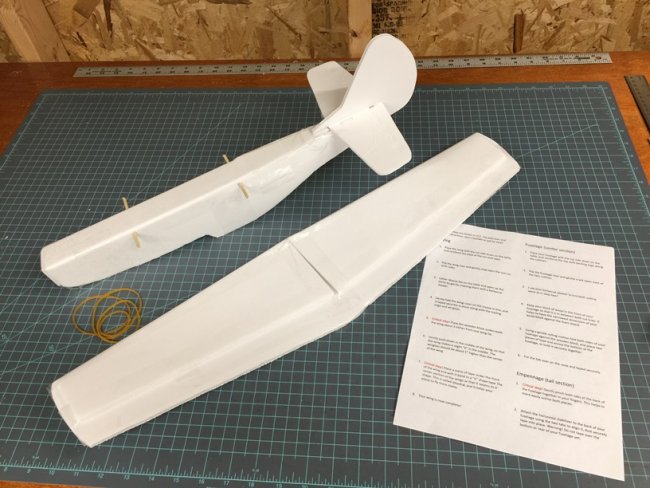
The weekend prior to camp my son and I went out to the shed and browsed through all the FT plans we had already printed, looking for something that might work as glider, but was also a simple build. My goal was to only use one sheet DTFB and packaging tape. The best thing I could find was the mini Mustang. We hastily built one prototype using the plans, but it was overcomplicated with separate wing pieces. A little work on the wing plan in Inkscape brought it down to four pieces of foam. I wanted it to be strong and teach some build techniques, so instead of making an airfoil wing with a spar, we opted to combine the wing and treat it as a KFm-2 airfoil.
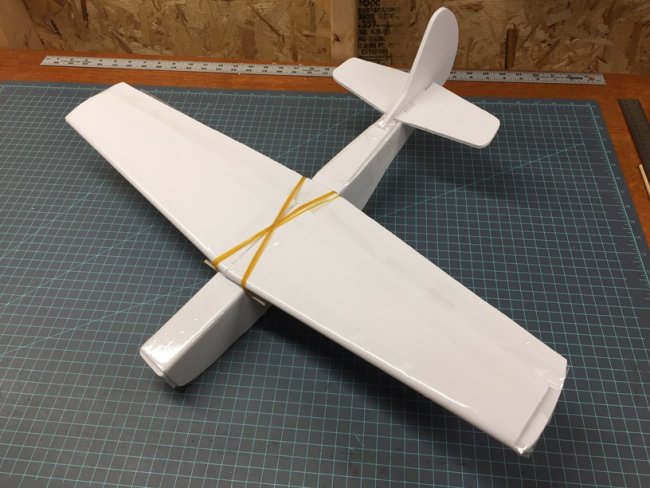
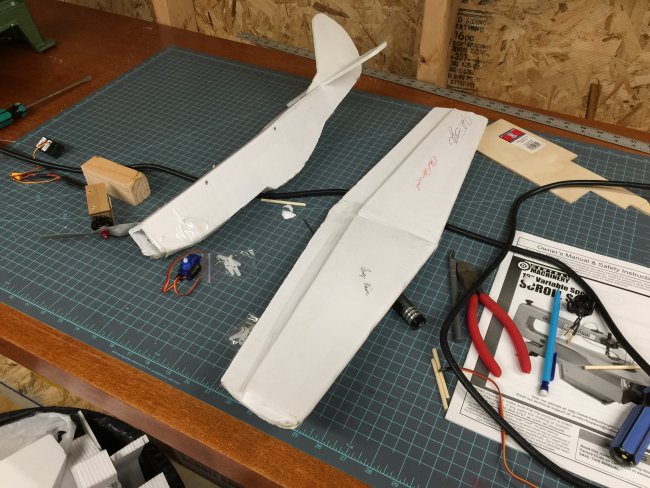
The first prototype with a single piece wing flew well, but was unstable in the roll axis because of the low wing/high CG. It required a lot of speed to get a good distance, and some of my younger kids that were testing it weren’t able to throw it very far. Also, the foam under the wing slot wasn’t holding up very well, but I didn’t really have time to change plans if I was going to get everything prepped and ready on top of everything else I had to do (I teach Sunday School and the Sunday night youth program at our church). On a whim, I stuck two barbecue skewers through the fuselage, and used them to attach the wing with rubber bands. Not only was it more secure, but it was also more stable in slow flight.
Next step was to make sure the build would be consistent, and could be massed produced. We cut out four kits by hand, and some church kids build them at my direction. They all flew very well, and their reaction told me that it would be well received.
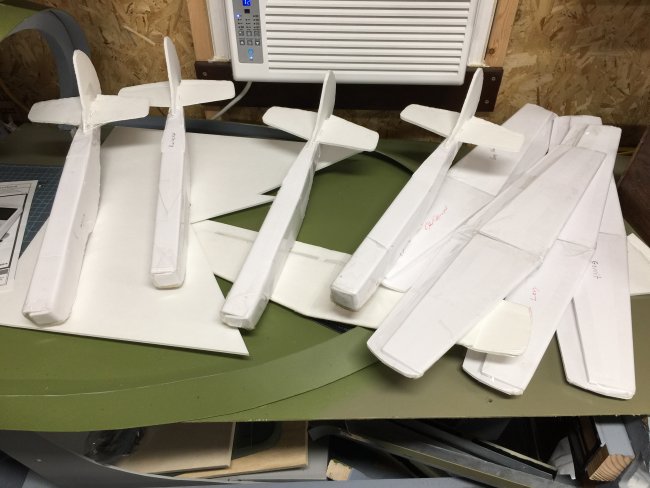
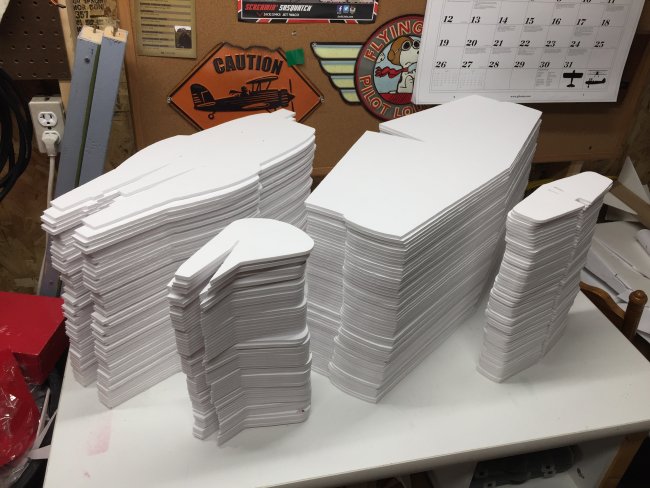
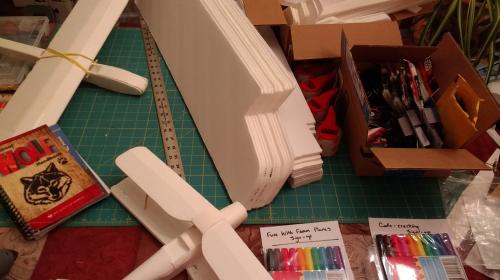
So… off to Harbor Freight to buy a jigsaw. We figured out that we could cut a stack of nine sheets of foam board for about an hour before the saw overheated and had to cool down. That was about the equivalent of cutting out 50 individual parts in one session.
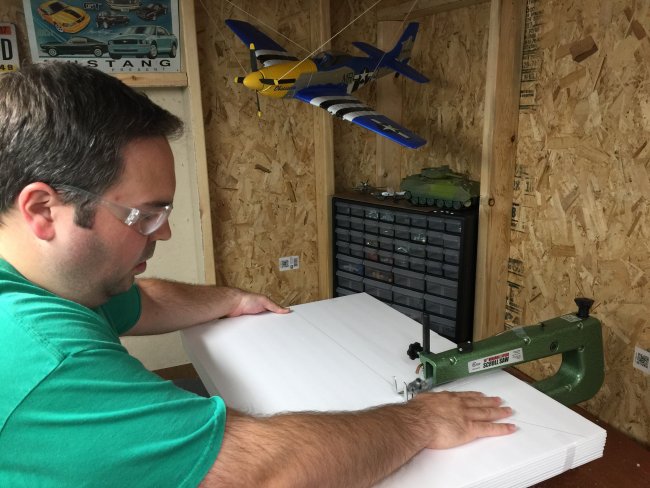
Approx. 40 kits were needed and spares. I accidentally mixed in some extra foam board, and ended up with 60 sheets. 60 sheets x 4 pieces = 240 individual pieces. Divide 240 by 9 sheets at a time = 26 cuts. We could do approx. 50 pieces an hour, so I had 4.8 hours of saw work to look forward to, with time for it to cool in between. Totally worth it!
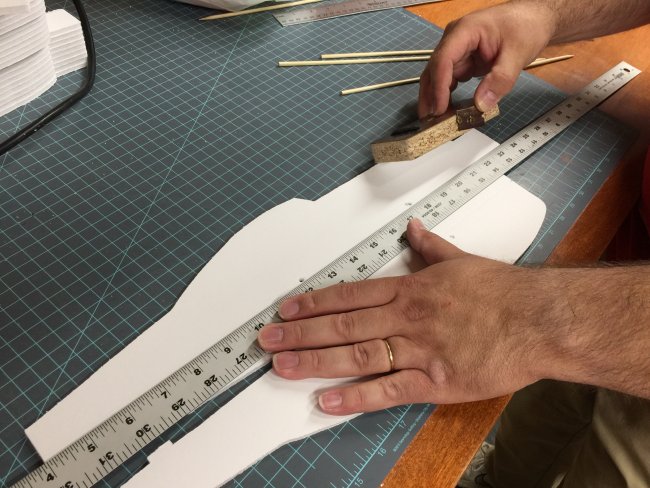
All of the 1/2 way cuts and the tab holes in the horizontal stabilizer were made by hand with an exacto and a jig.
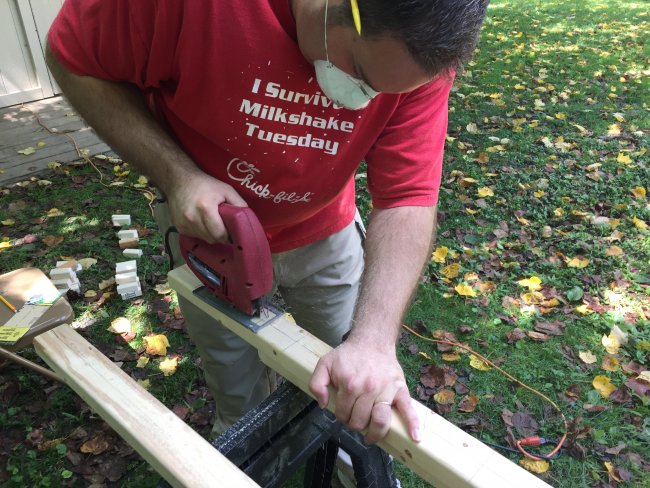
I also ended up cutting out sixty 50g-55g blocks of wood for nose weight. The easiest way I found was splitting a 2x3 down the middle, and trimming it to approximate size for the weight.
Since there were going to be so many boys, and our time was limited to about an hour and ten minutes; I knew I would need some detailed self-guided instructions. That night, my son and I assembled a kit while taking photos, and the next day I dictated the instructions into my phone on my way to work. Knowing that most of the boys wouldn't have prior experience with foam board, I tried to explain each step as comprehensively as I could while keeping it easy to read. Later that evening I combined my dictation and the photos.
I ordered 30 rolls of packaging tape off Amazon (link below), and the day before camp we boxed everything up, including 40 sets of instructions (link below).
Why “G”-51? Since it’s a glider and based off the FT Mustang design, it seemed appropriate. Plus, there is a running joke with the youth about my camp nickname “Counselor G”, which made it even more relevant.
My plan was that once each plane was built, we would have a competition to see who’s would fly farthest. Since the Jr boys would each take their plane home with them, I decided that I would give away an all-in-one RC plane kit to the Sr boy who won the glider throw. It would also be incentive for them to help the Juniors accurately build the gliders. So I went to the local hobby shop and purchased a RTF Horizon Sport Cub (the plane I started with).
I not only wanted each boy to learn how to make a foam board plane, but I also wanted them to know that they could use the same techniques to easily and cheaply make an RC plane they could fly. In an effort to do this I intended to make one of the planes radio controlled. I quickly added some servos, a mini power pod, and a spare Ares TX/RX combo to one of the glider prototypes. After a few tweaks, it flew successfully! Unfortunately, we didn’t fly it at camp due to the higher windspeed. (see video)
Camp was awesome, but I couldn’t wait for Wednesday. I was a little apprehensive about how the planes would be received. I had taken along my son's FT Bloody Baron and one of my own designs to show the boys. I gave a short lecture about how I had gotten into the hobby, and how cheap and easy it was to build planes with DTFB. I also explained some critical steps such as adding dihedral.
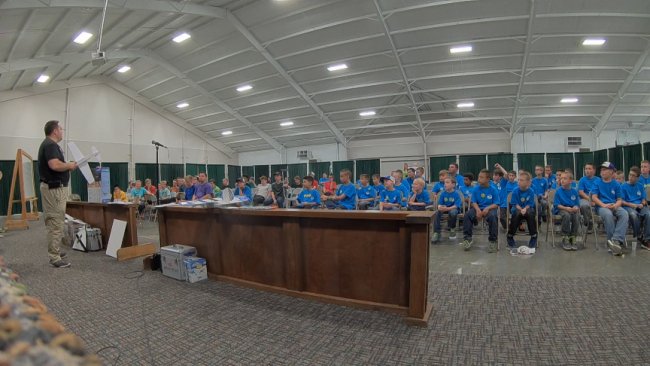
After passing out the kit parts, everyone found an open space on the floor and began building. Not everyone followed the directions exactly, but amazingly most of them flew just fine. Even the ones covered tip to tail in packing tape!
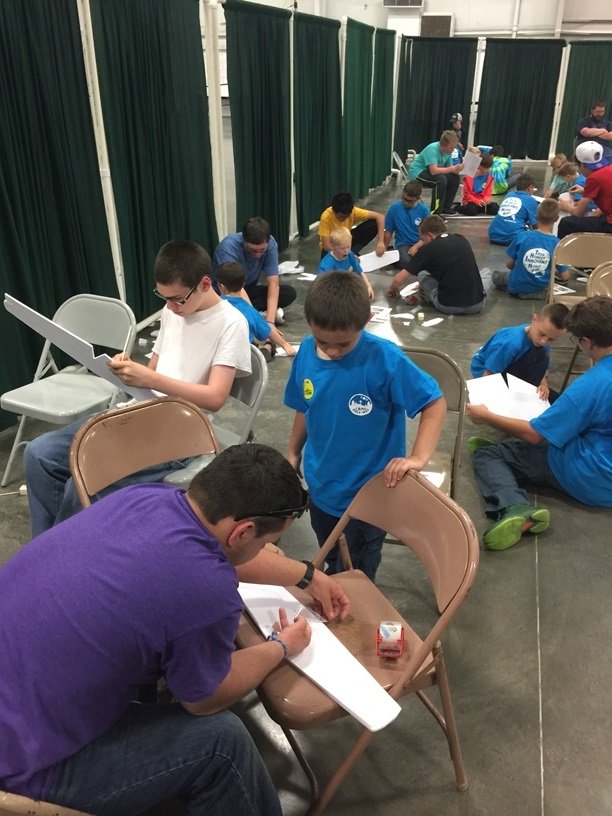
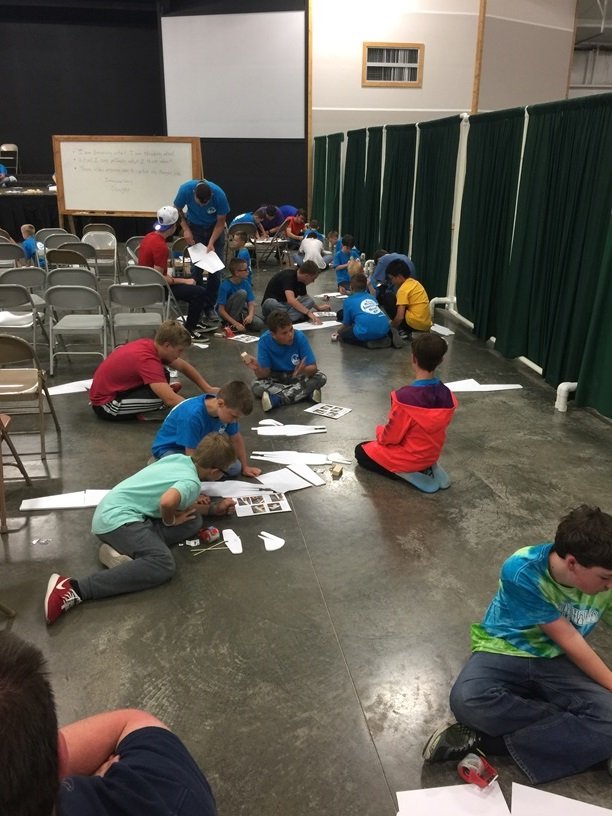

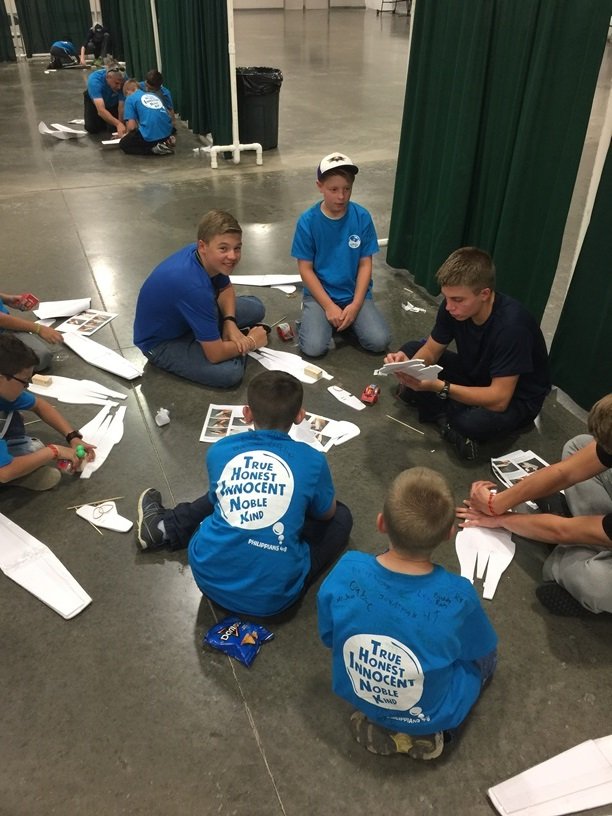
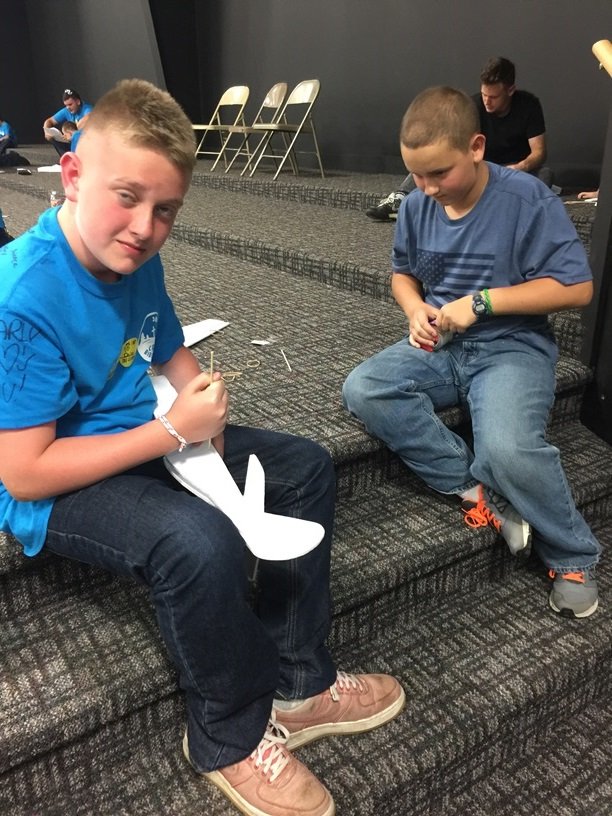
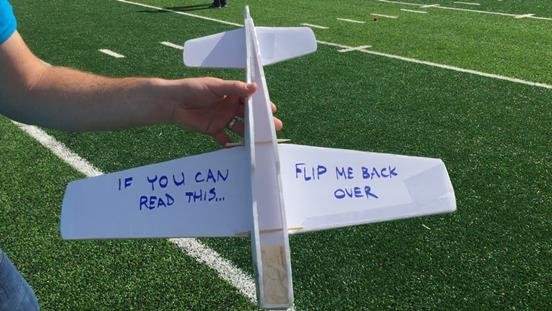
I ended up walking the perimeter answering questions and giving tips to those struggling. It was a thrill to see so many kids building at the same time, and was a very special time to share and enjoy my passion for aviation with everyone! It also helped to have several kids who assembled the prototype kits helping others. My son had about five or six people watching him build. When they were done, we had some sharpie markers for them to add a little personalization.
As all the youth were heading out to the football field for the glider throw competition, I launched my small custom “Hopeless Diamond” design, and flew it around for a few minutes.
When I landed, the kids and their gliders poured onto the field. As you can see from the pictures and video, it was pretty neat to see so many gliders go into the air at the same time. They nearly covered the field from one side to the other. Everyone got a chance to line up and see who could launch theirs the farthest. Some of the flights were quite impressive. I couldn’t have been happier with the results.
I ended up charging a few more batteries, and each evening I would go out during snack time to fly one of the planes. Of course, there would always be a gaggle of Jr boys that would instantly run out to see me as soon as they saw the plane. I even attached my Runcam3 to the bottom of my son’s FT Bloody Baron and overflew the grounds one evening at dusk. At the end of the week, the Sr boy who won the glider throw ended up giving the Sport Cub to one of the Jr boys. My son helped them get it setup, and they flew it around for a few minutes until the battery gave up.

All the kids enjoyed the RC demos, and it started an endless run of questions. For the rest of the week I was constantly being approached and asked; “Can I fly your plane?”, “How fast does it go?”, “How much does it cost?”. I felt like an astronaut that just returned from the moon. Everyone wanted to share the experience, and I wanted to share it with them.
Thank you Flite Test. I now understand your passion to share the hobby with so many young people, and I hope this motivates other to do the same.
JGplanes +}-
Downloads:
Links:
Inspirational FT Article about cutting out multiple pieces at a time.
Overflight video of Camp


Log In to reply