Hi everybody,
I am currently building a P51 Master Series where I am trying out a couple of new things. While browsing for decals, I saw a P51 park flyer from MinimumRC and as I had few electronics lying around and the plans for the Guillows P51, I went for a short interlude. I ended up building not one but actually three of these. I had to modify the first one a couple times and then decided that I would like to build one for a dear friend of mine as well as a clean one for myself. As I did not take any pictures during the first build, most of the pictures are from the second and third build.

First I had to decide on how to build the fuselage. Shock flyers are usually extreme light builds. Some only have one sheet of foam as a fuselage (with the electronics attached to the outside of such sheet) and another sheet for the wing. After a bit of research I decided to go for a three sheeted main fuselage and one sheet for the wing. The three sheeted fuselage has the benefit that it allows to hide a lot of the electronics, in particular the cables, in the fuselage and therefore provides for a cleaner build.
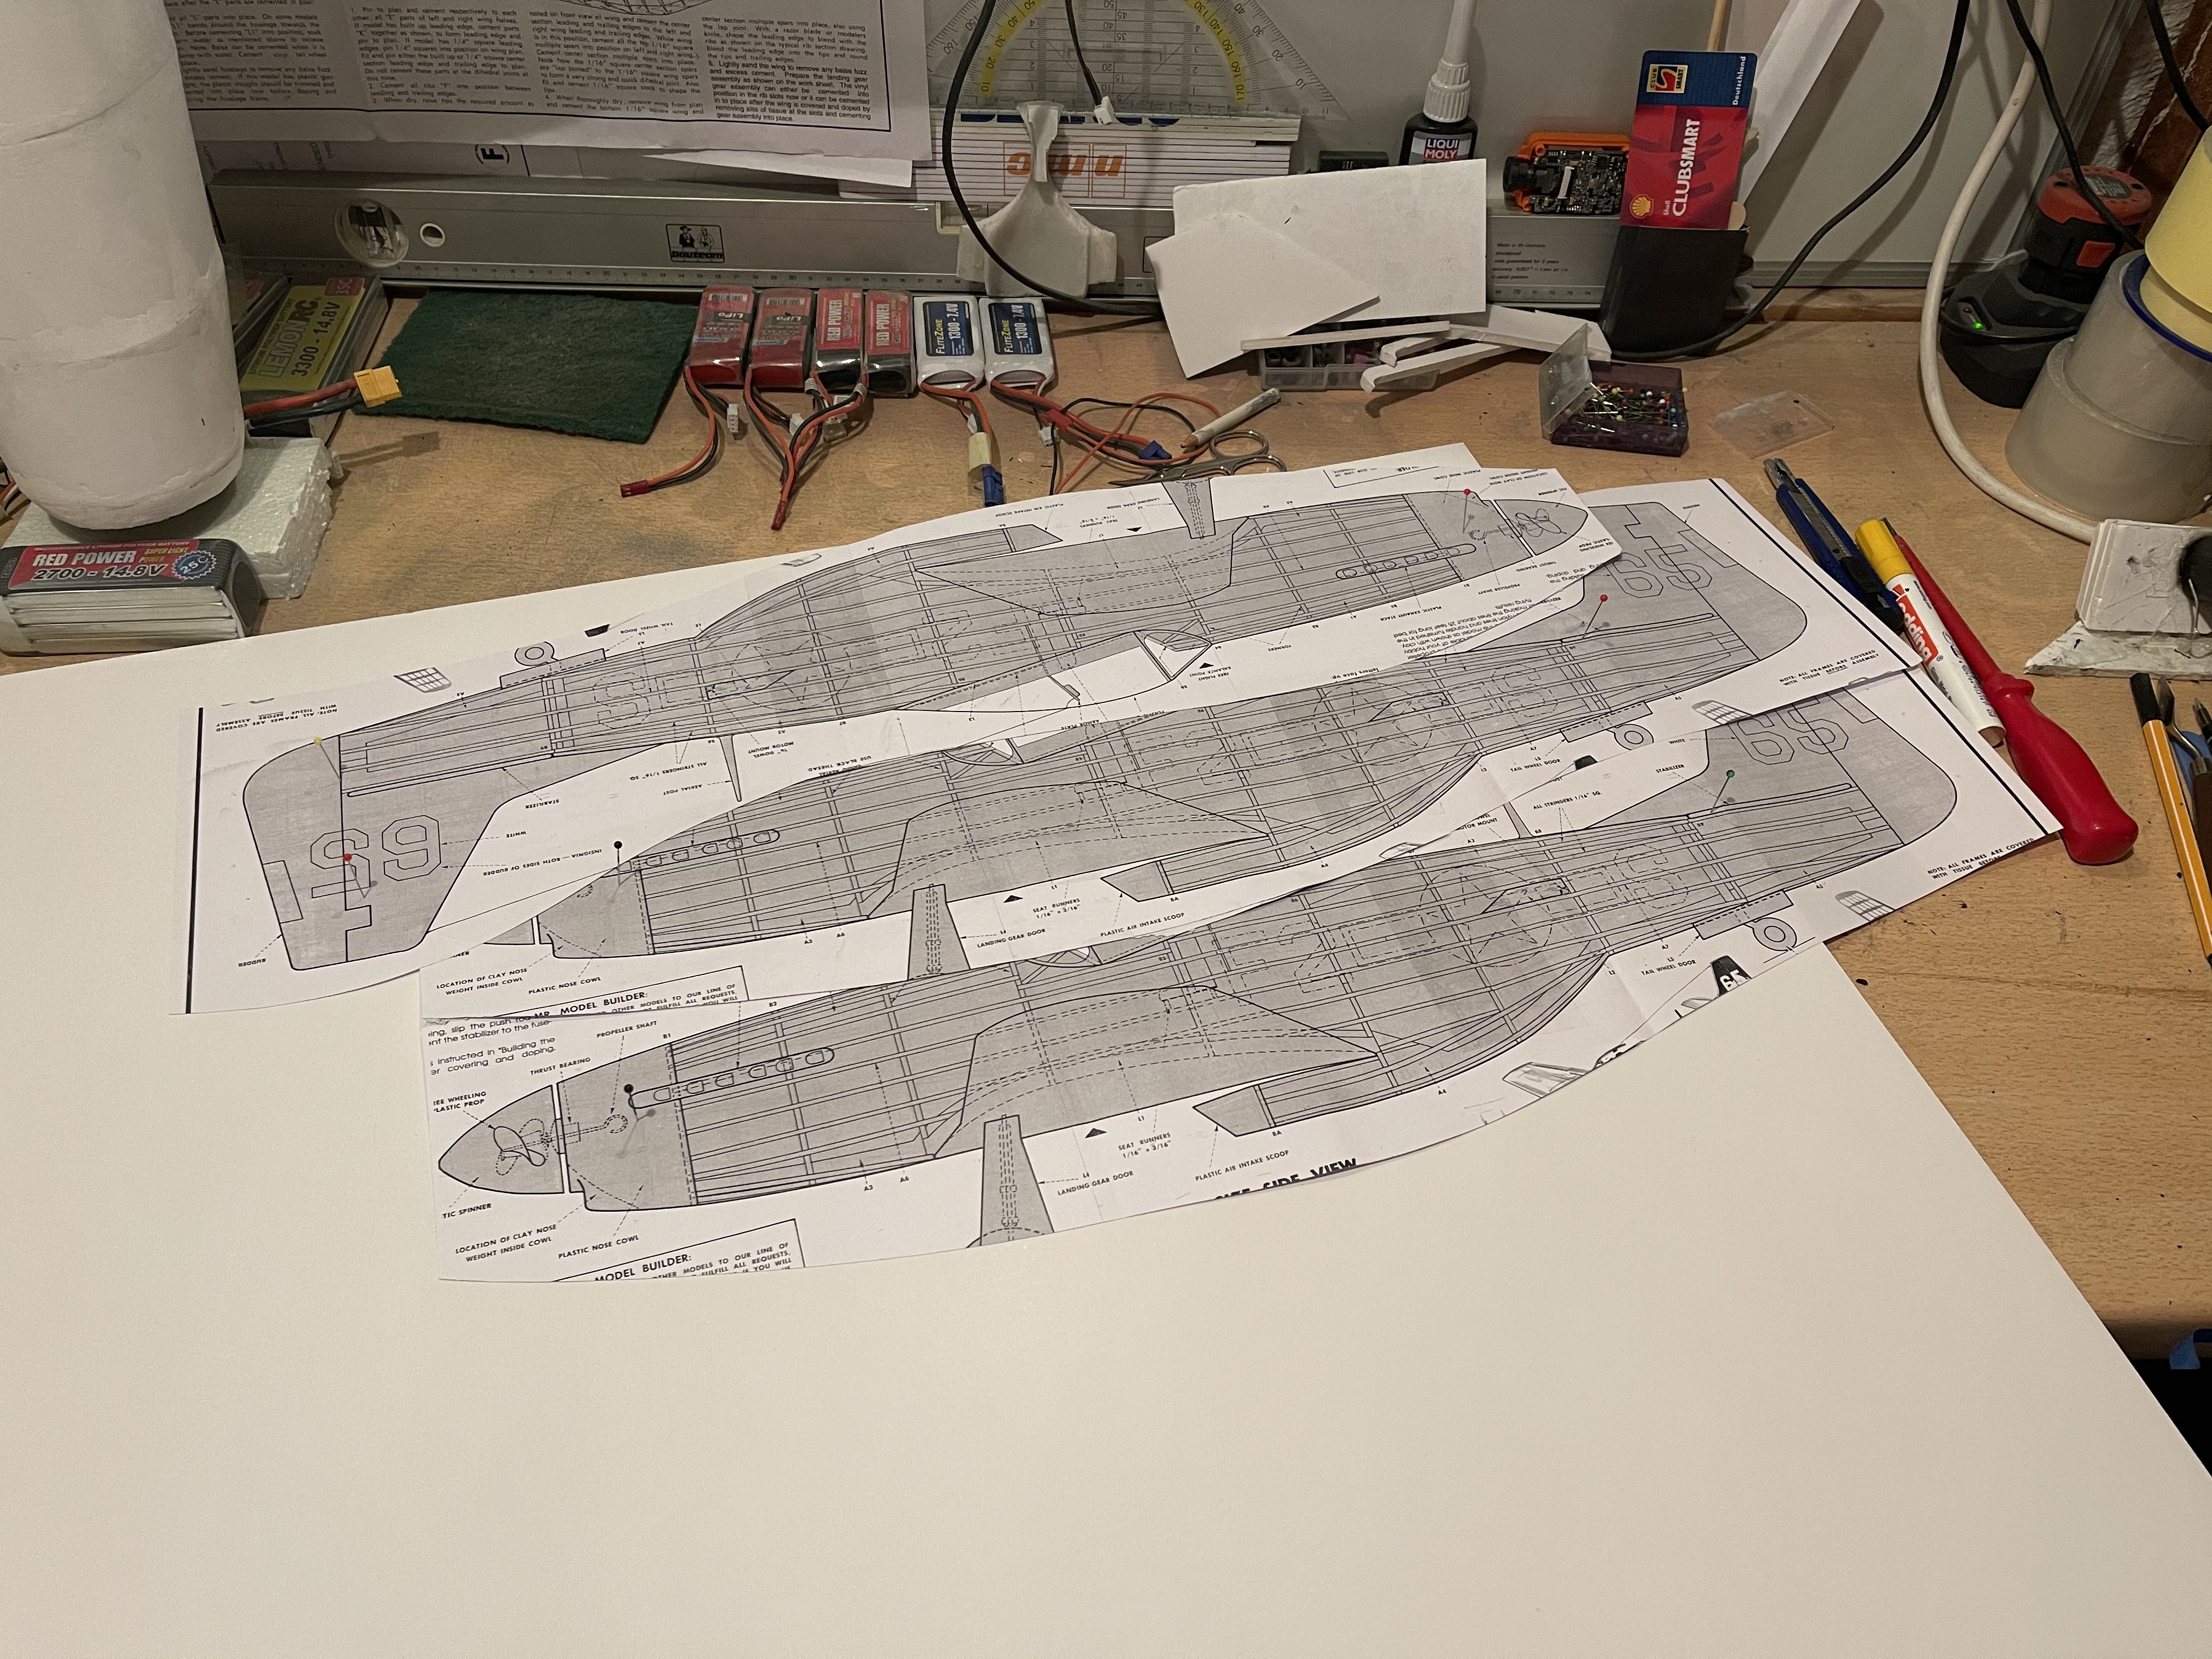
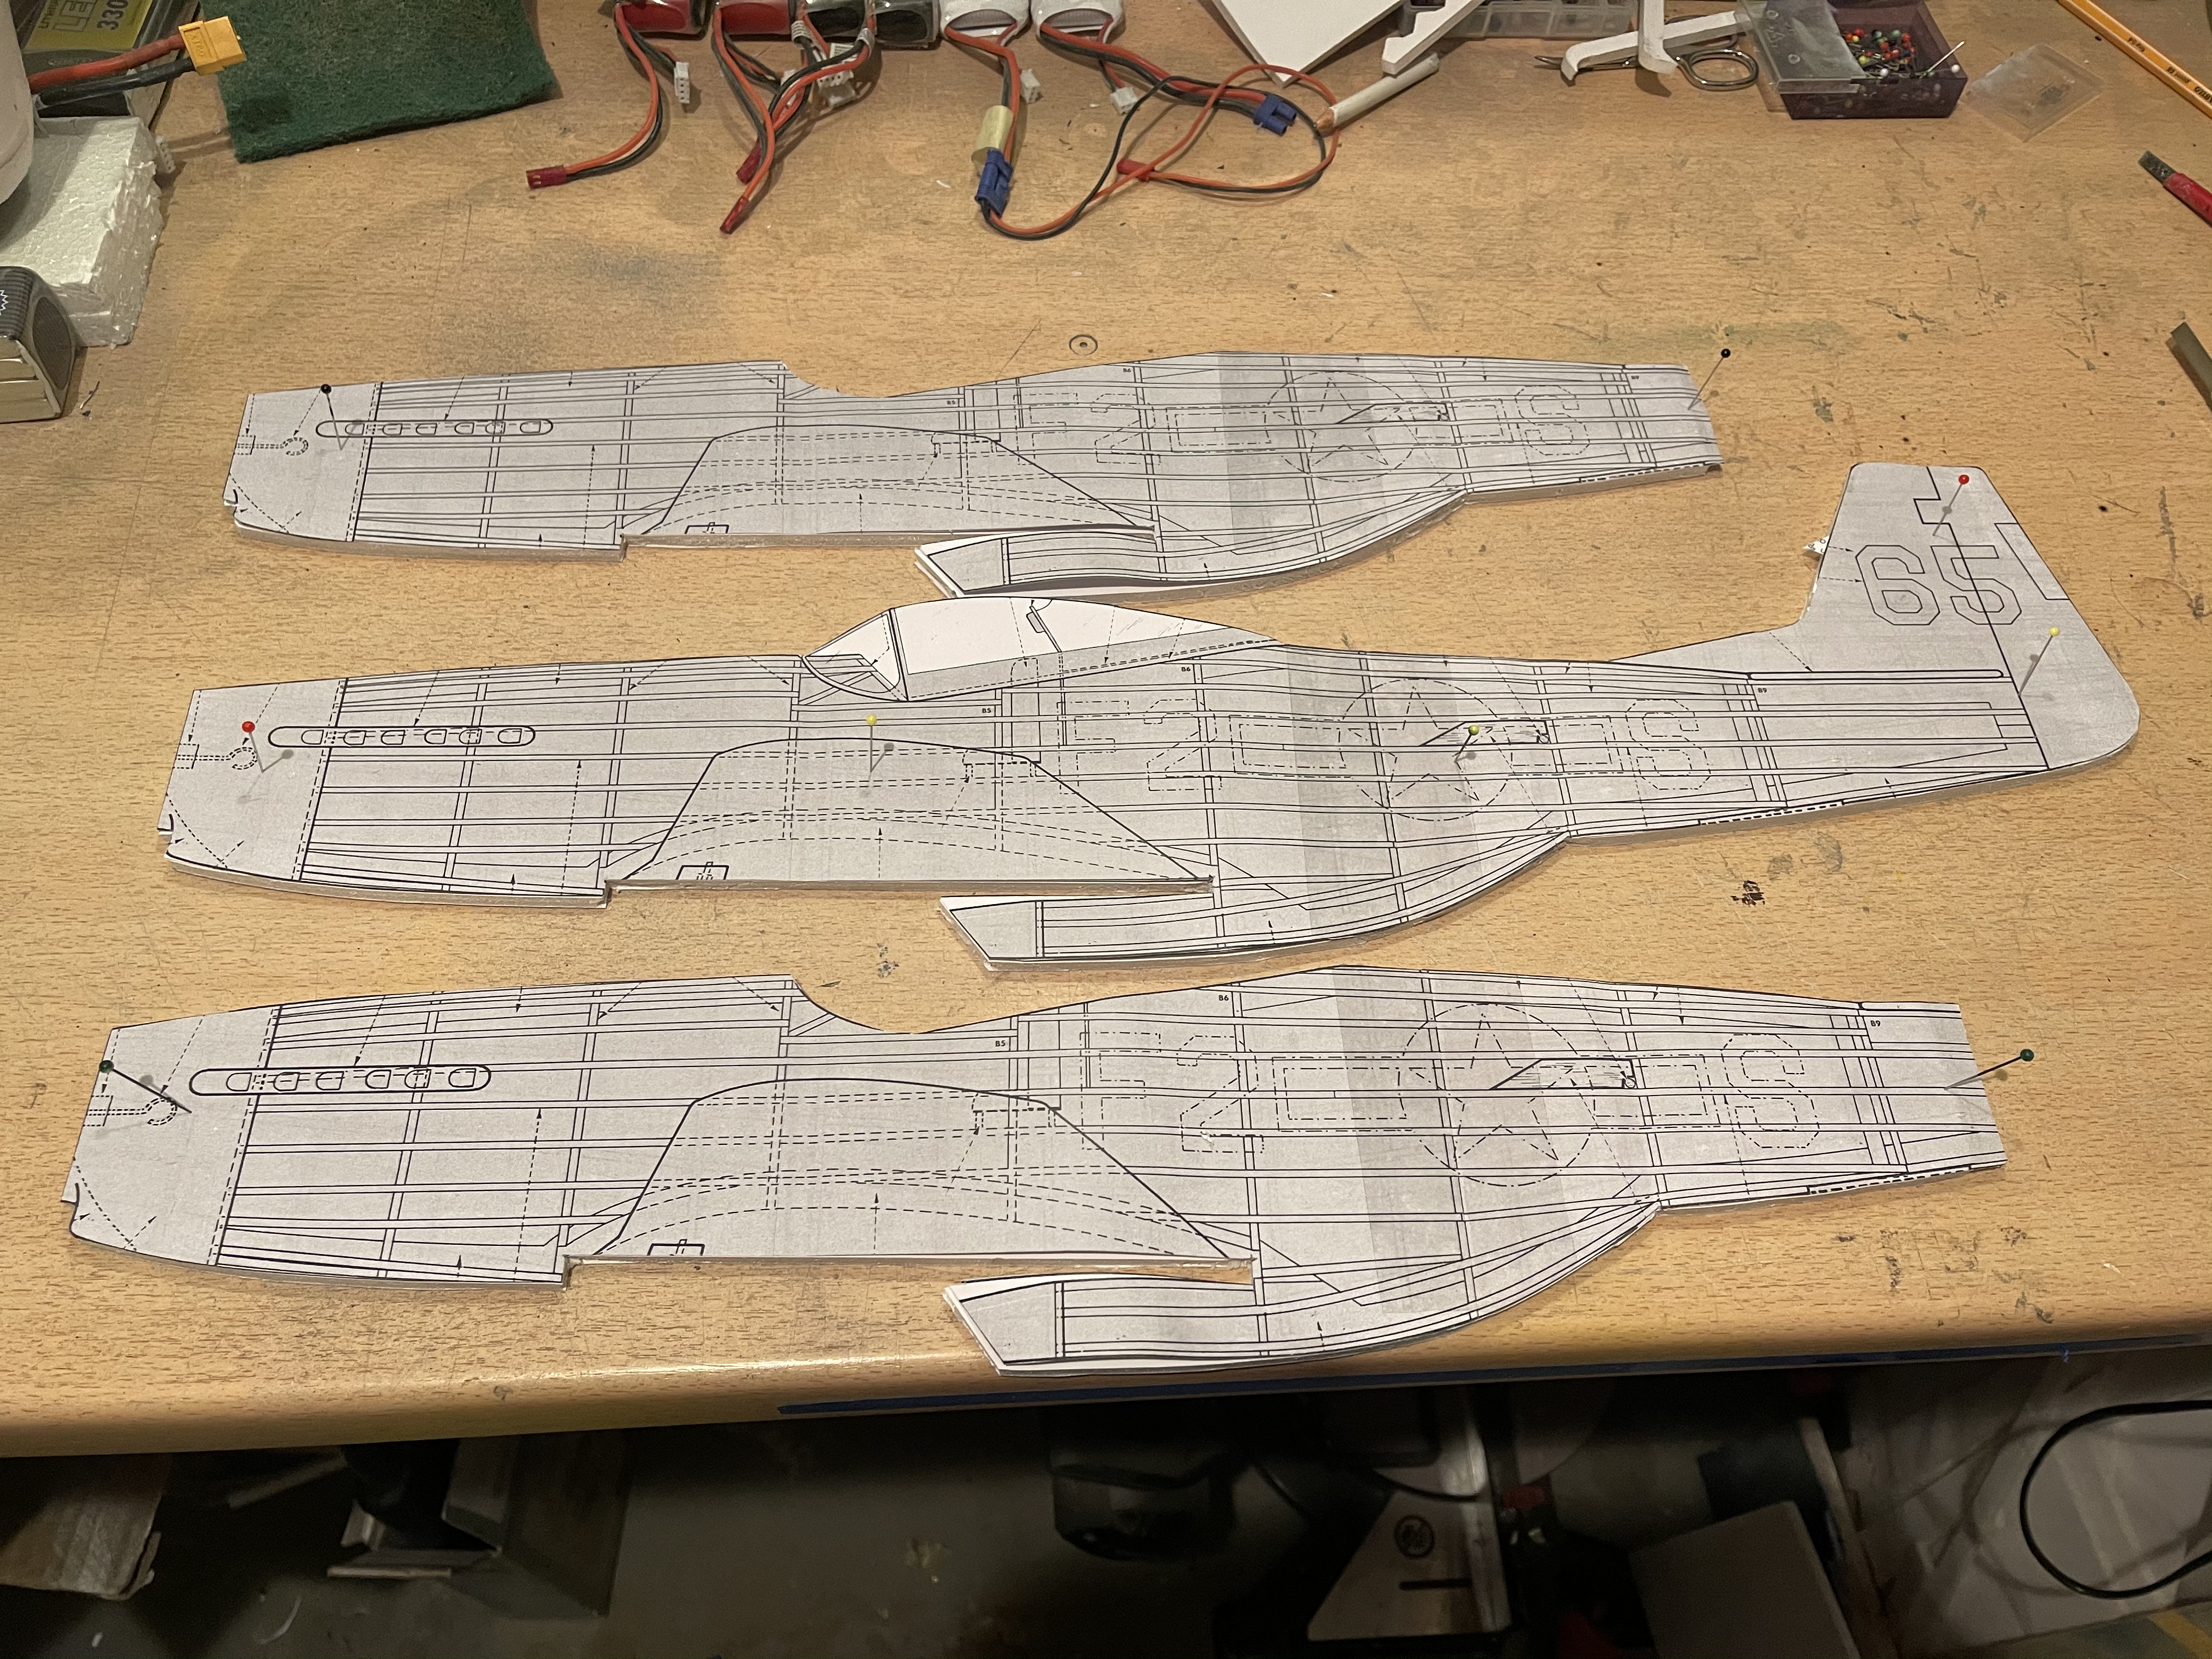
 The Guillows plans are a great start for the shape of the fuselage and the wing. From a sheet of foam board I cut the three pieces for the fuselage, the elevator and the wing. For the main fuselage I went for two sheets for the outside without the canopy and the stabilizer and rudder. From the first build I located where cutouts need to be made for the ESC and the servos for the rudder and the elevator. The middle piece includes cutouts for the various cables. Further the back part of the middle piece includes a few cutouts to ensure that the aircraft is not tail-heavy. For gluing together the sheets, I used some standard craft glue as this is much lighter than hot glue and also provides for a stronger and and cleaner finish. I also used Foam Armour (https://store.flitetest.com/deluxe-materials-foam-armour-protects-foam-wood-surfaces-dlmbd50/p253223) to protect the open foam surfaces.

 The plans provide for a dihedral of the wing so on the first build I ended up with a three piece wing (a short level piece in the center and the right and left wing with dihedral). The disadvantage of this structure is, that there is not much strength in the wing and it quickly folds. For the second and third build I experimented with a two piece wing with dihedral and a one piece wing without dihedral. The best flying results are with the one piece wing without dihedral.


 Also originally I inserted the wing with a slight angle of about 10 degrees because I wanted to have the wing to go through the main fuselage, so that is can be easily fixed without much glue. That turned out to not work at all (the wing worked like an elevator and I could hardly control the aircraft). I changed the wing so that it fits under the fuselage. That helped a lot. Second issue I faced with the original build was that the ailerons (which I kept scale and were much too short). I ended up adding ailerons over the full length of the wing.
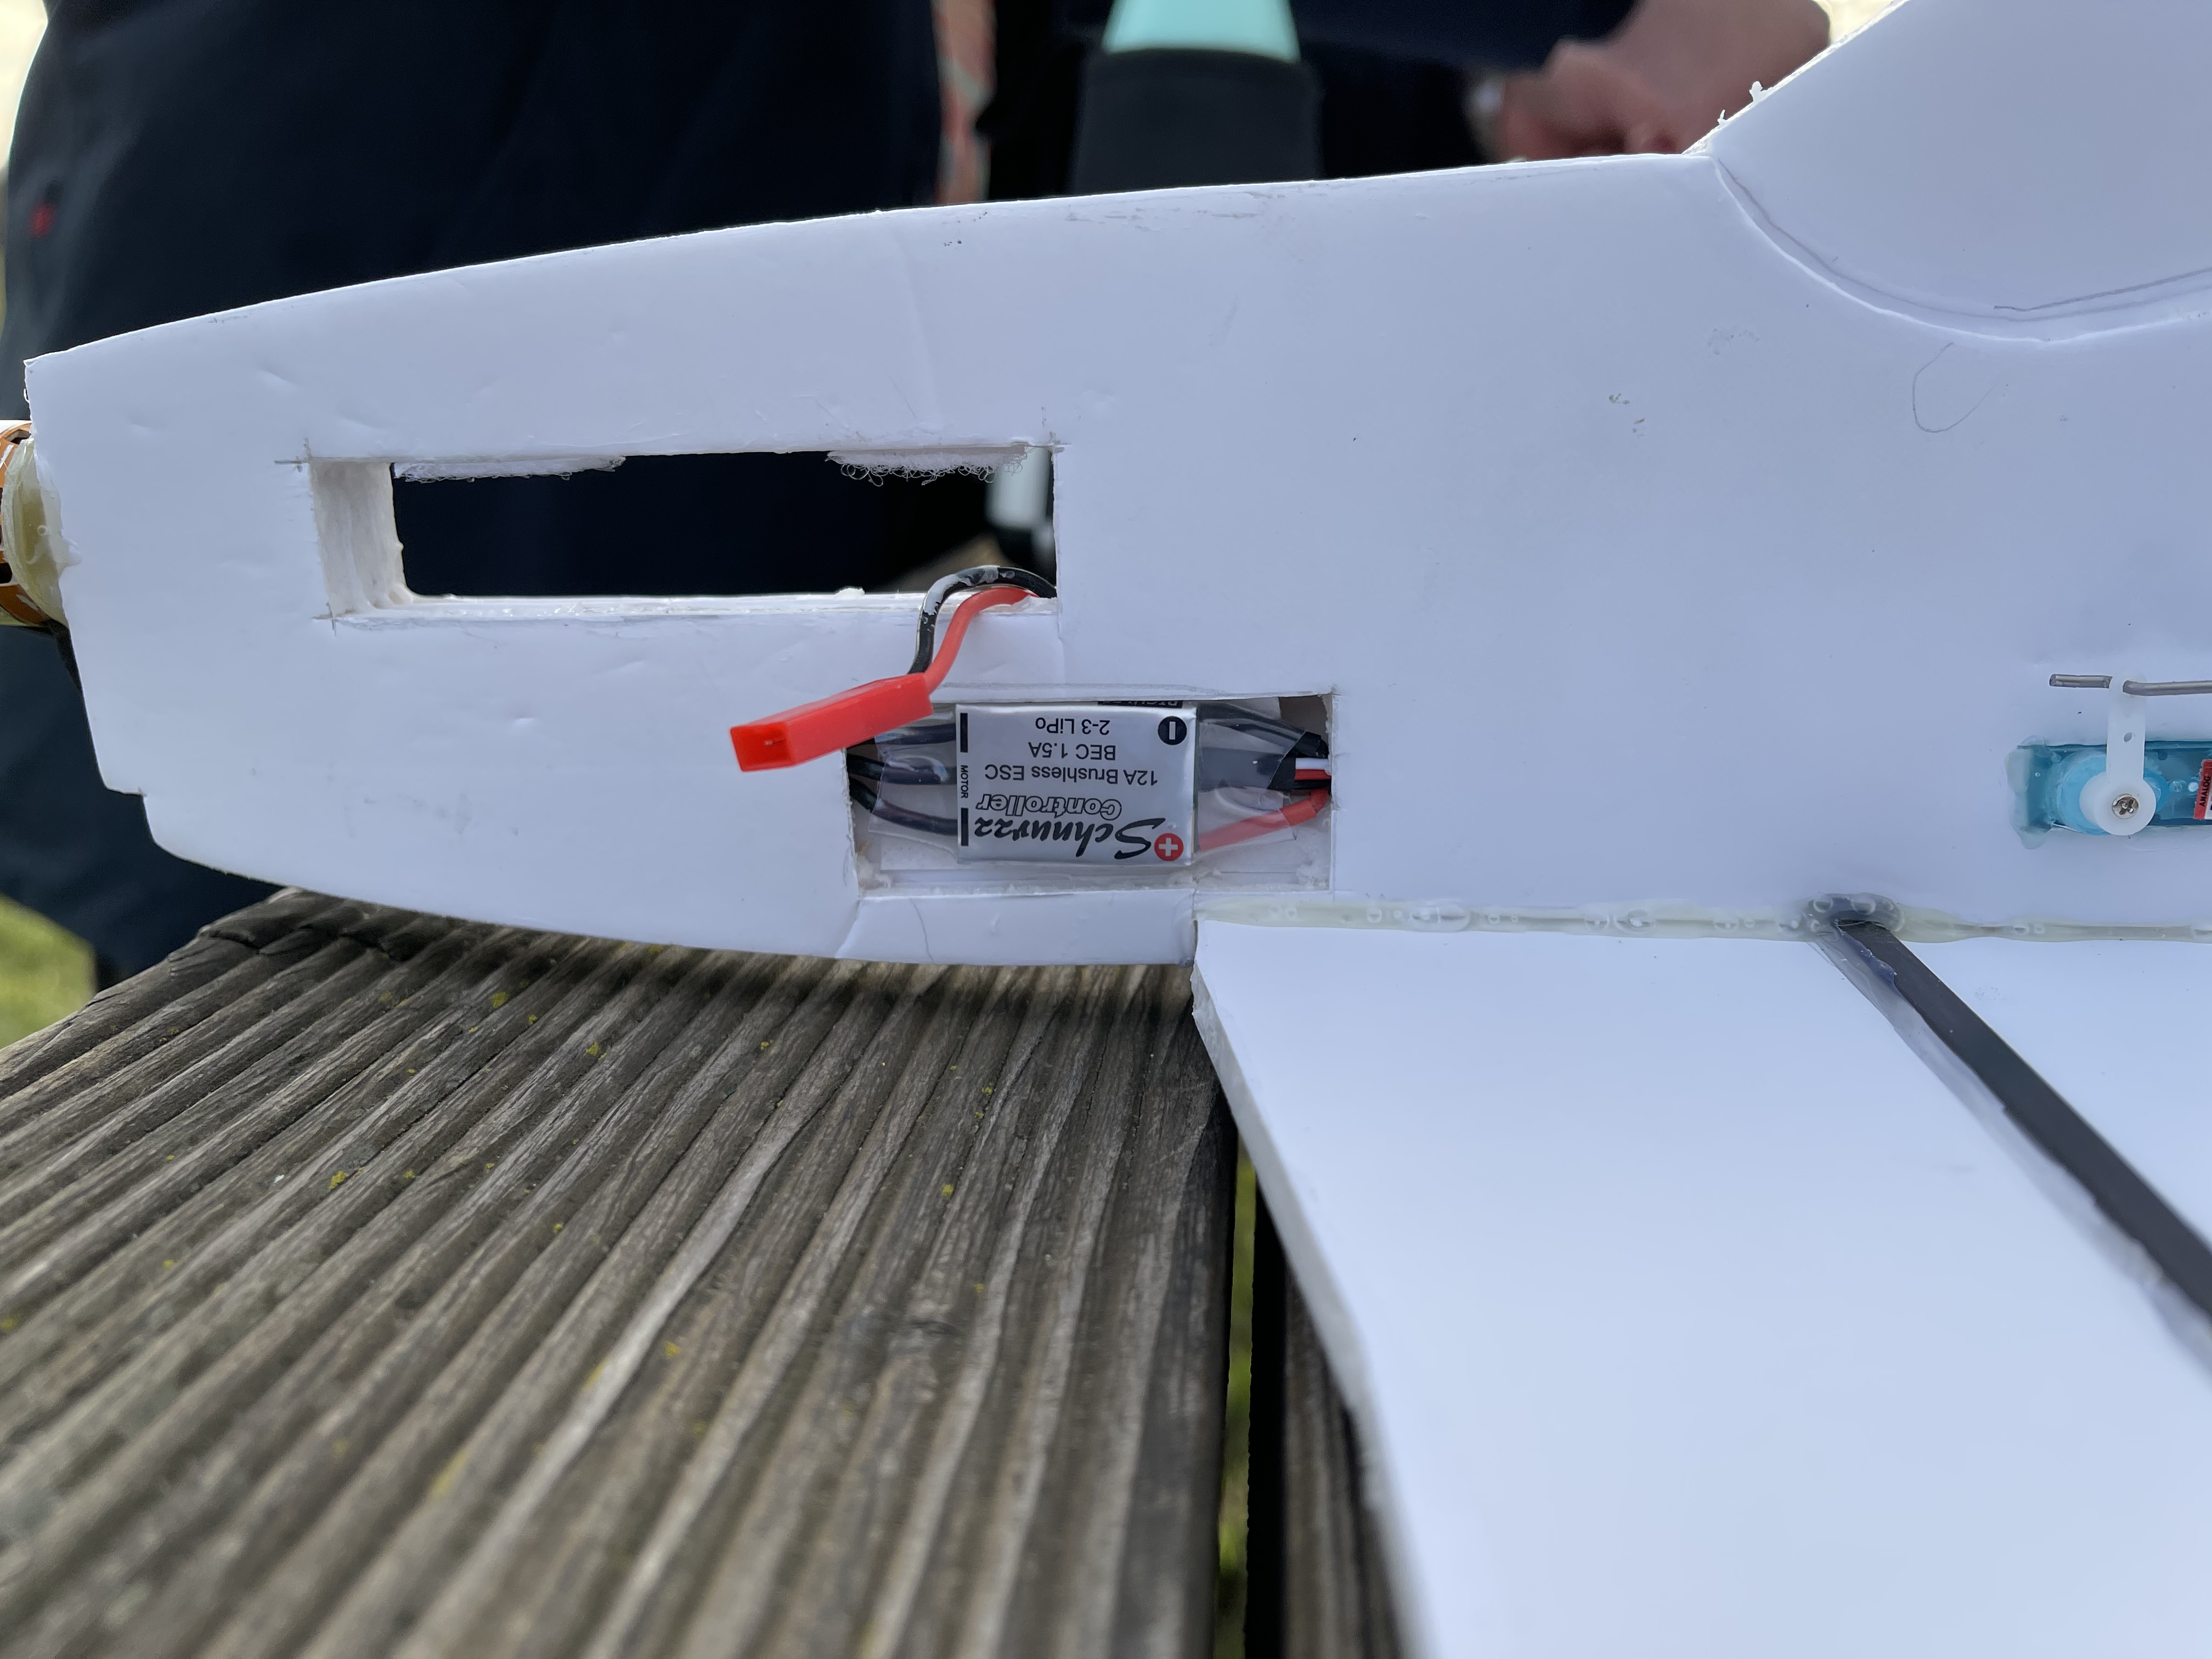
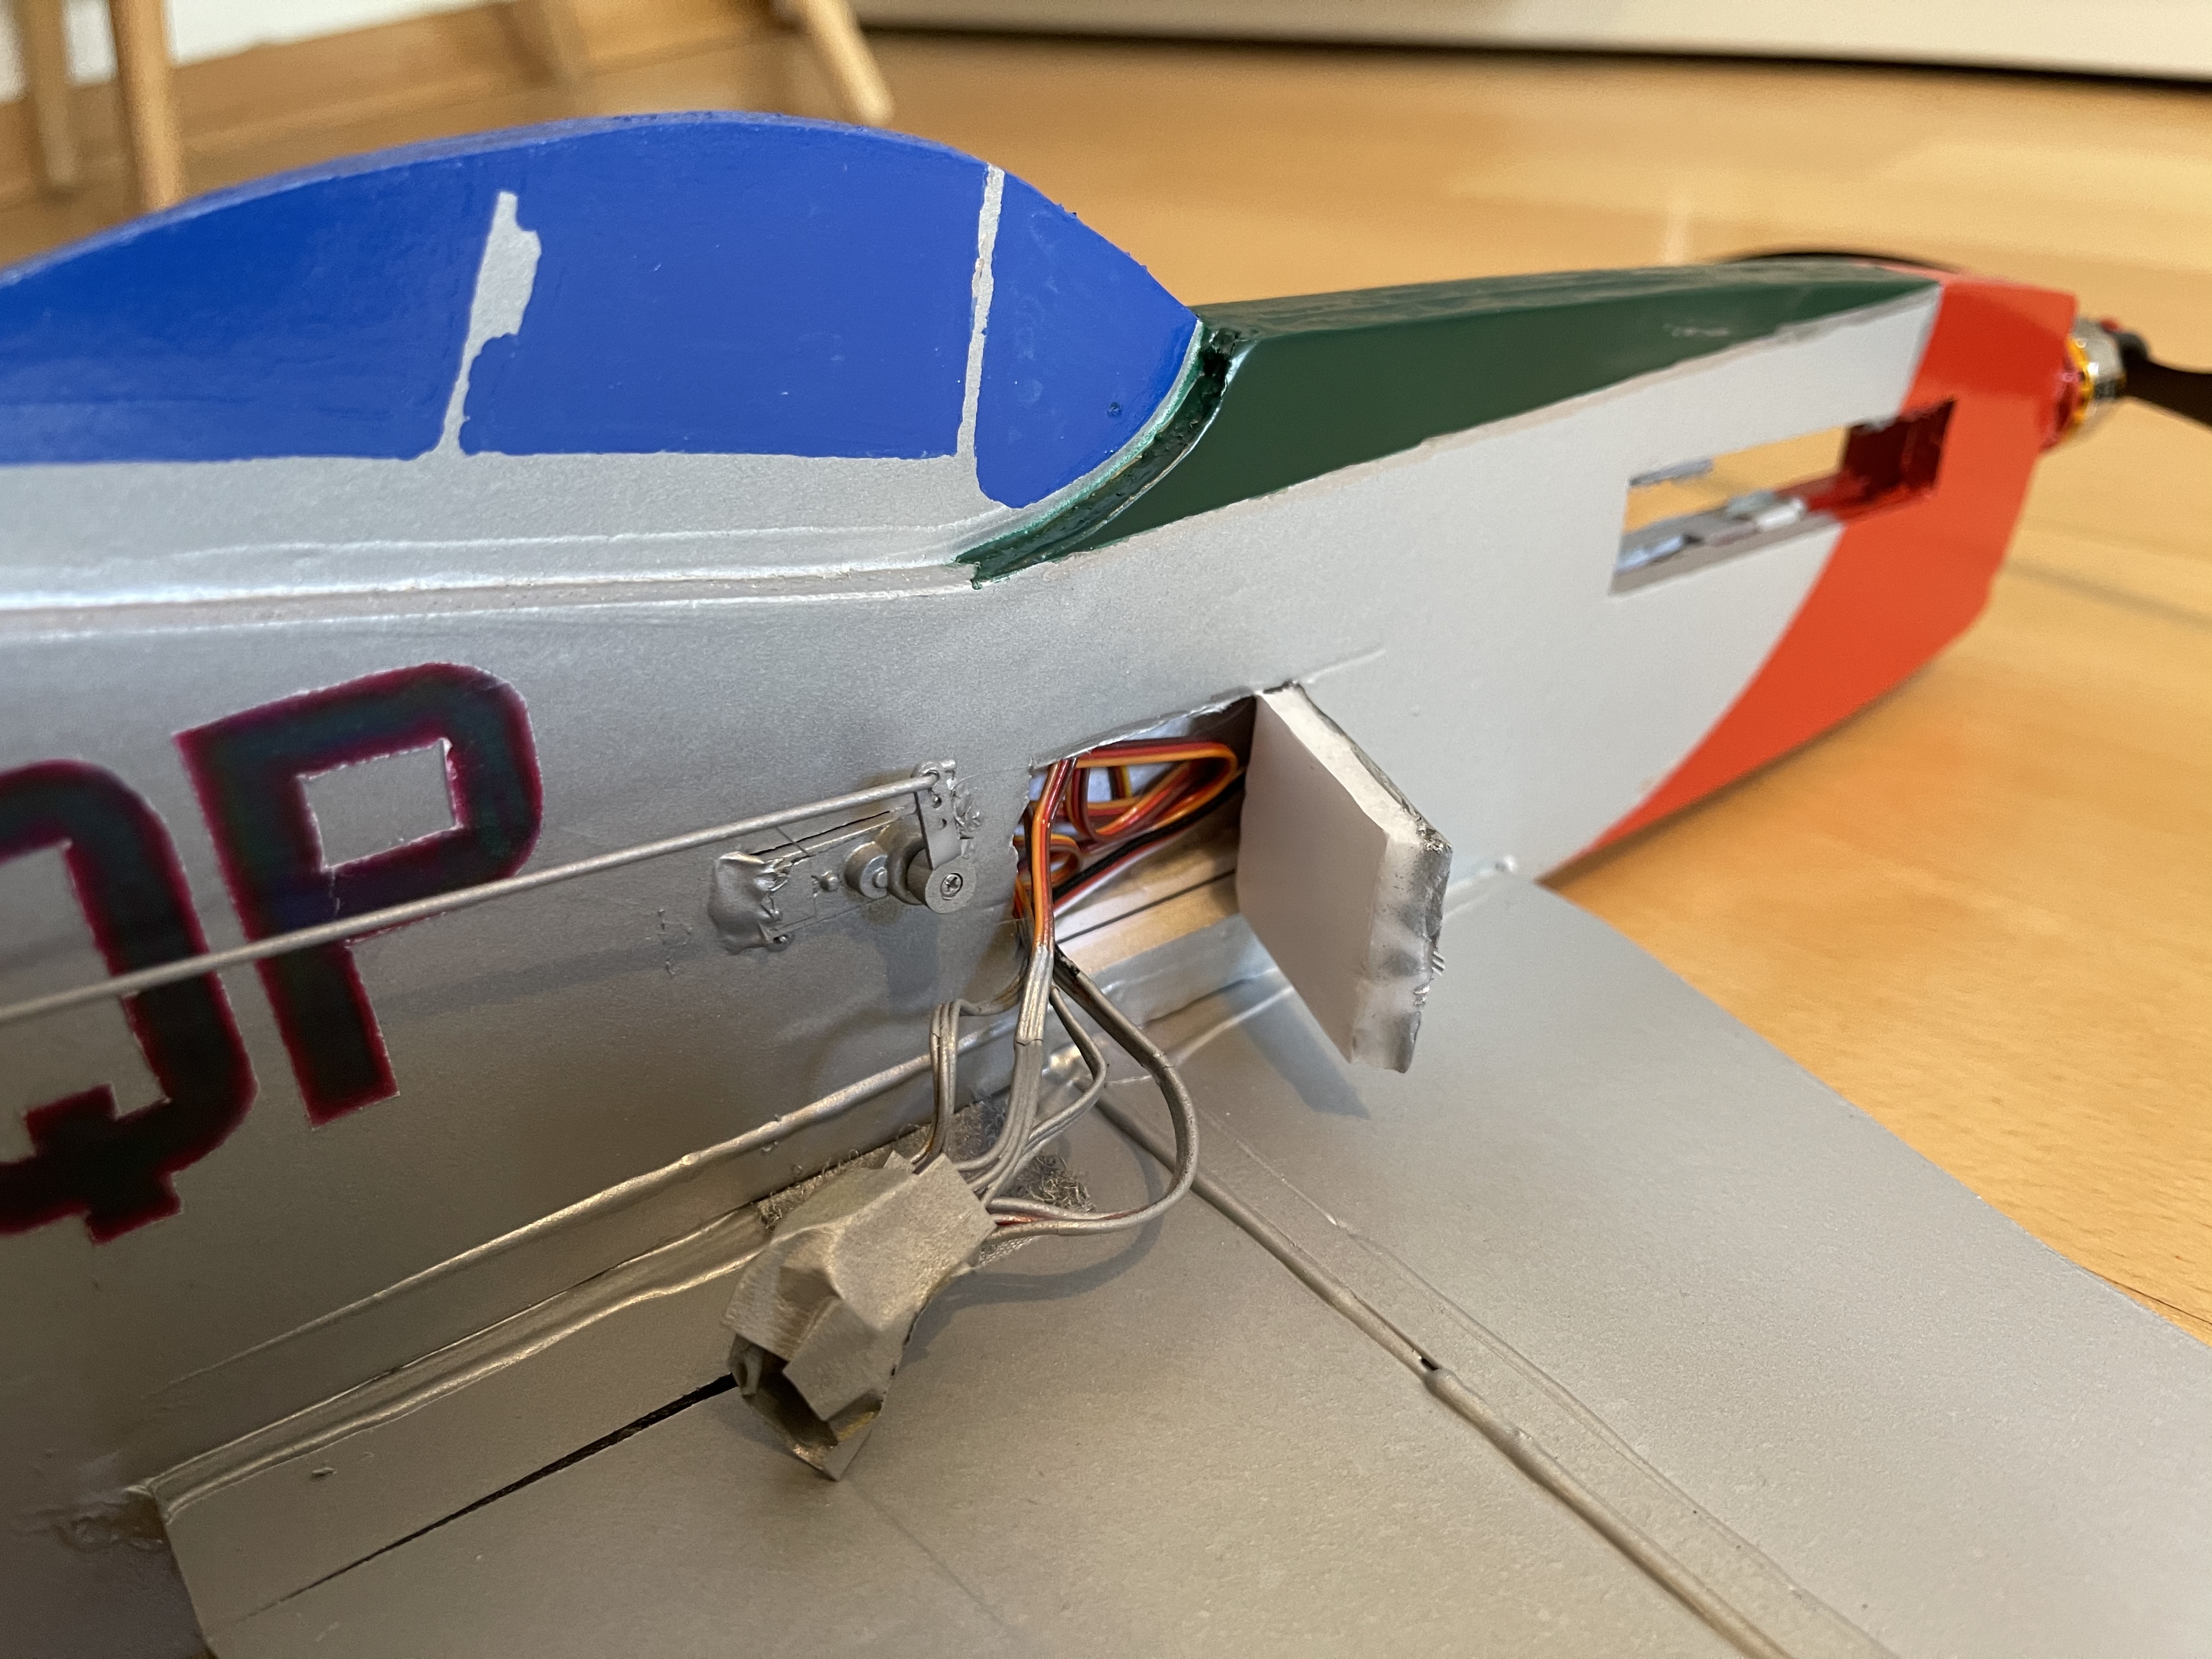
 For the second and third builds, I also added a few maintenance aids, such as a small magnetic hatch that gives access to the electrics. This proved to be very helpful for my third build, because when I connected the servo for the elevator, it turned out that this servo was defective and had to be replaced. Since I had changed the location of the servo in the fuselage from the original build (you can see the difference on the pic above and below), I only had to use a drop of glue to hold it in place. To replace it, I used a hair dryer (be careful with heat guns and foam, as they melt the foam quickly, as you can see from where I removed the control horns during the first build) which is just warm enough to loosen the glue.
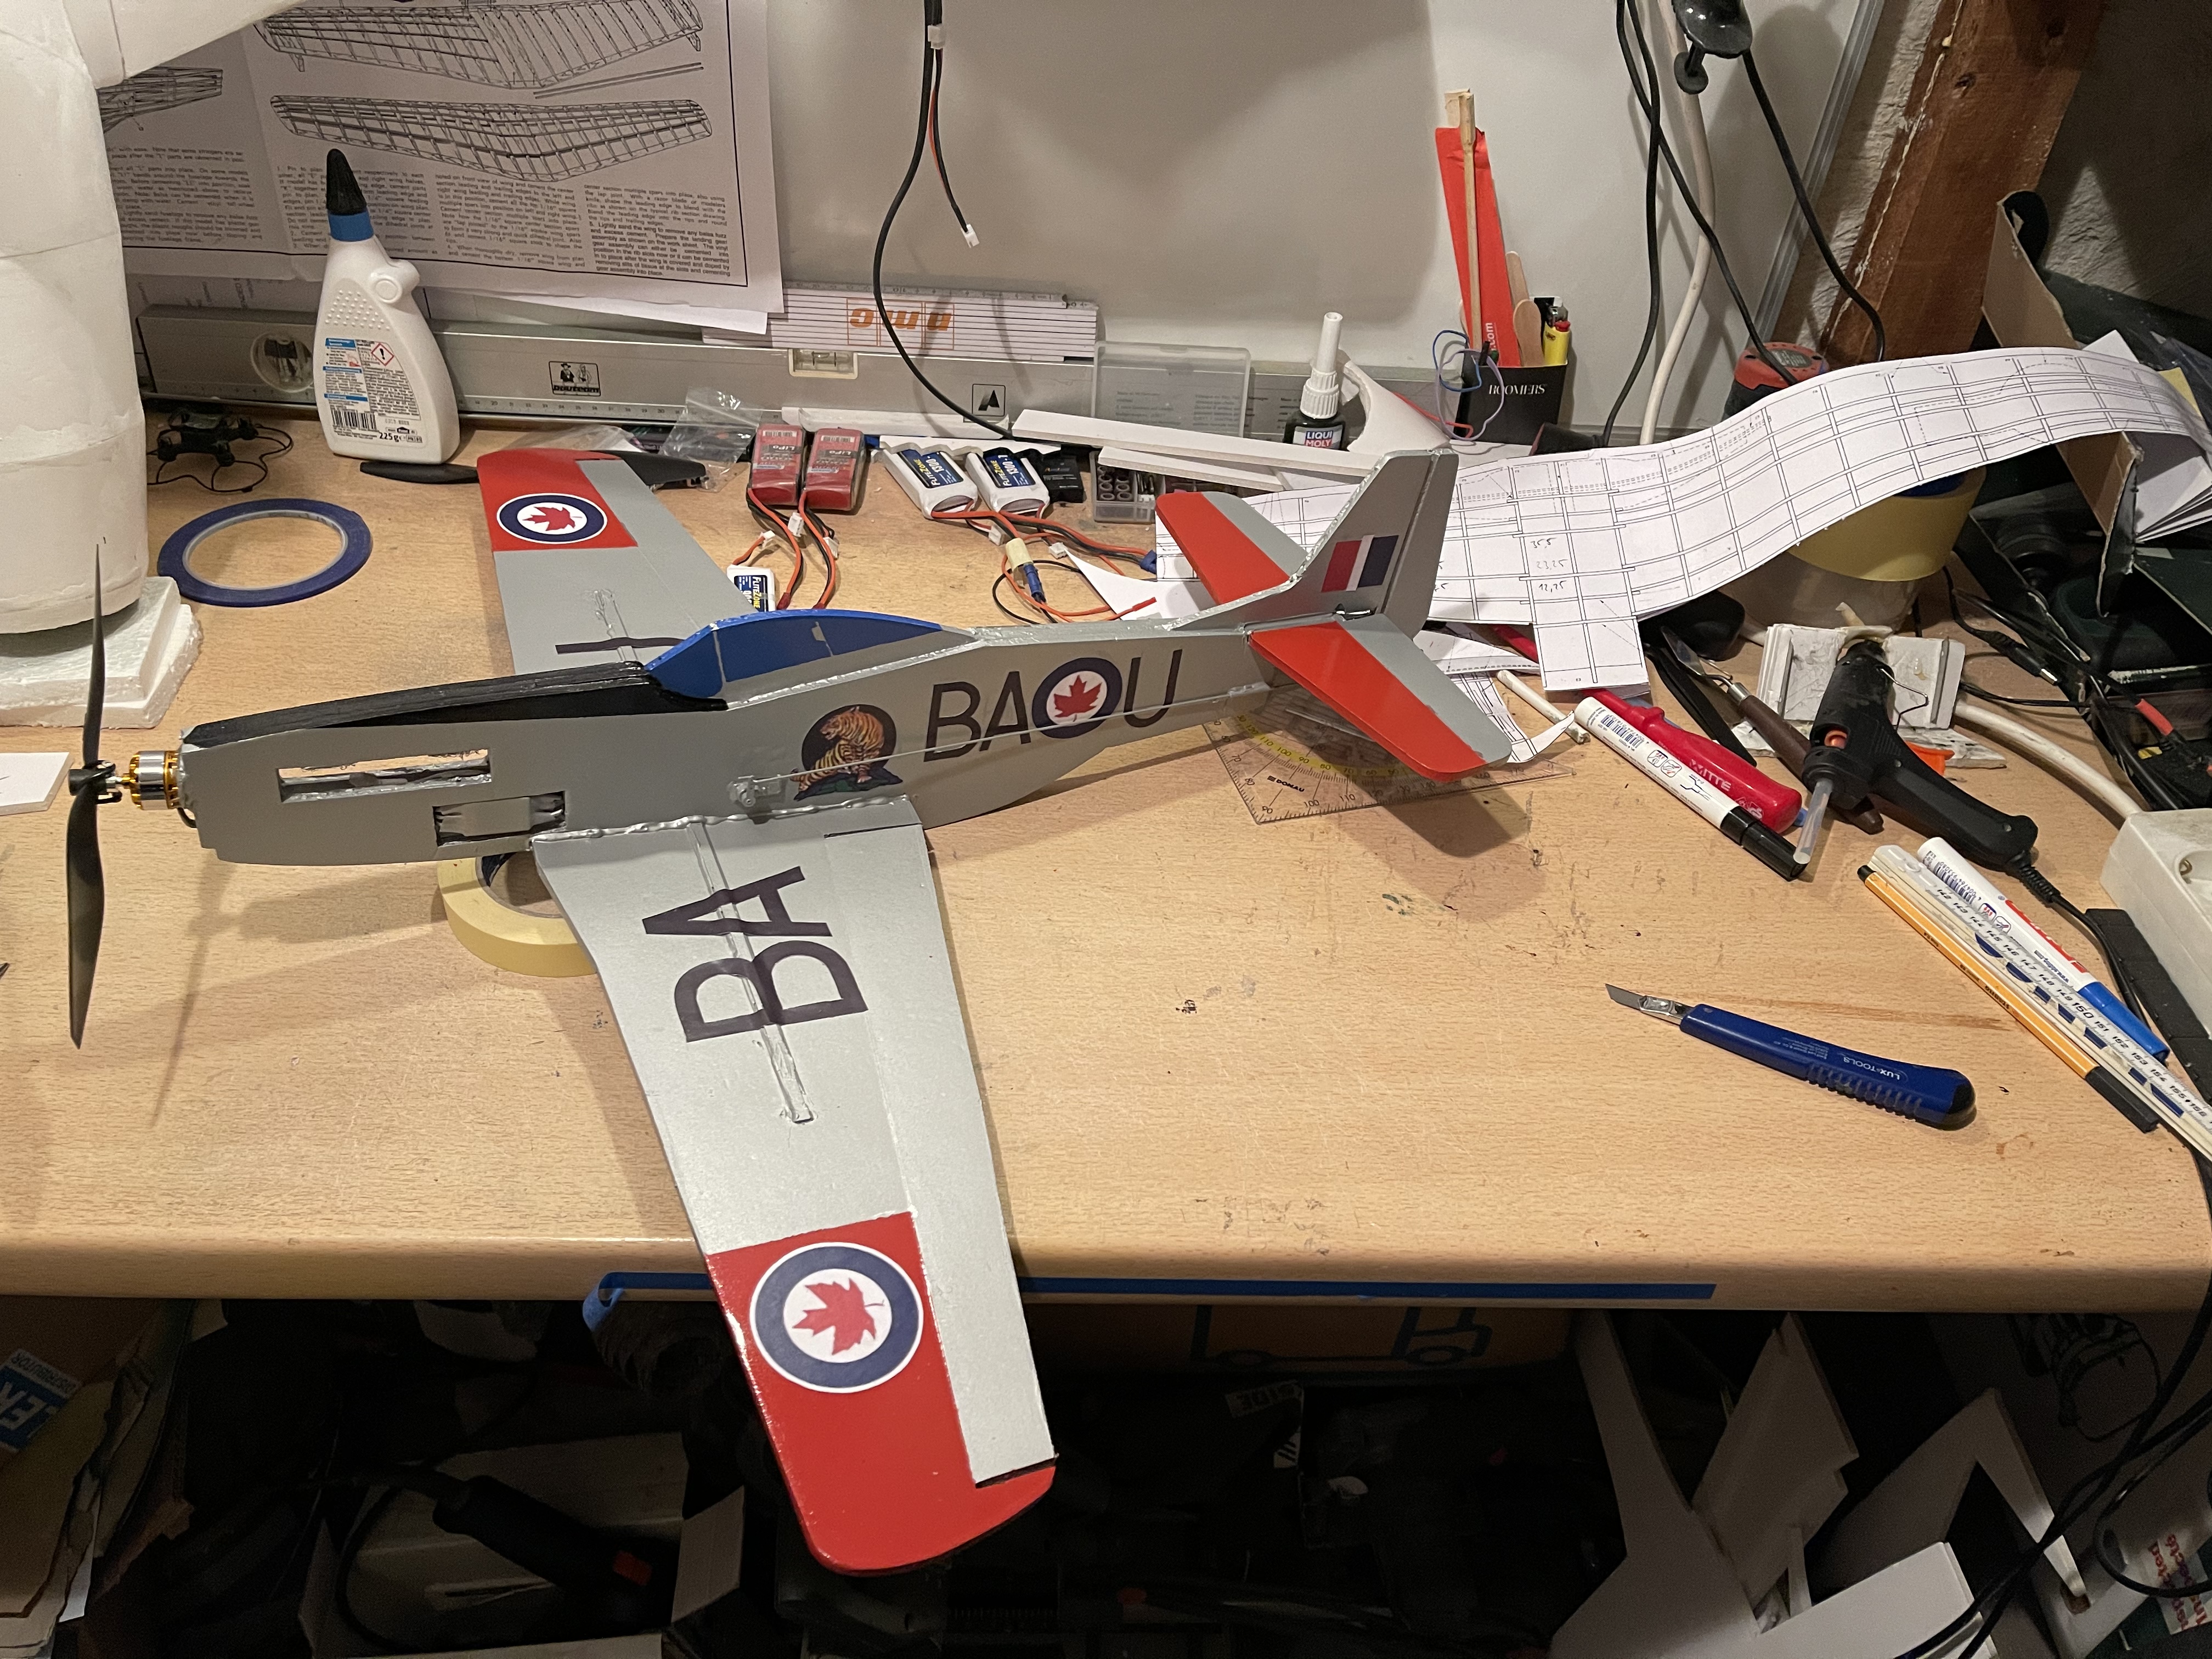
 For the paint jobs I checked the pictures at Callie Graphics (https://callie-graphics.com/) which provided for great inspiration.
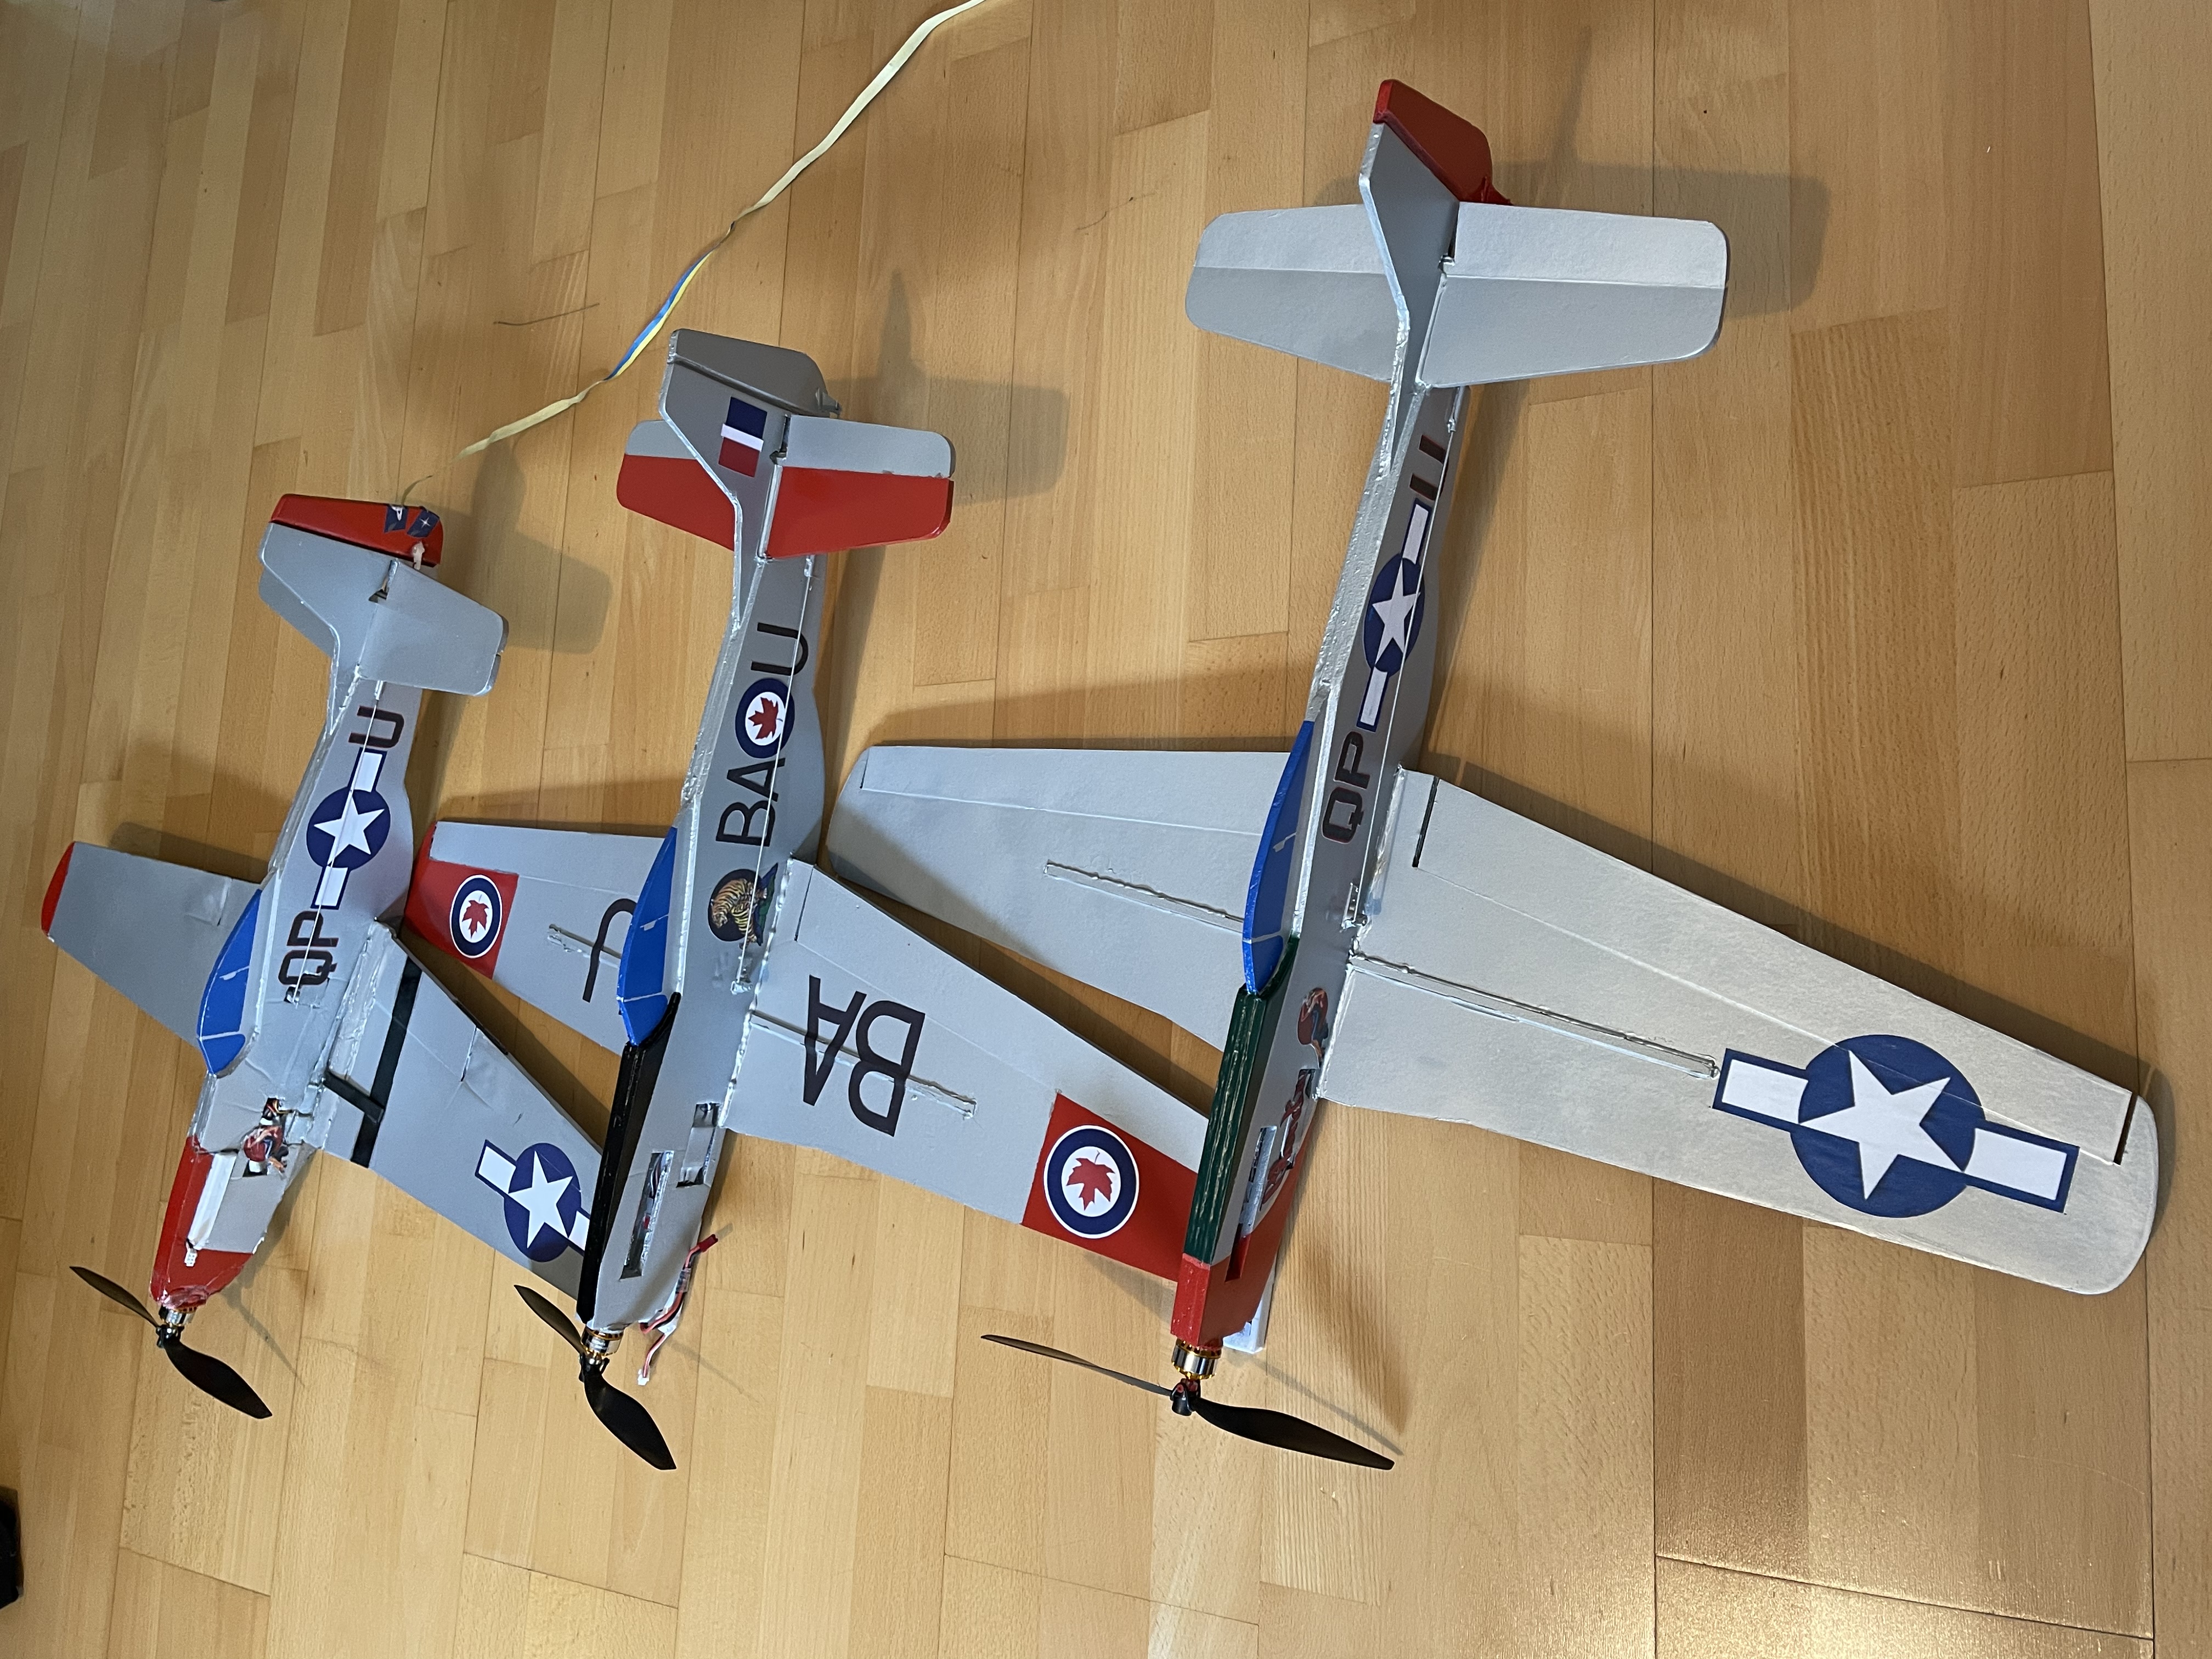 The P51 park flyer is a quick build for the weekend and is fun to fly. Total weight including electrics and a 900 mah 2s Lipo is a about 220 gram.
Hope you enjoyed the read!


I also used the MinimumRc-principle of a three layered fuselage for building something similar but as a multi-motor. With these planes everything is planning the positioning of rc-components and cable routing in advance.
Very impressive building speed over the weekend! I myself needed literally months :-)
What is the wingspan of your P-51? What type of reinforcement (wood, carbon...) did you use and where?
Greetings from Germany
Martin
Log In to reply
Log In to reply
Log In to reply
Log In to reply