I haven't seen any tricopters based on the AnyCopter design yet. I recently crashed my previous tricopter while recording a video on doing flips. When I decided that I really needed to rebuild the frame, I instead chose to build a new frame based off the AnyCopter design. Here's the build video:
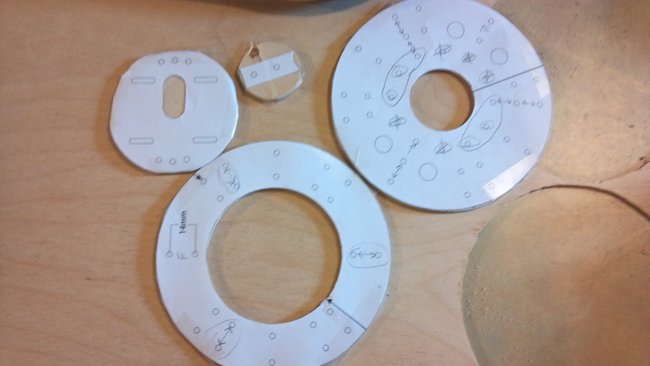
I drew the circles on 1/8" plywood with a compass, cut them out, then cut out the templates that I printed off, and taped them to the wood frames. I then used a drill press to cut only the holes I wanted. If I ever switch to a quadcopter, I'll keep this frame and just make another.
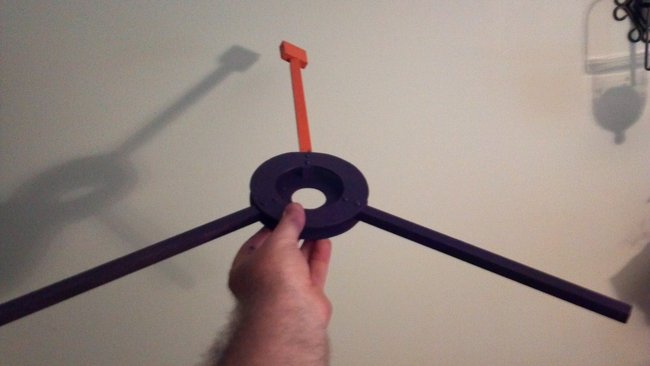
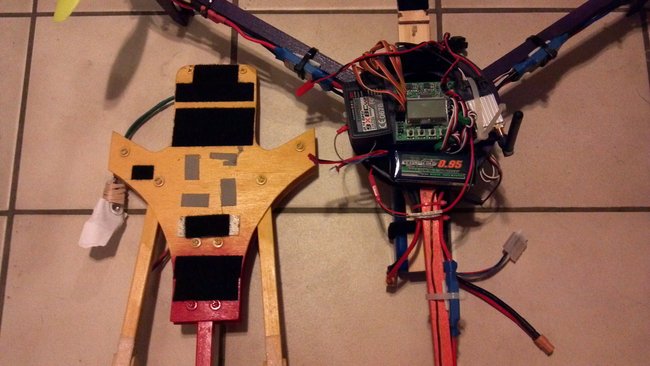
I was having a hard time deciding which colors to paint this frame. In the end I went with purple and orange. Purple because K-State football is awesome and orange because I already had the paint.
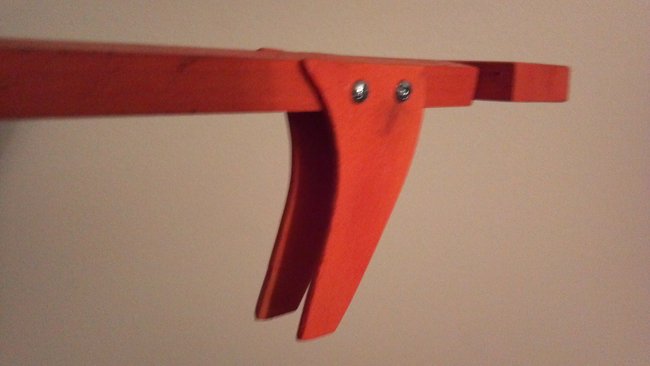
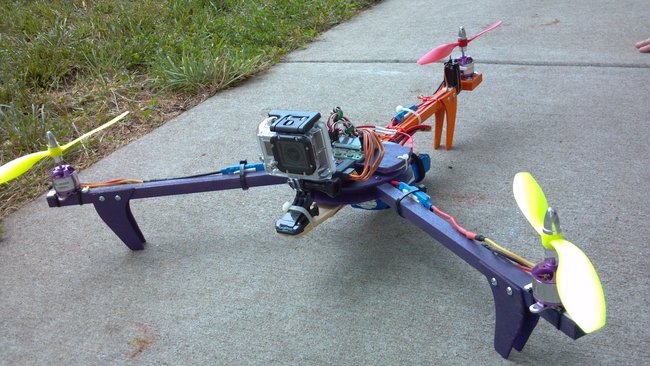
Because I didn't purchase the kit from FliteTest, I had to make four distinct changes to the frame. First, I had to design my own landing gear. I drew up this landing gear to make it look similar to the original design and then cut it out of the same 1/8" plywood that I used for the frame. I put two pieces on each arm and bolted them on with 6-32 1" screws. The main thing to remember is that the landing gear needs to be at least 3 inches tall (2.5" below the arm) so that the battery can be mounted below the frame. This is also enough room for Chad's camera & battery rig. Second, the swing plate that was added on the rear arm was the idea of HallStudio who simply used a sheetrock screw for it to swivel on. I added the two metal washers to help reduce friction.
The third big design change was to use arms that were 12 inches long, instead of just 10, so the motors could mount on top of them using zip ties. The forth big modification was that I added another wooden plate on the very top where the KK2.0 board could be mounted. I don't like the idea of the KK2.0 board sitting on the foam and just being wedged into the frame. It seems too "not permanent" for me.
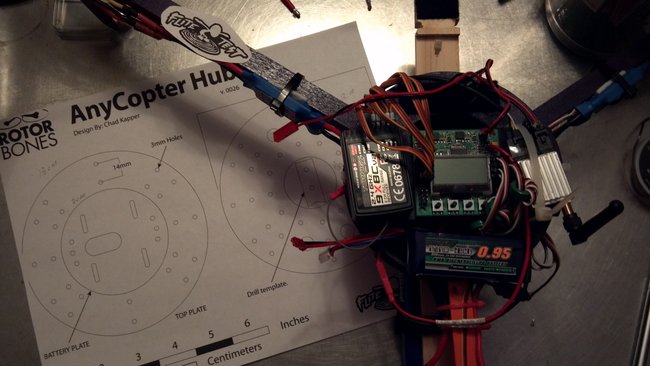
I mounted the receiver on the left side of the board and the 5.8 Ghz video transmitter on the right. It is getting kind of crowded now. I know these transmitters are suppose to be spaced as far apart as possible, but for now it is good enough. I may use a servo lead and move the video transmitter back to the rear arm and mount the 2.4 Ghz transmitter on the front, but there isn't too much interference when you are only flying 30 yards away.
Because of the larger size of my previous tricopter with 16" arms instead of 12" (based off HallStudio's design), I was more comfortable with flying his very high because it was easier to keep track of the direction it was facing simply because it was larger. The AnyCopter design, being smaller, is more nimble or at least seems to be. I've only had it out twice (5 batteries of flying) as of the time I wrote this. It is probably the same for all RC vehicles that larger ones fly different than smaller ones. I REALLY liked this design. Here is a video of my previous tricopter flying in my front yard:
Here is the video of me describing how to do flips. The tricopter was so far away that I didn't want to make an article out of it. You can skip to 8:00 to see why I had to make a new tricopter (hint: "crash"):
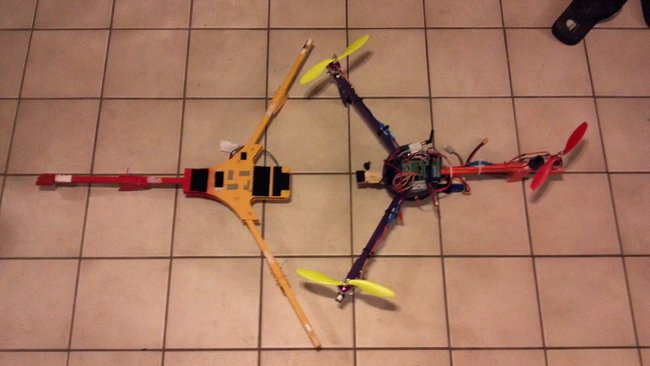
Here are some pictures showing the over size difference and frame size difference between the HallStudio design (enlarged rcexplorer.se) and the AnyCopter design.
Anyway, back to the "AnyCopter with the Tricopter flavor", I want to get into FPV. I built the camera & battery mount that Chad designed to help with FPV. Right now I'm flying on a 7" LCD screen and it is not easy. If you've never done FPV before, the only advice I can give it to practice and then practice some more. I'm not sure if googles would help me much at this point. I've only been out once trying FPV and it was real windy so I couldn't tell if it was me or the wind that was making it so difficult. I'll keep trying and if I can get descent at it, I'll probably invest in some googles at that point. The next picture shows the GoPro in the case, but I had to take it out to could get the USB cable attached to it for the video out. I was really wanting to keep it in the case since it isn't mine and I don't want anything to happen to it - oh well.
There is some flight footage of this tricopter flying at the end of the first video. I really wanted to integrate footage from the GoPro into my maiden flight video, but the battery was dead. Oh well, maybe next time.


No Comments Yet
Be the first to leave one!