Hello everyone!
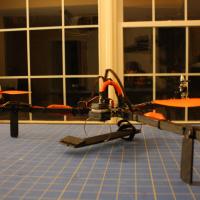
I'm back with my new and improved Version 2 of the Tricopter V2.6. In this build I tryed to make it look almost exactly like David's Tricopter. I really really like the way it looks without any wires or zipties on the booms. It just looks so much better. To be achieving this I will be using carbon fiber arms with a tube cut out in the middle of it to shove the ESC wires into. I bought the carbon fiber from Hobbyking so it was pretty cheap. Unfortuantly with Hobbyking is that, with most orders, you have to wait two to three weeks for it to get to your house. After what seemed like forever, which really wasn't it came quite fast, my package arrived and I got right to it! I bought the Hobbyking F20a ESCs that I flashed with the SimonK firmware which are a HUGE step-up from normal ESCs and even the Multistar ESCs which are made strictly for multirotors! Once I was done I was able to punch the gains on my KK2 board up more than 2 times what they were to start with!
I feel like I've done enough talking about that stuff already, lets get into it!
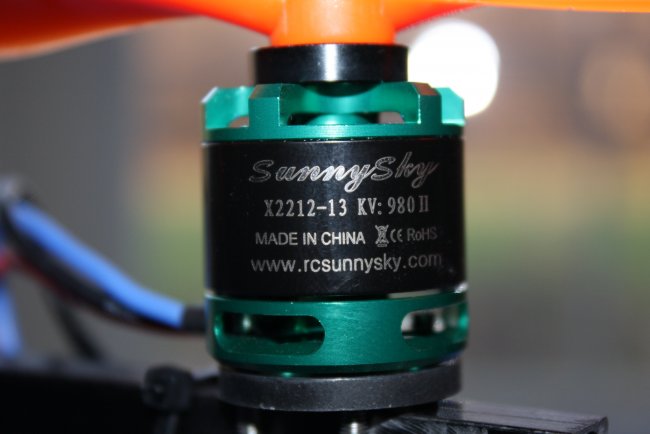
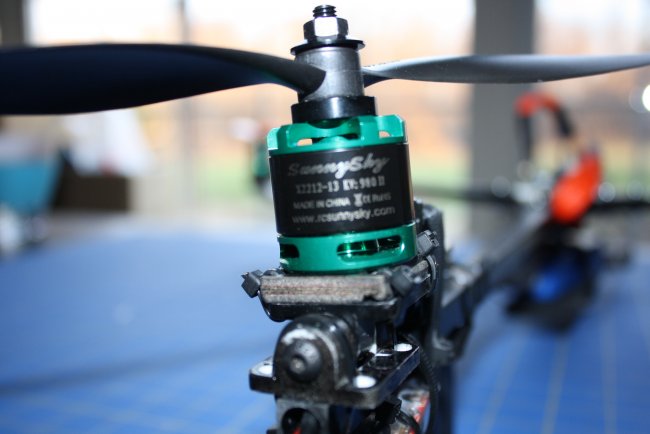
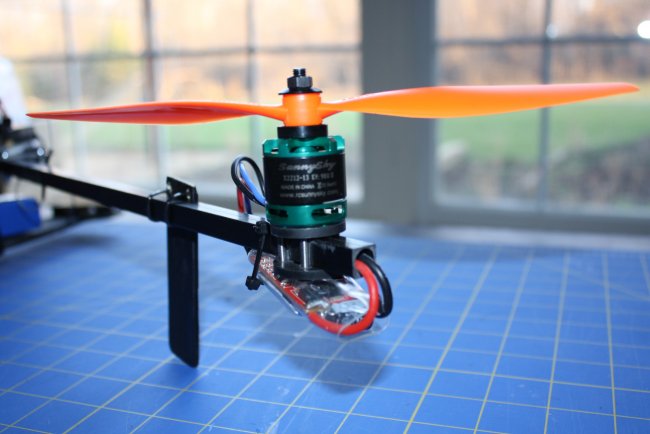
To start off, I bought new motors! My old motors, NTM 2826 1200kv, couldn't handle the faster timing in the SimonK firmware so I bought these! They are SunnySky 2212-13 980KV II motors. These things are AWESOME! I've had them for only a couple of days but I still love them. The only thing I have to say about them is that the little prop adapters/prop spacers that come with your propellers. Use them. Or else you get terrible vibrations. After you do this, it's as smooth as a baby's bottom ;-)
I painted my tail mechanism black to match the arms of the booms. Unfortunatly the paint I was using was a little too runny for the plastic. Oh well it looks pretty good from a distance. :-)
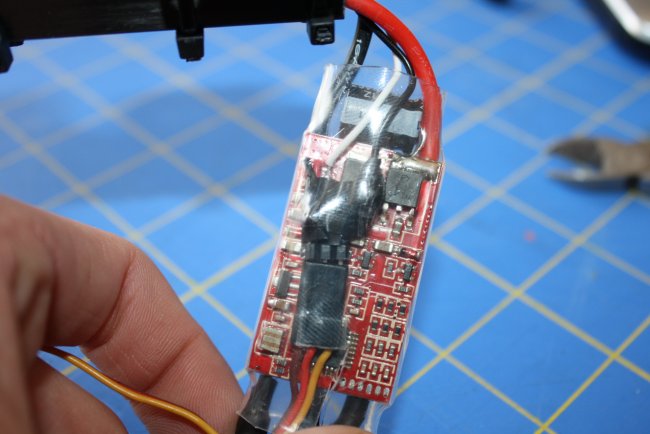
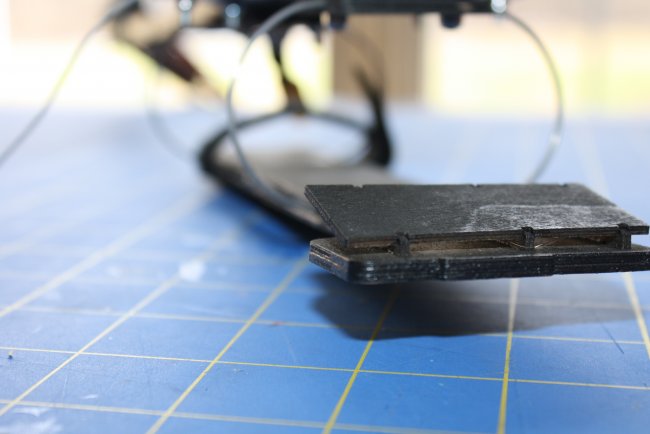
It took me a while to figure out how David actually modified the ESC to be able to plug the servo right into it but after a while I came up with this. All I did, since I am still not a perfect solderer, was cut the wires very short and soldered on the pin connector to those instead of the actual pads on the ESC. I made a little diagram below on you would actually solder the pin onto the servo. Check it out!
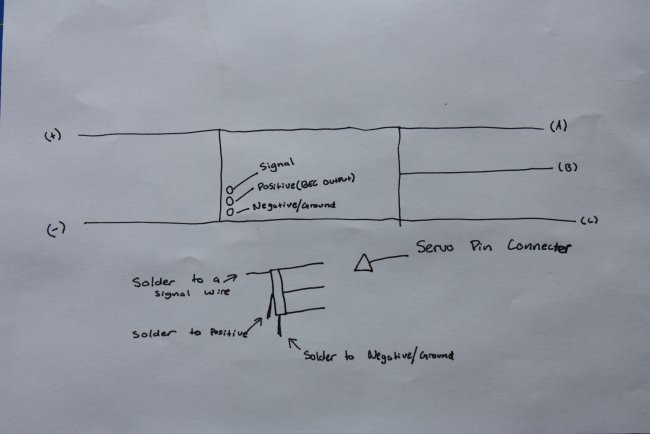
Sorry in advance to the poor wording but what you want to do is solder the two wires, Positive and Negative, onto the pin conncetor. Or if you are cofident in your soldering skills, just do it on the ESC itself. Next solder a seperate wire onto the end of the connector to act as the signal wire and your done! It really makes a huge difference because you lose four wires and theres no servo wire going across on top of the boom to make it look bad.
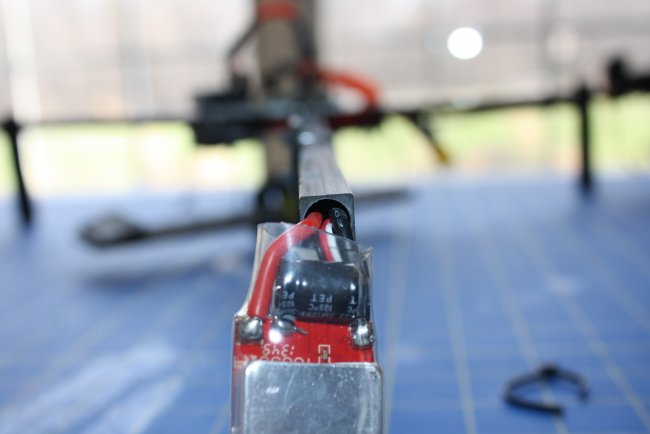
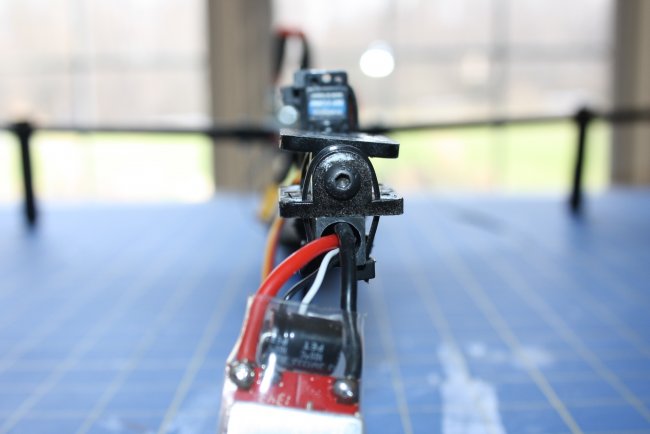
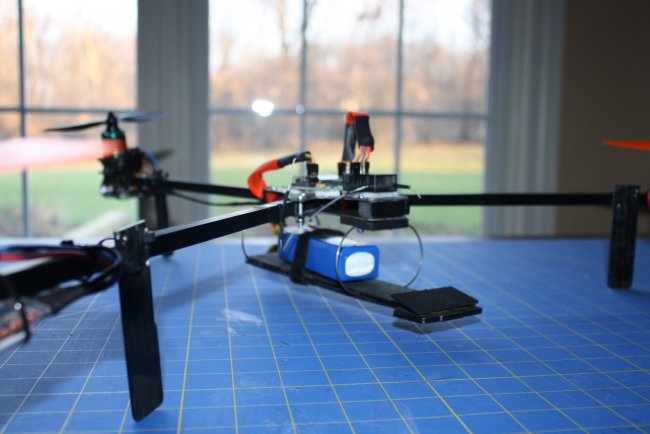
Here are a couple of pictures of the wires stuffed into the carbon fiber booms.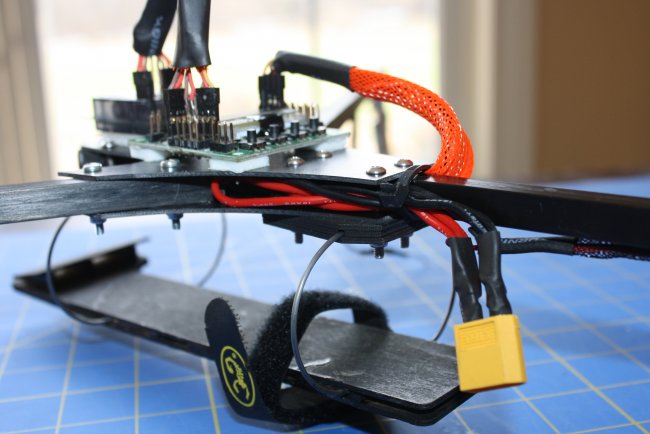
I got all the power wires around to the left side of the copter which is just a personal preferance of mine, it really doesn't matter what side you put them on. Next I soldered on an XT60 connector. Just keep in mind that after a crash and you have to replace one of the arms, you'll have to have a plan to get the wires out and into a new arm.
I used just one esc to power the KK2 board, the rest of the ESCs are just using the the signal wire
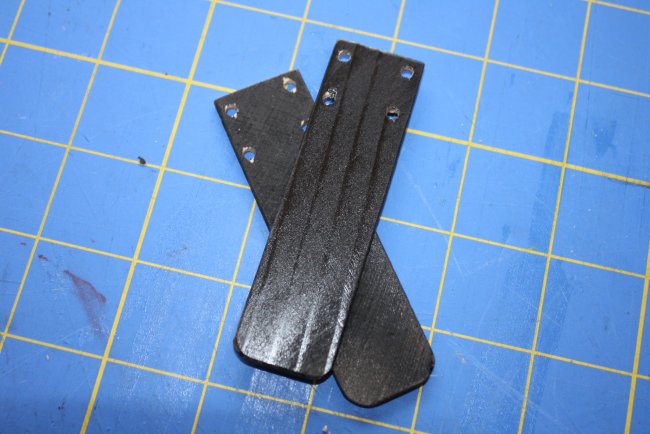
I really like the simplicity of the landing gear that David uses so I just cut some out and painted them black to match the rest of the copter.
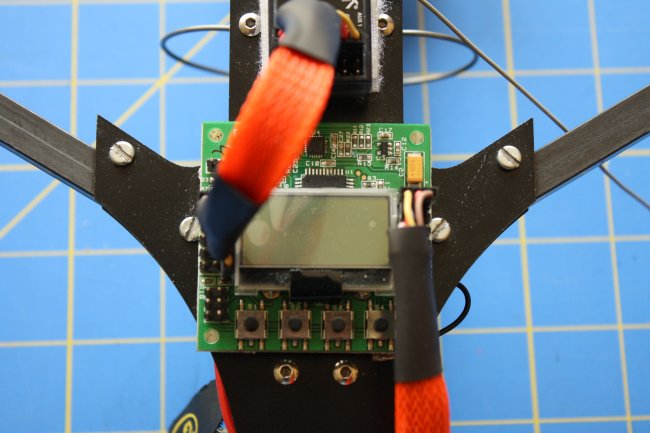
The KK2 board. I flashed it with Stevie's firmware which is tons better than the stock firmware it comes with.

I'm using Stevie's 1.17S1 Pro frimware.
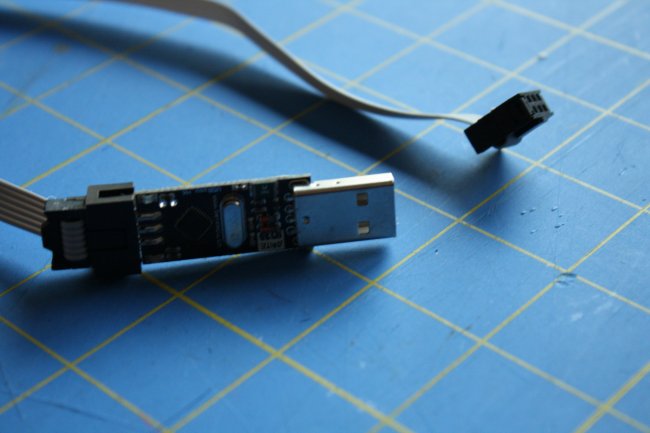
I used the USBasp AVR programmer that I bought from 9xrprogrammer.com to flash the KK2 board. Hobbyking usually is out of stock for the ones that they sell and just for a couple of bucks more and US shipping, you really can't beat that
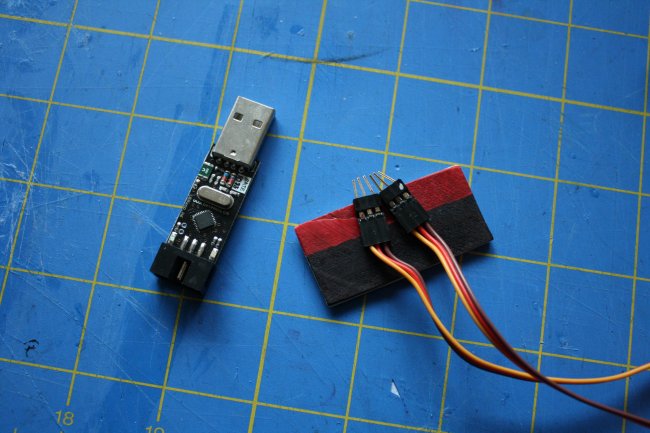
While on the topic of flashing stuff, I made this little flashing tool out of two servo leads to flash my ESCs. It takes about 10 seconds to them now.

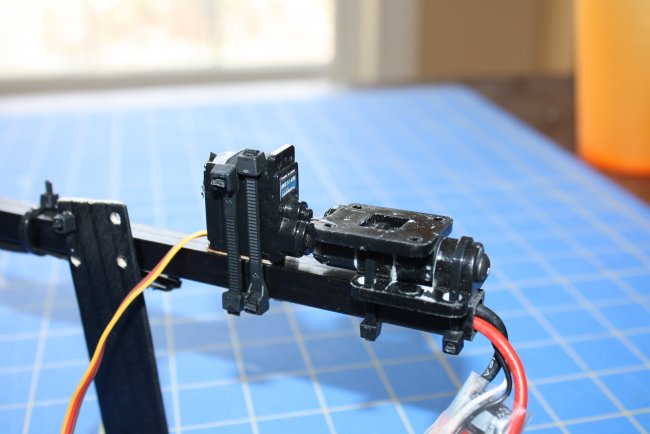
A couple pictures of David's Camera tray that I bought from FliteTest. I also bought the Tricopter plates from FliteTest.
I made a little plate to mount the motor on the tail.
To mount the motors I used nylon washers. They had a nice hole for clearance for the bearing. All I did was drill the holes to fit over the motor mout holes.
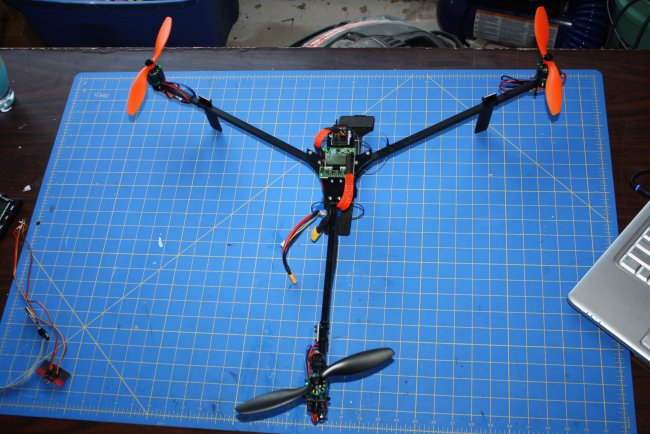
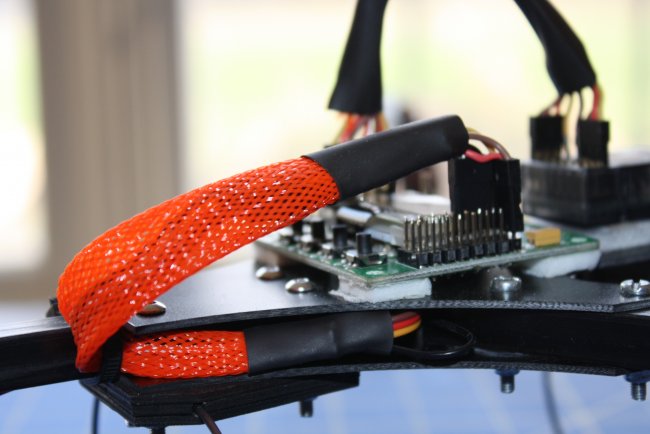
A top view. It looks really clean.
To sum up, I'm really happy with my tricopter. I feel like I acomplished what I wanted and I'm happy with that! I will be putting up my KK2 settings right when I get them perfectly. I don't want to post anything that won't work for everyone. Also, I'll be putting up a couple of flight videos. I am really looking forward for what this "spring" and summer bring for me and I would love to share it with you!
Please let me know how you liked the article. Any constructed critizism would be greatly appreciated because I would really like to keep posting my articles but I only want to give you something that you(the audiance) will get something out of. Thank you for reading my long build log of my tricopter. As always, Happy Flying!
Electronics Used
Motors: SunnySky 2212-13 980KV II
Props: 9x5 HQ
ESCs: HK F20a flashed with the SimonK firmware
Servo: TGY 113MG (Although this works well for me, I would not recommend this servo. I would recommend the one that David uses on his tricopter.)
Flight Controller: KK2.1 flashed with Stevie's 1.17S1 Pro
Battery: 4s 3000 MaH 20c Zippy Lipo
FPV Stuff-
Goggles: Fatshark Attitude SD
Video TX: ImmersionRC 600Mw VTX
Antennas: Spironet V2 5G8 antennas
Camera: Fatshark 600 TVL CMOS , Mobius wide lense and Gopro Hero 3+ Black


Log In to reply
Log In to reply
Log In to reply
Log In to reply
Log In to reply
Log In to reply
Log In to reply
Log In to reply
Log In to reply
Log In to reply
Log In to reply
Log In to reply
Log In to reply
Log In to reply
Rock ON!
fretsman
Log In to reply