Hey Flite Test!
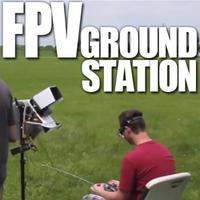
So this is my recently put together ground-station in a single case. I'll run you through the build and its features! This is really meant to outline the case and the screen. Everyone has their own preference and custom set-ups when it comes to reciever(s), frequency, brand, antenna etc. This is just to help inspire others for their own ground-stations! The pros of this one include that fact that there is LOTS of space to add in whatever you want, it's portable and easy to transport! The one down-side is that you need a table to sit it down on. I really enjoyed the ground-station episode that Flite Test did, but I really wanted something that could be easily moved around! Good luck and I hope this helps you with any ideas you may have for you project!

Materials and parts:
-The case itself - I live in Canada, so I picked it up at Canadian tire, but they should have similar cases elsewhere.
http://www.canadiantire.ca/AST/browse/6/Tools/ToolStorage/HandBoxes/PRD~0580916P/Aluminum+Tool+Case+with+Strap.jsp?locale=en $30
-The screen - I removed the screen out an the Insignia 18.5" LED TV. I bought it used for $65 dollars, but you can by it from Best Buy for $100.
-4 amp 12 volt HK B-grade battery - http://www.hobbyking.com/hobbyking/store/uh_viewItem.asp?idProduct=28546 $10
-Some nuts and bolts and rope
-Cardboard for a sun visor
-An FPV System (I use the 900mhz system from HK) It doesn't matter which one.
Construction:
The first step was to reinforce the case, as I put a screen in the lid, the hinges were not secure on their own. So I inserted bolts into both the bottom of the case and lid and tied rope to each bolt so to secure the lid and take some stress off the hinges. Below is one of the bolts in the bottom.

Below is the bolt in the lid. I did this on each side of the case. You can also see the bolt directly above with an l-bracket to hold the screen in.

Step number two was to mount the screen in the lid of the case. You can use any screen you want, but I wanted a really big one. An 18.5" screen fits perfectly in my case. I first as to remove the screen from it's case as it is meant to be a television. A key point here, if you plan to use a TV, make sure it runs off of 12 volt dc so it's easy to power. Mine does so it was really easy to wire up!

As you can see above, the screen is installed with a sun visor I constructed from cardboard. This is useful for two reasons. 1. It helps you see the screen :P and 2. when it folds up, it protects the screen from being scratched. To install the screen, I just used foam in and around it and a couple of l-brackets.

Here is a good shot of the final set-up for then main part of the case. It came with foam inserts that I put my equipment in. The battery is in the front-left. The great part about this case is that it can be completely customized to what you want to do with it. For example, on the right, I put a space for a transmitter, that way. When I go to fly, all I need to carry is this case, and the aircraft.

Finally is connecting the battery. I put a big fat battery up in the front to counter the weight of the screen. It's a 12 volt 4 amp battery that powers both the screen and the receiver. It's a B-Grade battery from HK, but it's cheap, and it's not a plane so it has a very low discharge rate and I'm not cycling it too often. As you can see below, both the television and receiver only draw 1.3 amps, meaning this battery could run them for about 3 hours. Due to the low discharge rate, instead of dealing with the large cumbersome regular discharge plug for the battery, I simply spliced in a male charging connector to attach to battery, this means if I want to use another battery I easily can. I haven't added a voltage monitor yet, but I definitely plan to in the future and I recommend that you do it.


This is the final product, again this is just a starting idea that you can customize to your fpv set-up and a big pro is its portability.

Thanks for reading! Please rate!!! Good or bad, I want to improve my articles so leave suggestions in the comments please!


Log In to reply
Log In to reply
Log In to reply