Hello Flite Test community,
This is the story of the 2nd foamboard aeroplane I built (after a free flight Tiny Trainer). Originally designed as a slightly modified Explorer, the plane morphed into a 1930s style air racer last year, and later emerged quite radically different from the plane's original roots.
Genesis of the project & Inspiration behind the design
The story of what eventually became the Emma can be traced back to last year. In early April 2018, I built and flew an Ft Explorer. Apart from a Tiny Trainer chuck glider I made last year, this explorer was my first scratchbuilt rc plane! However a few months later disaster struck. On the 10th of June 2018, I crashed my Ft. Explorer. I was flying using the trainer wing with a wooden span, when I decided to do a loop about 3 mistakes high. I was confident in both my abilities and the aircraft, I had done many loops before in this aeroplane. However this proved to be one loop to many! When I pulled up to commence the maneuver, half of the left (port) wing panel decided to fold at an angle almost perpendicular to the rest of the aeroplane's wing. Immediately the aircraft began to auto-rotate about its own axis. I could only cut the throttle, and watch in horror as the plane plummeted into terra firma.
On closer inspection the damage was not as terrible as i had originally feared. The nose was a mangled wreck, but it could be repaired. The tail boom, though slightly bent from the crash could be fixed. Most importantly however, all of the electronics were undamaged, a testament to the rugged design of the Explorer.
So what caused the crash? Truthfully a combination of me pulling up to hard to commence a loop, resulting in the wing being fatally overstressed, and not running the wing spar the entire span of the wing. Working with foamboard, flexibility is always a bit of an issue. That's why I retrofitted the spar after the first few flights, after noticing after a few extreme maneuvers the wings flexing alarmingly. Tellingly, the wing had folded at the point where the spar had ended ( about a third of the span of the left wing.)
Even though a crash is always somewhat disheartening, this provided the stimulus to start developing a newer and improved version of the Ft Explorer.
The airframe was repairable despite the damage suffered. But then I figured, why rebuild a completely stock Explorer, when I can fix some of the issues which plagued the original design. Just to clarify, the Ft. Explorer is undoubtedly the best model aeroplane I have ever owned, however I feel it could be a much better aeroplane with some tweaks and redesigns. For a while I was considering a Ft Explorer designed specifically to handle higher speeds, with a streamlined nose and a strengthened wing to cope with high g turns. The crash of my stock Explorer cemented my resolve to build a better plane.
The most serious problem faced by the Ft. Explorer was the absence of a wooden, metal or carbon fibre wing spar in the original design for the trainer wing. I guess Flite Test omitted a non foamboard spar, because they correctly thought that noobs wouldn't be pulling aerobatics any time soon. When I didn't pull any loops on my first half dozen flights, very soon I was trying my hand at some mild aerobatics, which the standard trainer wing couldn't really handle. This is the main Achilles Heel of the aeroplane, as the rest of the aeroplane is unbelievably durable. Trust me I know. After the aforementioned wing folding incident, i was able to rebuild the majority of my first Ft Explorer (save the tailboom which was bent in the crash). Even the nose which was a crumpled mess, I was able to flatten out and rebuild, without the end product looking like a patched together mess!
One other issue I had was the fact that I had to add 100g of nose weight to the Explorer in order to get it balancing properly. This is because the Explorer was designed for some light FPV equipment in the nose. Flying without this necessitates some ballast in the nose. However I don't like flying around with dead weight in my aeroplane. It doesn't aid any aspect of the aeroplane, such as durability, flight performance or aesthetics.
Rather than start with a completely new airframe, I started to modify my repaired Explorer involved in the crash. My first action was somewhat mundane but necessary. I replaced the forward bbq skewer with a 5mm diameter wooden dowel. My reasoning for this was simple. The bbq skewer had ripped free in the crash meaning a 5mm dowel would fill the gap left perfectly. In addition during any previous hard landings, this forward bbq skewer would snap, necessitating a field repair. 5mm of wood is much more damage resistant than 3mm.
Then I set about repairing the failed foamboard wing. Apart from the section where the wing had bent mid flight, the wing as a whole was structurally sound! I flattened out the wing and replaced the puny spar with a larger much more beefier one. This I test flew on the repaired Ft Explorer.
In an attempt to lesson the ballast in the nose I decided to scrap the badly warped foamboard tailboom and replace it with a marginally lighter wooden spar.
My first modification of the Ft Explorer design proved to fly a little sportier than the standard Explorer. While I found this enjoyable, I wished for non-experienced pilots to comfortably pilot my revised Explorer around the skies with confidence. This change in flying characteristics can be attributed to my moving the tail slightly closer to the wing with the wooden tail boom.
While the 5mm dowel did prove much more effective, the revised tailboom did not. While the design did prove to be immune to flexing in flight (something which I had feared) the fixing to the fuselage proved to be overly fragile, being glued to the foamboard and not a friction fit. After a few smooth landings on an ordinary grass field, the glue joint was starting to come apart. Clearly, this was not a good long term design. In addition to this, i had no choice but to run the wiring for the servos along the exterior of the boom, which looked rather unsightly. So for the next version, I decided to stick with the conventional foamboard tailboom.
Overall I was not totally satisfied with the slightly modified Explorer, so I began planning a more radically different design.
Building a new prototype:
Using the lessons gleaned from modifying my stock Explorer, I began designing a completely new prototype. Some of the requirements I planned to implement were:
1. A longer, more streamlined nose section.
2. A structurally strong tailboom.
For the prototype , I also decided to make modifications to the removable nose. I decided to revise the nose design to make it roomier to store batteries, as this was a slight problem I faced on the stock variant. The overall redesigned nose drew heavily from late war variants of the Bristol Blenhiem WW2 era bomber.
I changed the color of the plane to bright yellow overall. I did this so it would be easily visible against an overcast sky, a problem the blue and white stock explorer of mine had.
Around this time, the Ft/Red Bull competition was announced. I was thrilled. A very open ended competition which left lots to the imagination. Immediately I started work how I could give the just started prototype a racing spin.
One aspect which has always intrigued me in aviation is the pusher/puller propeller argument. To clarify a pusher aeroplane (think Vickers gunbus) has the propeller on the rear of the plane, while a puller has the prop at the front of the aircraft. The latter is most used in full scale aviation, however this was not always the case. During WW1, pushers proved to be quite popular as fighters, bombers and reconnaissance aircraft.
So why have pushers faded from the limelight? While pushers do have a number of distinct advantages, such as better pilot visibility and safety in the event of engine problems, the also have their fair amount of drawbacks. For instance a pusher's propeller(s) are aerodynamically less efficient than a conventional puller design. For this reason pushers were succeeded by more conventional designs post WW1. However I've always speculated "what if pushers became the most used configuration in aeronautical design. It's somewhat unlikely, but the situation is intriguing nevertheless.
I based my design around this brief that i created for myself. I think a pusher racer would be a fascinating sight. To make the situation more plausible, i decided to model the aeroplane from the 1930s, when aeronautical engineers would have less knowledge of the relative inefficiency of a pusher propeller.
I also decided to base my design off of those long range air racers which flew from continent to continent back in the golden age of aviation. But at its heart (more specifically mid fuselage) my plane is a Ft Explorer, albeit a highly redesigned variant.
Naming the design
But still I had to give the brand new aeroplane type a name. Super Explorer, while appropriate, was rather long to use when referrring to the plane in conversation, so I began casting around for a nickname. Arrow? Taken. What about Beaufort, Canberra or Dorito? All gone. (BTW dorito is the nickname of a Star Wars Imperial Star Destroyer).
In the end I settled on the girl's name Emma. Emma is a simple, yet attractive name was just what I needed for my plane. It captures the simplicity and elegance of the design. Plus no other budding designer had used it before (at least to my knowledge). I'm aware that during WW2 Allied military intelligence gave large Japanese aircraft, such as bombers and transports, girls names, so that pilots wouldn't confuse them in the heat of combat, however the name Emma was not among them.
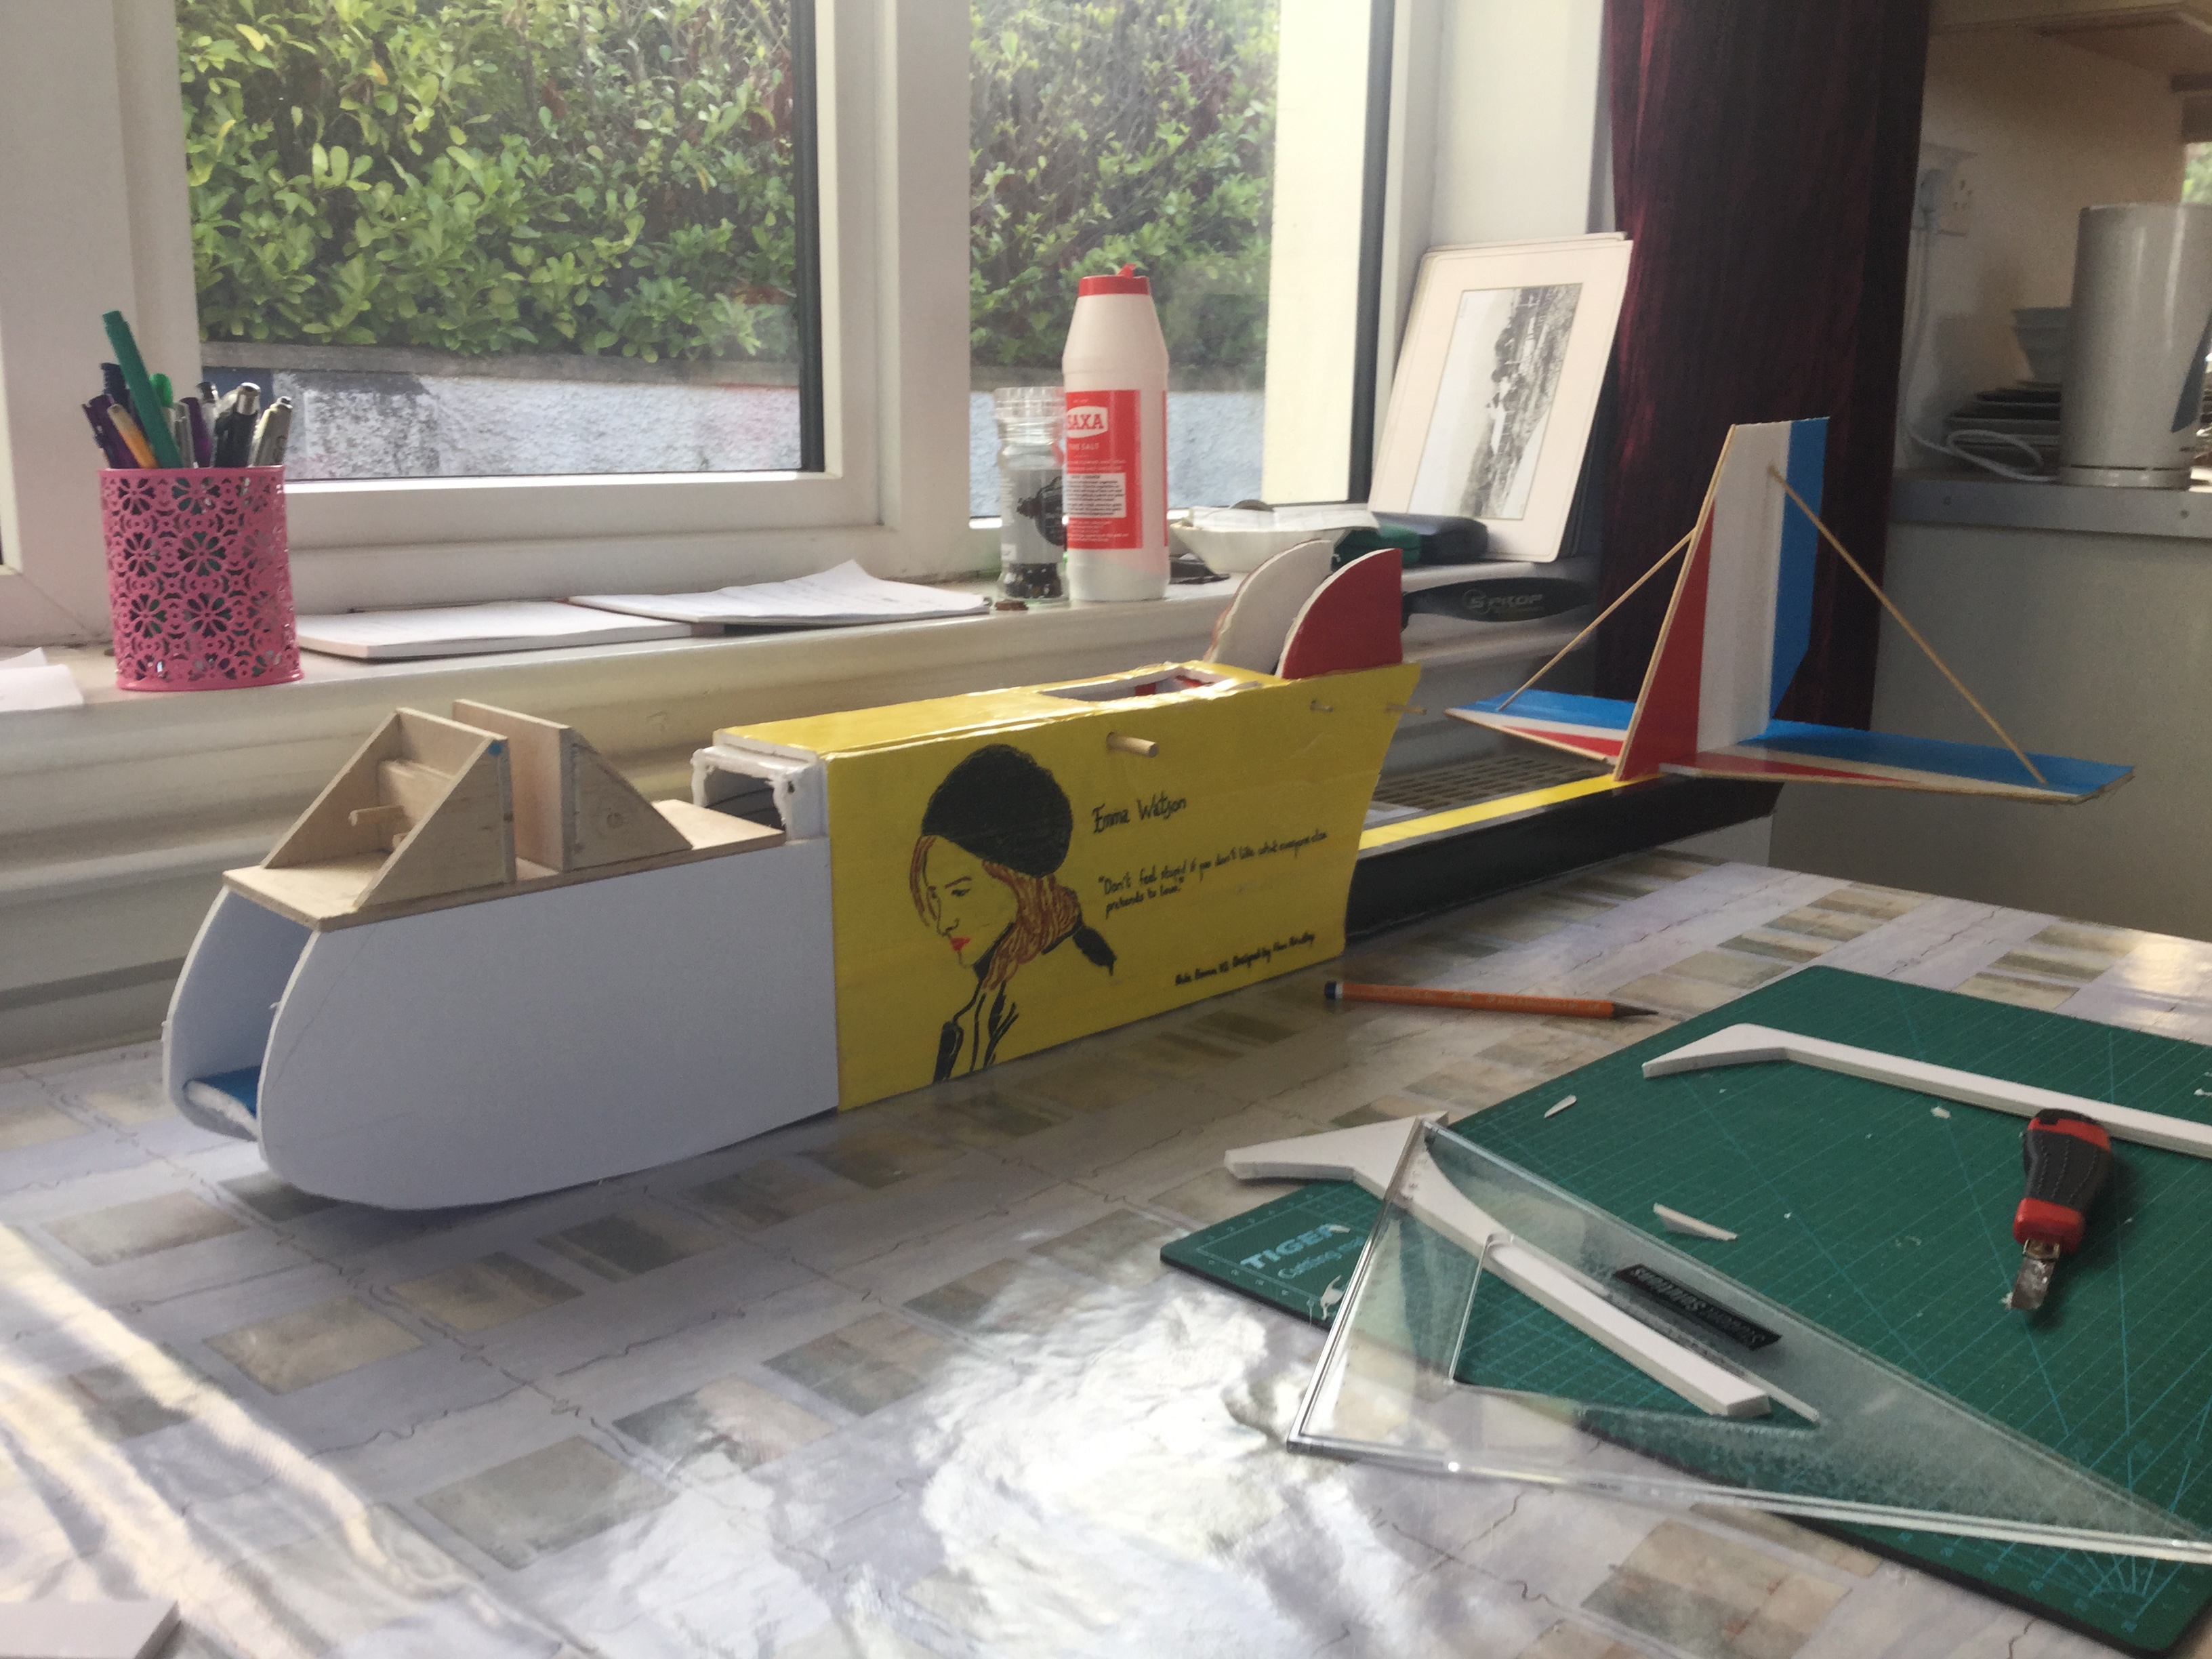
The Nose Section
From the get go I wanted to design the perfect nose for the plane. On the previous Explorer the stock nose did not really have enough room for larger capacity packs, let alone FPV gear. While designing the nose, I made it so it would be interchangeable with a standard Ft Explorer nose section.

The nose section draws inspiration from early versions of the Bristol Blenheim, a WW2 British bomber. As a matter of interest, the Blenheim was originally designed as a high speed civil transport in the mid 1930s. 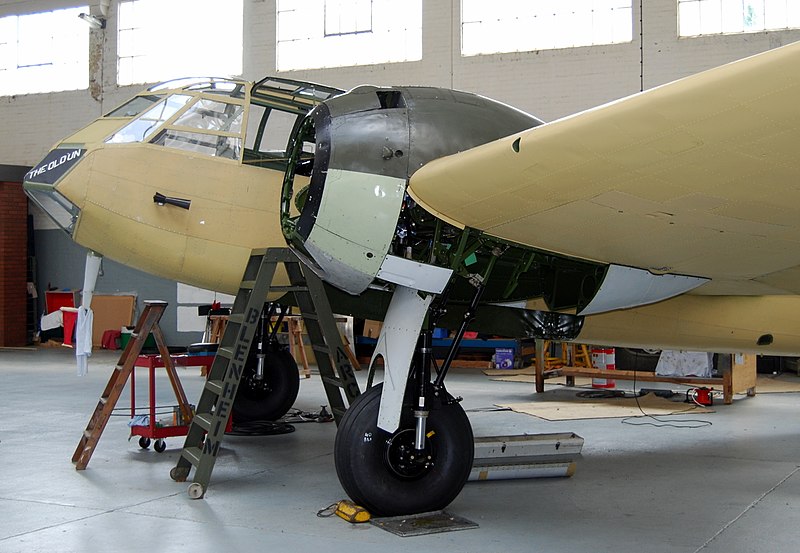
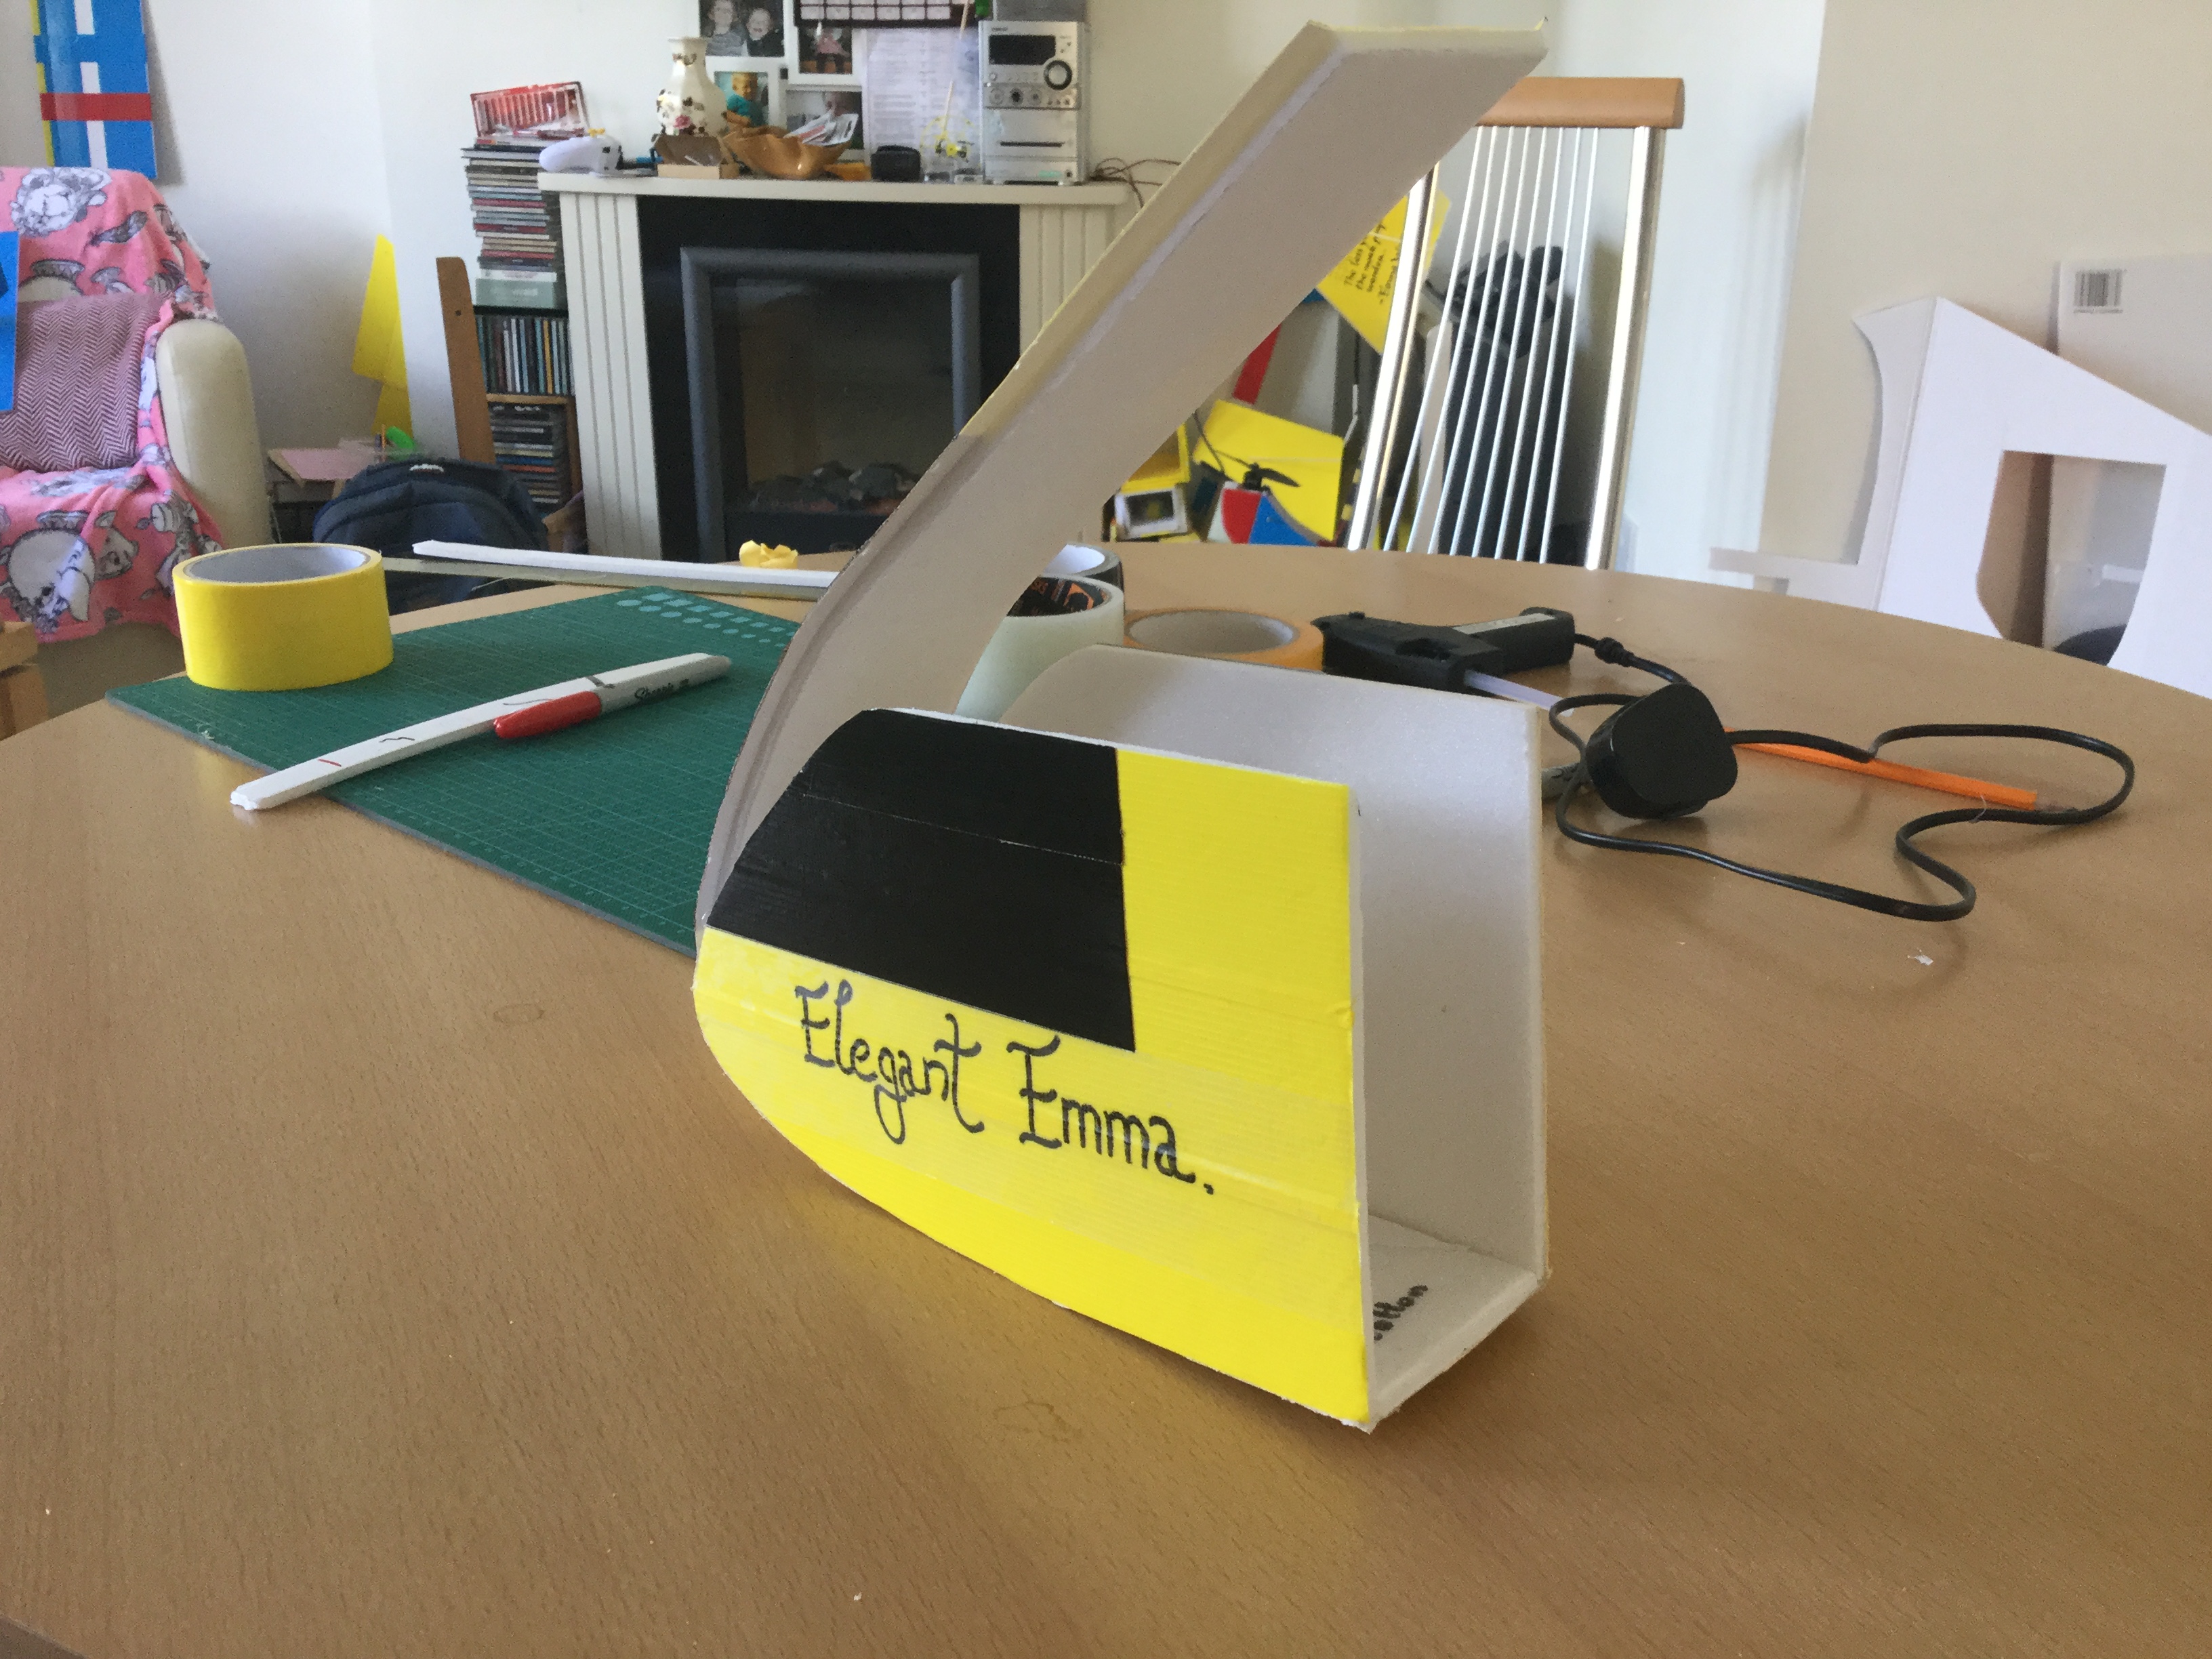
But how did I build it. Let me show you how. After designing the nose section on good old fashioned paper, I traced the shapes of the three sections onto foamboard.
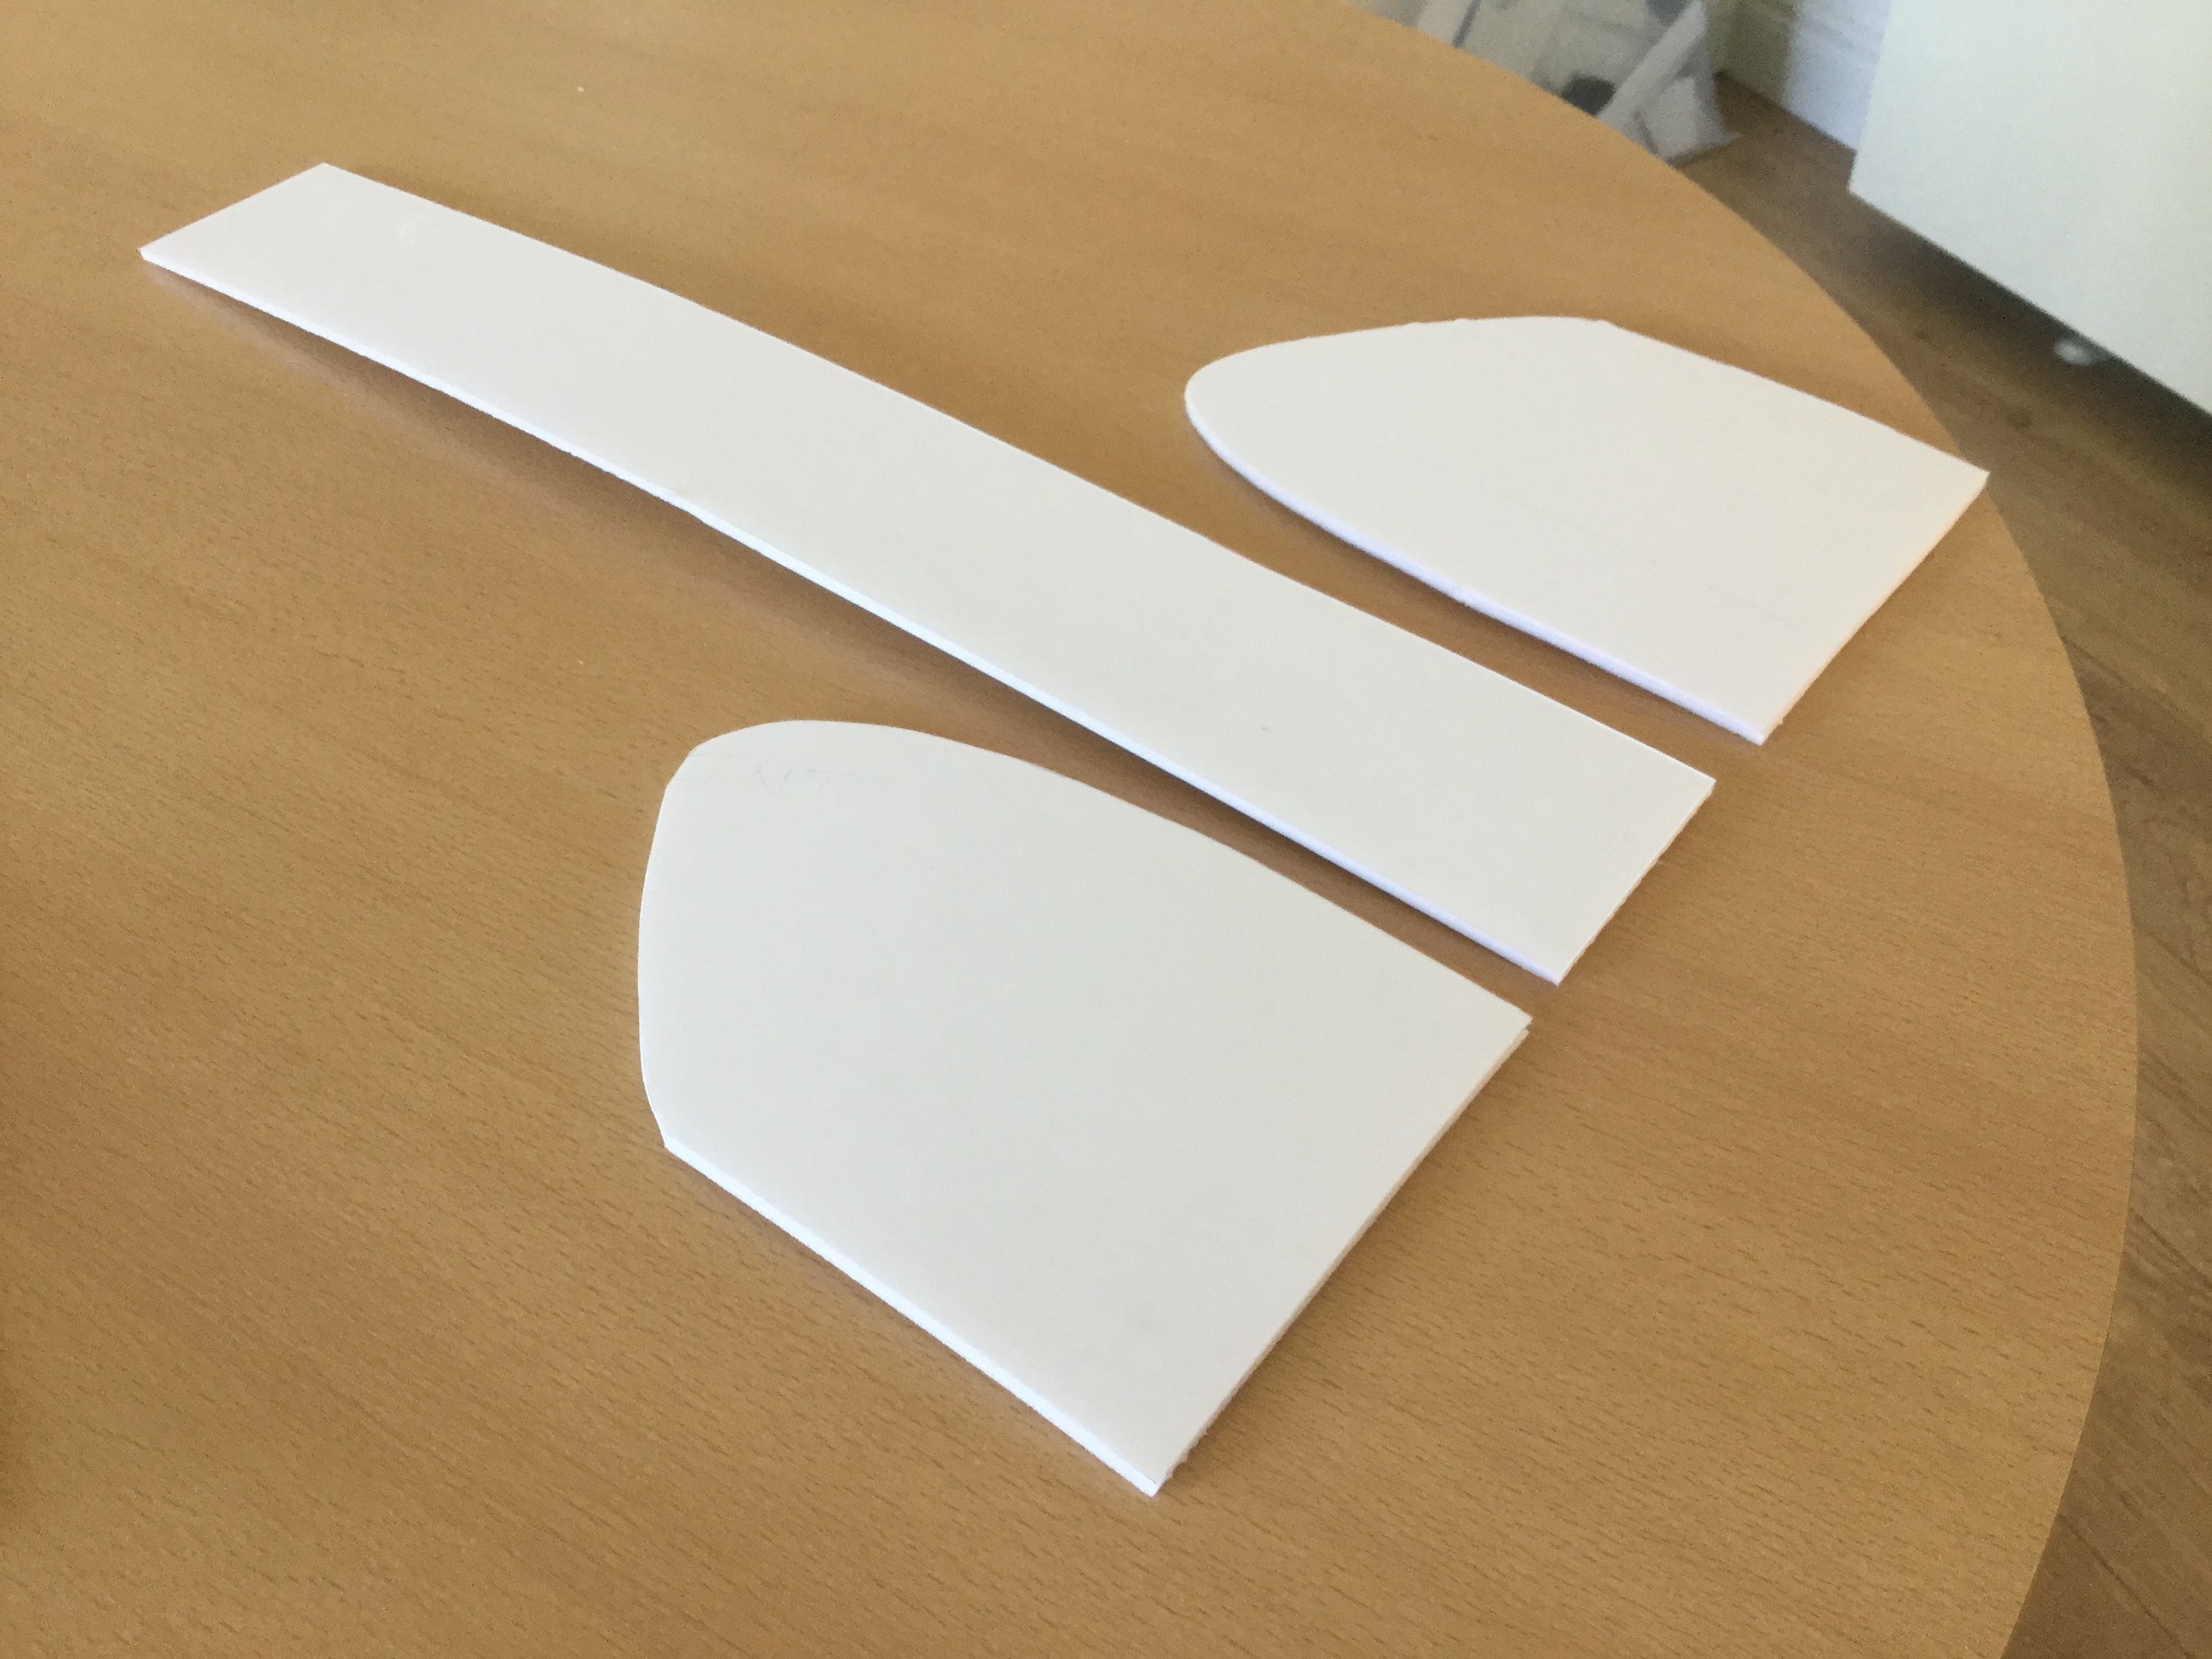
I then proceeded to cover them with yellow packing tape to give tremendous durability to the nose.

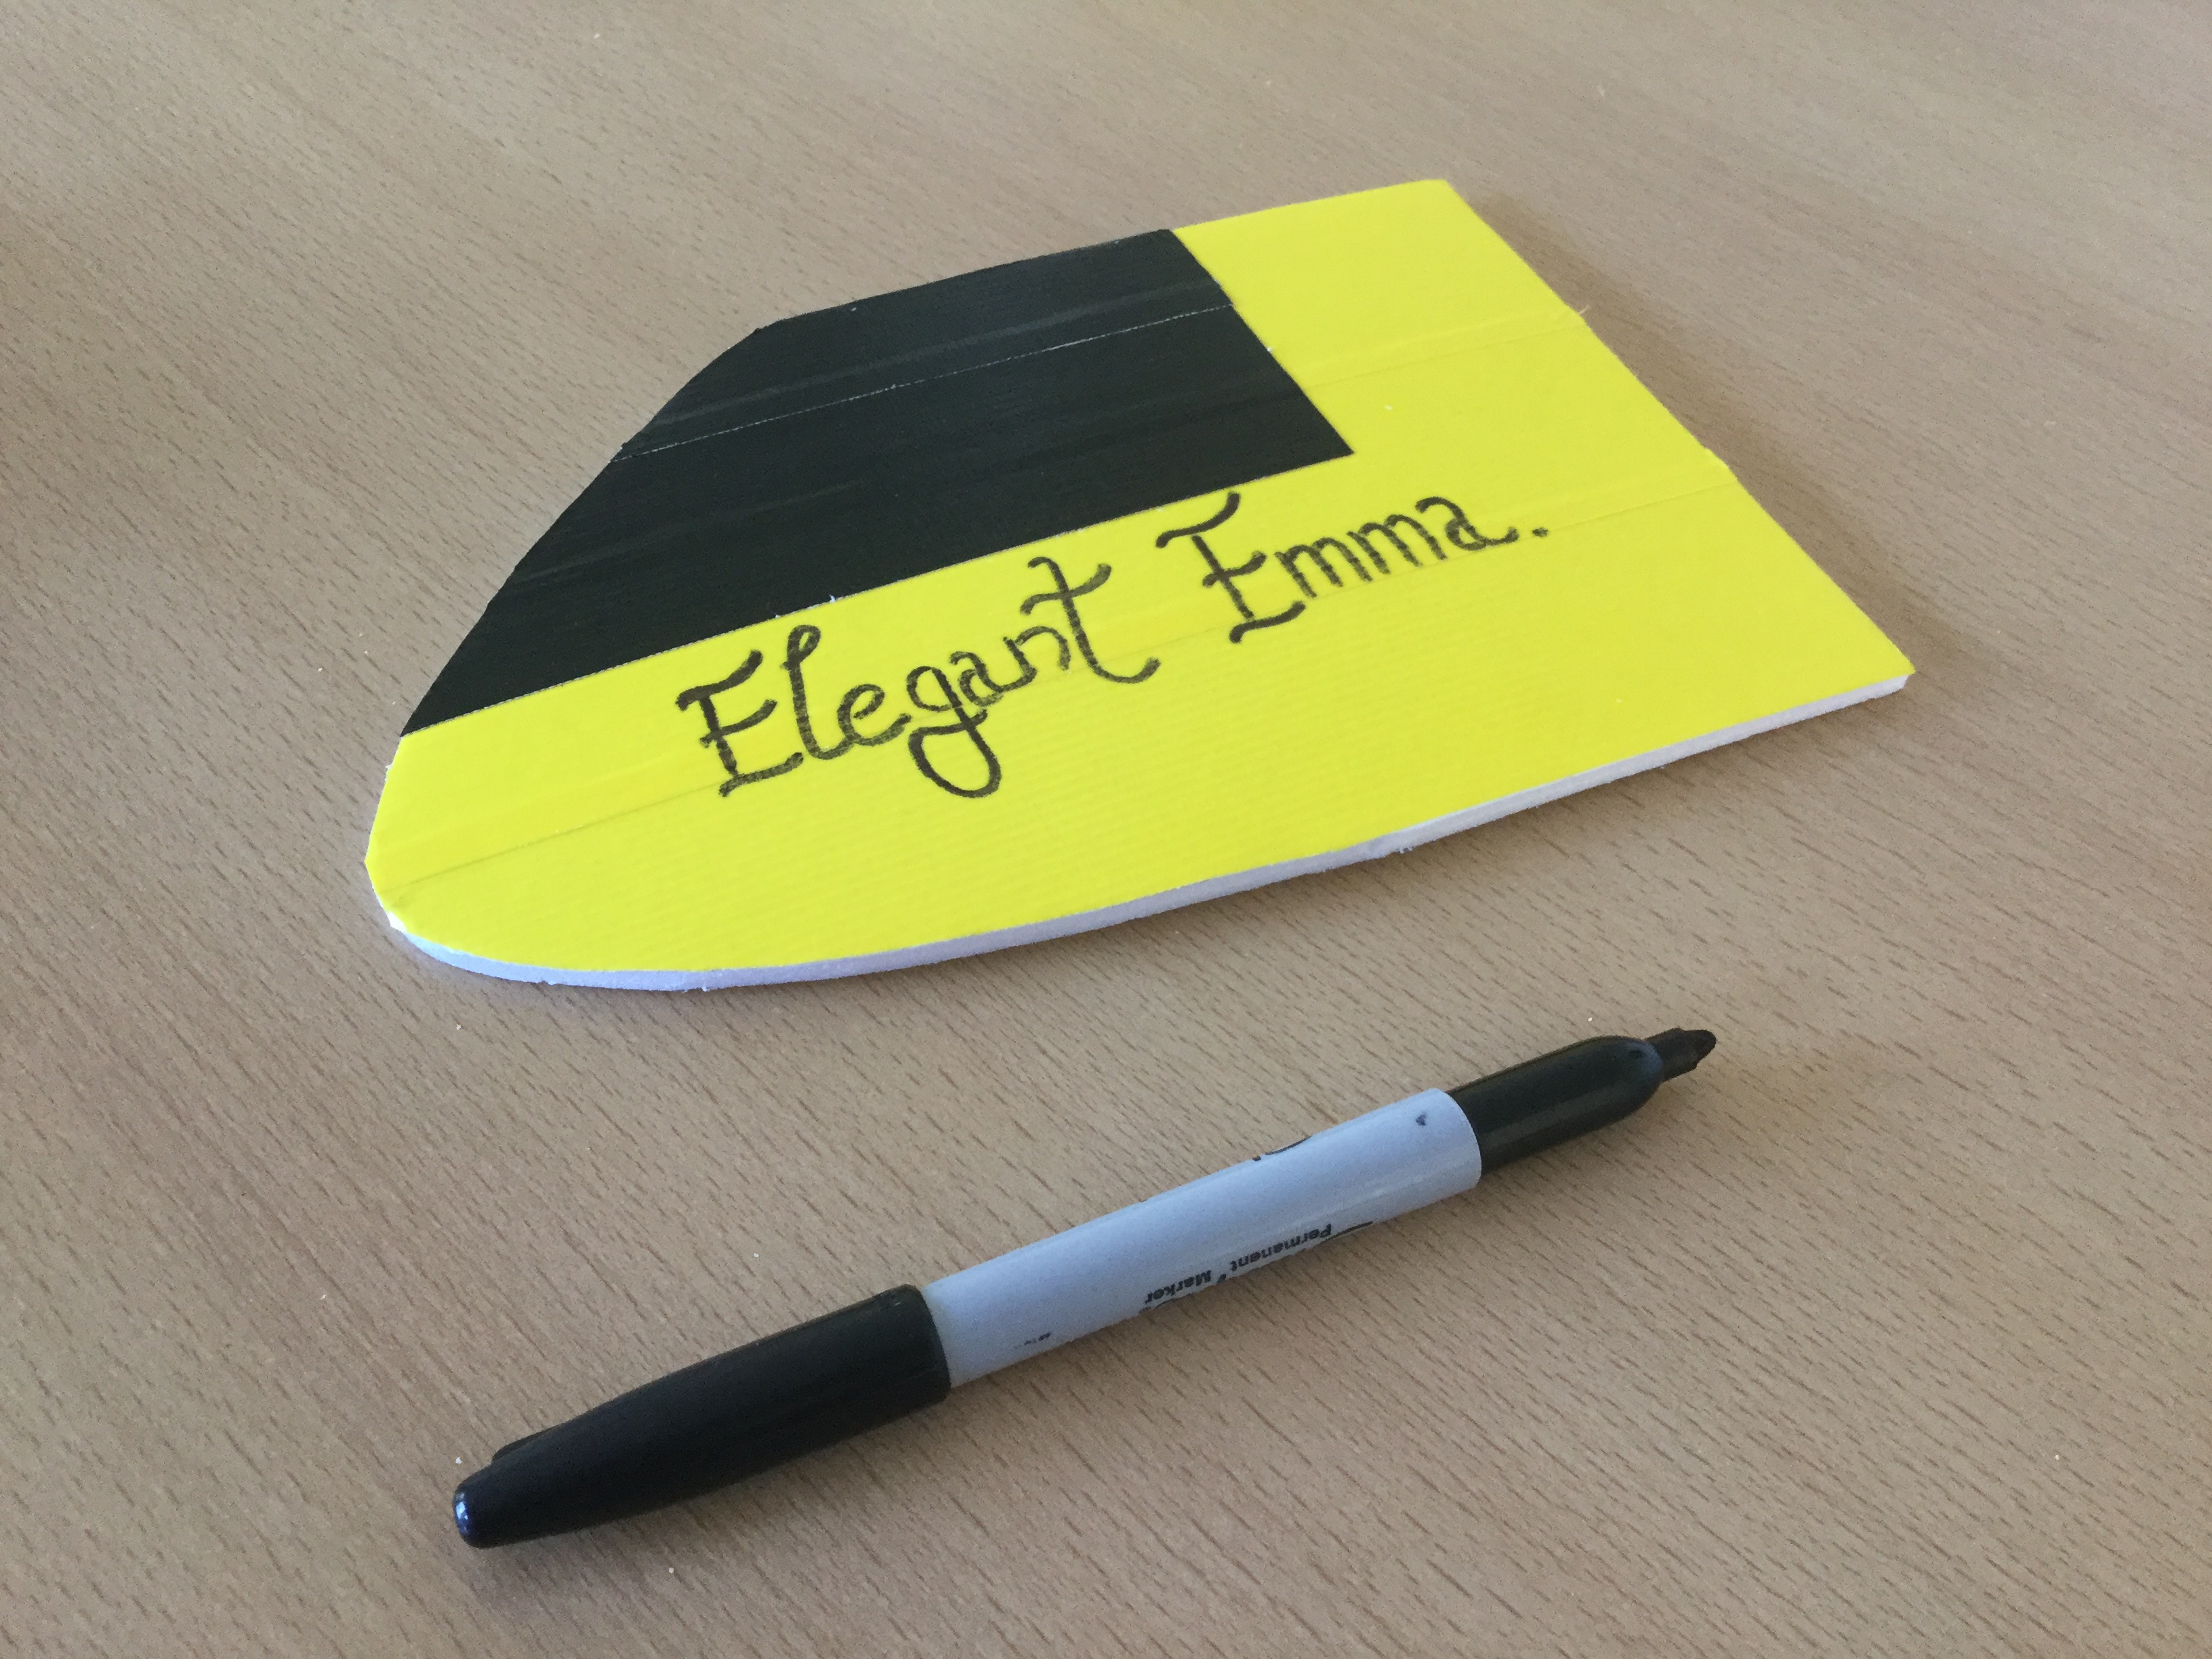
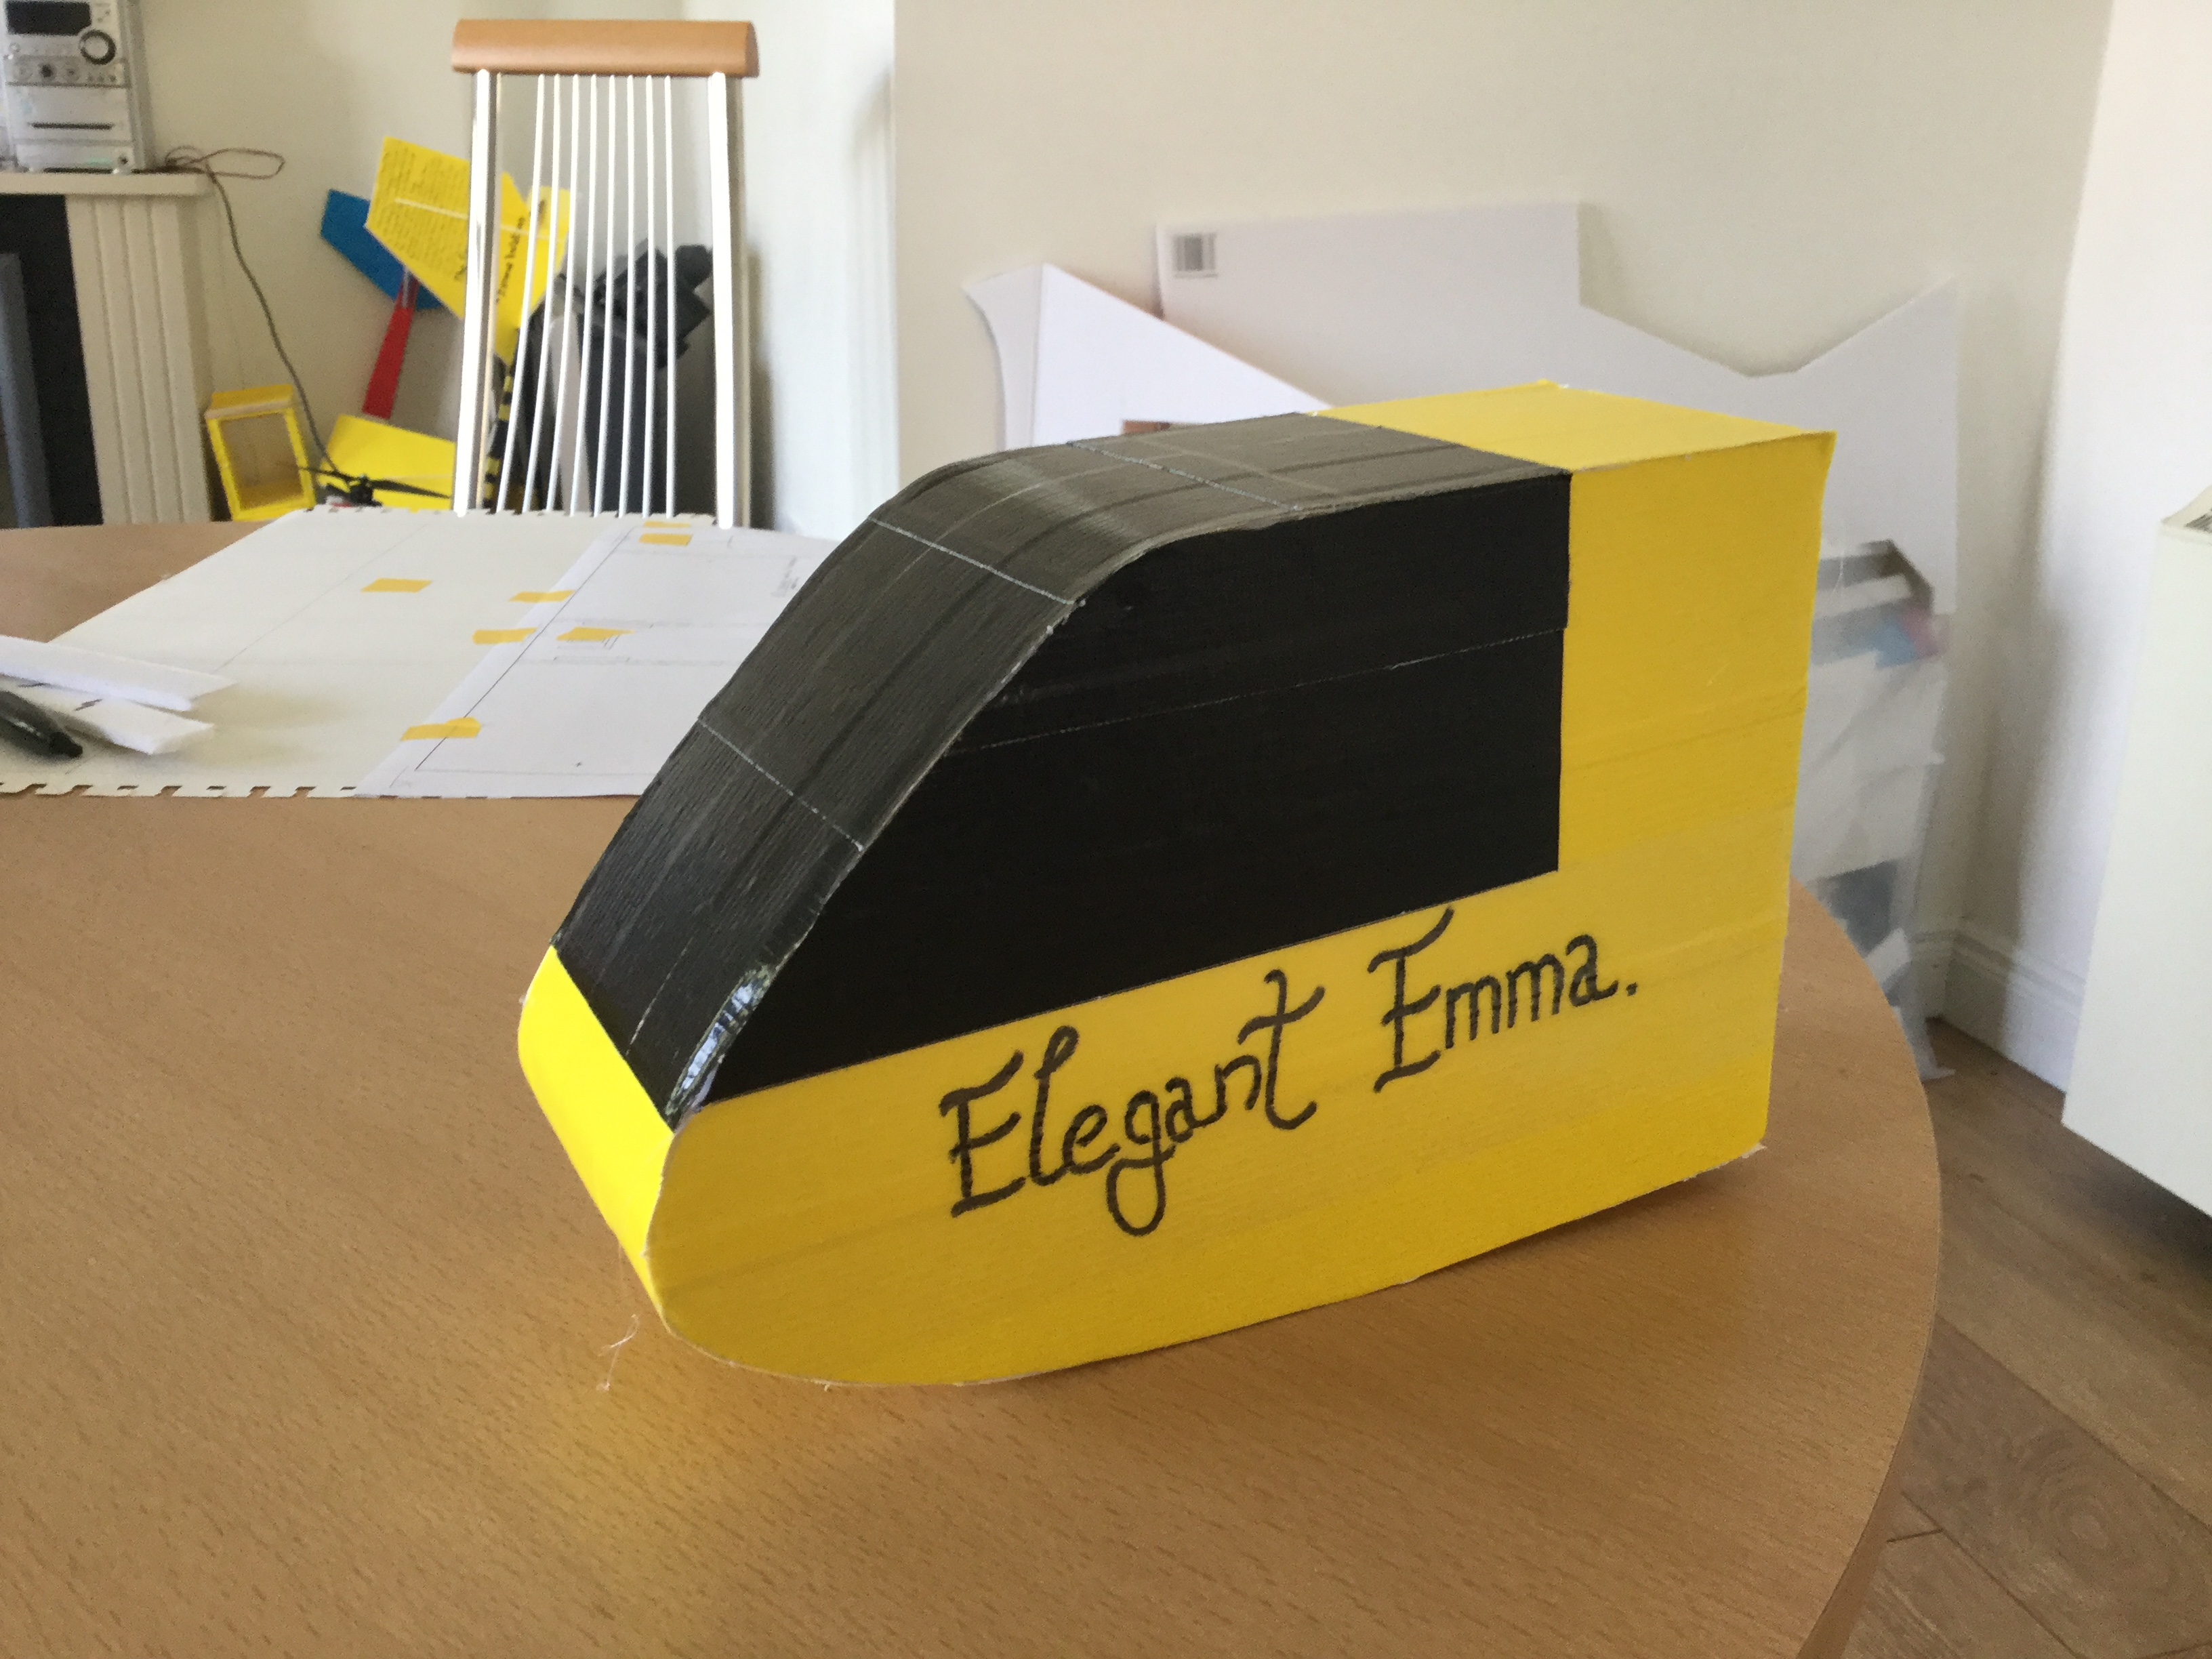
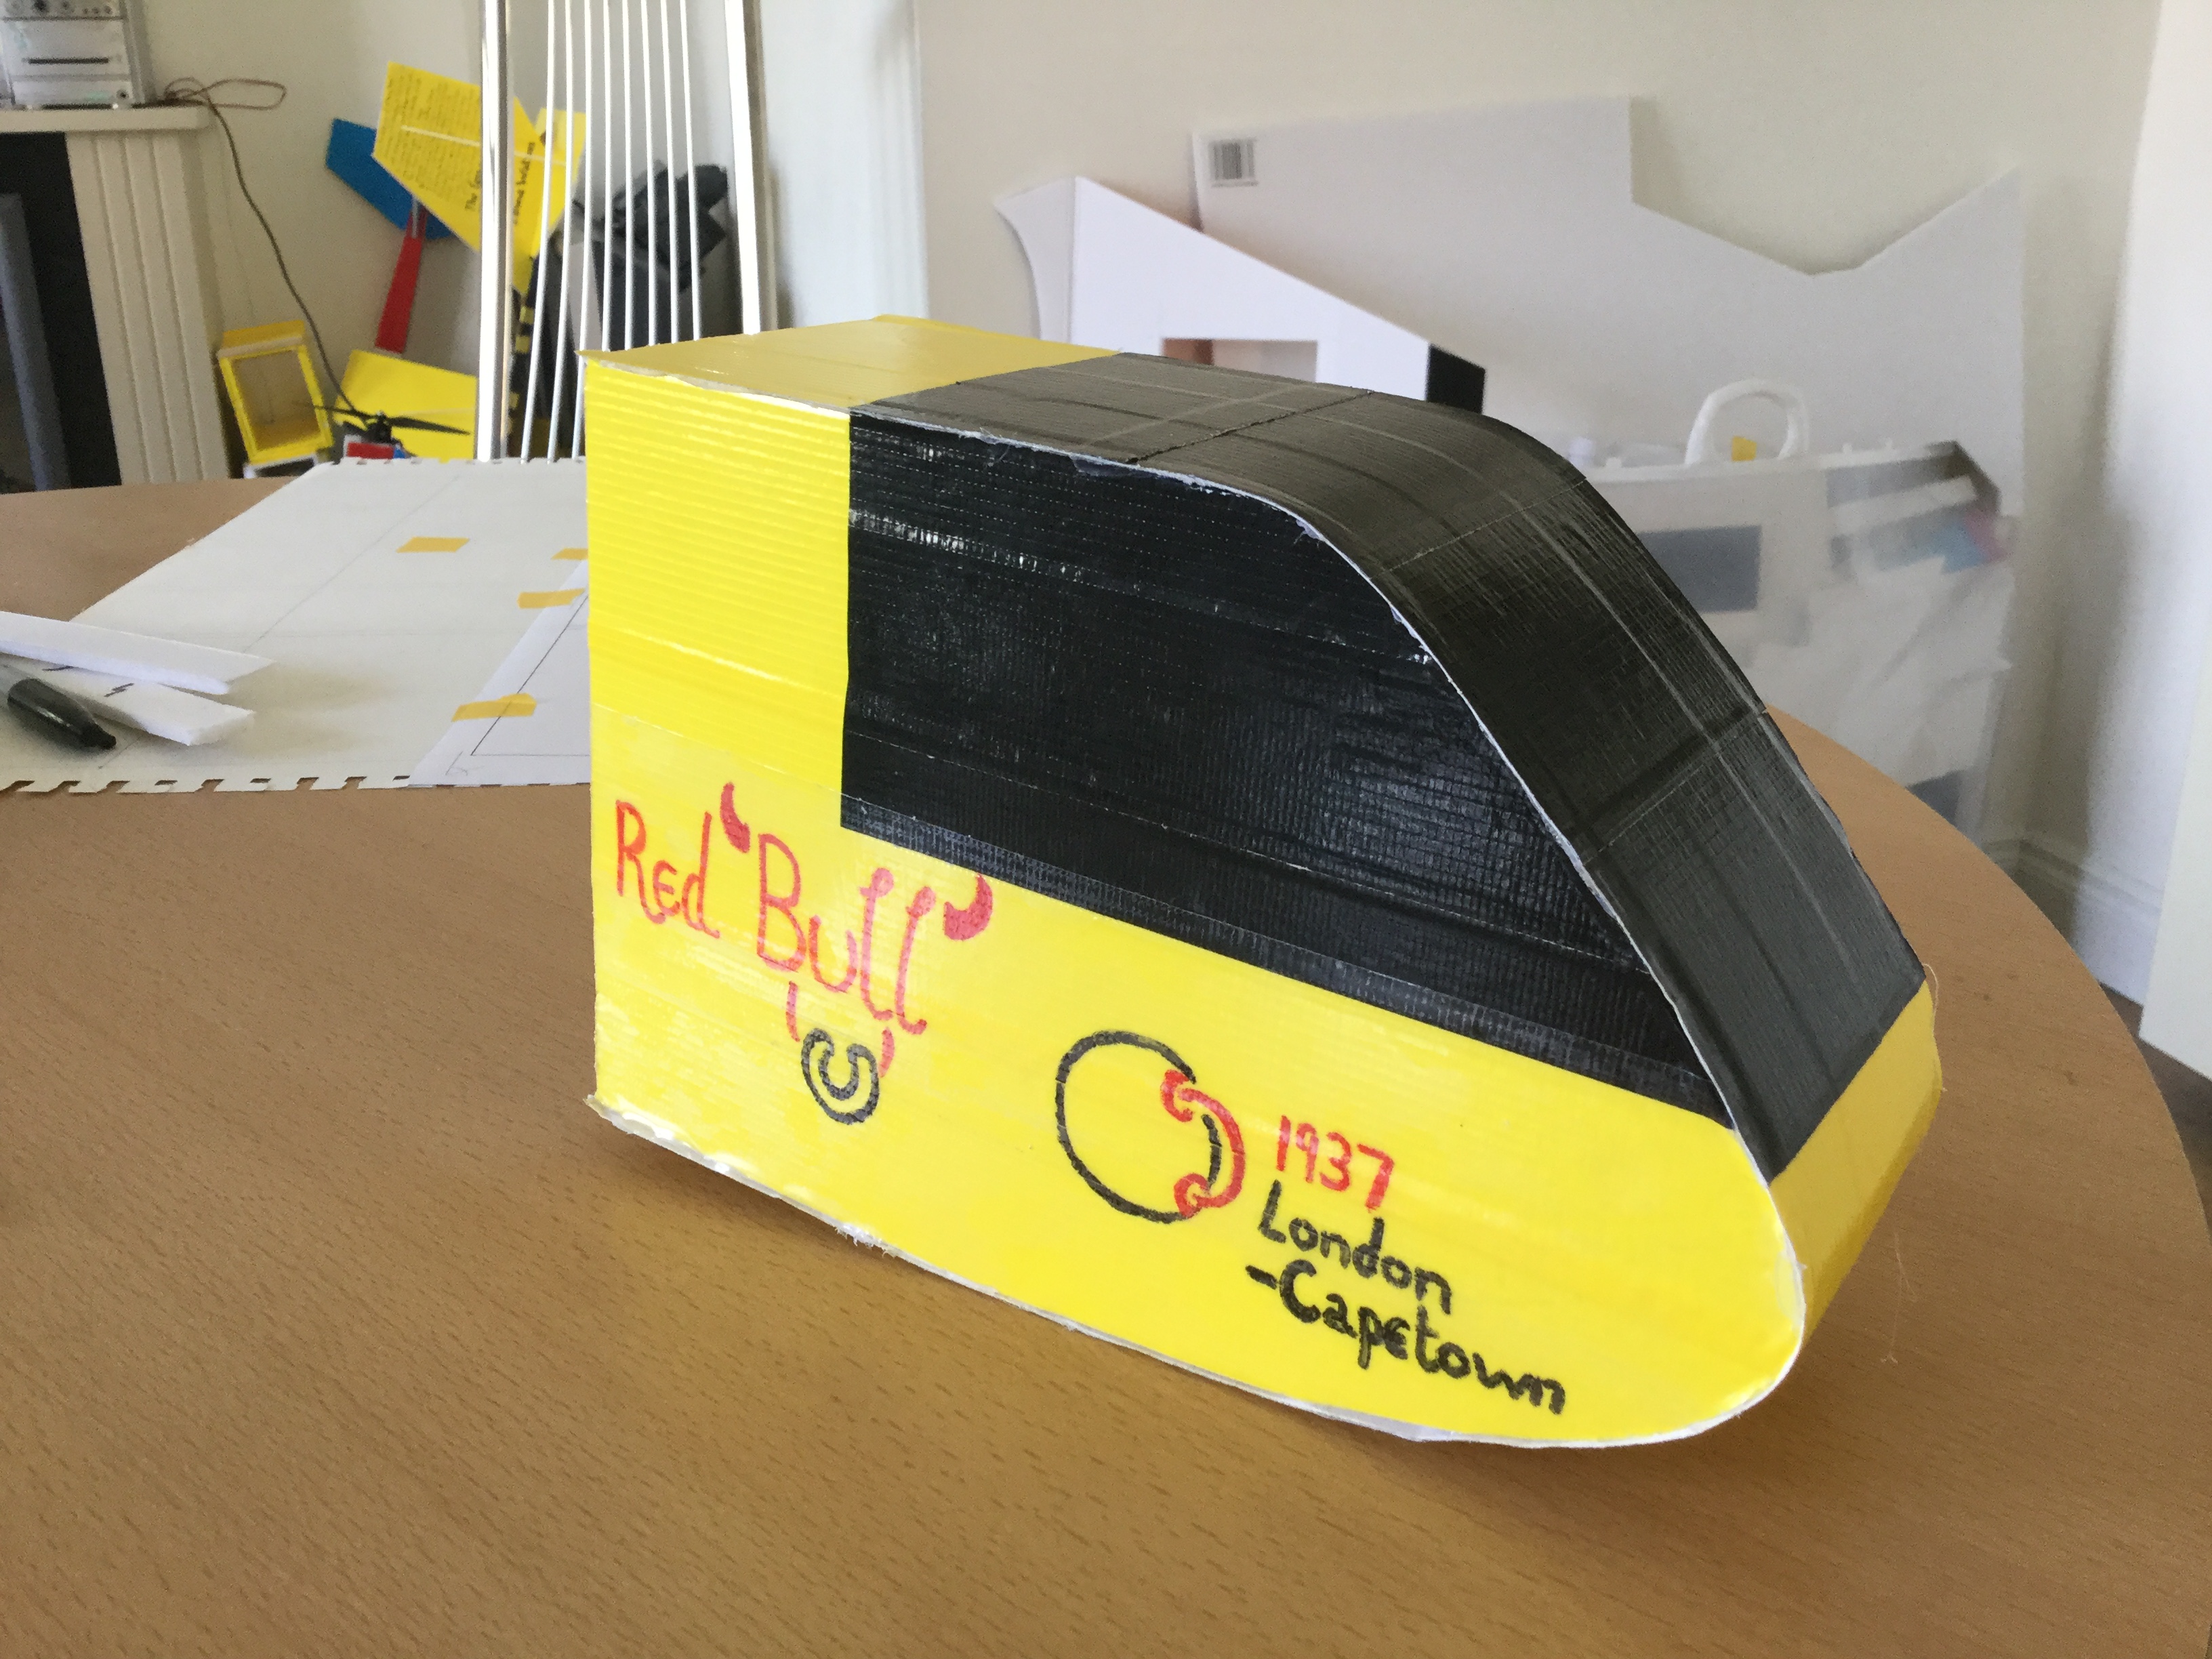
Before assembly of the nose section, I decided to decorate it first. Firstly, I applied black packing tape to create cockpit windows.
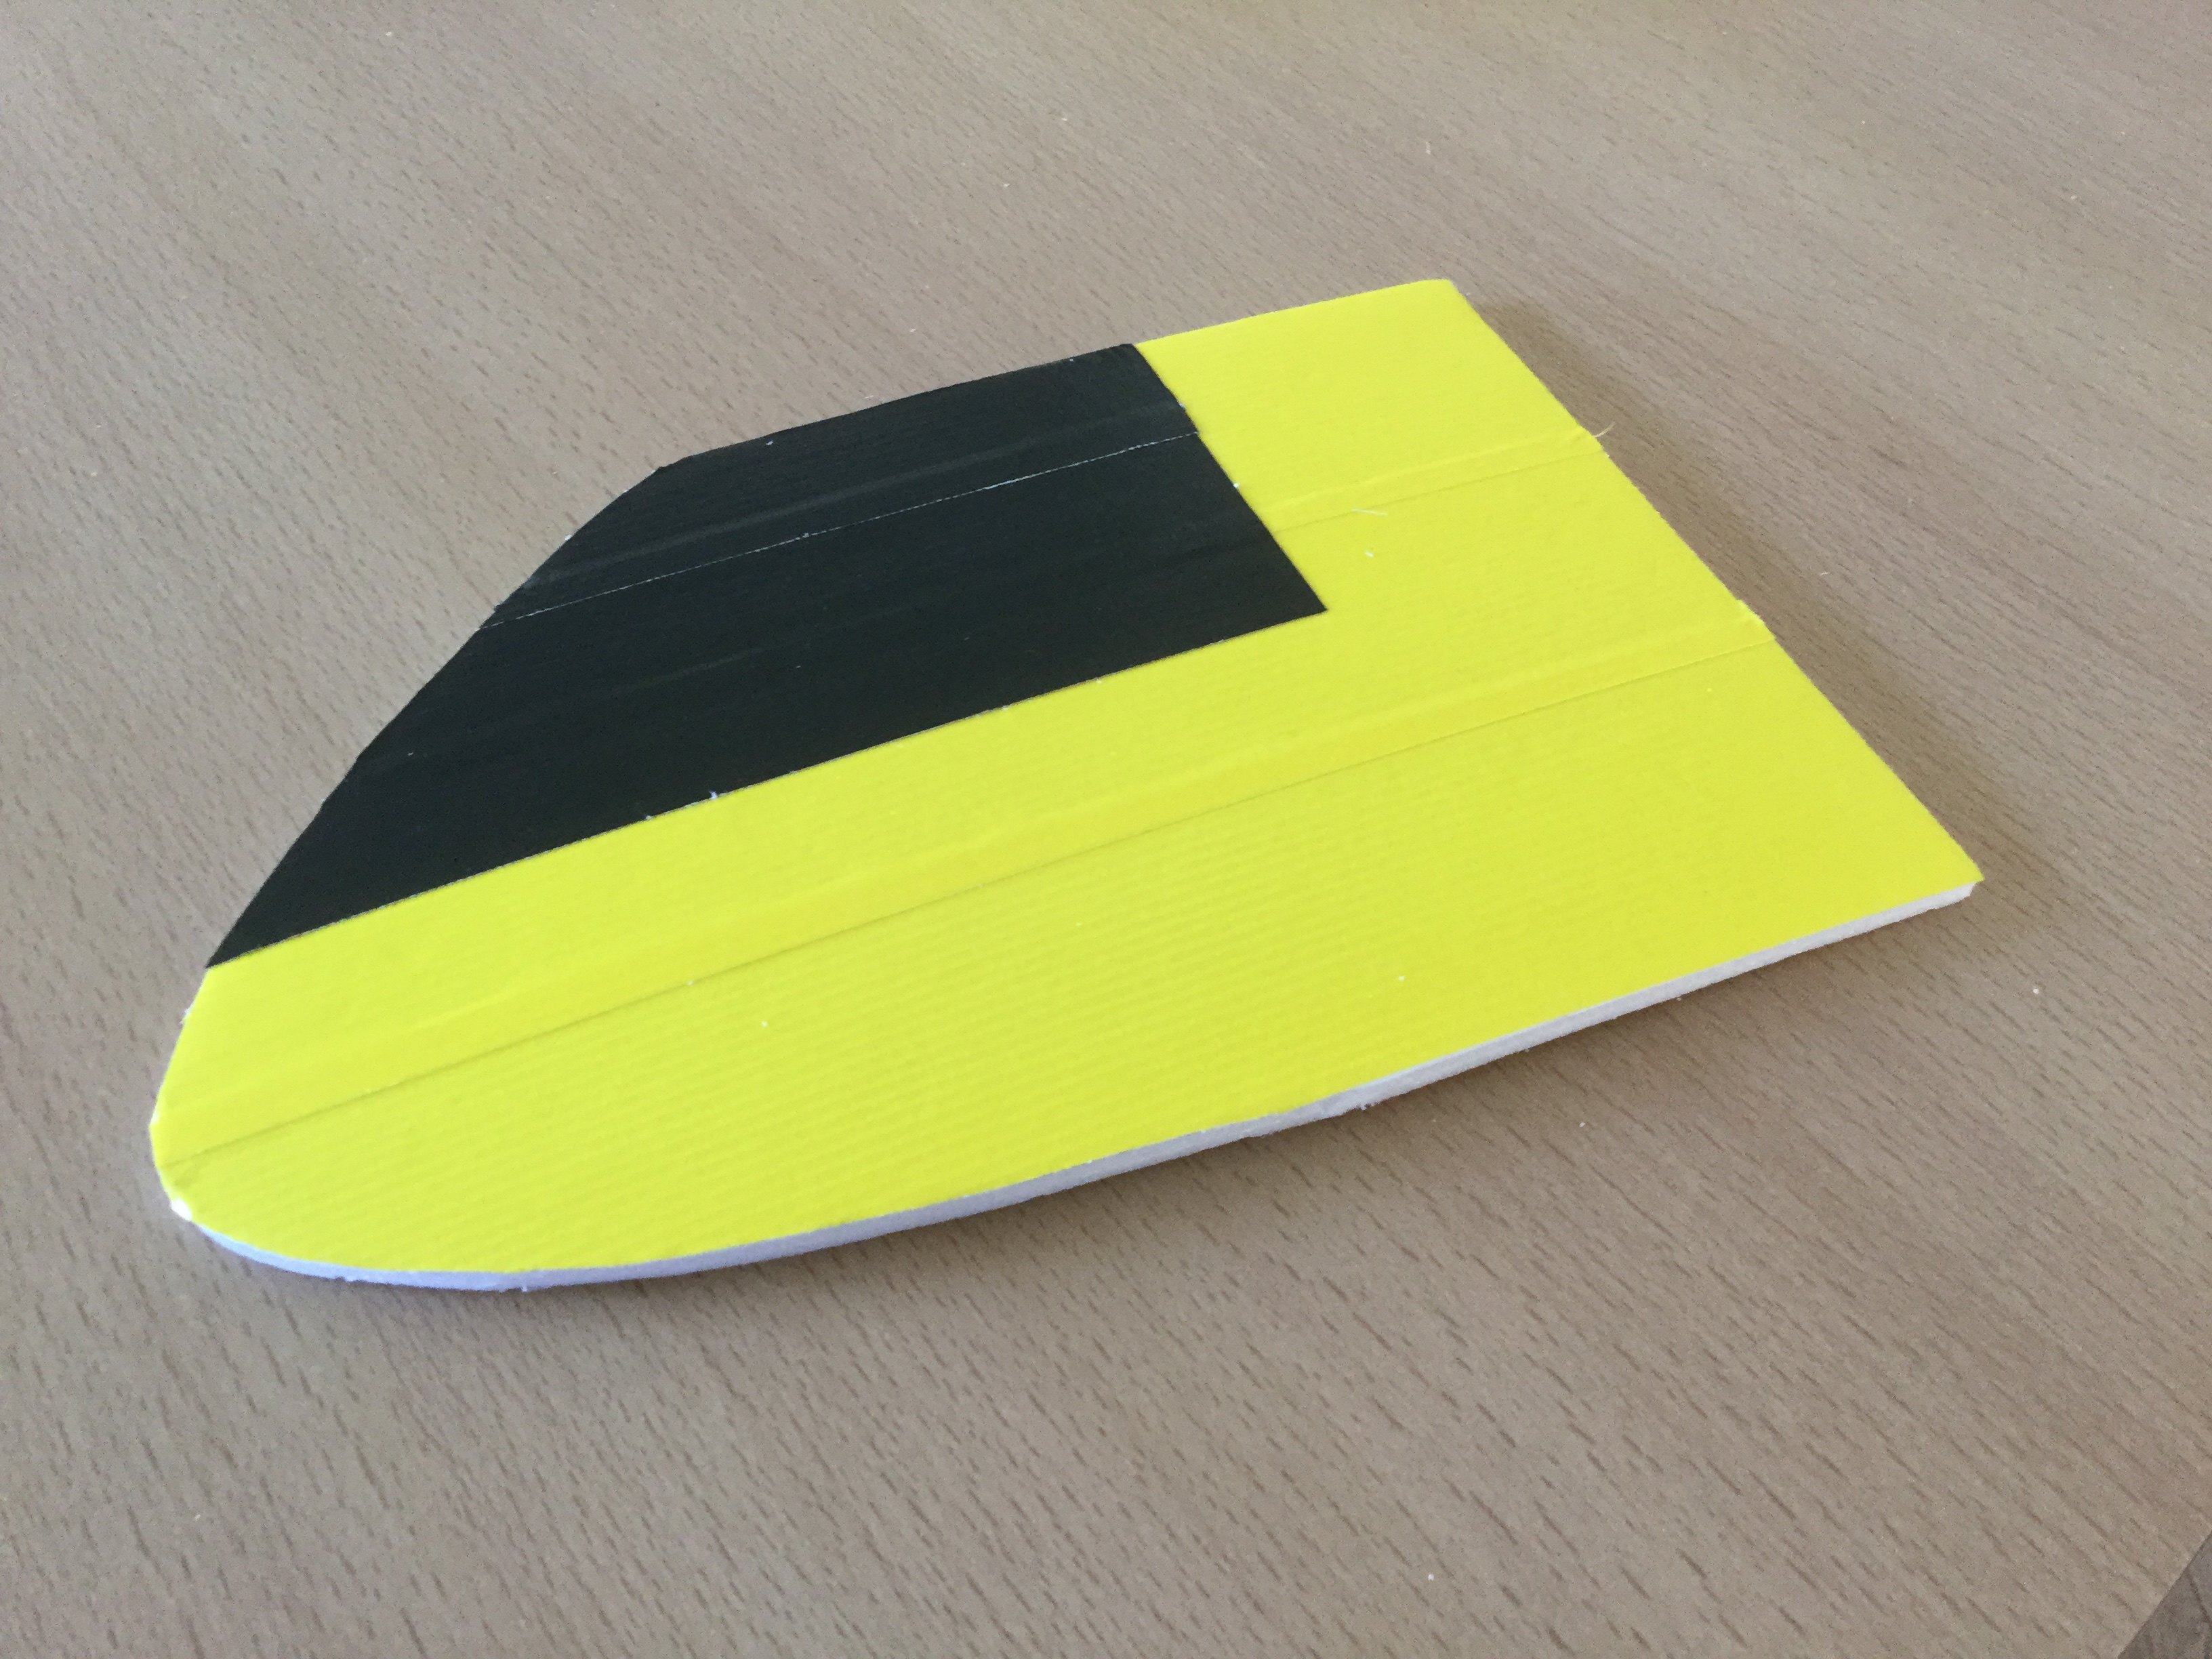
Then using a black sharpie, I applied the name of the plane in elaborate script.
For the right hand side of the nose section, I reflected the theme of the competition. However the air race is one of those long point to point races literally spanning thousands of miles that were popular in the 1930s.
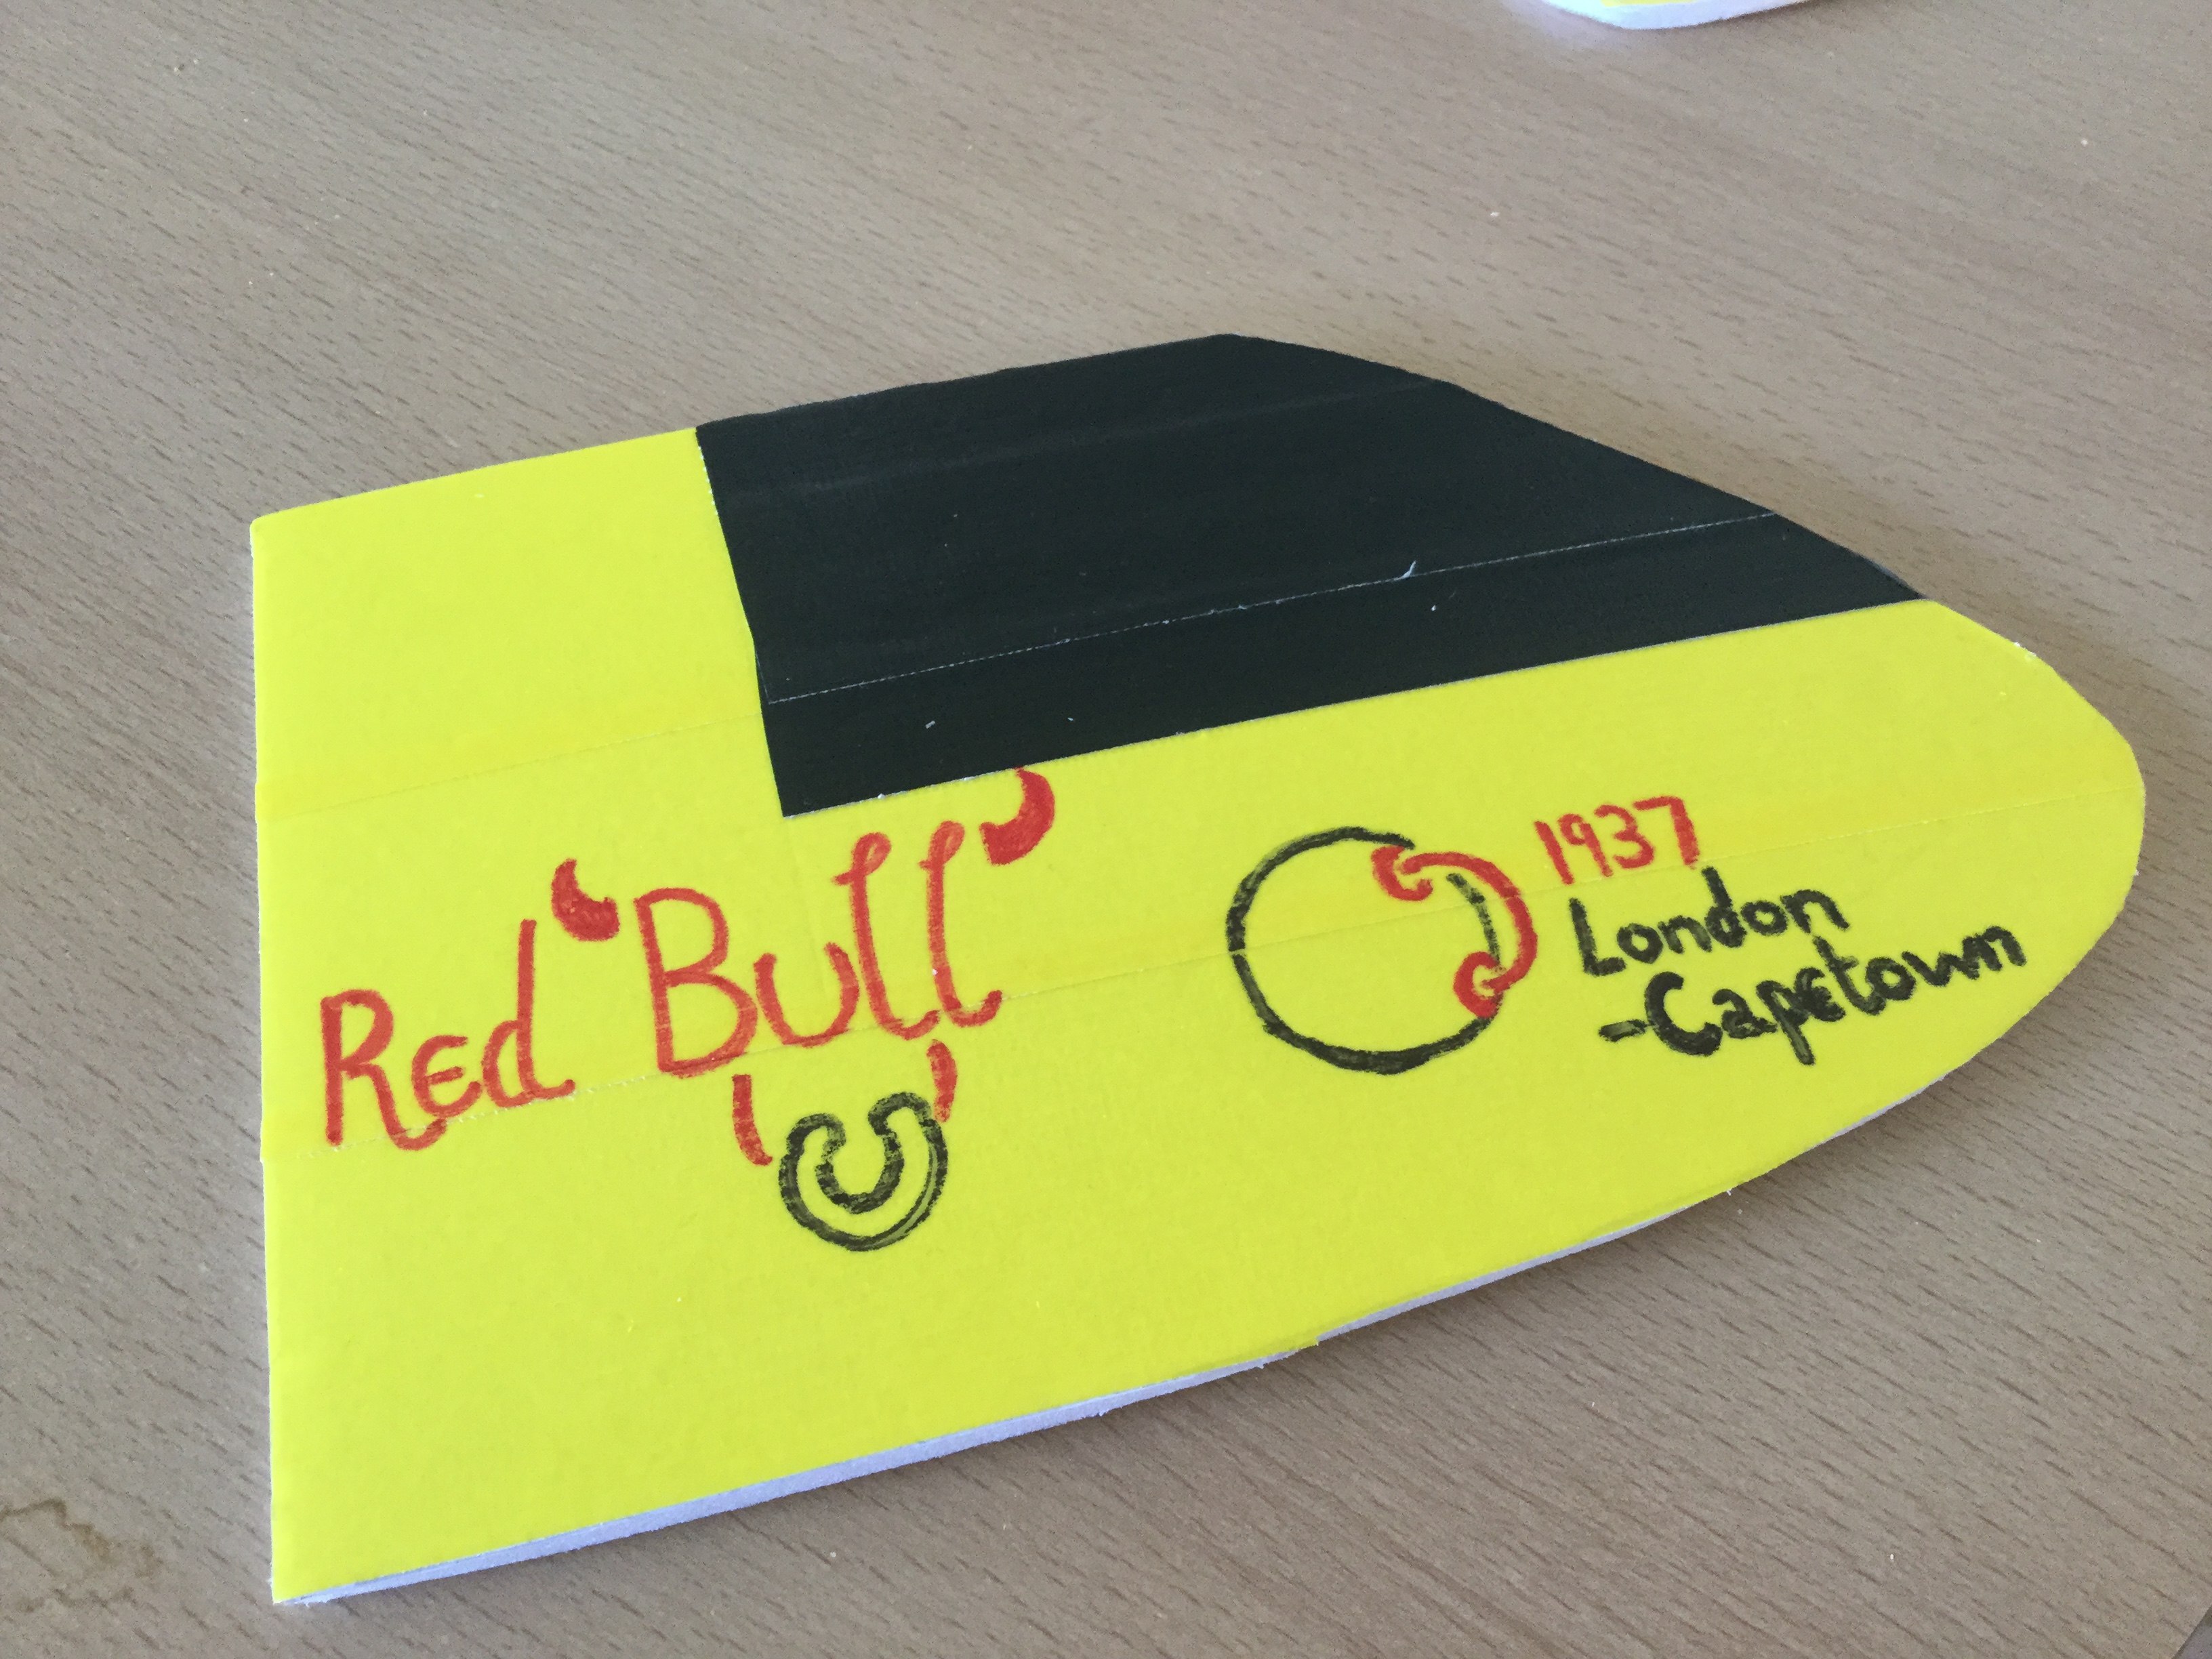
To ensure the graphics were not washed away or tarnished in the future, I covered the graphics on both sides of the nose in clear packing tape.
As to how the nose is constructed, it's pretty much identical to how a standard Ft Explorer nose is built. First, cavities on either side of the sheeting were hollowed out, before both sides of the nose were glued to in in a B-style fold.
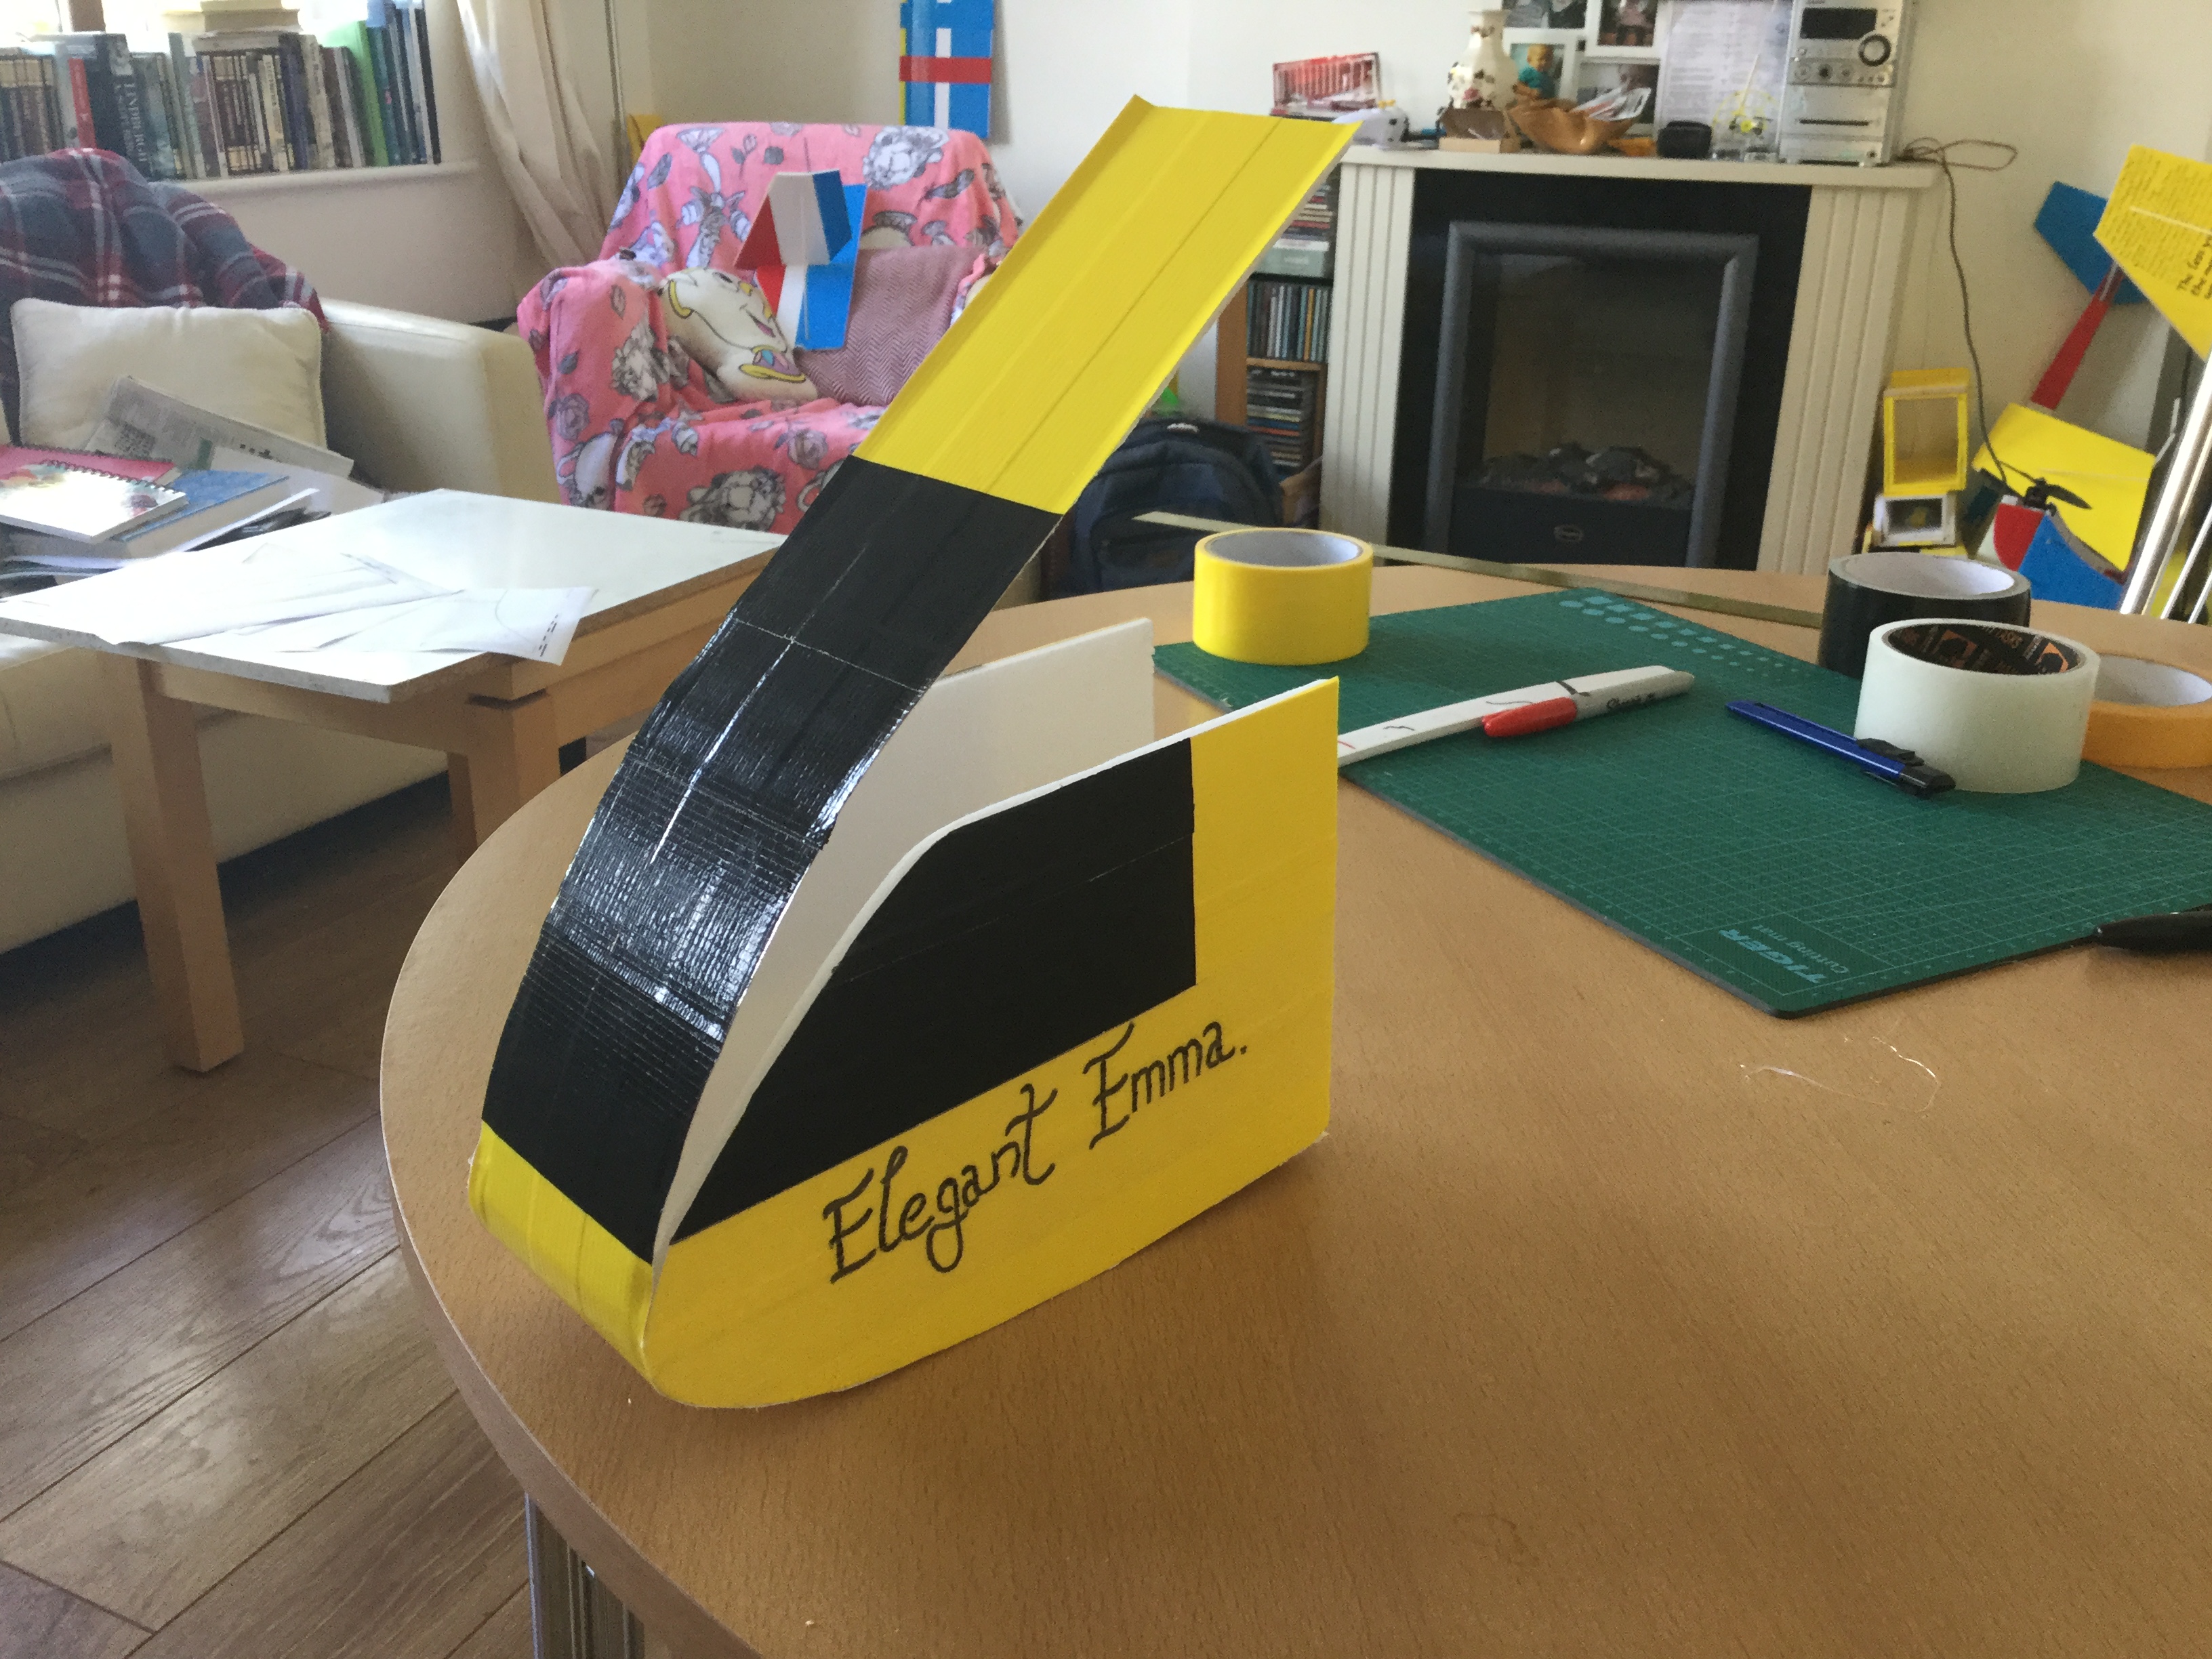
Then the rest of the nose skin is glued into place, and any excess is trimmed to size.
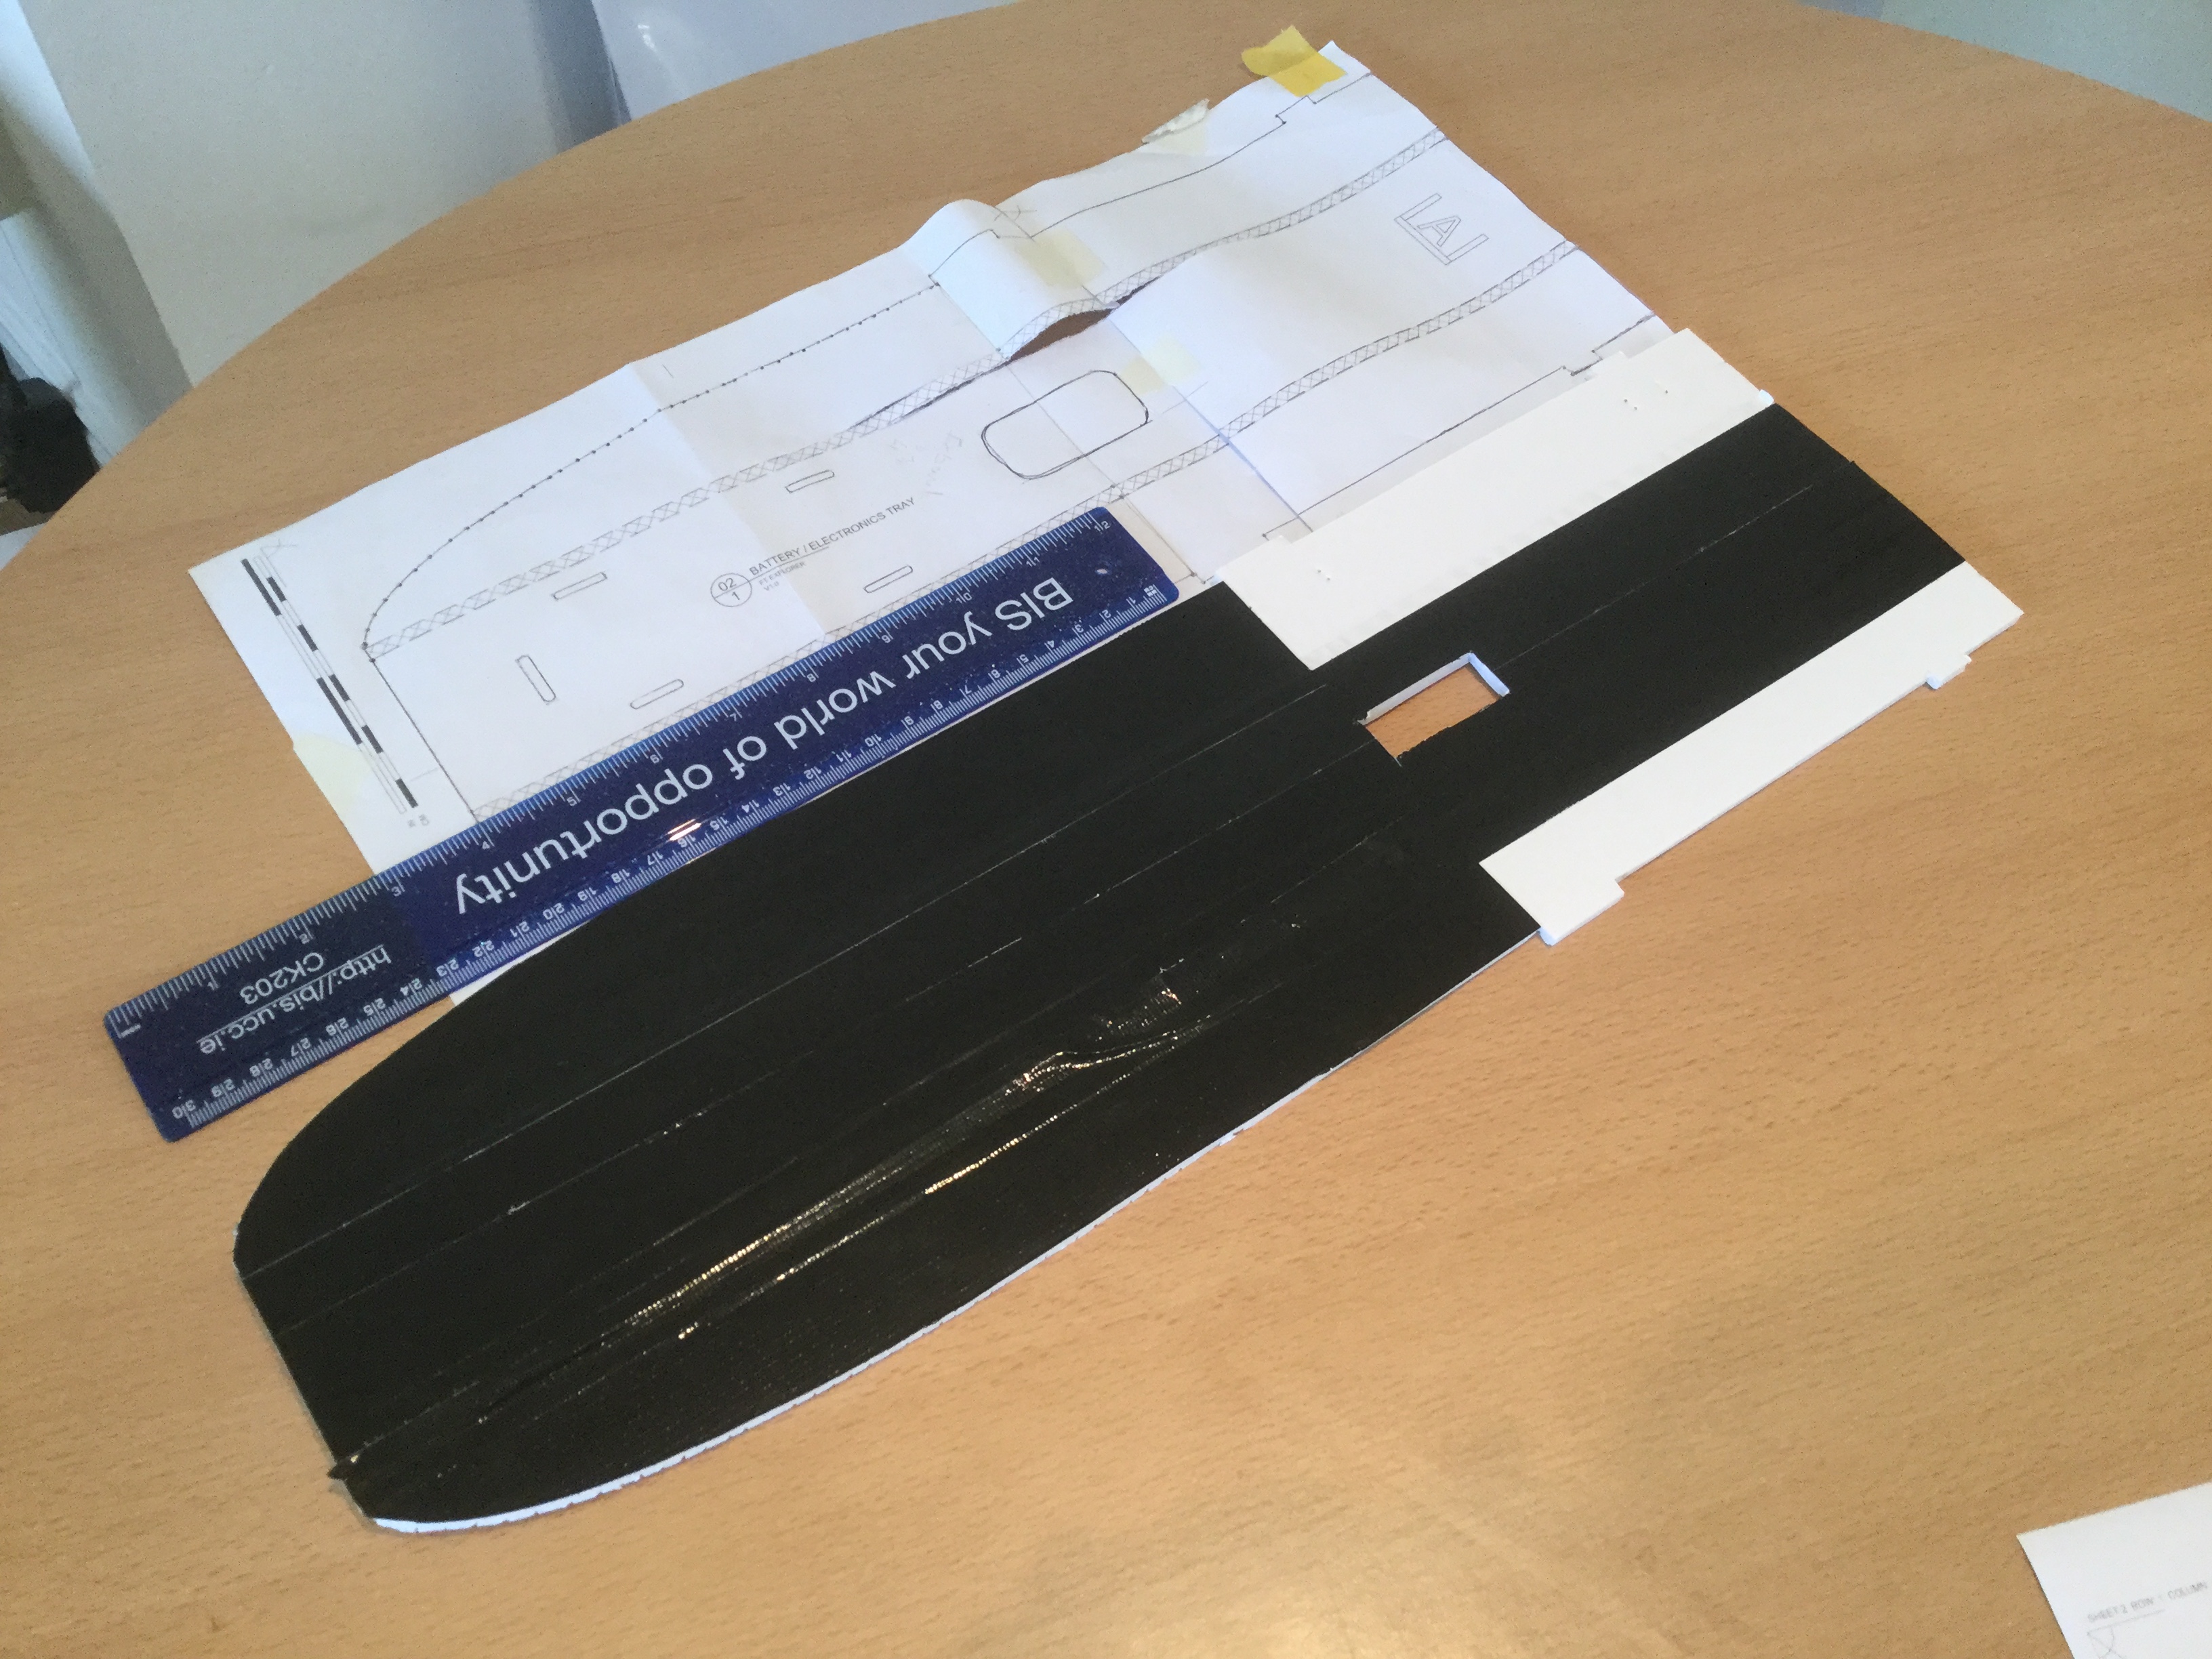
The Battery Tray
For the battery tray I made the standard Explorer designed tray 4 inches longer. I also proceeded to stretch the fuselage the same length as well. I made the fuselage longer in order to get the Emma to balance with next to no ballast. Below is a comparison of the standard battery tray vs the new redesign.
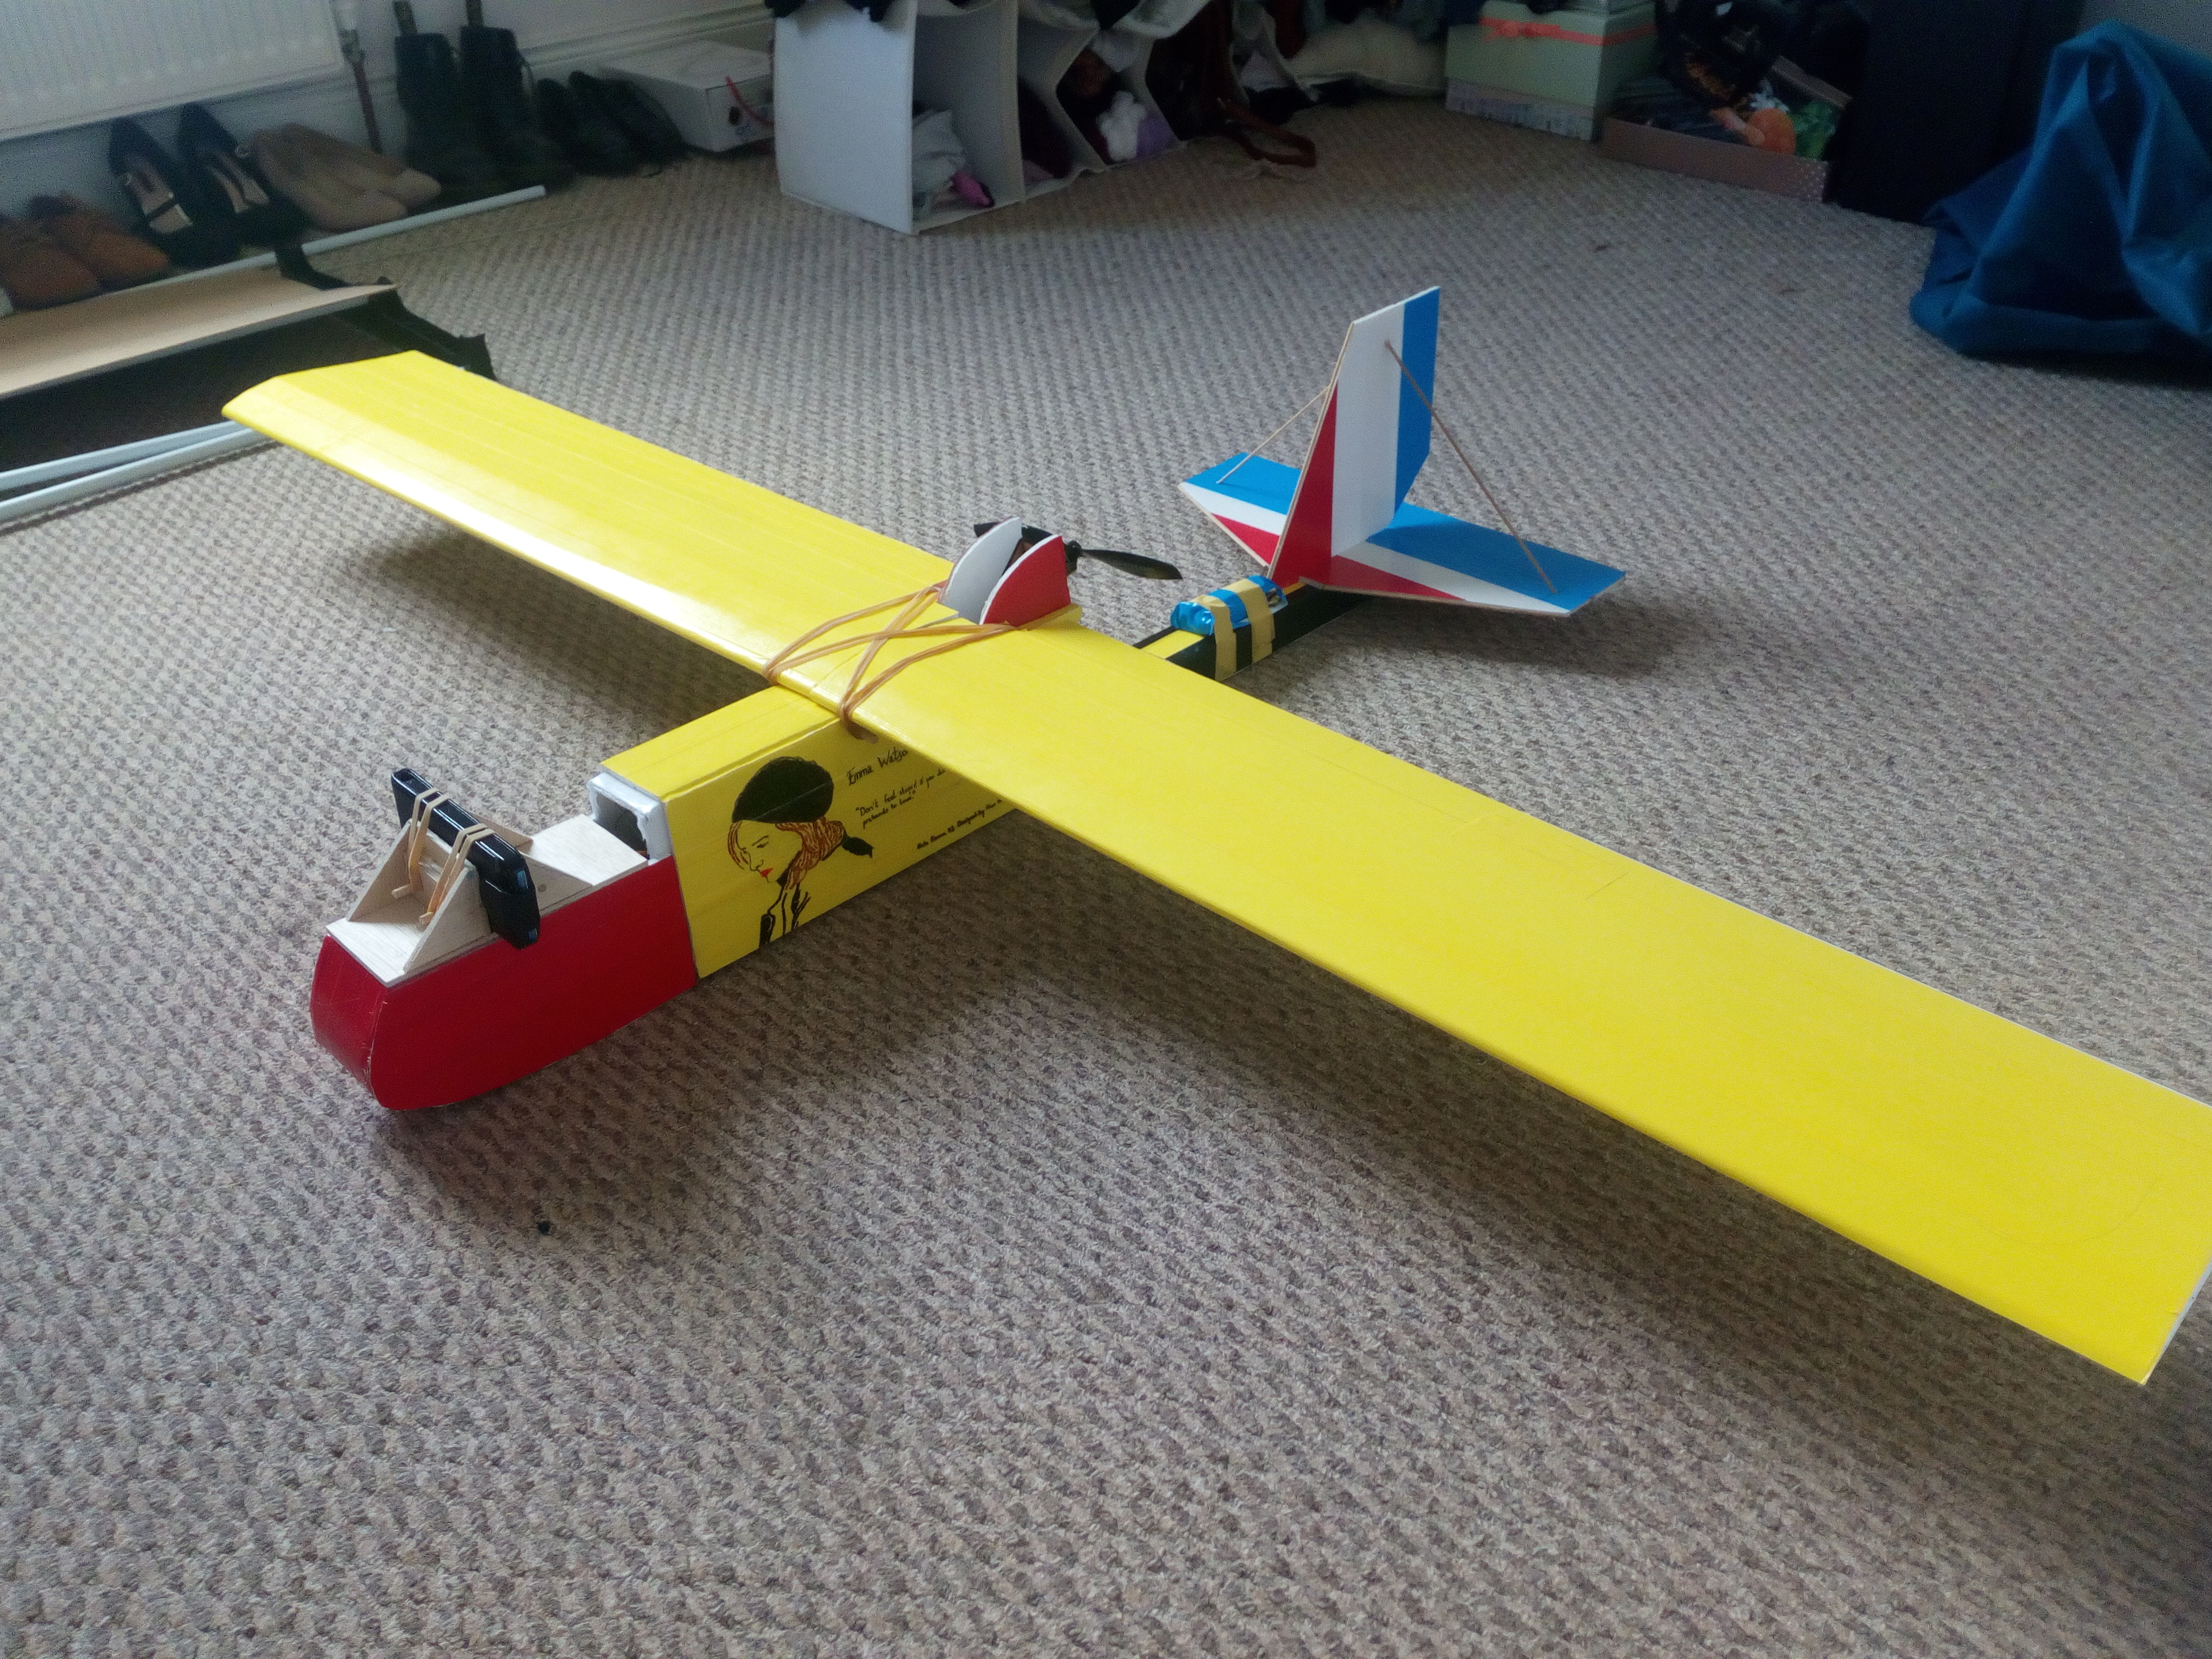
Finally after much work, my first prototype of the Emma was complete!
At this stage, I reused the wing and tail from my first stock Explorer (in order to cut costs and time).
By the time the aeroplane was ready for the first flight, the Red Bull competition was already long over. So much for keeping to that deadline!
For the first flight, I opted to keep the aeroplane as a three channel (rudder, elevator and throttle), so as not to complicate matters. At this stage I was a pretty novice pilot. My heart was pounding as I launched Emma into the air. Suddenly her nose dipped towards the ground as she left my grasp. Pulling back frantically on the elevator, I realized that Emma was slightly nose heavy. Also that I needed to work more on my launches.
Despite being slightly nose heavy, Emma's first flight proved to be a relatively stress free, once the launch was over. The generous wing area coupled with the under-cambered wingtips made Emma just as docile as its older sibling. Stalls proved a breeze, with Emma never dropping a wingtip.
After a few dozen flights, I decided to retro fit ailerons to the standard Explorer trainer wing. This experiment proved successful, however it looked pretty unsightly. The wing already being built, I had no choice but to run the servo leads along the underside of the wing using tape and hot glue to secure them.
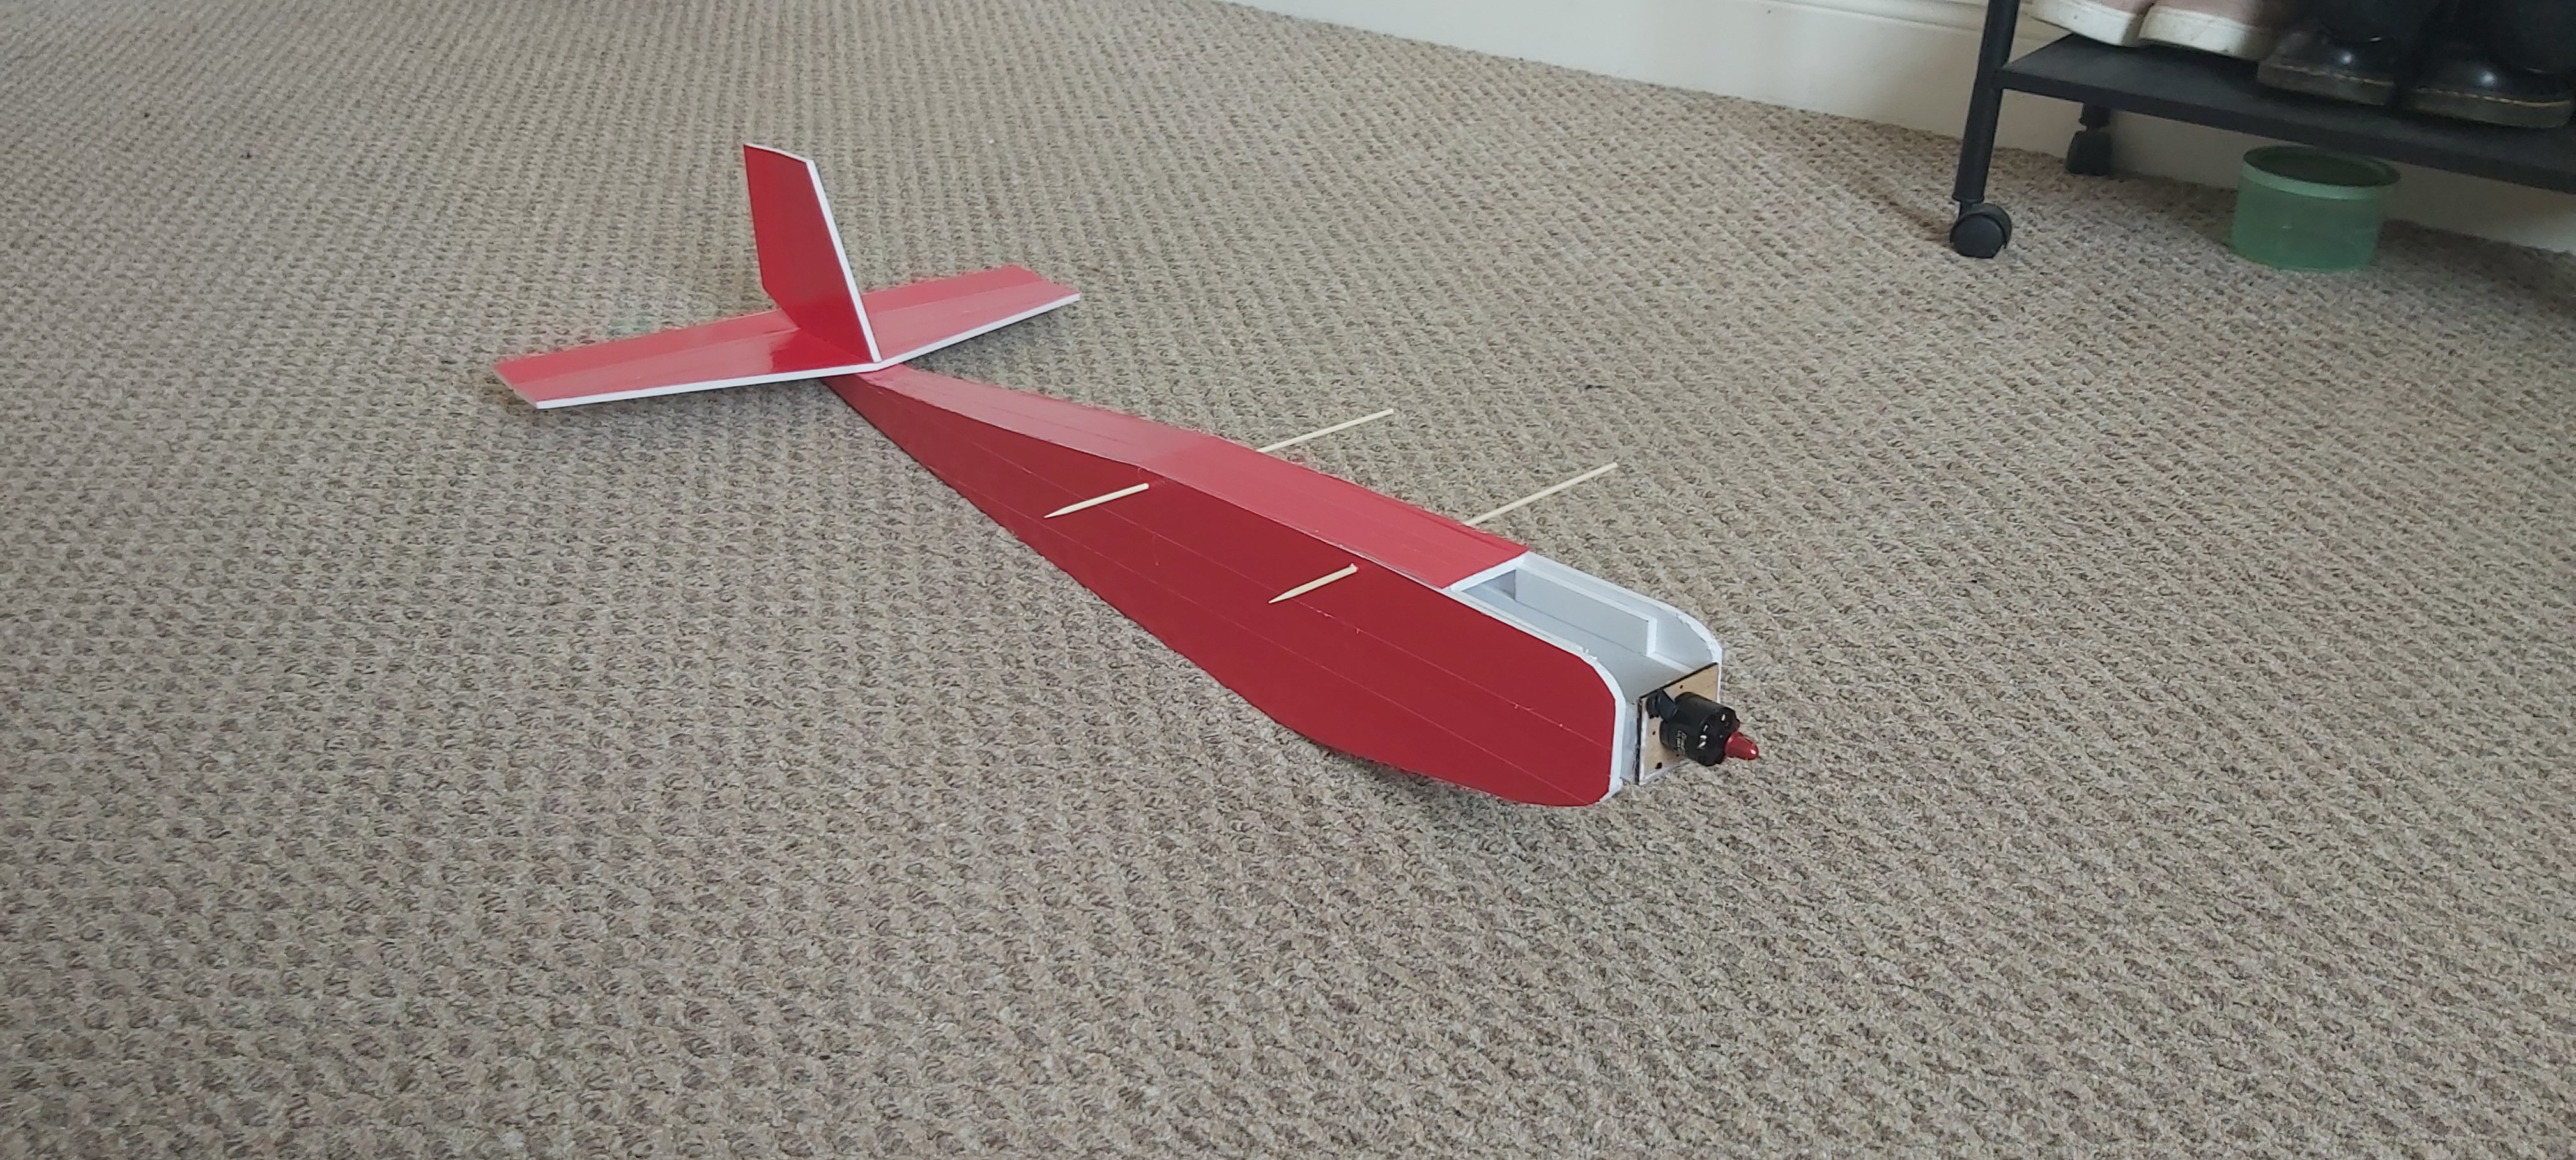
Later, I decided to make a new wing to replace the older wing design. This I loosely based off of Experimental Airlines Armin wing design.
The main details I decided to change were a vertical spar design (as opposed to the horizontal one in the video).
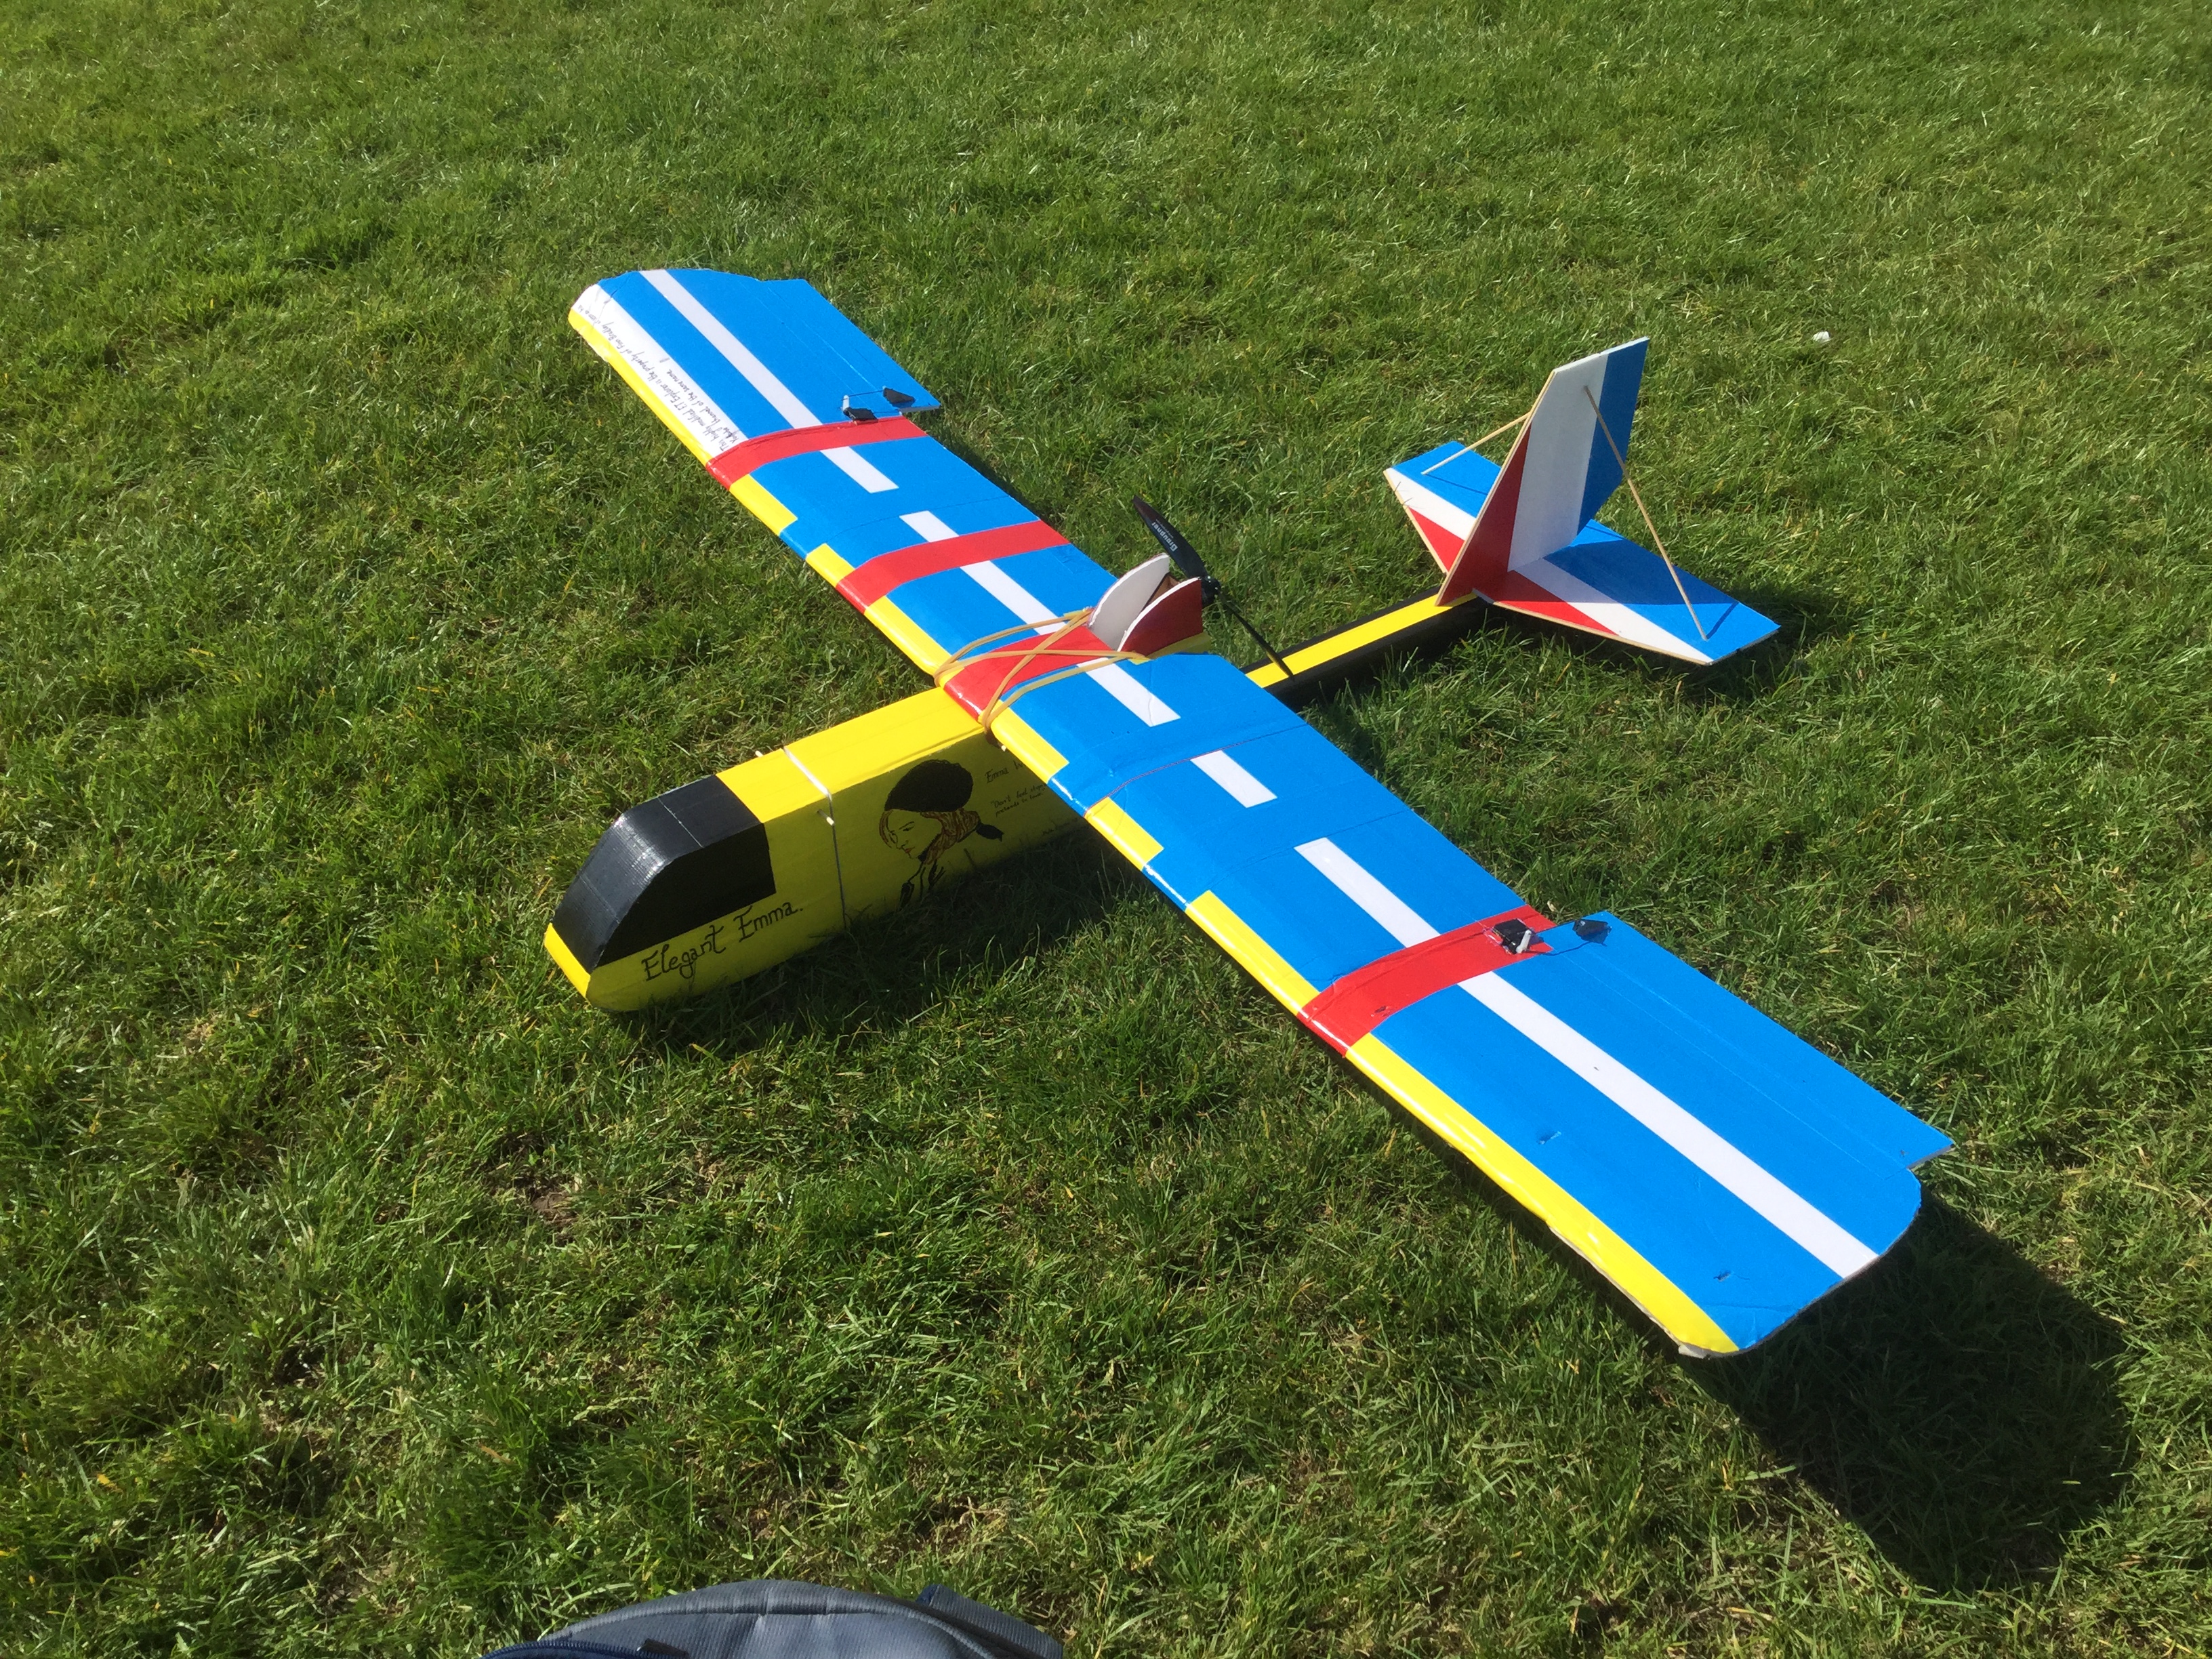
 The Emma fitted with the improved wing design after testing
I test flew this wing just before going on a long summer working abroad, and handling characteristics improved dramatically!
The Emma in the future:
While I am already working on better and more efficient scratchbuild designs, I will continue to make modifications to the Emma design for a while yet. Being a sturdy and well proven design, I am considering a floatplane variant, a twinned fuselage variant and even a VTOL variant!
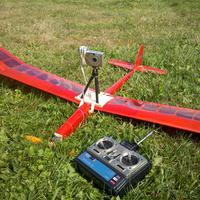
However, before moving onto all these ambitious variants, I decided to design a somewhat more mundane mod, for aerial photography. However there was one major problem. At the time of writing, I did not have a Go-Pro or any other sort of action camera. This meant I had to use my mobile phone instead as a substitute! Having your phone strapped to the front of a foamboard aeroplane travelling through the air at 30 mph is not the most efficient or ideal solution, but hey it works!
I quickly mocked up a prototype, using blueprints sketched on the back of a napkin. The material I used was 5mm lite-ply, which proved to be quite light and durable. I glued the entire structure together with Gorilla Superglue, which did the trick. Although not the most aerodynamically efficient ( especially with the phone installed), the design turned out to be sturdy and lightweight.
 The camera nose of the aircraft undergoing a test fitting
Finally, after about 1 1/2 hours of work, the nose design for the camera was complete! The design work was pretty simple, being a slightly modified Emma nose.
 The completed camera pod, mounted and ready for the maiden
In order to balance out the airframe with the added weight of the camera pod, I crudely fixed a counterweight to the rear fuselage boom of the aircraft.
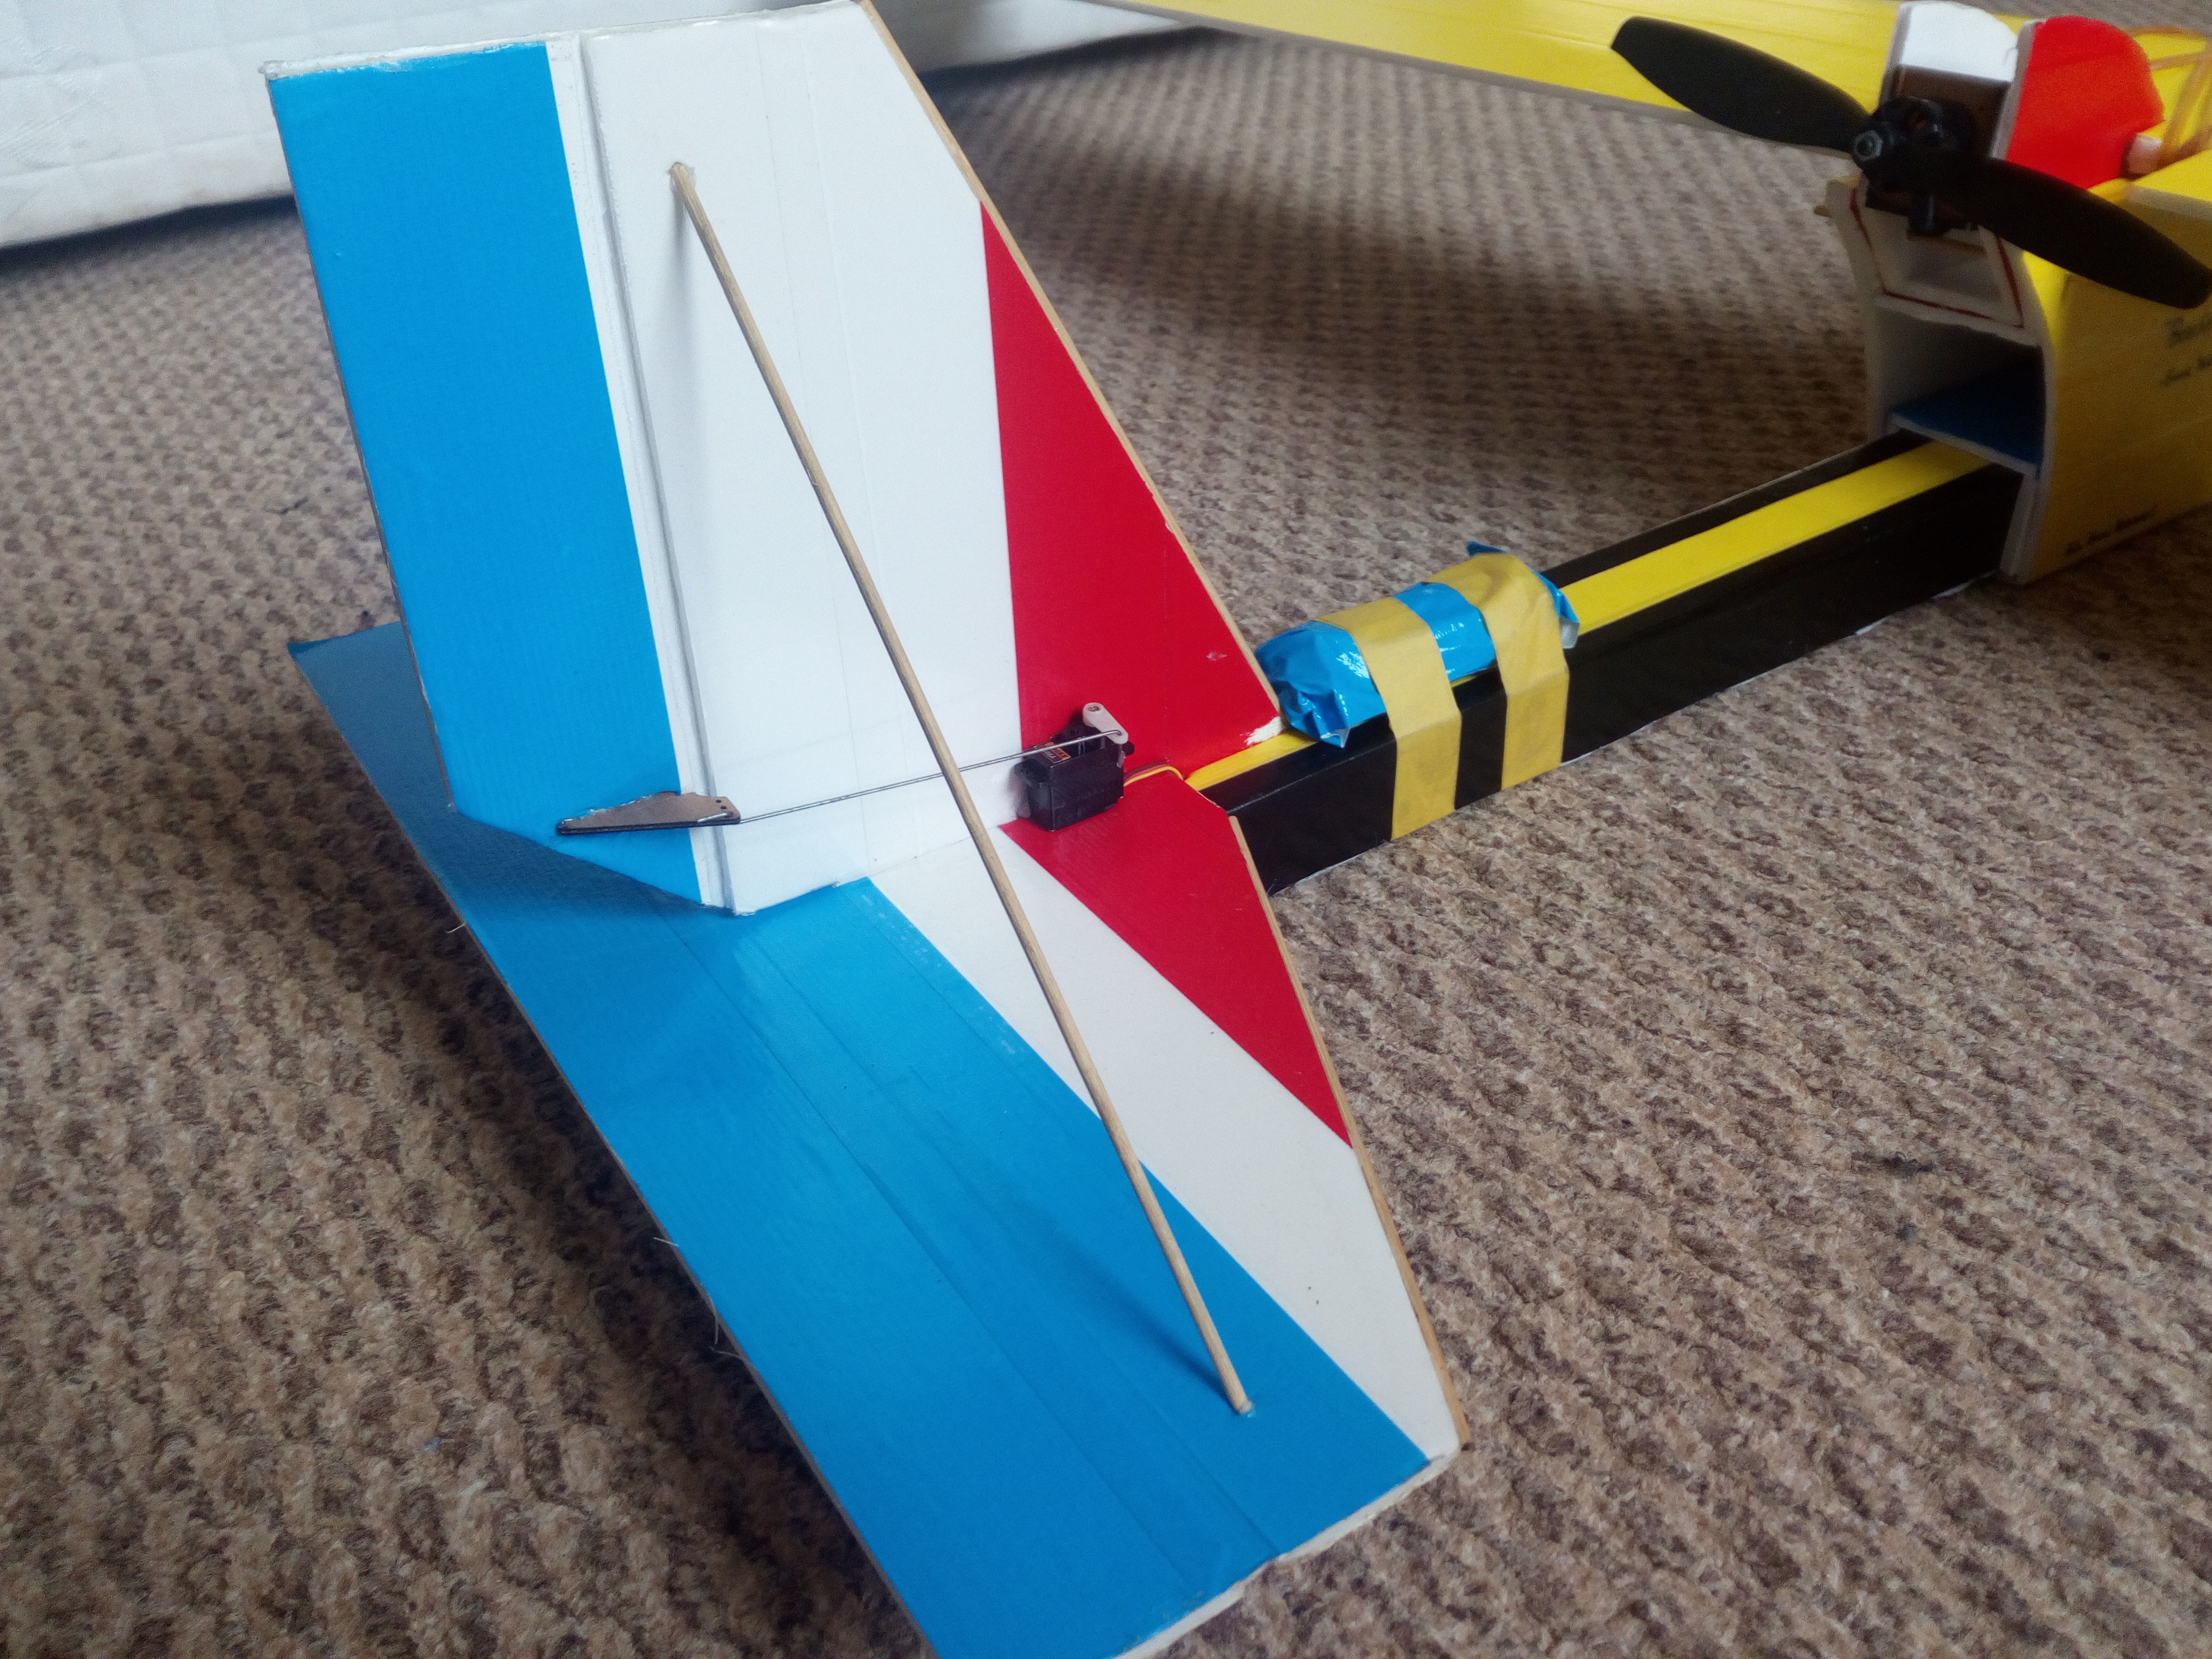 The counterweight for the camera is the cylinder taped on with masking tape!
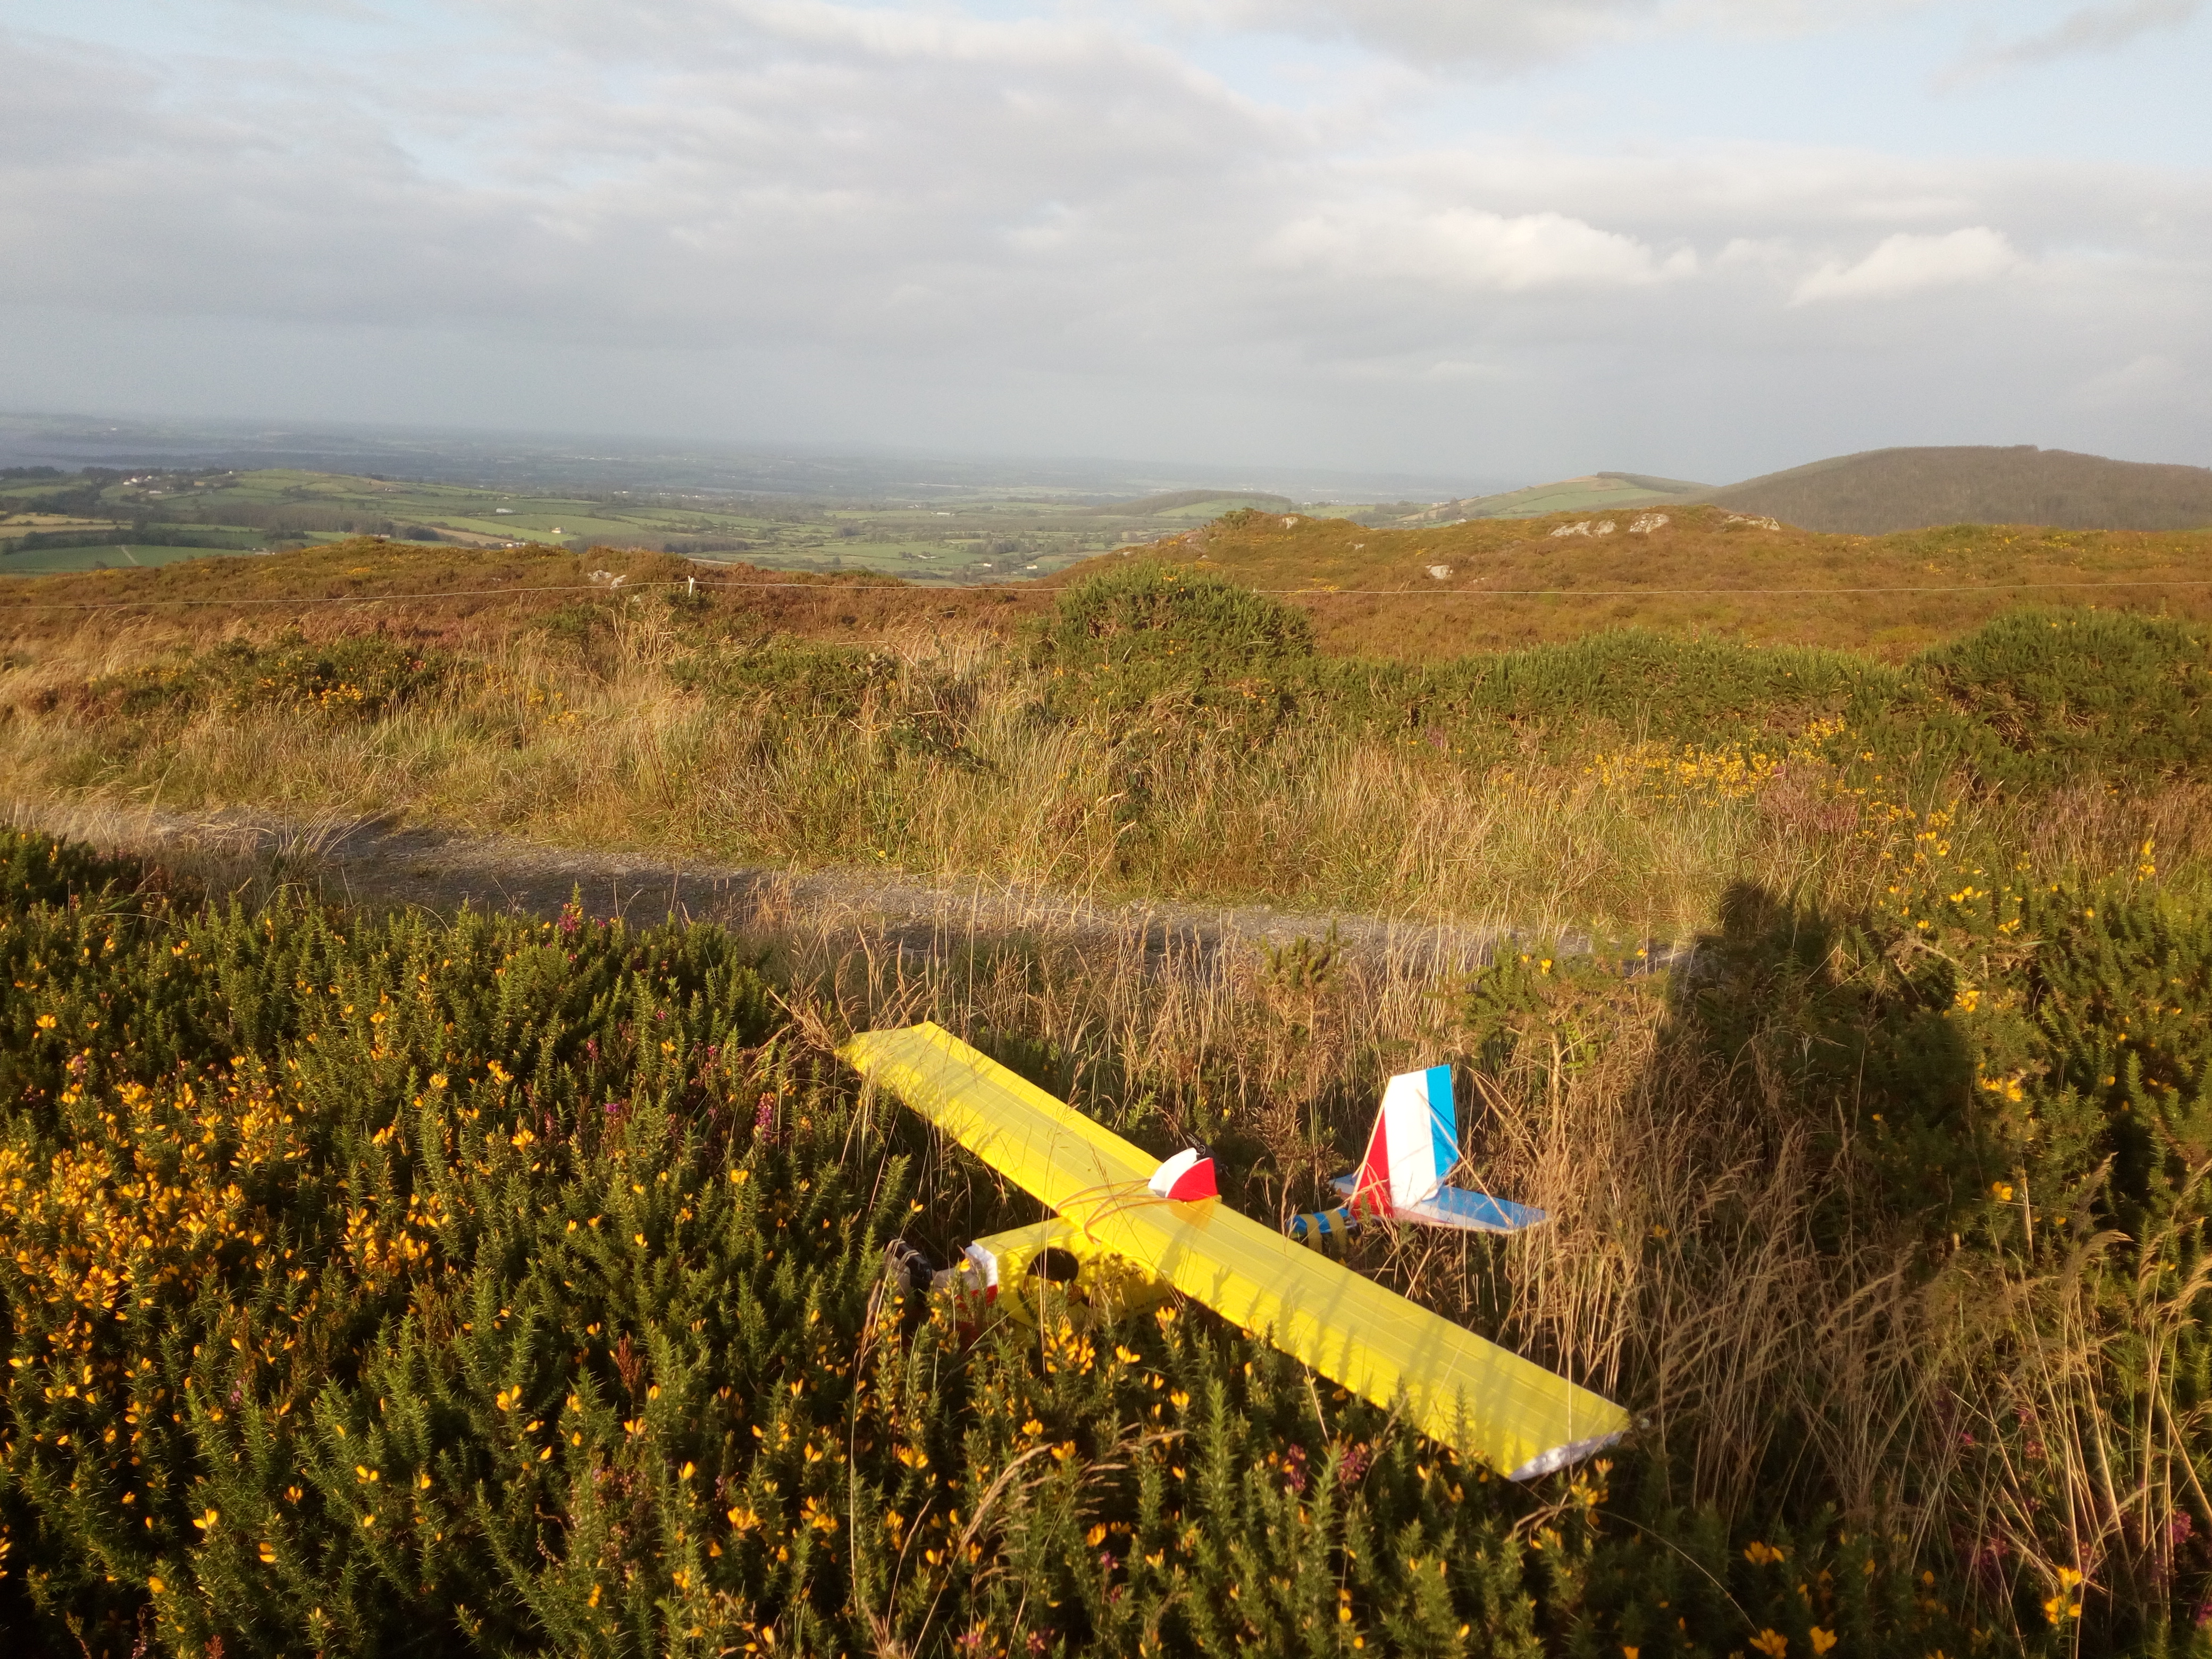
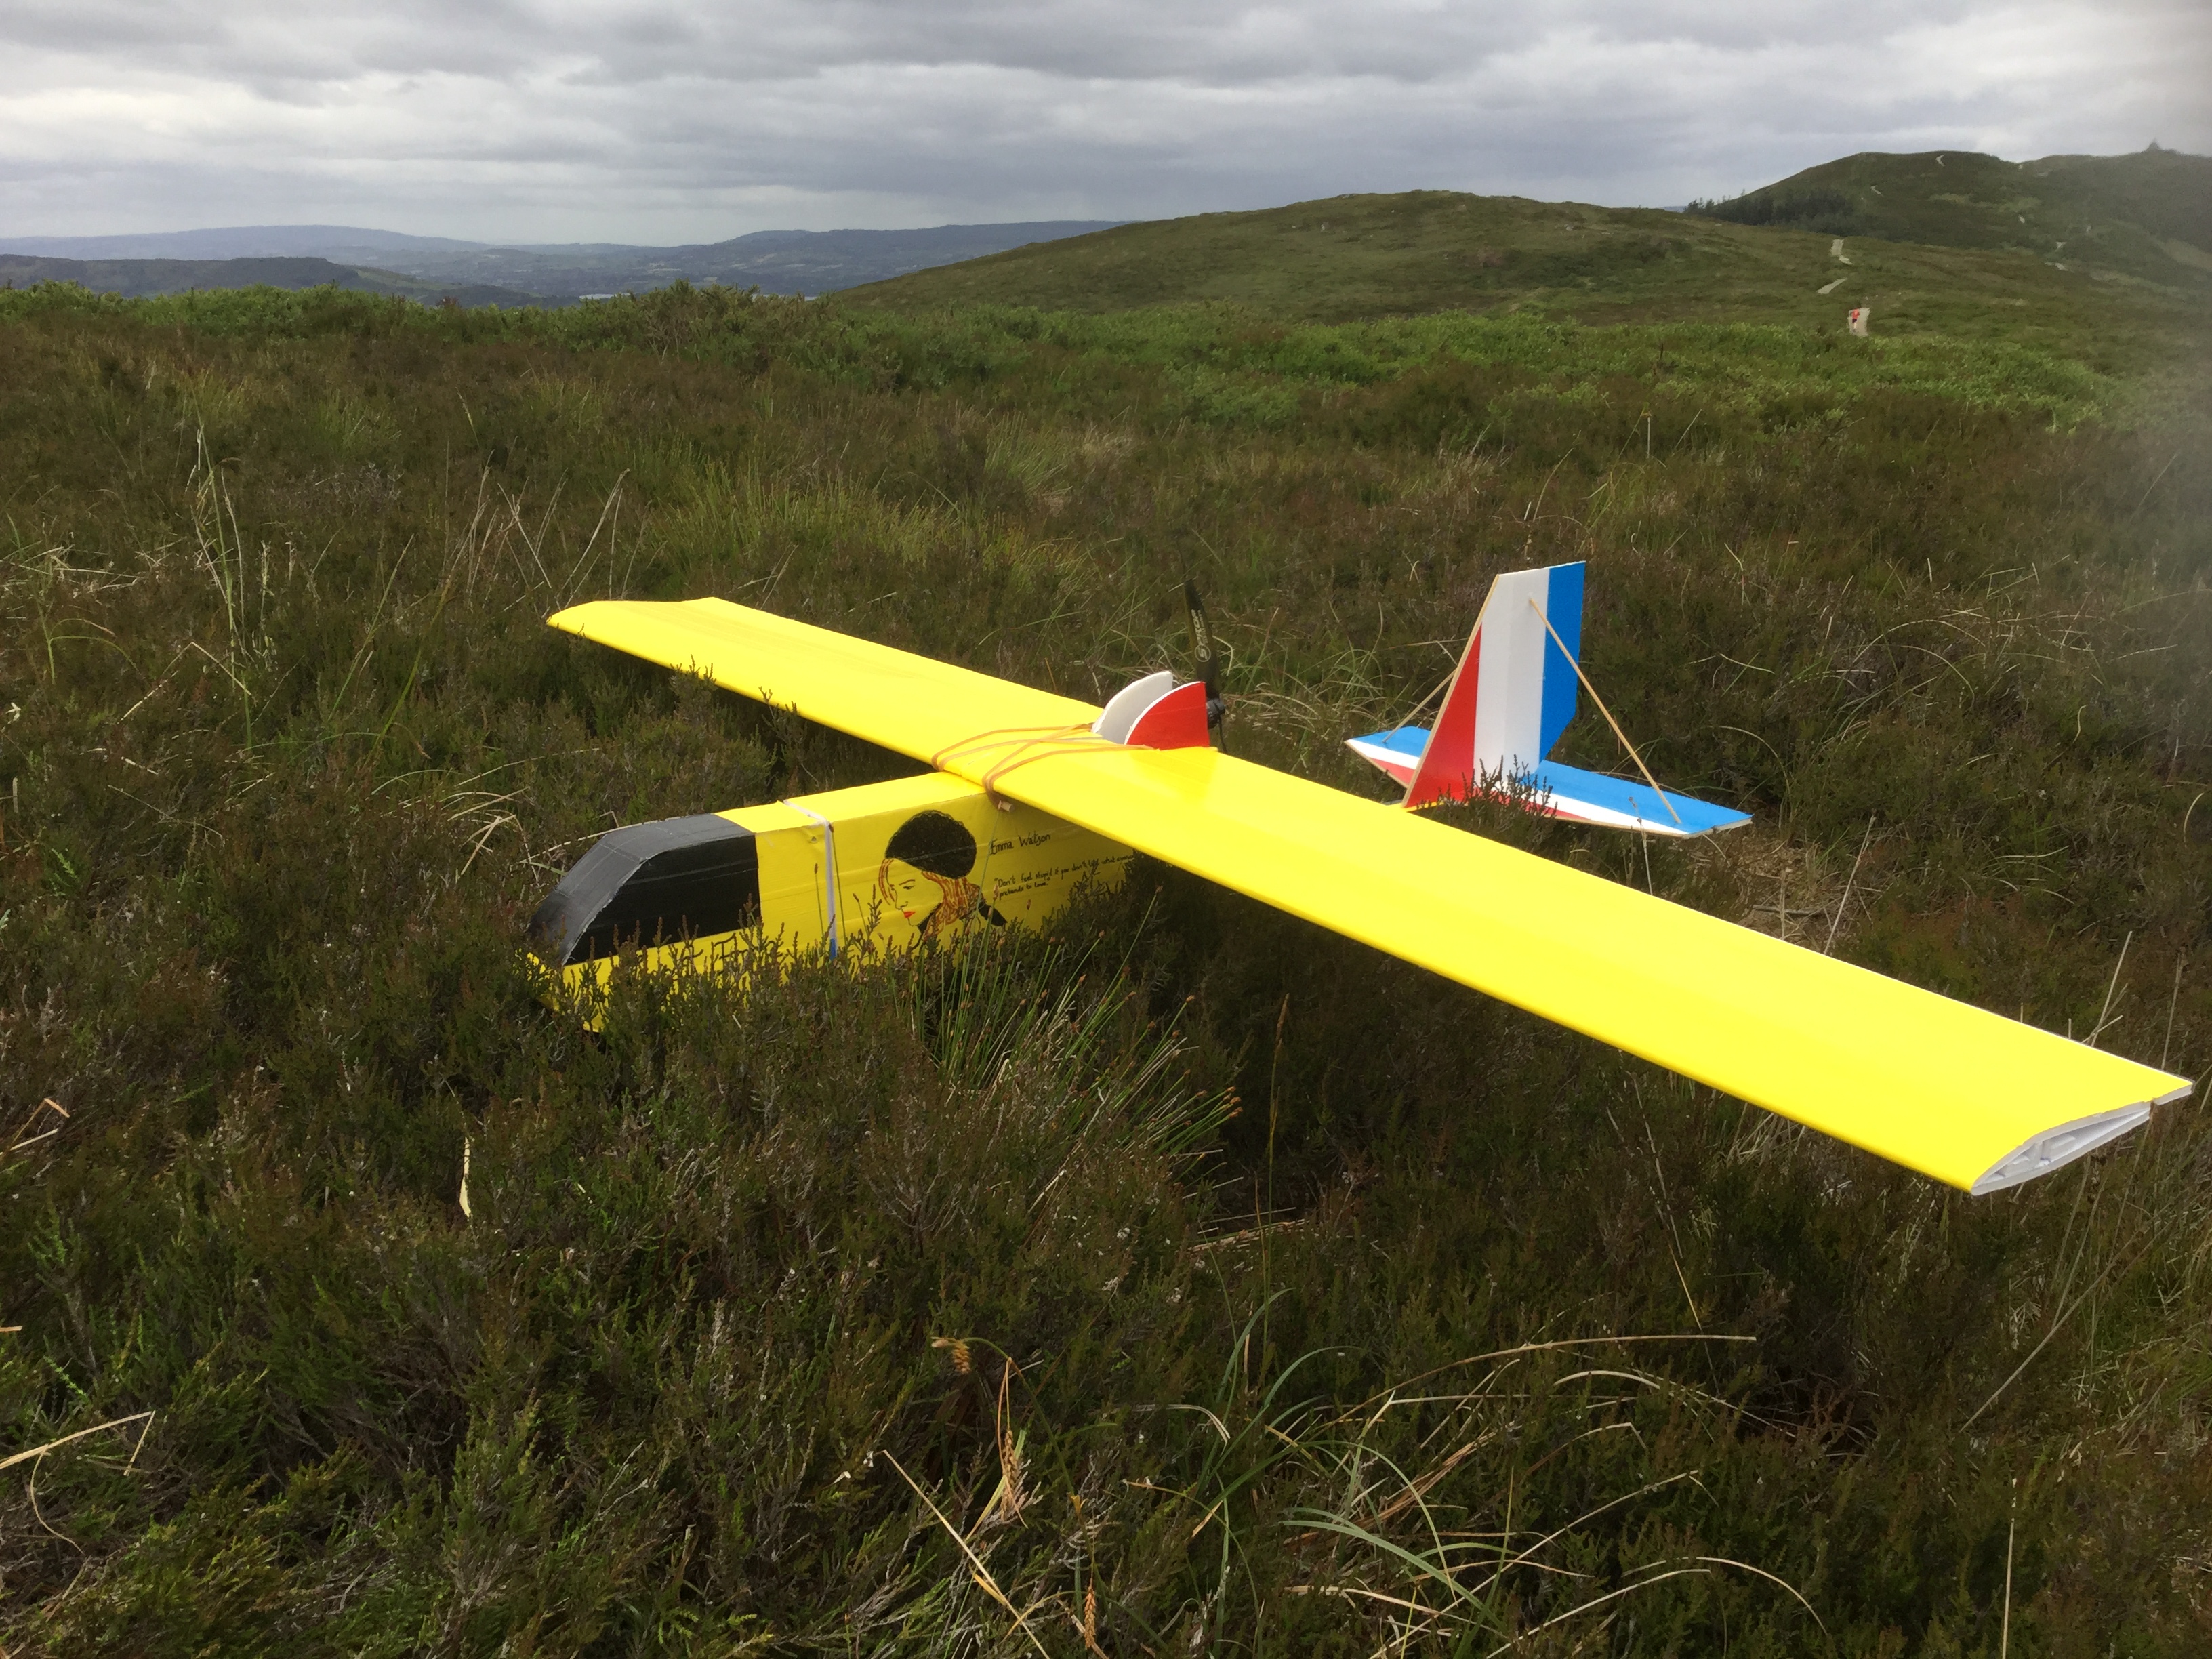
I finally got to test the design on the 4th September 2019. Flying off a hilltop in Ireland, the first flight, though short at only 2 1/2 minutes in duration proved the design. Coming into land, the Emma showed its sturdy Explorer roots as it descended almost 15 meters vertically with no forward velocity (thanks to a strong 20 mph headwind). Miraculously there was no damage to the aircraft.
The second flight was much more exhilarating, with the aeroplane performing half barrel rolls. Unfortunately, I have no footage, as my Ipod decided to turn off of its own accord before the flight without me knowing!
The third flight I made with the setup, I had no sooner climbed out when my motor shut off suddenly. Stupidly, I had been flying too long on the previous flights without changing the battery. I glided in the Emma to make a downwind forced landing, and watched in horror as it disappeared behind a rugged outcropping of rock. Miraculously, as before I recovered the plane completely undamaged (bar two wing rubber bands).
The fourth and final flight of the day was the most successful, despite the very high wind.
First Prototype Crash!
On March 20th 2020, while the entire world was in panic over CV 19, I decided to make the most of my mandatory self isolation, and take the Emma up for the first time in a few months. The first takeoff, i had to abort, because I did not throw the plane with sufficient strength, but the second attempt was successful.
I decided to do my usual loop above the hillside, when suddenly disaster struck. When I pulled up, the wing spar decided to fail. The aircraft abruptly went from having 0 degrees of dihedral, to having 35 degrees or more!
The Emma suddenly fell into a spin, when this happened.Thankfully, due to the wing not fully failing, I was able to partially recover, as the plane spiraled to earth. As the Emma impacted the ground, I expected the plane to be a complete loss.
However when I reached the crash site, the Emma, was again, in remarkably good shape. Apart from the wing spar, which had fully broken upon impact, and a slight dent in the nose section, she was relatively unharmed. Saved by providence yet again! That or the plane inherited its robustness from the Explorer.
I am convinced that the accident occurred because the spar I had been using had been soaked in heating oil a few weeks prior.
I had to do some pretty major wing surgery to remove the two bits of broken spar within each wing. I had to cut through the glue joints and unfold the wing skin, which proved to be quite a delicate operation.
I wanted to refit a new spar in order to go flying again. But because the country was in lock-down at this stage, I was solely confined to my house, with no access to new building materials. So I modified the wing of the Emma to fit a rectangular spar, which I had lying around.
On the 31st of March 2020. early in the morning when the weather was incredibly calm, I took the modified aeroplane out to test. It was a success! The wing proved to be incredibly robust, with no flexing and the Emma flew no different to pre crash.
Here is some more footage from another flight.
Conclusions:
Without a doubt, I have really enjoyed the entire process of taking the standard Ft Explorer design, and modifying it into something entirely new. I have especially enjoyed making little incremental changes along my journey, to improve certain flight or performance characteristics of the plane. I will continue to make modifications to the Version 1 prototype document described here, and in the future make a version 2.
In conclusion, here are a few things I learned when looking to design your own aeroplane.
1. If designing for the first time, it is a very good idea to start off with simple modifications to someone else's design.
2. When making modifications, make sure to document the changes you make.
3. If the plane is for testing, make sure to paint it in bright colors.
I hope to release plans for the Emma in the future, as soon as I find the blueprints in the mess that is my workshop! In the meantime, please check out my newly formed Youtube channel @thedifferentdesigner for any more modifications, future updates or flight footage.
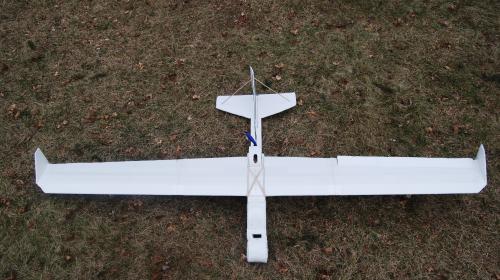
In the meantime, here is a sneak peak of a future project!
Happy Flying,
Finn.


I know how hard it is to get started but I'm looking forward to your next project.
Log In to reply
Log In to reply
Log In to reply