
In anticipation of the 15km SN8 Starship hop, I decided to launch my own Starship program, starting the same way SpaceX did: with a Starhopper test platform. I needed to know how to stabilize a vehicle like this so that I can scale up to more advanced hardware later, for a (hopefully) fully functioning radio controlled Starship.
The Plan
I didn't want to simply build a cool airframe around a multirotor, but rather build a complete, unique and integrated aircraft. The real Starhopper uses 1x Raptor rocket engine. I don't have one. So I'll use two counter rotating brushless motors and propellers inside the body. At the bottom, I'll use two control surfaces to direct the airflow for roll and pitch control. This vehicle will, of course, need some sort of stabilization (more on that + free code later).
The Build
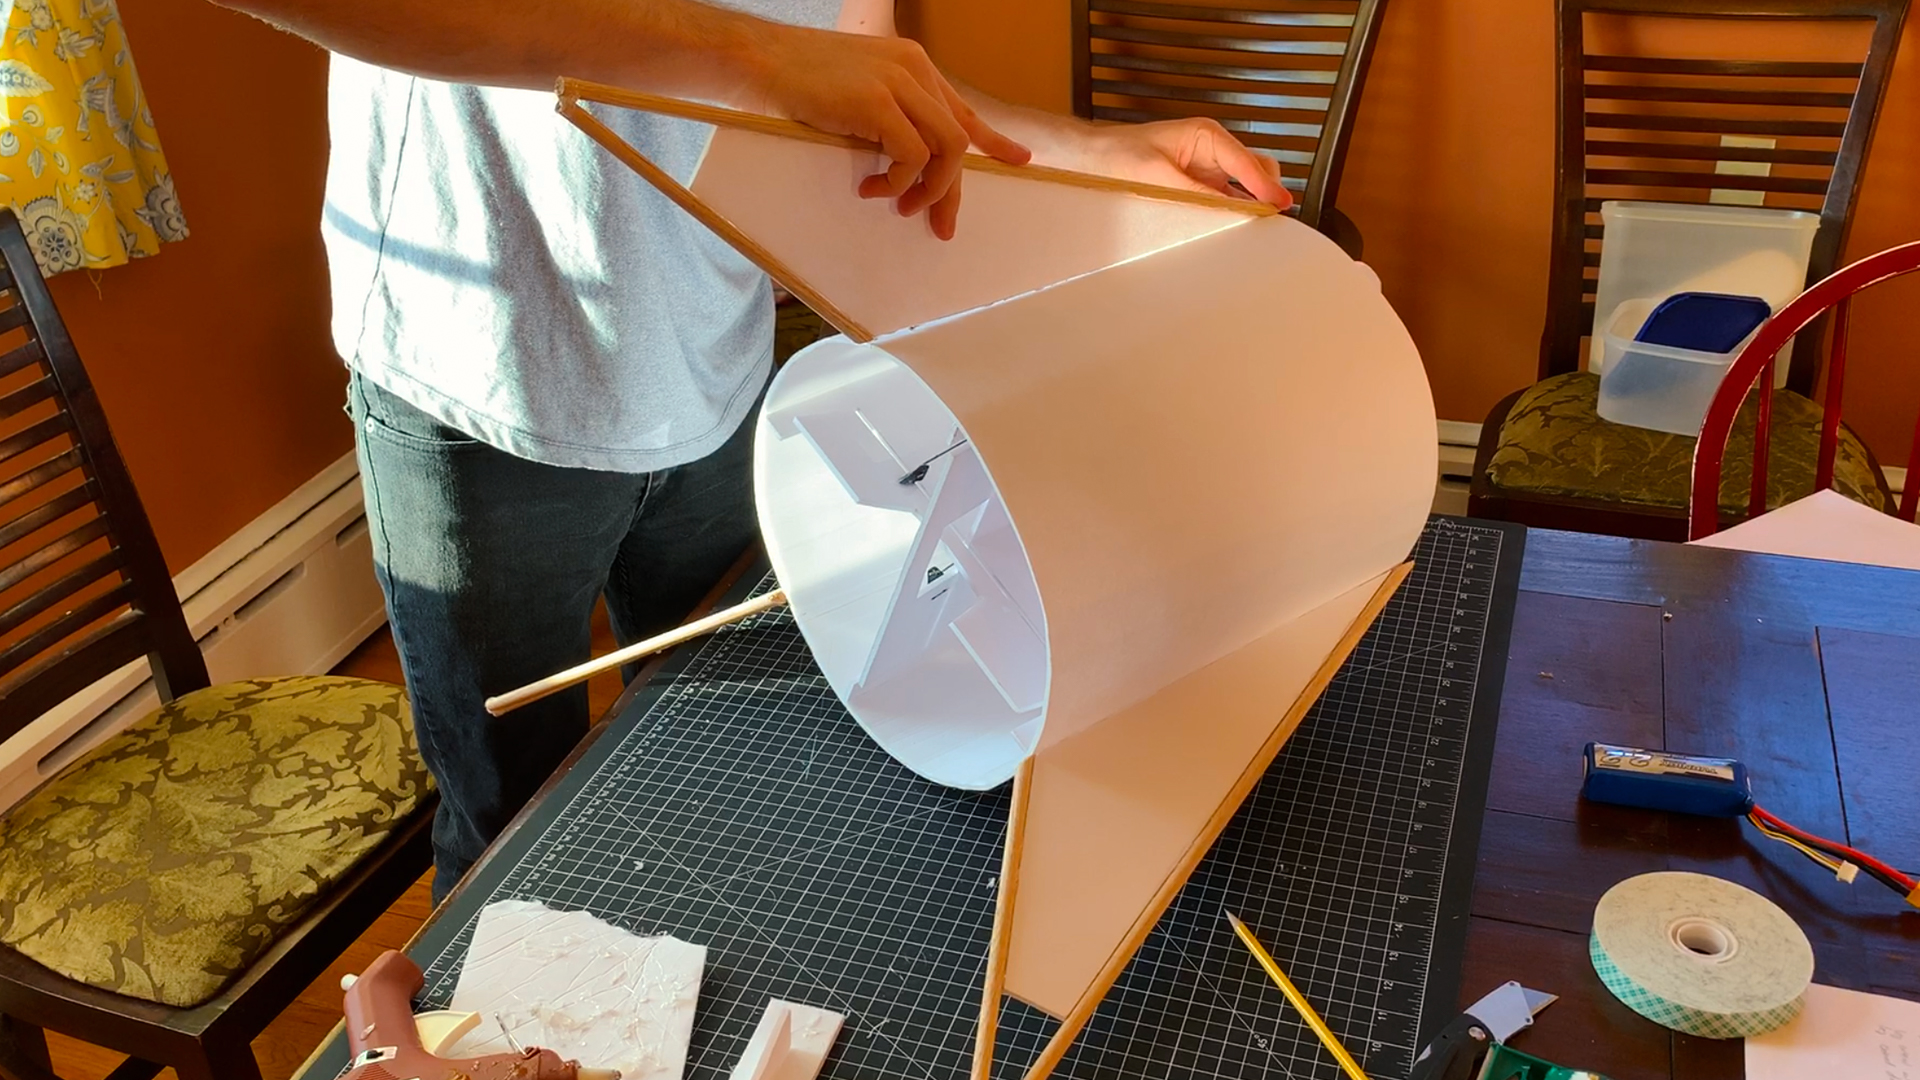
I started the build by cutting out some internal sections from dollar tree foamboard. These will be hot glued together in a "+" configuration to form the internal structure that will support the motors and electronics: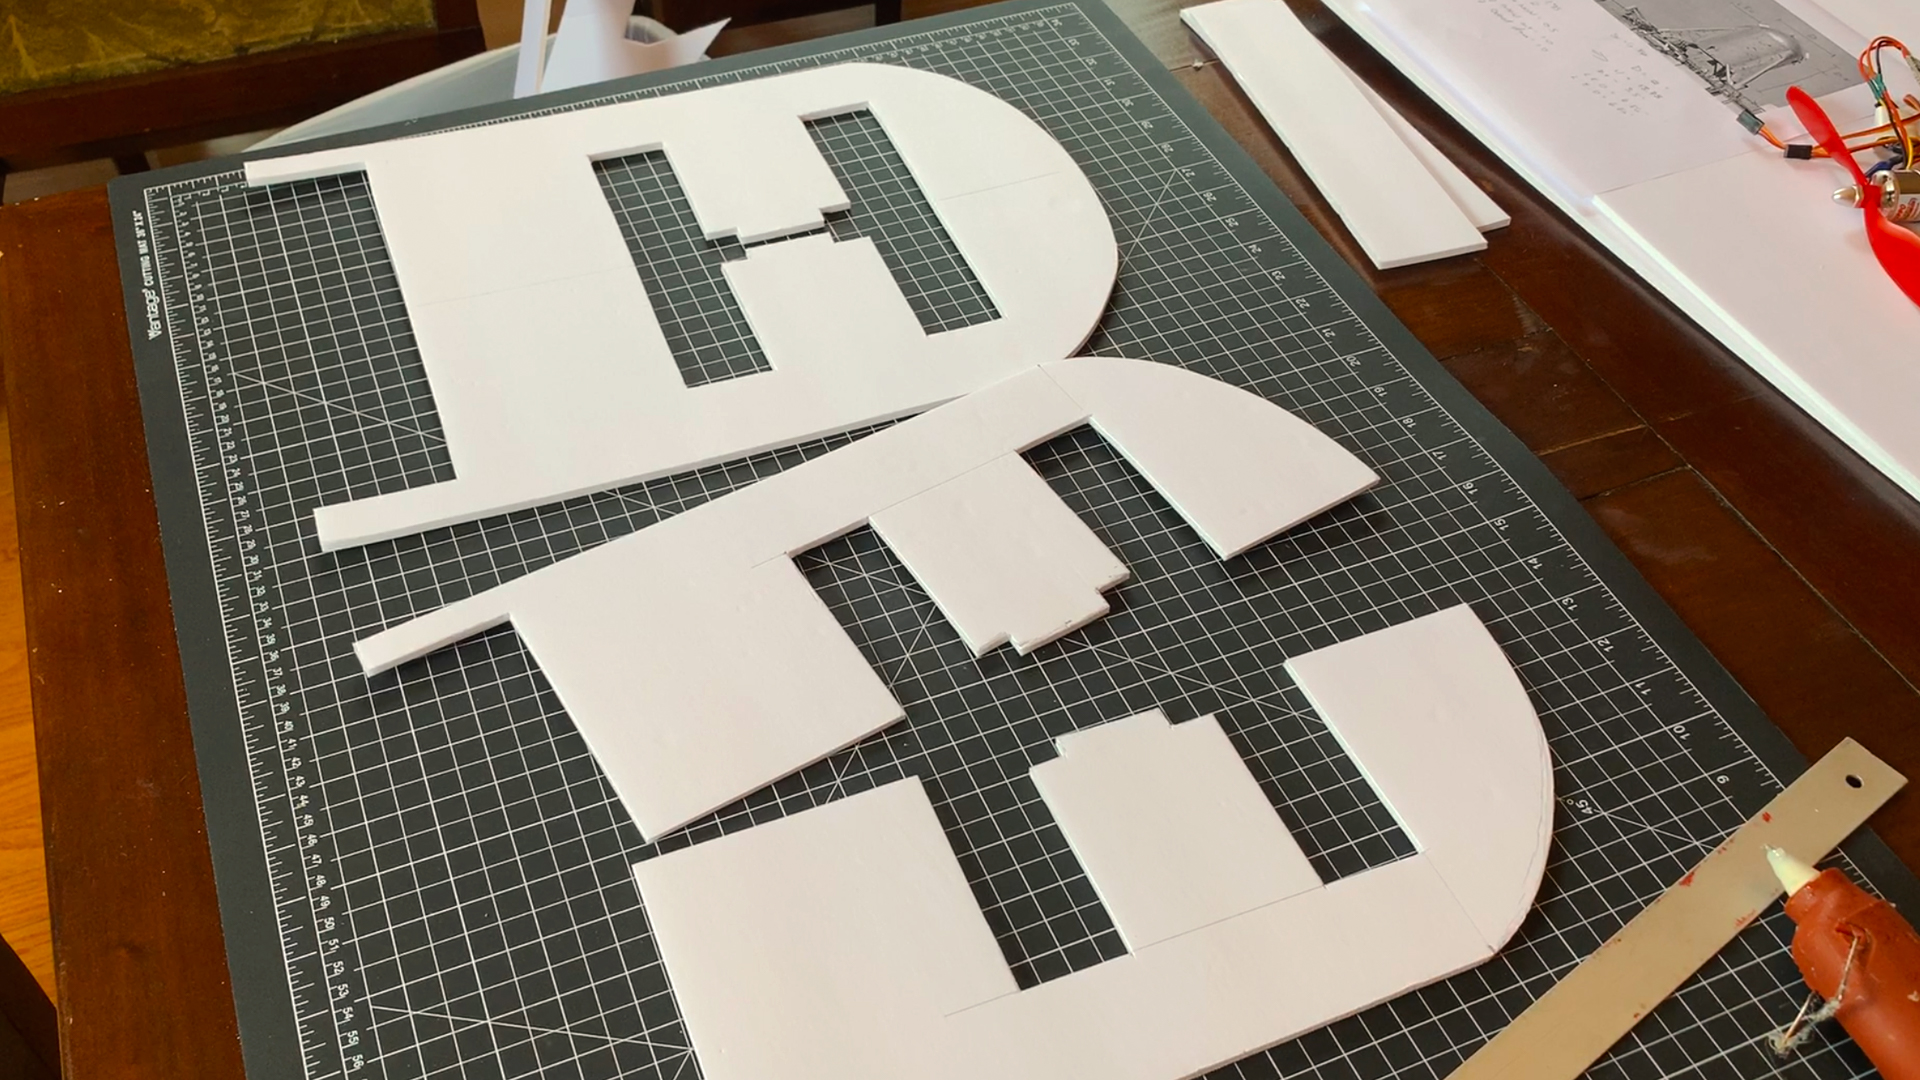

I glued on the two 1000kv brushless motors with 8-inch counter rotating propellers (it was all I had to spare for this project; Much better hardware will be used on the next iteration!). Then I taped on the ESCs, receiver, and my custom flight controller:
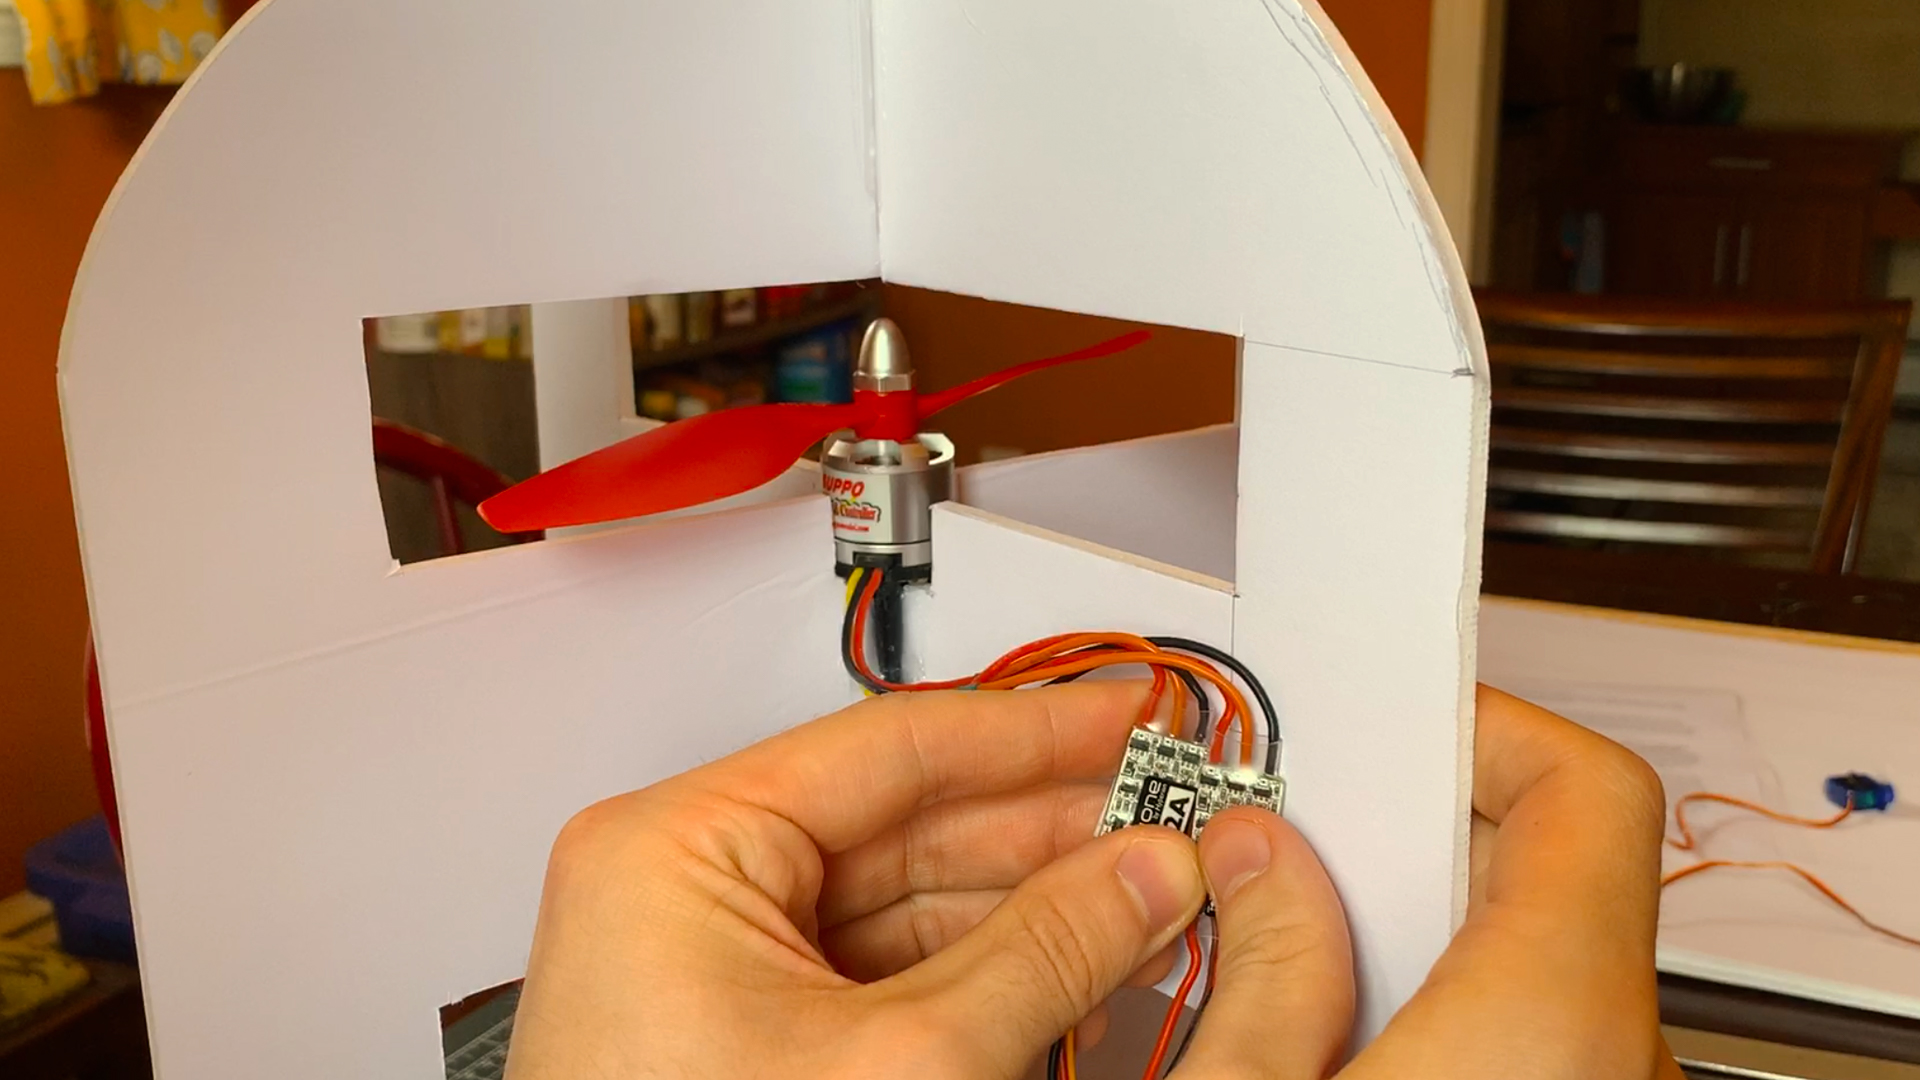
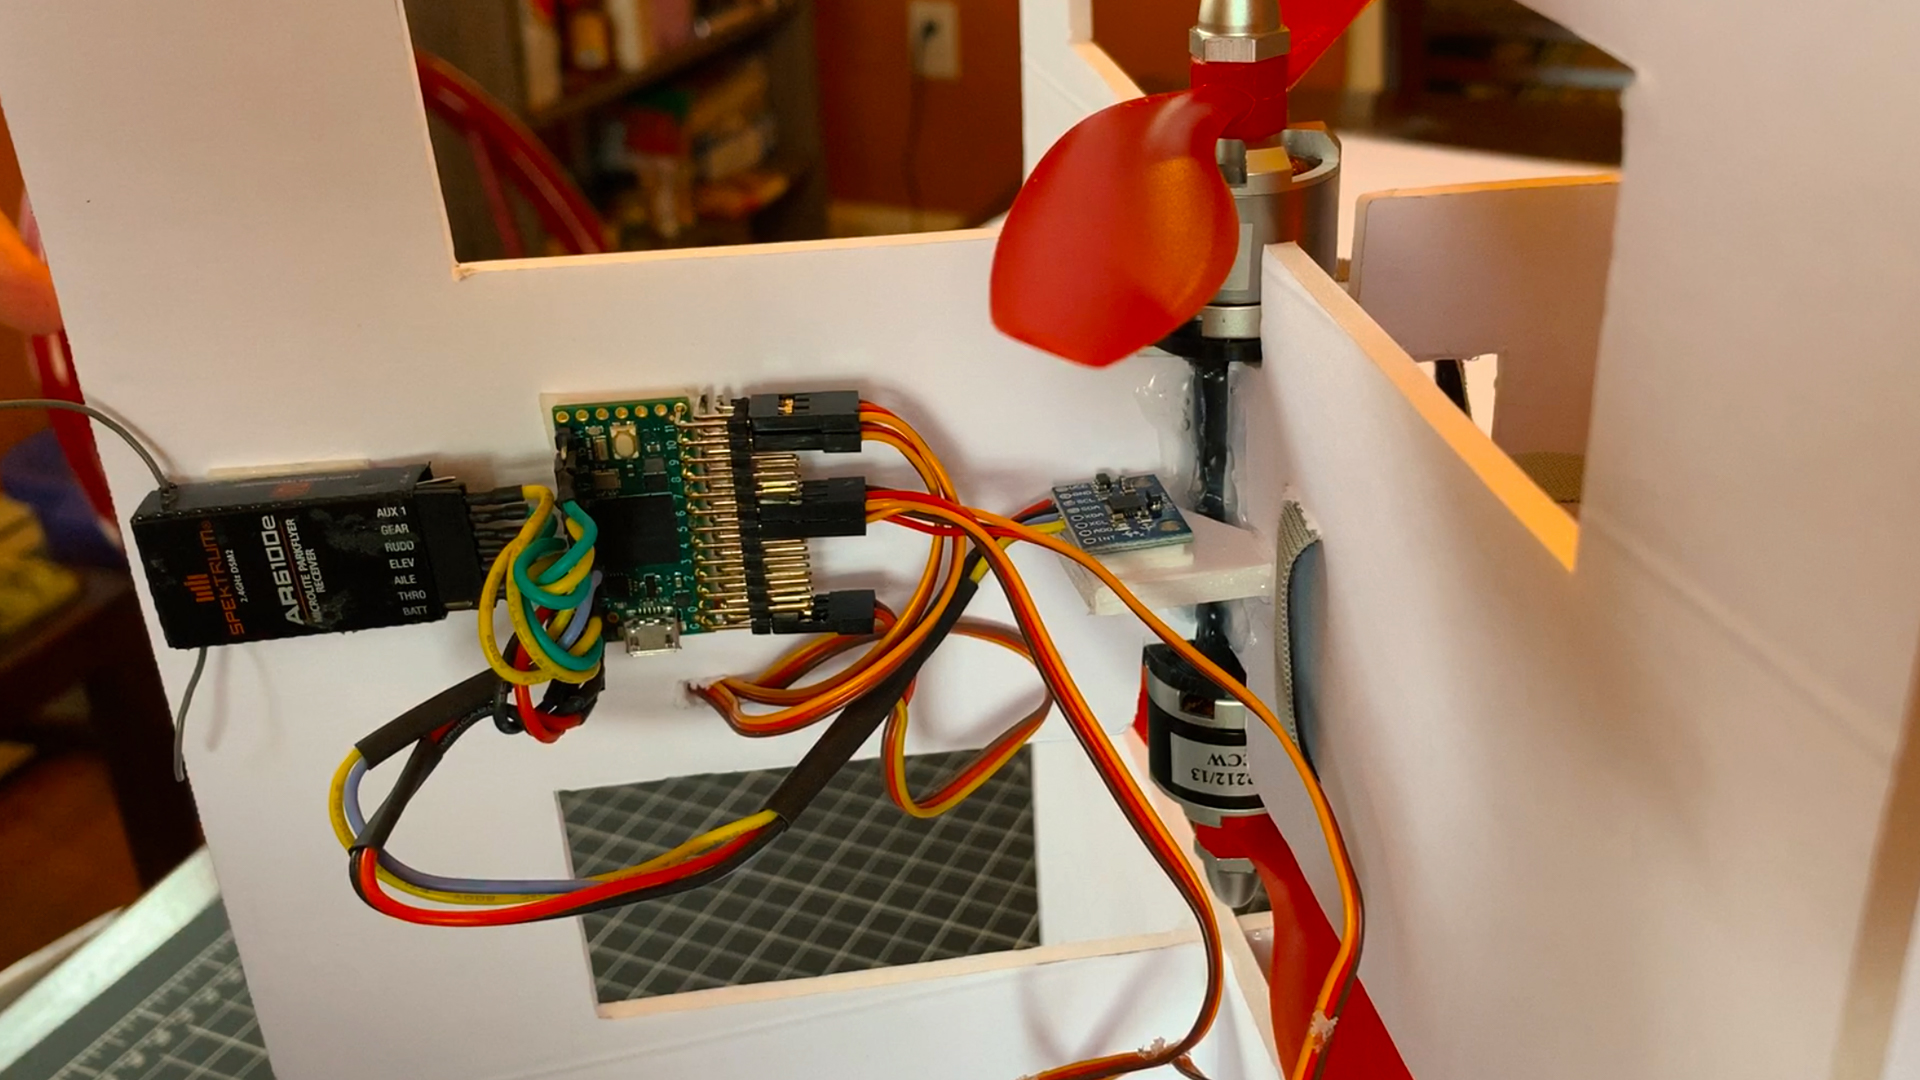
The flight controller is a Teensy 4.0 with MPU6050 IMU (all less then $30). You can download the base code which is uploaded to the board just like an Arduino here: https://github.com/nickrehm/dRehmFlight
Next up, I wrapped the exterior with a layer of foam with paper removed on the inside surface. Tip for bending foam without cracking it: heat it up over your stove and use the counter's edge to gently roll it. 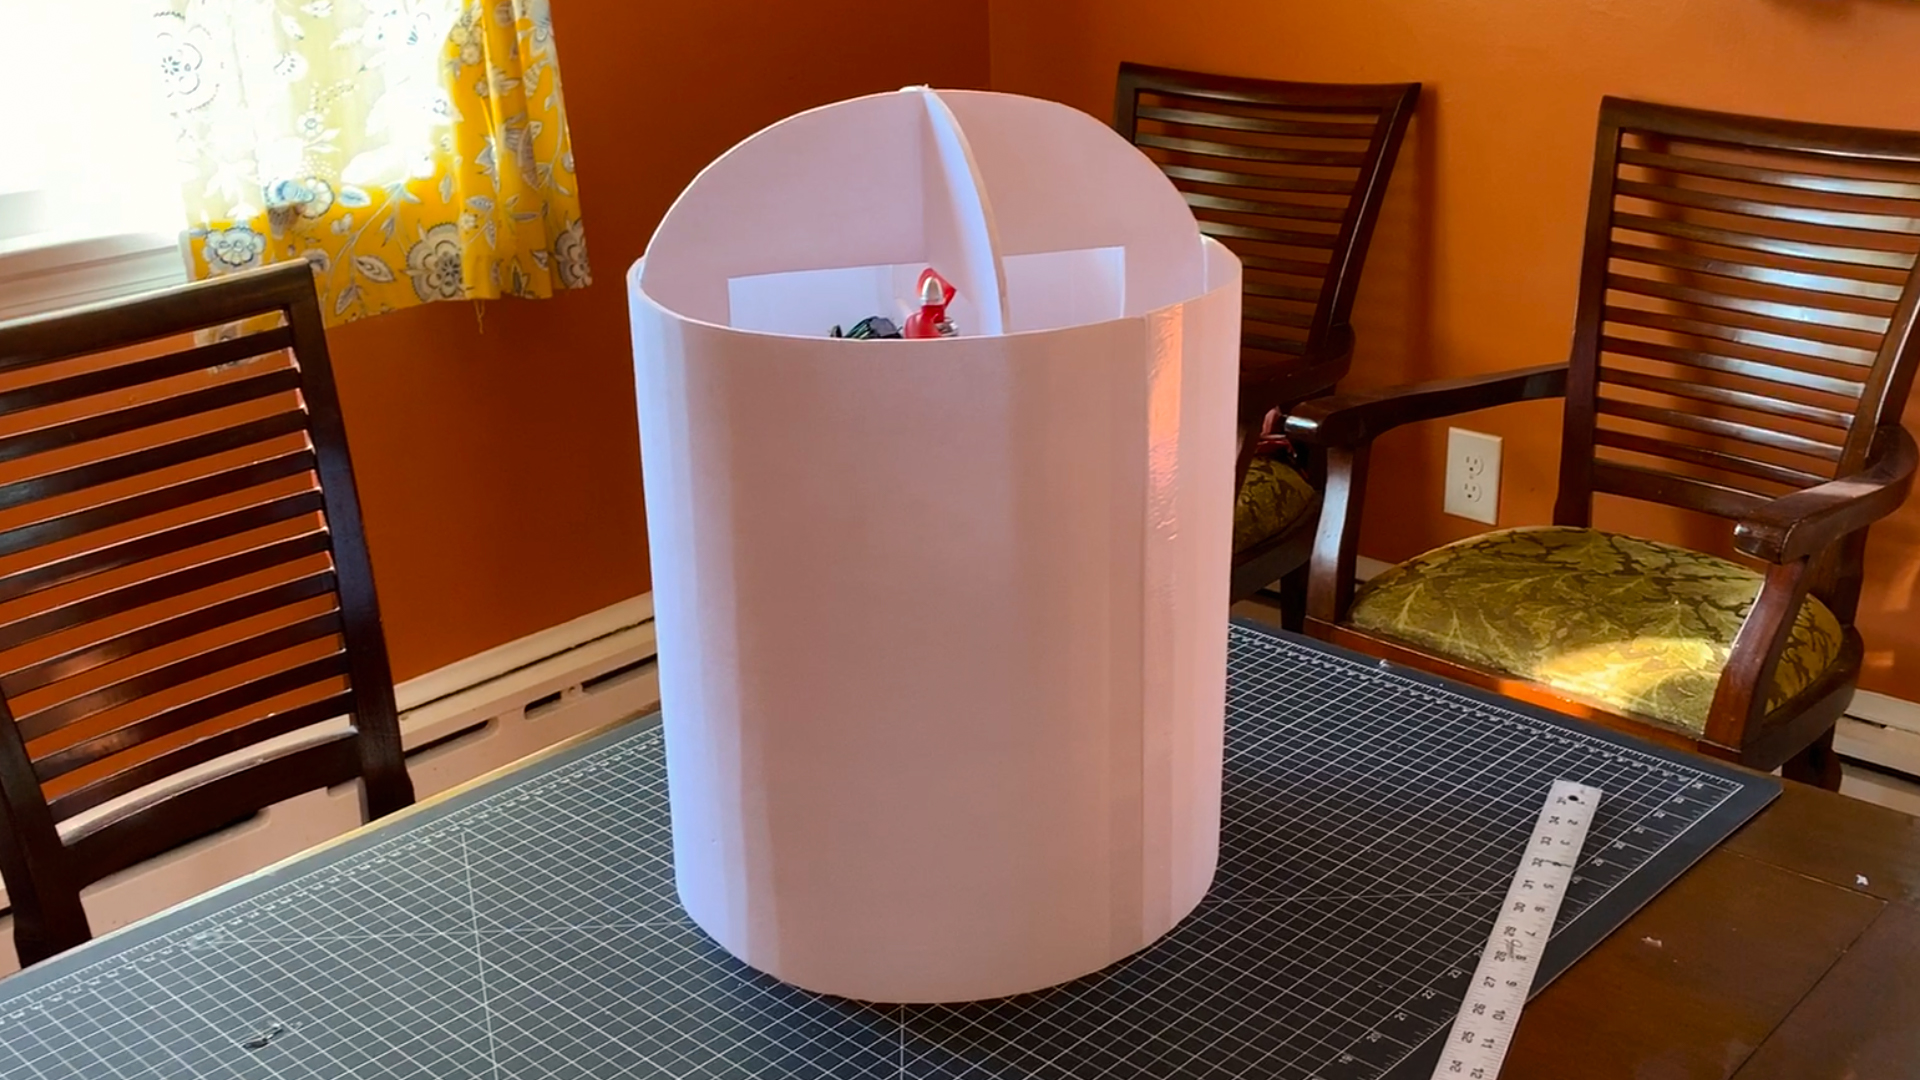
Then I cut out and glued on some triangular foam pieces to serve as the landing legs. I braced them with some wooden dowels, which was actually more for looks than anything. I eventually cut those off to save weight.
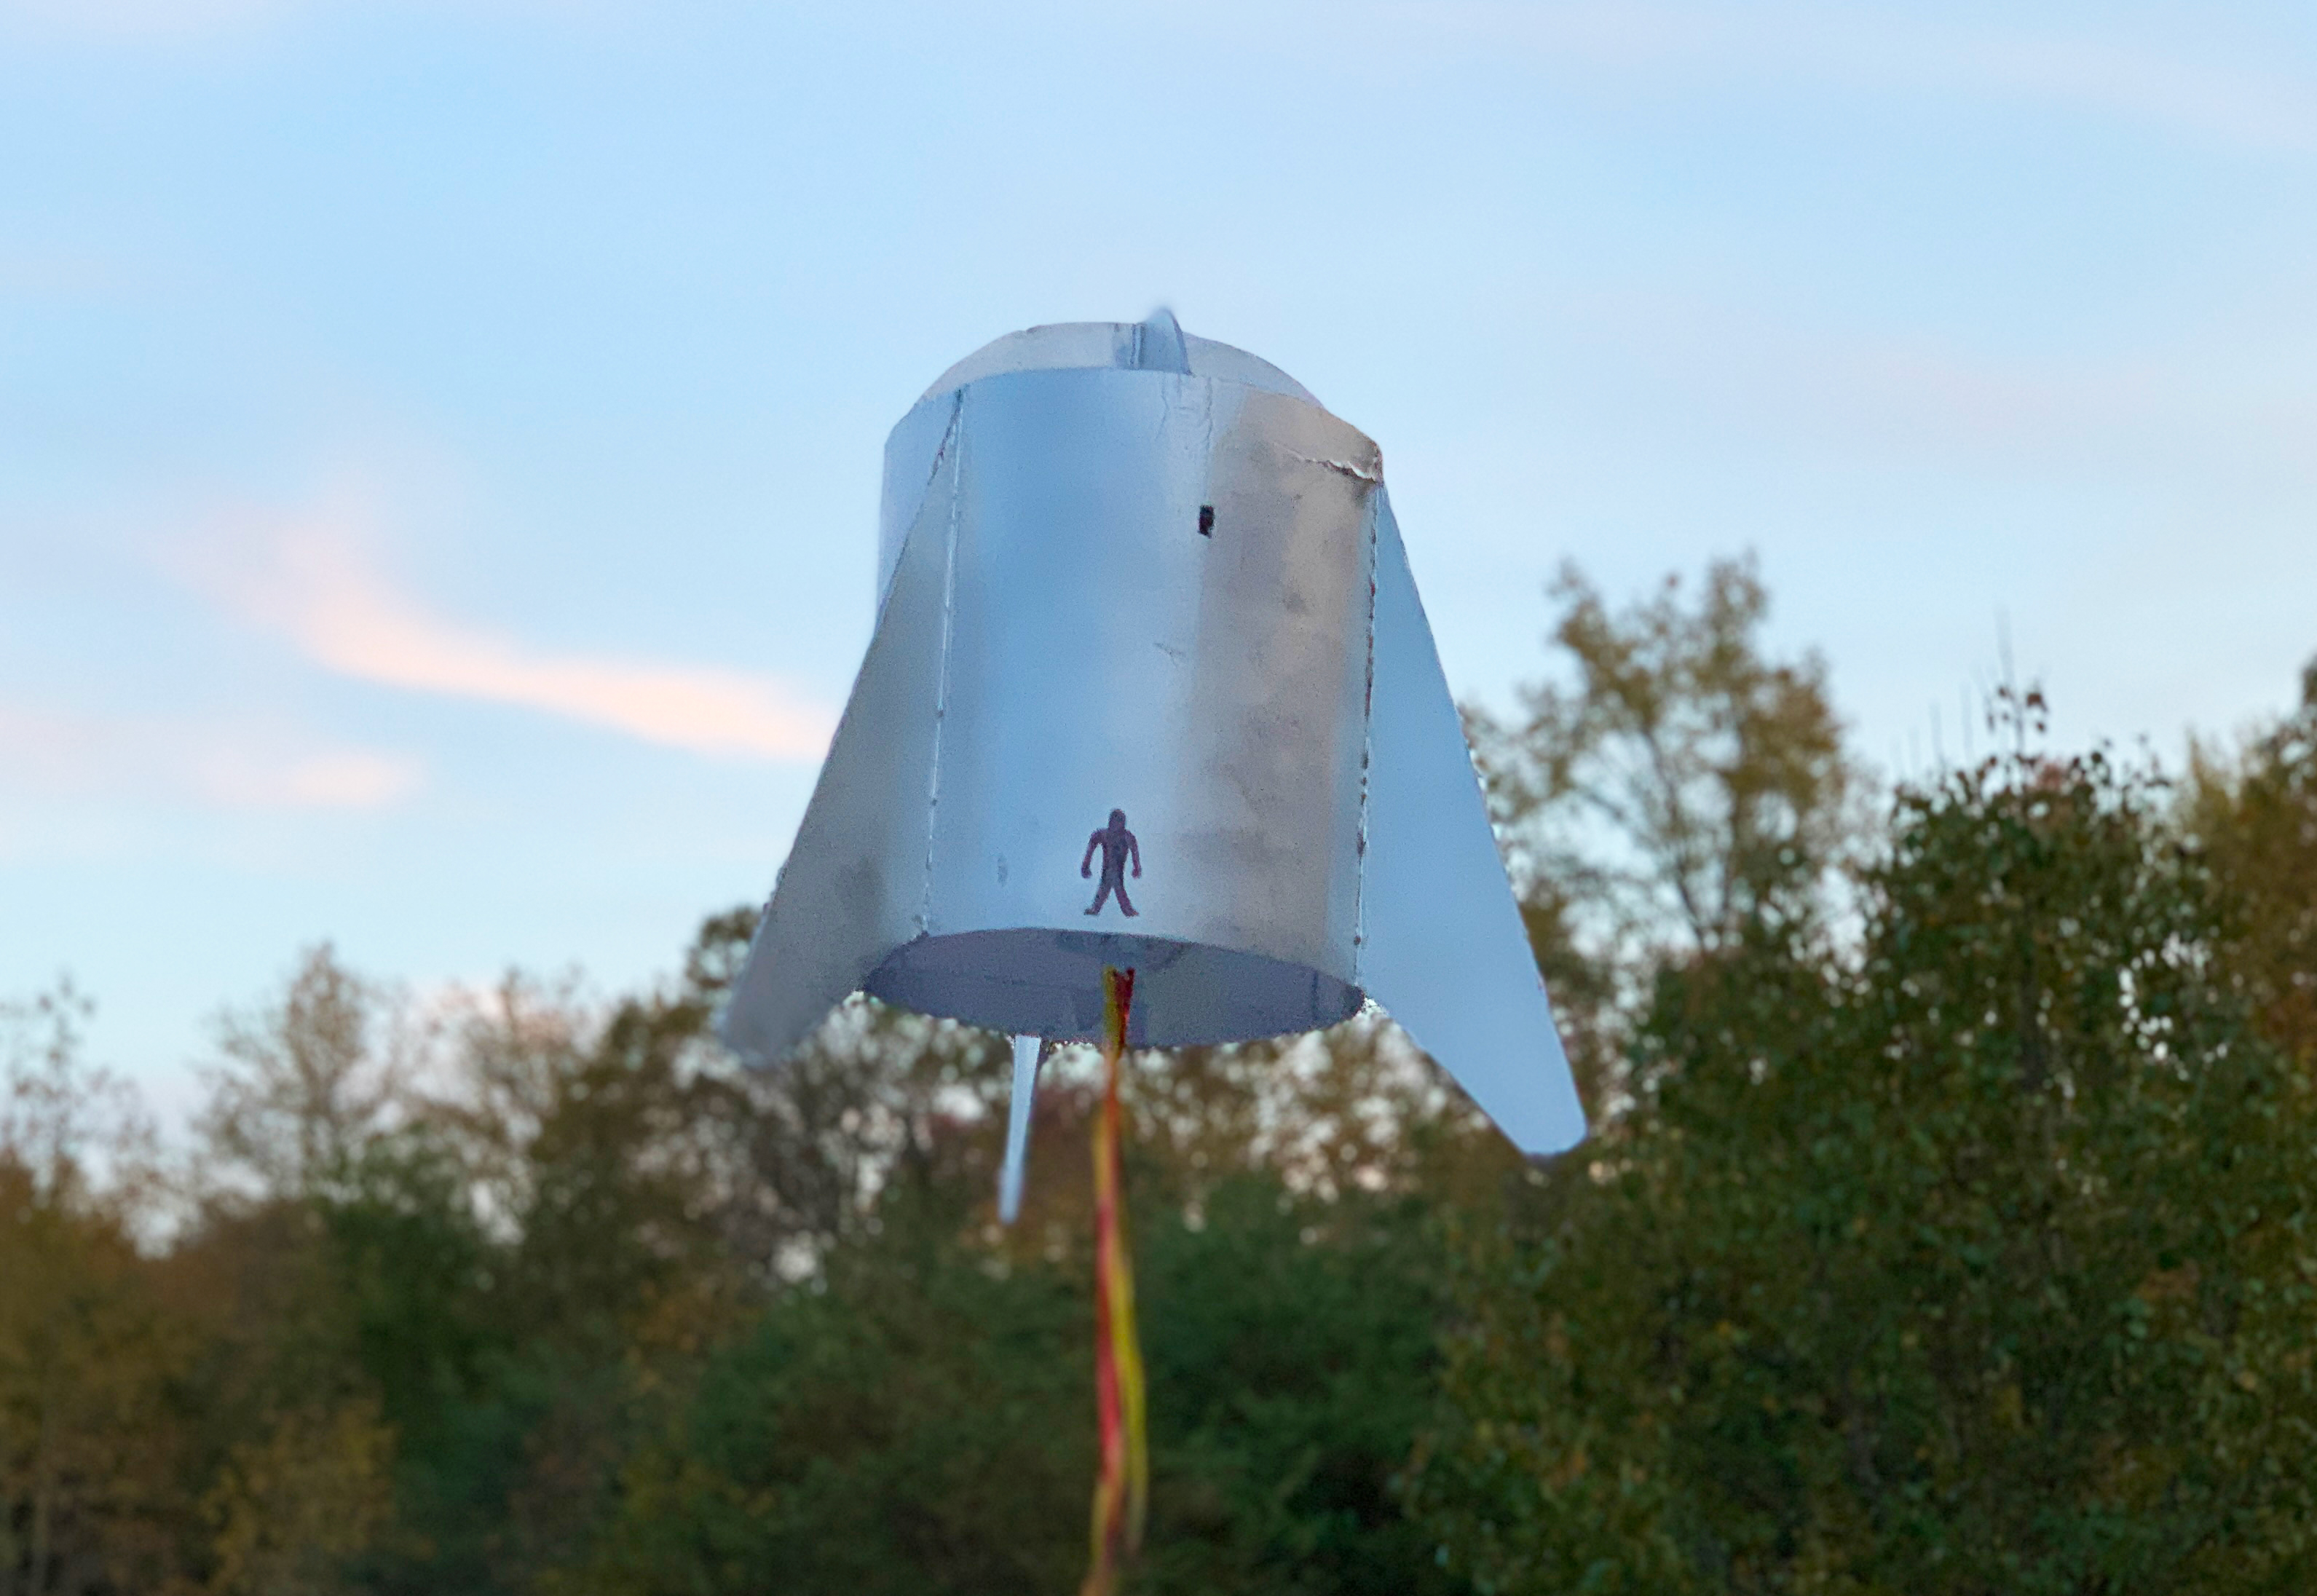
Last thing she needs is some paint:

What I Learned
This project was not meant to be a polished final product, but rather a starting point to learn about control of tailsitter VTOL aircraft, similar to the real Starship. I learned a lot from this project that will be directly transferred over to the next iteration of my own Starship program:
1. Stabilizing with control surfaces requires much higher PID gains than conventional motor RPM control used for multirotors
- I found through tuning this vehicle's PID gains that the Proportional term needed to be much higher, which made sense because it requires a lot of control surface movement to hover a 3D airplane, for example. What surprised me was that it also required substantially higher Damping term (even more than what would normally be required for the increase in P term). This was surprising because I thought the airframe had plenty of natural damping compared to a multirotor that has almost no natural damping because of the lack of aerodynamic surfaces.
2. Control surfaces might not be the way to go on the next version
- Because of the large surface movement required to stabilize the vehicle, it lacks the maneuverability I was looking for. By vectoring thrust over a control surface which then deflects the thrust to create a control moment, significant time delay is introduced which is a nightmare from a controls perspective. I think I want to investigate direct thrust vectoring in the future, i.e. pivoting the motors directly for a more instantaneous control moment.
3. Larger propellers will give more total thrust, but will result in less control authority...
- This one seems counter-intuitive. More thrust = more control, right? Well, not exactly. Larger propellers generate more thrust because of their larger disk area, but this thrust is moving slower than a smaller propeller generating the same amount of thrust. This goes back to the control delay problem discussed above. The slower moving thrust just doesn't have the 'punch' to quickly stabilize a vehicle when it's directed over control surfaces.
4. The fewer the parts, the better
- I added the wooden dowels on the landing legs for added support, and quite frankly, because it made my Starhopper look more like the real thing. I ended up needing to ditch them to save on weight at the expense of looks. In the future, I'll need to focus on getting something working THEN making it look nice, rather than trying to do it all in one go. When experimenting, keep it simple.
Conclusions
This was a fun project to learn about control of tailsitter-type VTOL aircraft. As with all projects, things didn't go exactly as planned, but that's when the learning happens. I hope you feel inspired to try building something new and different. If you enjoyed following along, sharing my video or subscribing to my channel to stay up to date on my Starship program would be greatly appreciated!
Youtube: https://www.youtube.com/channel/UCPe7XrmOPtz4OjL6KGtvJMA
You can also follow along with my Starship development on it's own Hackaday page:
https://hackaday.io/project/175745-radio-controlled-starship-program


https://youtu.be/zrONFl19QlI
Keep up the great work...good luck with your future projects. Loved this one.
Log In to reply
Cheers
Log In to reply