Removable Landing Gear
by HilldaFlyer


Credit for this article goes to Swappable Landing Gear ~ Flying Penguin RC
by Flying Penguin RC, Posted: February 9, 2014
http://flitetest.com/articles/flying-penguin-rc-removable-langing-gear
The reason for writing this article was because on March 30, 2014, alibopo commented on Flying Penguin’s article on how to make Flying Penguin’s design of swappable landing gear stronger - by changing the direction of the cut in the plywood so that the grain of the top and bottom ply would run fore to aft. One could also join the top of the square dowels together with another piece of plywood, so they are joined at the bottom with facia ply and at the top by another piece of plywood.
My suggestion would be to use a single piece of plywood, say 3/16 to 1/4 inch thick to substitute for the square dowels. Since a picture paints a thousand words, here is my 18,000 word essay of my version of Flying Penguin’s awesome swappable landing gear, so let’s get crackin’...
Materials Needed:
Wood Facing and Support
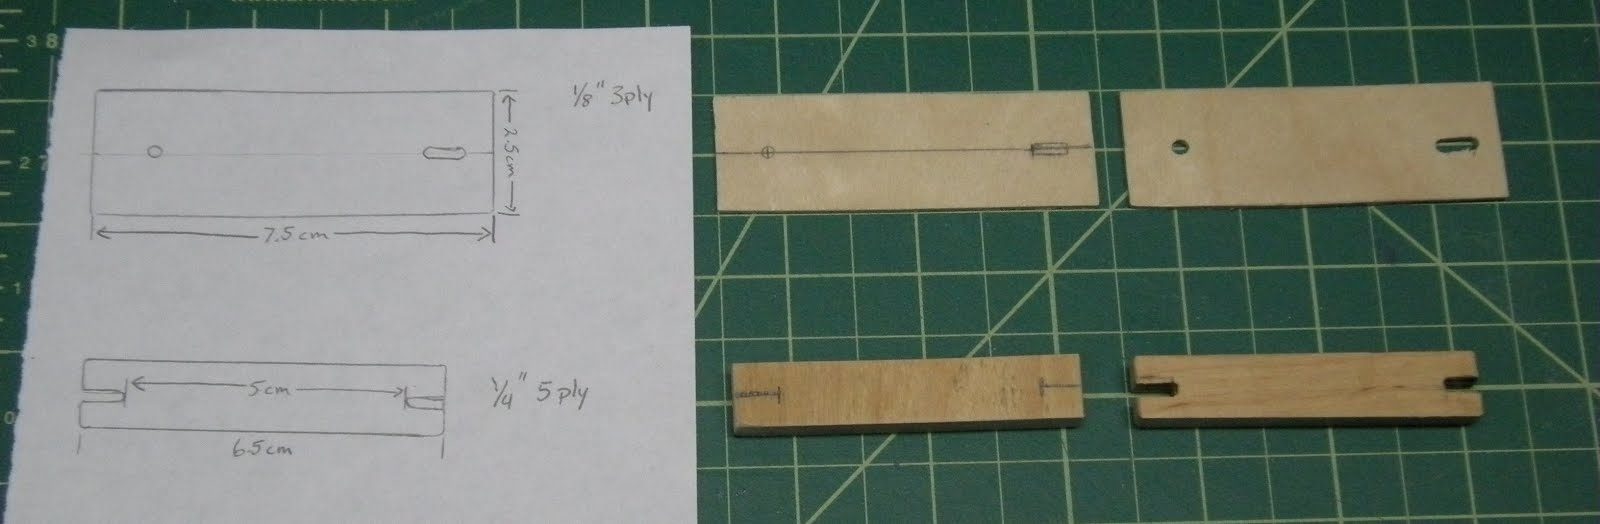
3 ply 1/8” plywood, 2 pieces 2.5 x 7.5 cm
5 ply ¼” plywood, 2 pieces 1.3 x 6.5 cm
Drill and ⅛” bit
Hobby knife
Glue & Clamps
Landing Gear Wire (shiny metal clothes hanger)
Wire cutters
Pliers to bend the wire (a bench vise is really helpful)
Pen to mark wire
Landing Gear - Version 1
My first landing gear for the FT- Racer was pretty simple, made from 2 pieces of 3/32” plywood cut into a 2.5 x 3.5 cm rectangle (the plywood was harvested from a clementine box). The wire was a coat hanger bent to the precise shape of a 1 cm square “C” and fastened to the plywood with wire ties. A small piece of balsa wood was glued in place to keep the wire from rotating in the wire ties. It works pretty well, but since it was glued to the surface, a hard landing would probably tear the paper from the foam. You can see the wrinkle in the wing starting to develop so… onto the making something stronger.
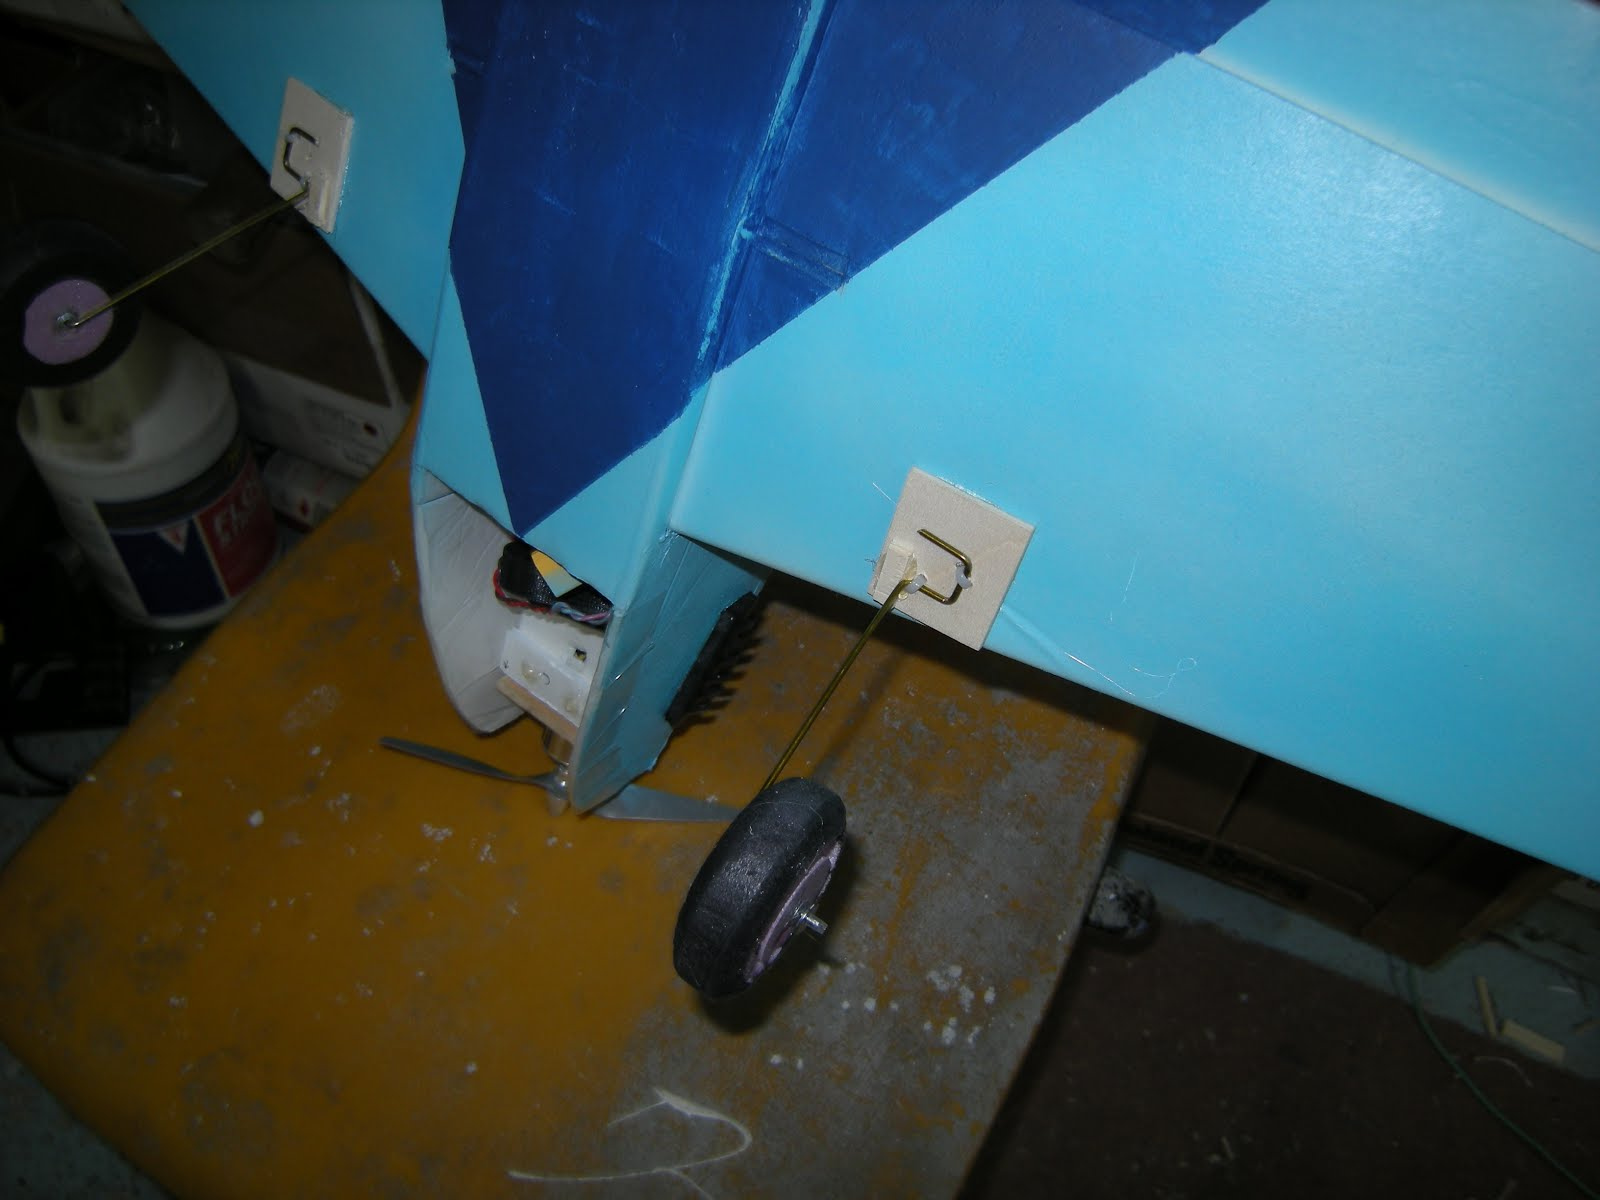

Removable Landing Gear - Version 2
Flying Penguin made a really cool set of landing gear that are removable (referenced above). Using this design, I created my version.
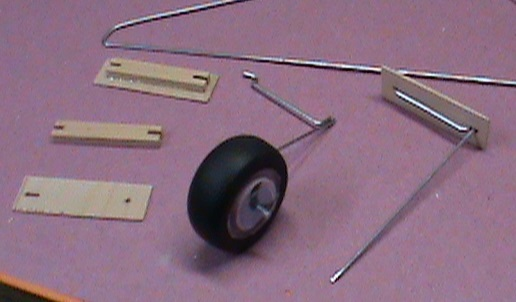
Wood Base
Plywood Facing - Cut 2 pieces of ⅛” 3 ply into rectangles 2.5 x 7.5 cm. Drill 1 hole along the center line 1 cm from the left edge and another 5 cm from it (6 cm from left edge). The third hole is about 8 mm from the hole #2. Use a hobby knife to join holes 2 and 3.
Plywood Support Structure - Here is how my gear deviates from Flying Penguin’s. Rather than using two square dowels, I cut 2 pieces of ¼” 5 ply into rectangles 1.3 x 6.5 cm. Cut notches into both ends about 8 mm deep along the center line. The holes should be 5 cm apart and wide enough for your wire. I use a Black and Decker RTX rotary tool (similar to Dremel) with a cutoff blade. I have also used a scroll saw and a jigsaw to cut the notches.
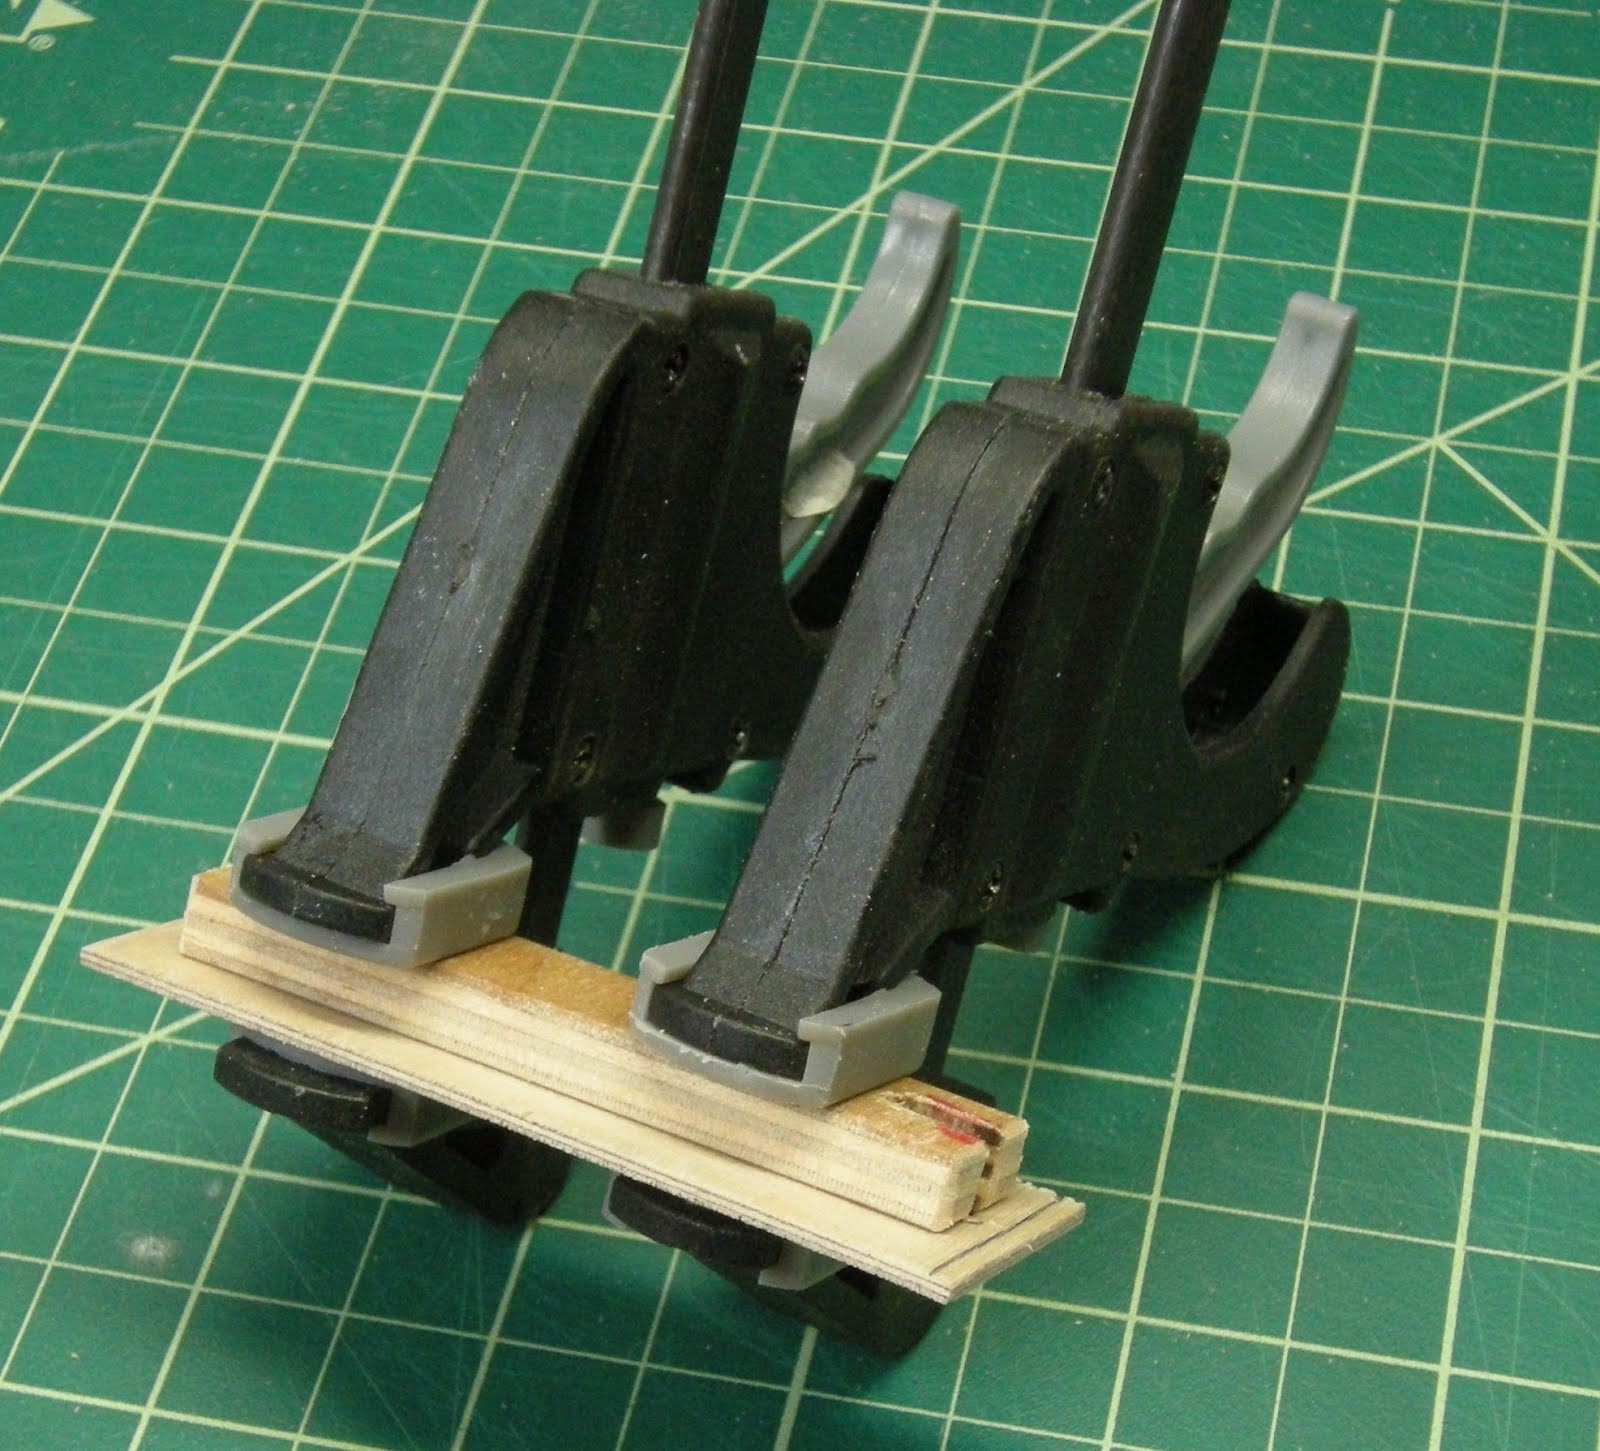
Before glueing together, I like to bend my wire (explained below and in Flying Penguin’s Article) and make sure it all fits. The notches can be enlarged if the bending is slightly off.
If all aligns, then glue together making sure the holes with the notches line up. I had to practice with 5 hangers before I had the technique well enough to produce the correct length bends - good thing my wife won’t notice the missing clothes hangers… at least she hasn’t yet noticed.
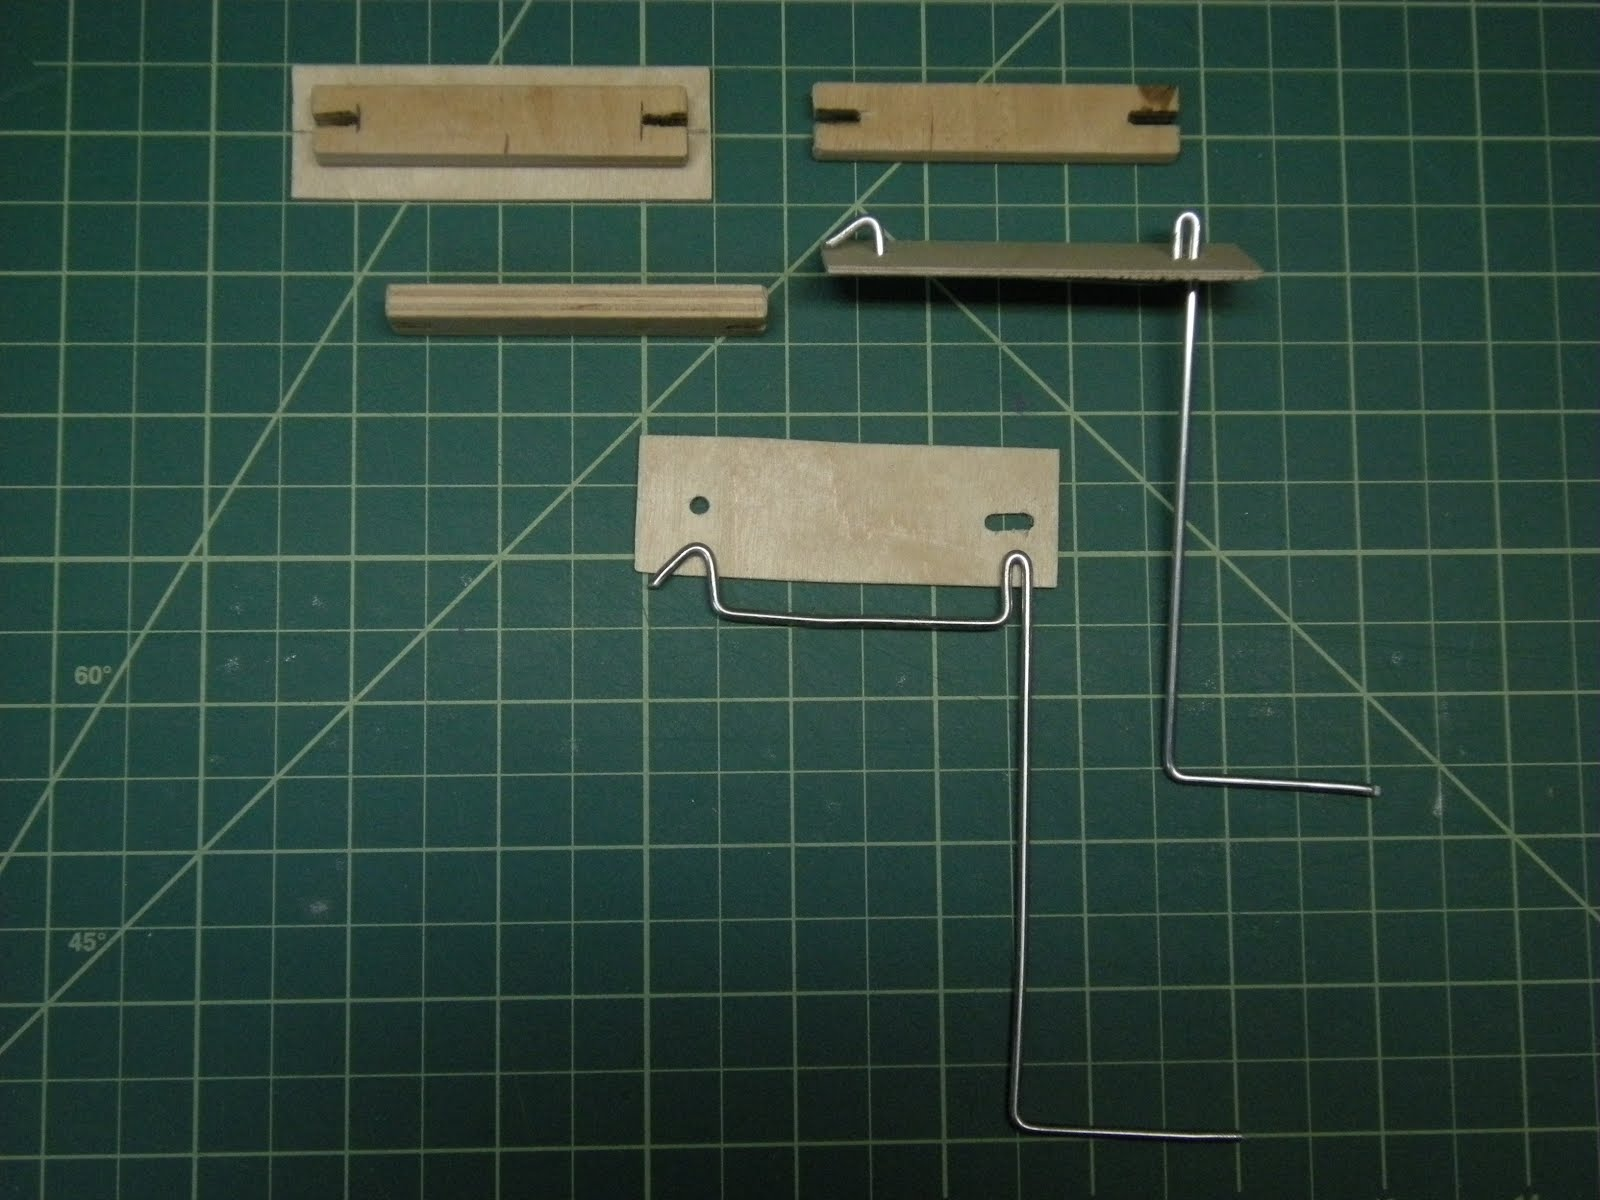
Bending Landing Gear Wire
Take one of your wife’s shiny metal coat hangers, but I will deny I told you this…
Remove the twisted part and hook (but don’t put it back in closet). Straighten out the rest of it with pliers or just harvest the long straight pieces. The overall length you need depends on the model and the length between the mount and wheel. In this example, for the Flying Penguin’s P51 (and for FT Spitfire) cut two about 25 cm long.
Mark the bend points along the wire at 2, 7 and 9 cm.
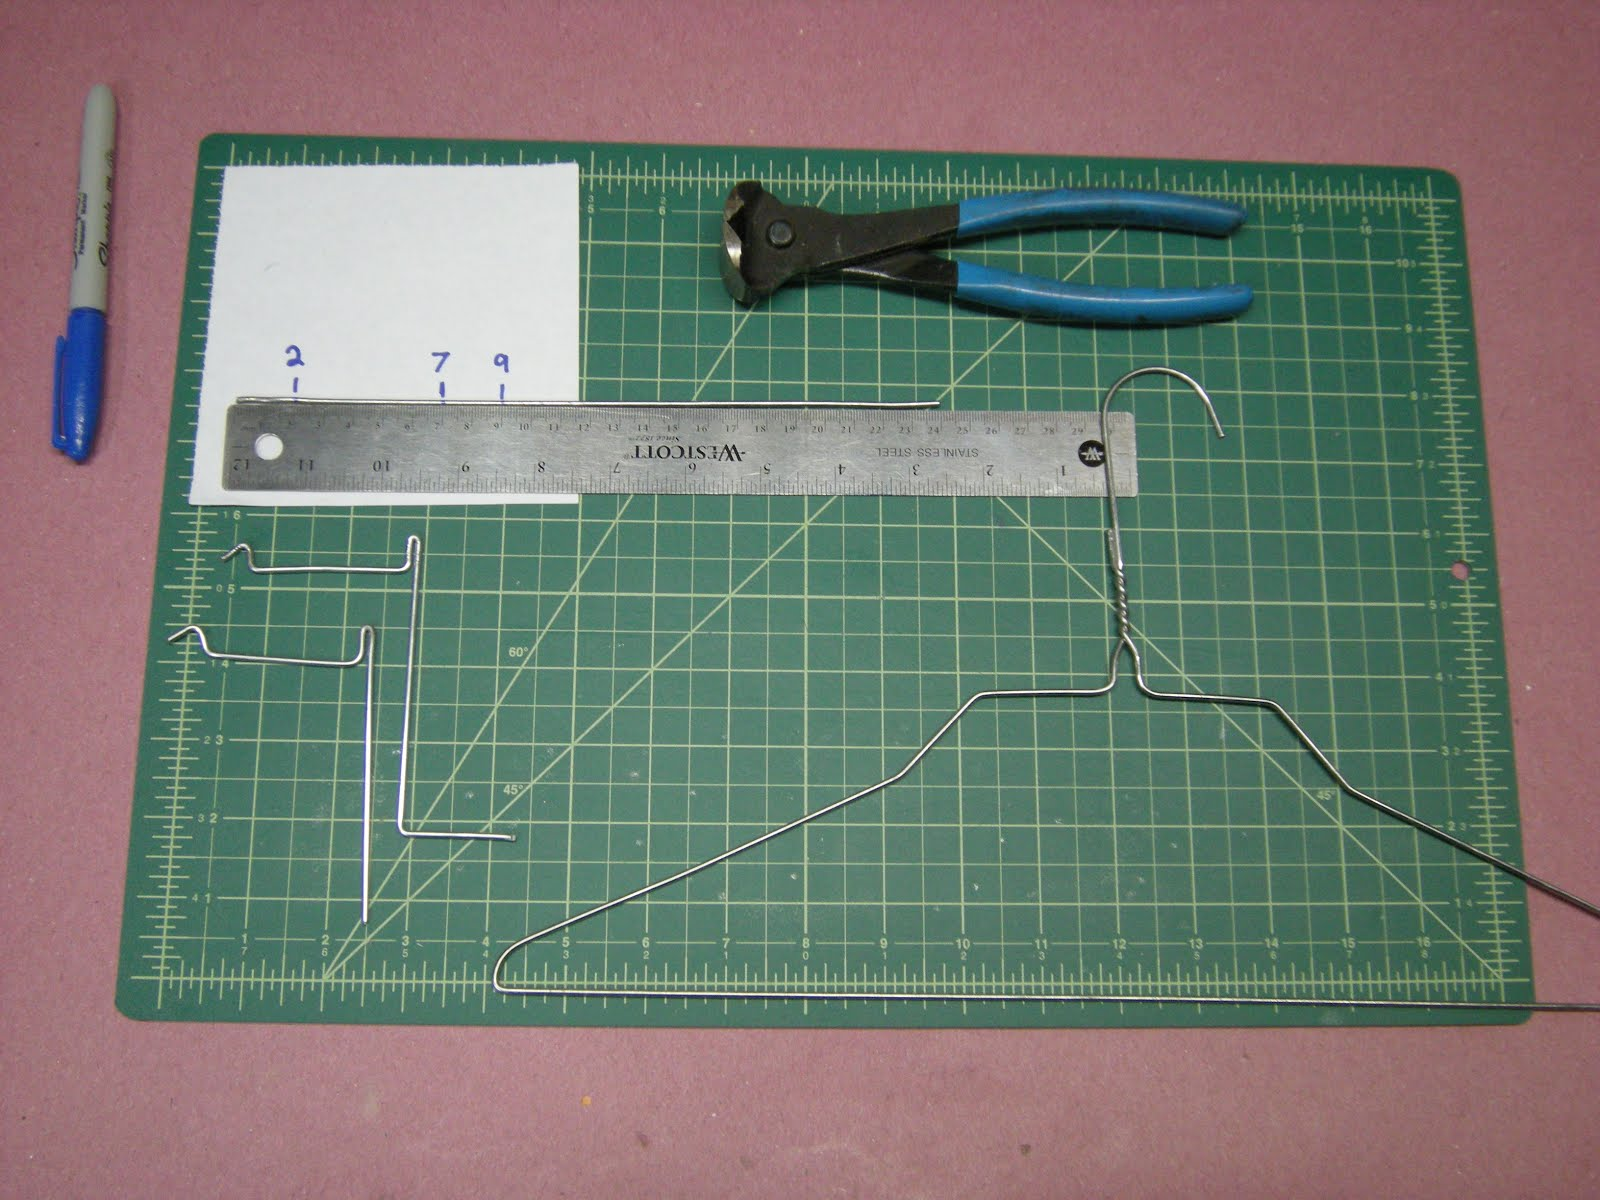
Bend the wire 90 degrees at points 2 and 7 forming a blocked “C” (A-C).
At 9 cm bend in the opposite direction of the “C” as far as you can with needlenose pliers. Use the pliers or vise to squeeze the loop tight (D-F).
Bend the first 2 cm section in half with pliers (G). The tip of this “V” bend should make contact with the backside of the plywood facing and will keep this end from slipping out of the hole in the plywood facing.
Bend an “L” at the length needed for wheel height (H).

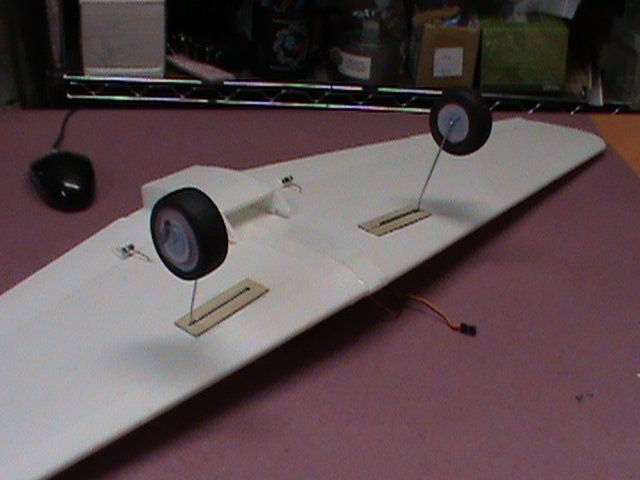
Slide the wheel onto the wire hanger and fasten with hot glue or fuel tubing. The wheel below is made of pink foam insulation. If you are interested, construction of the wheels can be found under the title “Foam Wheels” in FliteTest.
Flying Penguin explains how to cut rectangular holes in the wing of you plane and glue in place.
Congratulations - you’re done!
Oh, Just about forgot this tip... If the fit of the wire into the wood housing is a bit loose and the wire is easy to pull out of the slot in the wood, just give the little “loop” a twist (rotation) with a pair of pliers so it wedges itself against the slot cut in the plywood structure. At the opposite end, the curved “V” end slides through the hole and when fitted and should touch the plywood face, keeping it from sliding out.
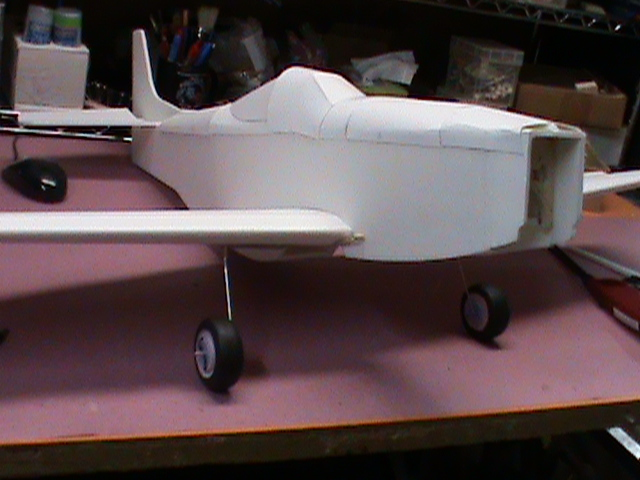
Here is the second set of wheels on my first build of Flying Penguin’s P51 (obviously, I need to practise with the poster board. Flying Penguin’s plane looks fantastic!).
HilldaFlyer - May 2014


Mustang is looking good, Have you maiden yet?
Log In to reply
Log In to reply
Log In to reply
I'll see what I can do to record the flights.
Log In to reply