What's up everybody?
So scratch building is a big part of foam board RC. For starters, any design without a speed build kit needs to be cut out somehow, and for us poor souls without laser cutters, scratch building is the only way we can get a design from our head to the foam board. The other, and in my mind more important, factor is price. Speed build kits are expensive- you have to pay for the cutting, packaging, and shipping as well as the foam board. On the other hand, in a scratch build you only pay for the price of the foam, not anything else. However, with these positives come some negatives. Scratch building takes time, effort, and most of all, practice! But once you get the hang of it, scratch building becomes second nature.
So once you decide to scratch build, there are two techniques that I know of that you can use. I will go over both of them here, but if you want more detail, and some visual references, be sure to check out the video above.
The first technique is quick and simple, but does have some downsides. The idea is that you use some spray adhesive (3M Super 77 or similar), to spray the sheets of paper to the foam board. This works great, and is very simple. You have a ready made template literally glued to the foam board, and all that's left to do is to cut it out. But, there is a problem with this technique, and that problem has to do with weight. Adding around 40-50 sheets of paper to your airplane is not a great way to conserve weight. Since foam board airplanes are light anyway, it is not a huge problem for sport builds, as you can sneak a little bit extra weight on and get by. But for any build that adds on weight in other places: painting, scale detailing, etc., the added weight of the paper becomes a big problem.
So, introducing my technique! My dad and I developed this method when we were just starting to scratch build, and since then, I have used it almost exclusively for a few years, slowly getting it to a place where I feel that it is ready to share! Before we start, I just want to say that if you are interested in implementing this technique, please refer to the video above, because I talk more about some minor details that I will only briefly go into in this article.
This technique starts with cutting out the blank borders of the sheets of paper, and then taping them together so that the parts perfectly line up. After that, you tape or pin the plan to the foam board.
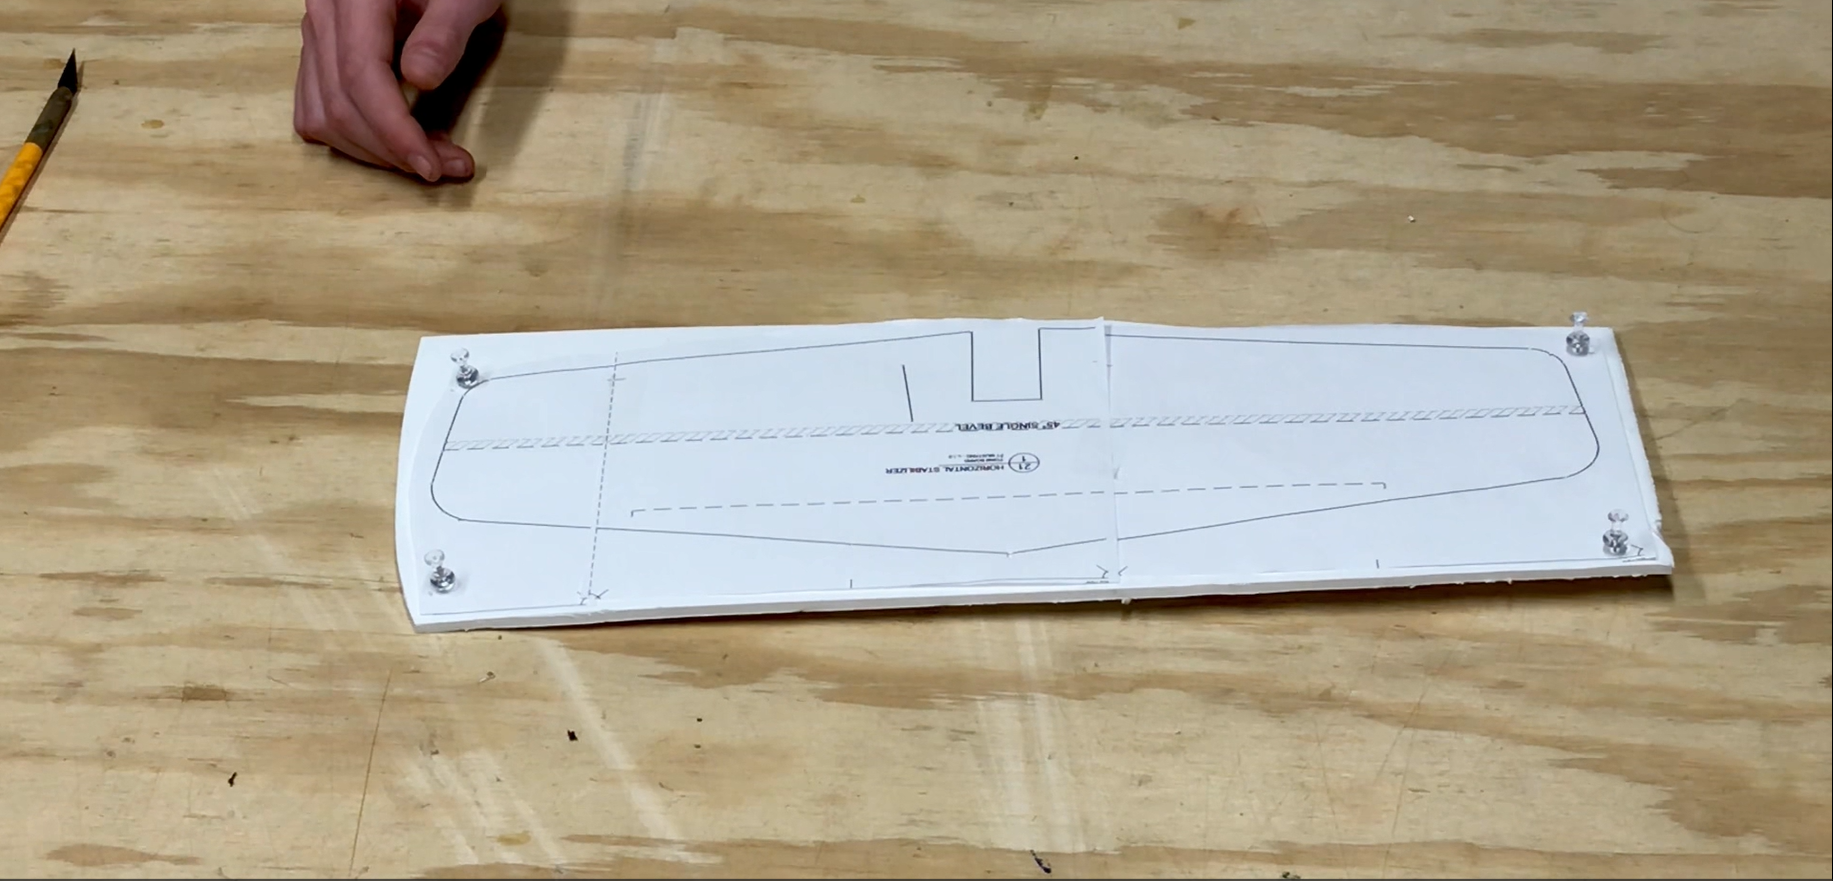
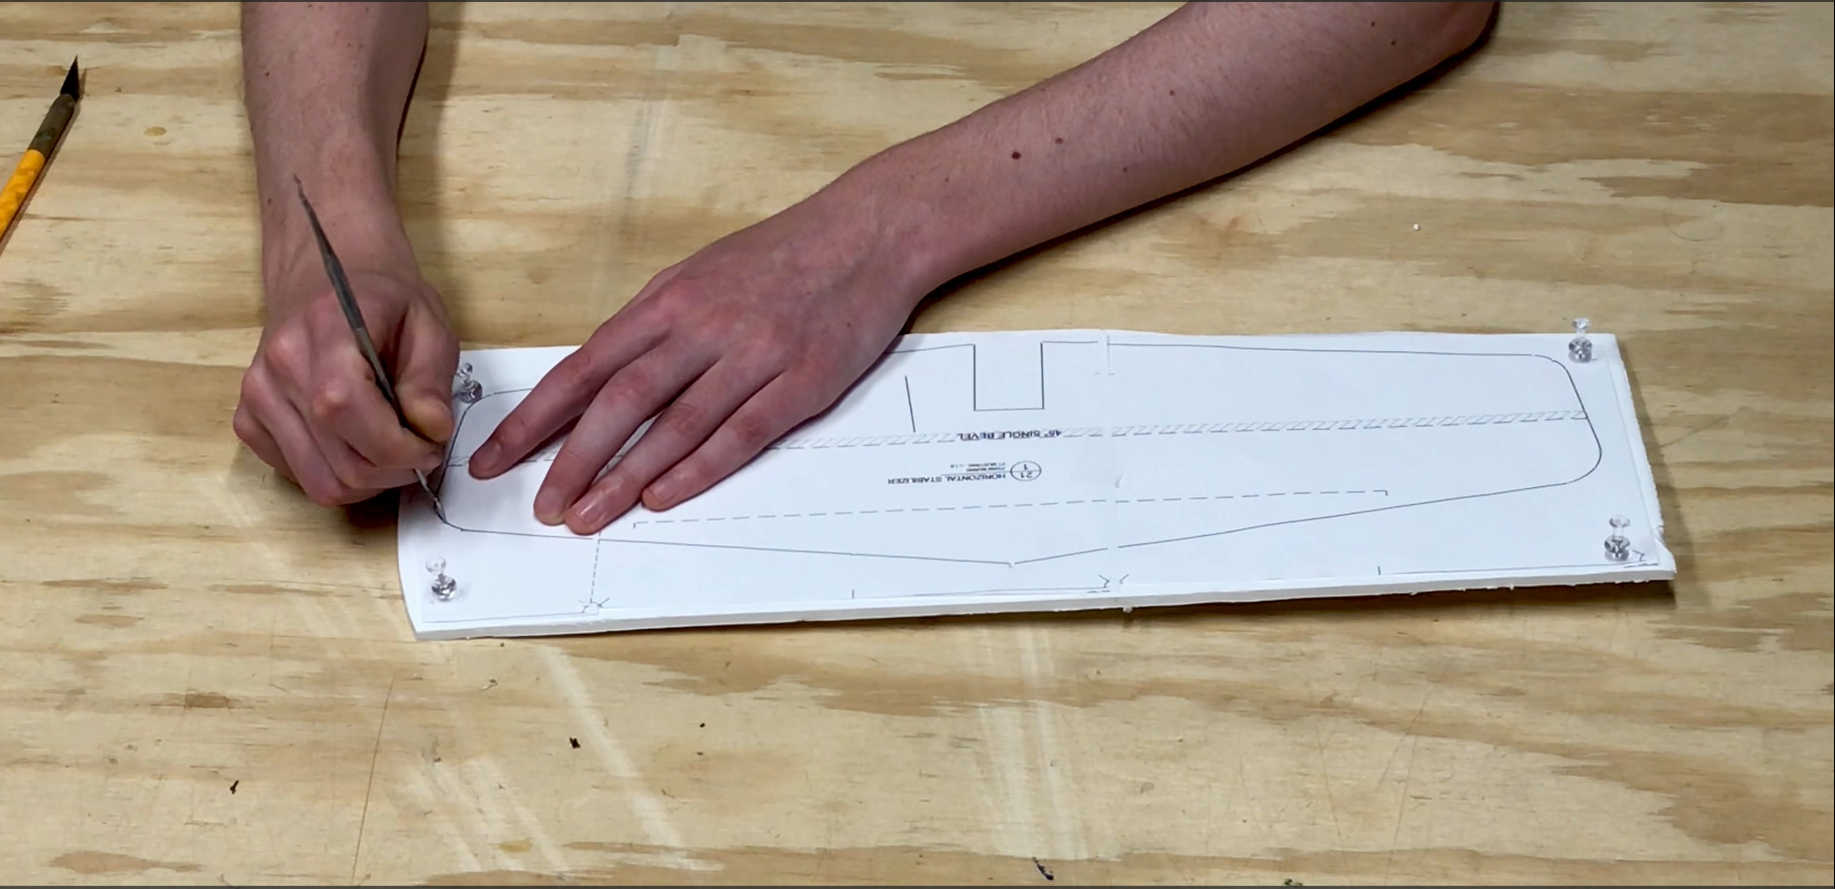
Once the paper is firmly on the foam board, the next step is to "connect the dots." Use any sharp poking tool, like an awl or even a push pin, to make holes at the beginning and end of every straight line in the part. For curves, put a hole every quarter inch or so, so that you can easily freehand the curve just by connecting each dot.
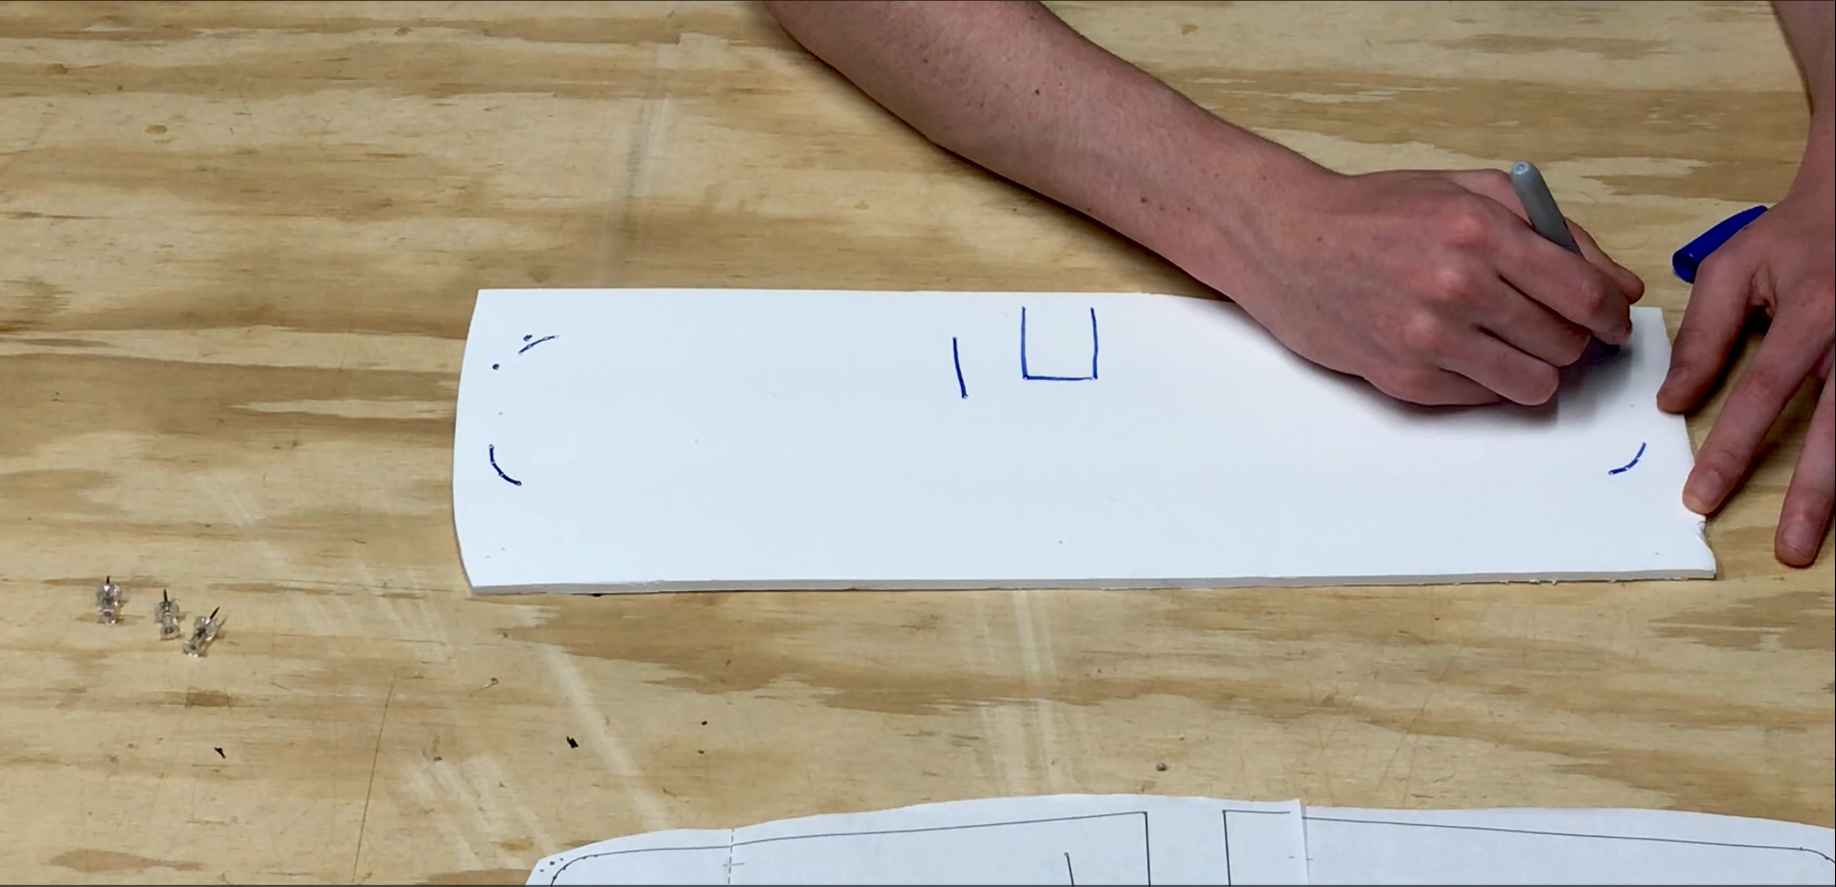
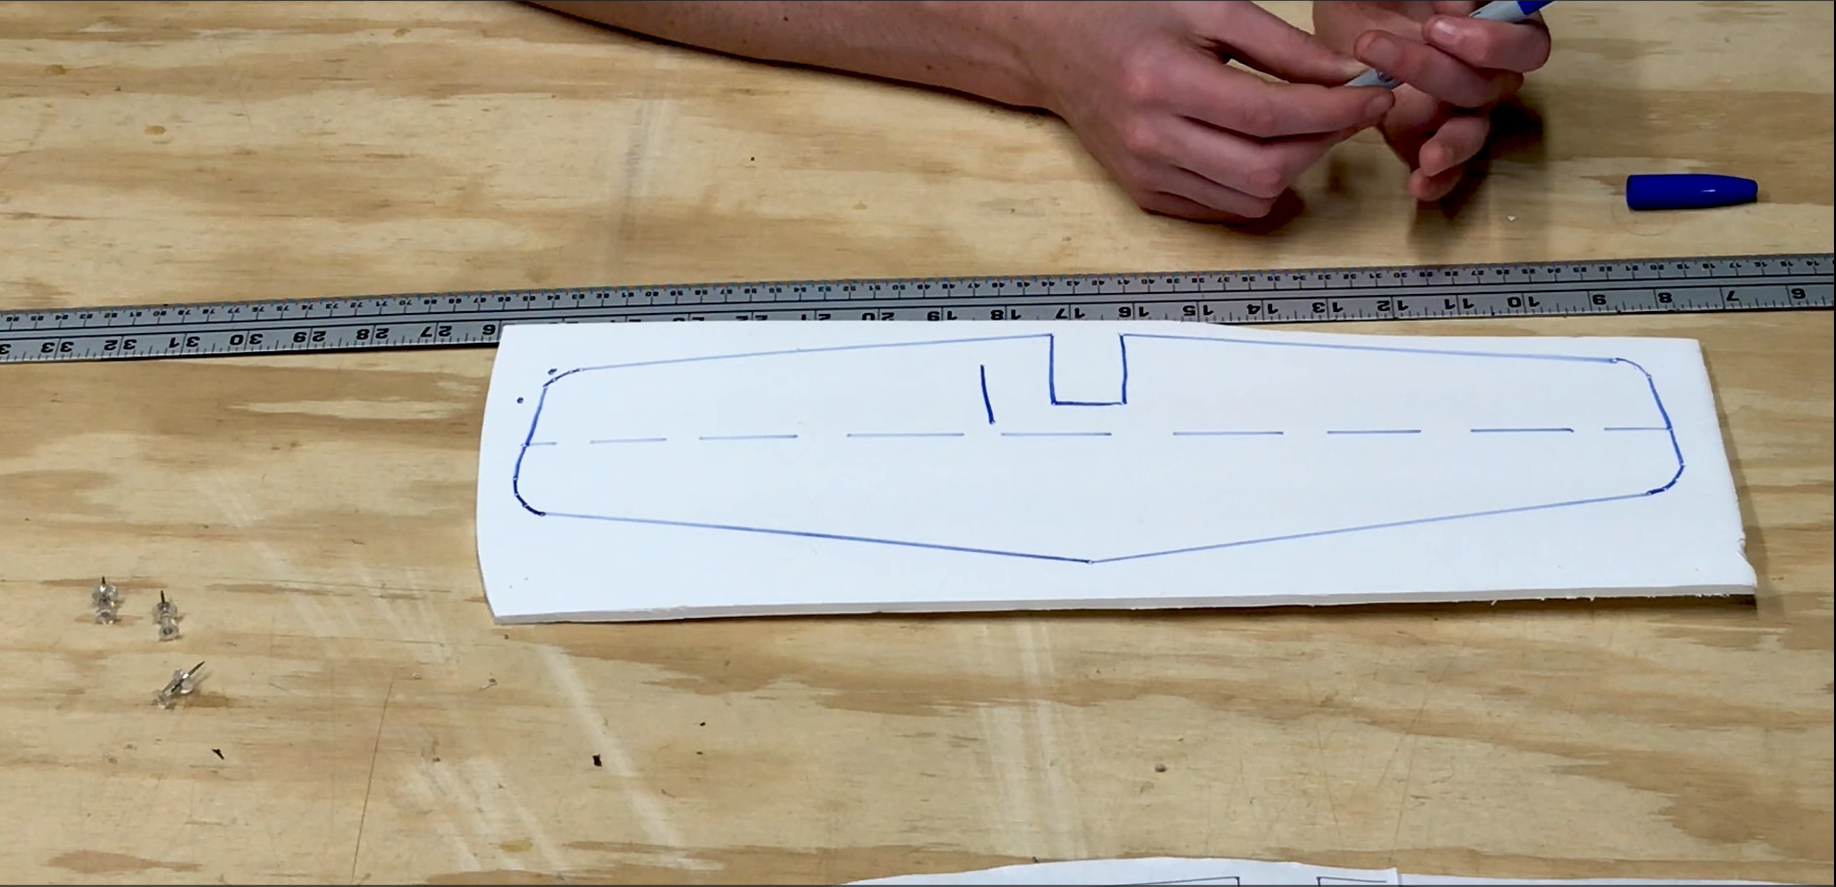
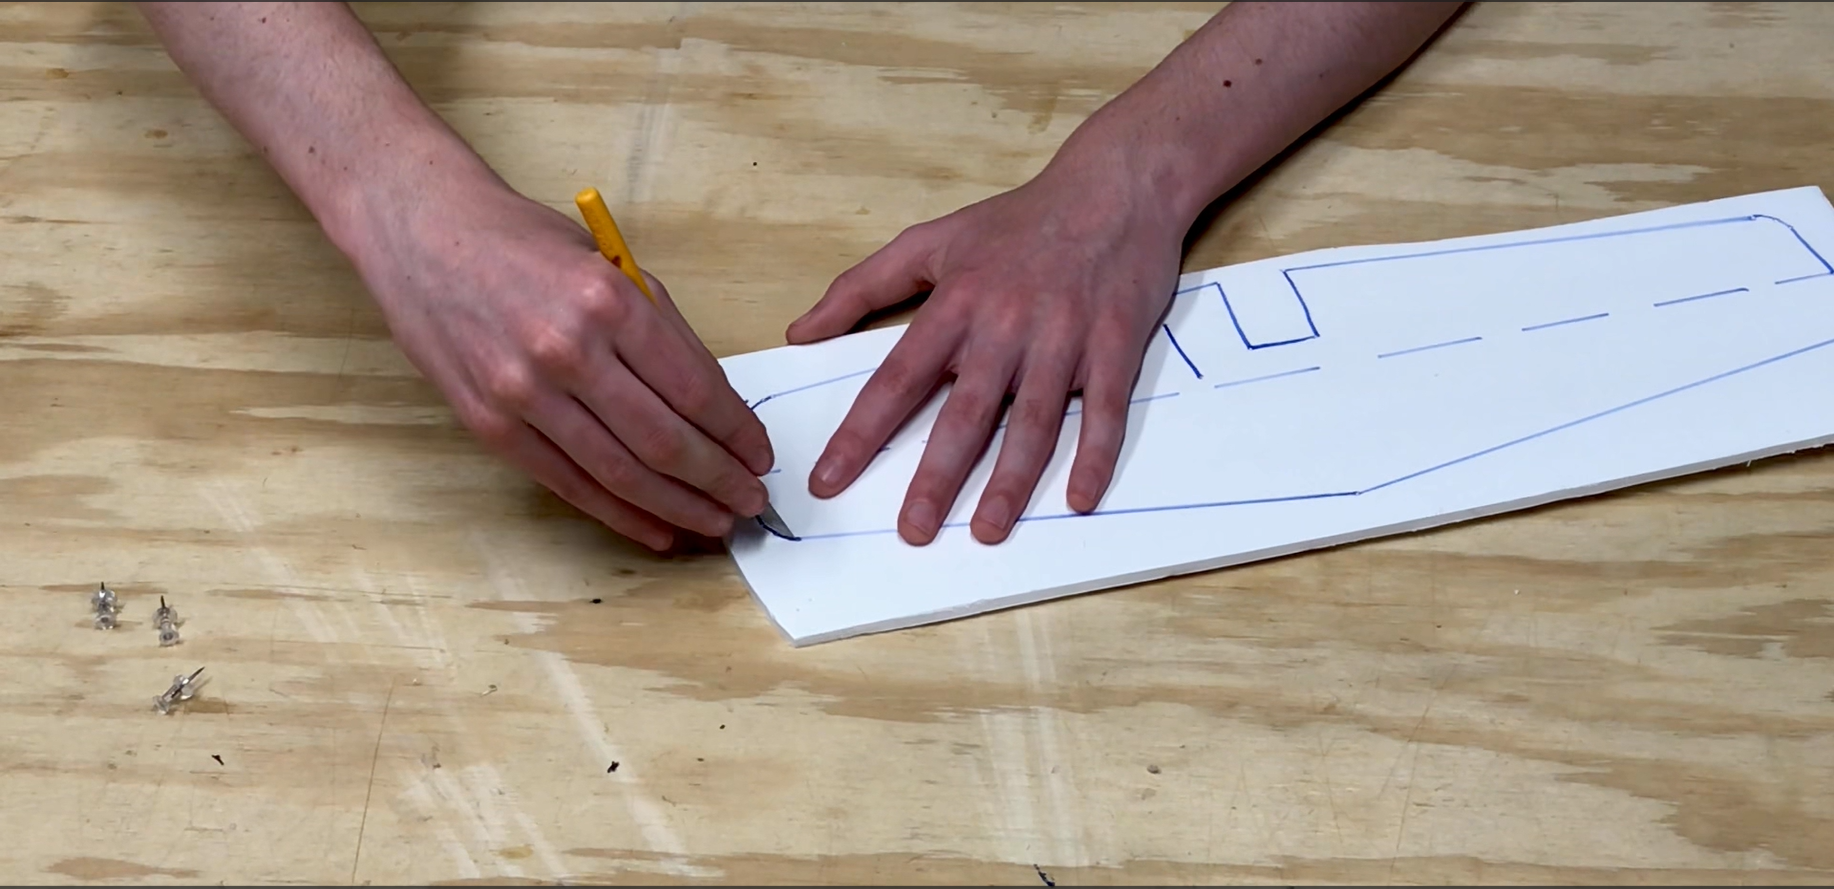
Once all of the holes are poked into the foam board, you can remove the paper. Now that you have all of the dots, its time to connect them! Use a Sharpie marker or a pen to draw the part using the holes that you just made. For long straight lines, use a ruler to connect the dots representing the beginning and the end of the line, and draw a straight line using the ruler as a guide rail. Be sure to leave a little bit of space between the edge of the ruler and the dot, so that the tip of the Sharpie is running flush with the beginning and end hole, instead of being slightly offset. The reason that this happens is that the edge of the Sharpie is what is running against the ruler, but there is a slight gap between the edge and the center of the Sharpie, where the actual line is being drawn. Moving the ruler out about an eighth of an inch will keep that from happening. For the curves and smaller straight lines, it is easier just to freehand them, instead of using a ruler.
Once all of the lines are drawn onto the foam board, it should exactly resemble the part on the paper. Check it against the paper template just to make sure. It is much easier to add little details that you forgot right now instead of waiting for later!
Now that the part is drawn onto the foam board, it is time to start cutting! Be sure to have a fresh blade on your knife, as fresh blades cut through the foam a lot easier and smoother than dull blades, and you end up getting a much better looking and working part. For curves, I like to bring my knife almost vertical to prevent accidently beveling the foam.
Once the piece is cut out, you have a finished part! This process is very simple, and once you do it a few times, you will definitely get the hang of it, and will be able to cut some really beautiful parts!

Well, I hope you guys enjoyed this little tutorial, and hopefully it will inspire some of you to get into the art of scratch building! Thanks so much for reading, and until next time, I'll see you guys at the field!
FOAMBIRDS RC


Log In to reply
Log In to reply
Log In to reply
Log In to reply
Log In to reply
Log In to reply
A lot of FliteTest designs are available in plan format for free. Just go to the flitetest.com home page, and scroll down until you find the plans. Some other plans are available through an FTCA (FliteTest Community Association) membership, which is not very expensive.
Hope this helps!
Log In to reply
Thanks for the tip. I have been following FT since they got started and have most of their plans already. Have built several over the years. I was speaking of their latest planes like the Zero, Spitfire, F18 and others from John Overstreet. They sell build kits but I would like to just have/purchase the plans.
Log In to reply
Thanks for responding! They actually do have plans for the spitfire, as well as the mustang and the P-47. The plans are on the Flitetest Forums. Just search "flitetest master series spitfire plans" and they should pop up!
Foambirds RC
Log In to reply
Log In to reply