
Hello guys/gals!
Here i am again with another project, this is a plane for a friend who ask me to build an Aermacchi MB-339 A rc plane for him, i didn´t see any commercial kit at small size like this so i say "challenge accepted" .
As usual don´t use any plans, or computer design. Just because it´s my way of building planes. I still have an EDF like the one i use on the A-4 Skyhawk so the idea was make a plane little bit longer to take advantage of the greater span of the italian plane, also, i wanted to try make a plane with all the tricks and tips that i used before in other planes. The intake ducts where a real challenge, ´cause the original aircraft has very small ones, and built-in the wing roots, so i had to put them out of scale to reach enough amount of air flow for the EDF unit. Anyway, as i just have 3S batteries and the trust will not be as high as i wish.
Let´s get some Specs:
Lengh: 830mm
Wingspan: 930mm (with tanks)
Weight: 570grs (On flight conditions)
Engine: 55mm EDF 4200kv aluminium case from HK (4S Version)
ESC: 30A HK ESC.
Battery: 3S 1300mah 75C TATTU.
The build:
First i was drawing the Aermacchi for days before i start to make real size draws so i could put all the pieces of the plane, the electronics and reinforcements togheter in my head.

Once i have a real size draw i built it up from there:

My friend suggest add a landing gear in the future, so i left some balsa/plywood hardpoints inside the wing and nose:

With pacience and calm the plane begin to take his shape:


Nose cone made from a soft foam core, shaped by cutters and sand paper, as the wing tip tanks:


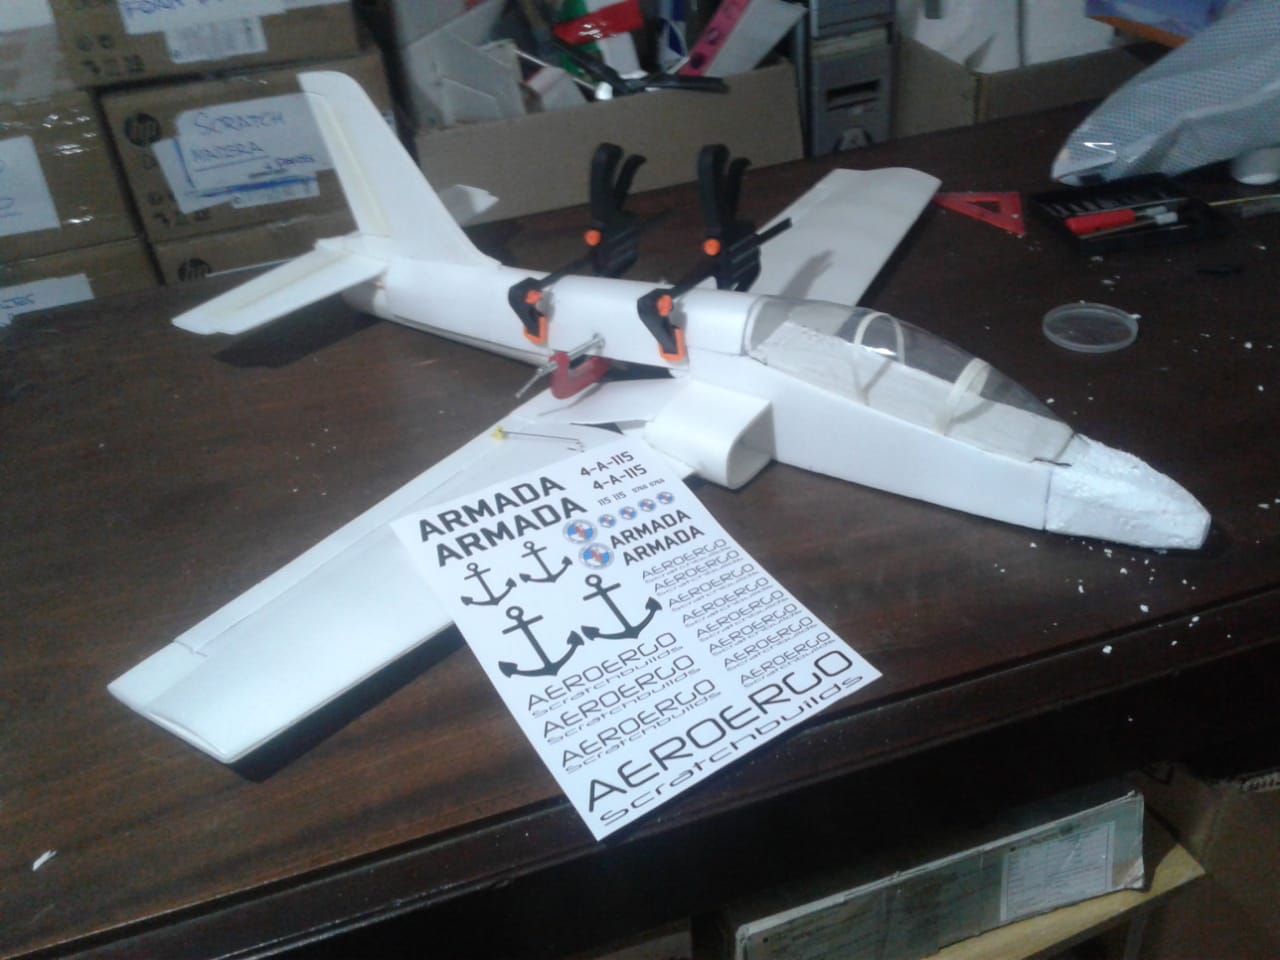
I made some stickers as the Argentinian Navy Aermacchi paint scheme. You can see here also how to cover the top of the plane.
I made this to put inside a plastic PET bottle and get a shinny canopy:


Almost done!

Ailerons pushrods above the wing to prevent some damage on landings and ventral fins made in hard balsa so it could bellylandig with ease:

At this point i choose to make the MAIDEN FLIGHT, so if i have to fix something i will not ruin the paint:
After that hard flight i realize when the C.G. is correct and the plane make strange movements the problem must be the incidence, so i make some modifications to the horizontal stabilizer and try again:
Now it flies great !!!! Let´s make it look cooler drawing some lines with black marker:

And the most important part, the paint job:

I use foam safe acrilic paint and some tips from FliteTest videos:


And some stickers of Argentinian Navy, as the plane piloted by Owen Crippa in 1982:


I hope you like and find the pics useful. Sorry for my bad english, i try to do the best i could. Happy flights!!!!


Log In to reply
Log In to reply
Log In to reply
Log In to reply
Log In to reply
Log In to reply
Log In to reply
Log In to reply
Log In to reply
Log In to reply
Don't worry about your English it was well written, anyway, its way better than my Italian ;)
Cheers, Nicholas
Log In to reply
Log In to reply
Log In to reply
Log In to reply
http://www.bestvpshostings.com/
Log In to reply