Hi everybody,
This is my first post in this forum.
Before I get into my project just a bit of background. As a kid I always dreamt of an RC plane but could not afford one at that time. Last September I started building a P51 from one of these balsa Guillows sets with the aim of converting it to RC. When I was almost done, I stumbled accross the two Joshs and watched the episode where they explain what mistakes better not to make when you are a noob. Realising that I have never flown a plane before, I came to the conclusion that trying to fly a 1,000 piece puzzle as a starter is maybe not my brightest idea. So I started with the Tiny Trainer (crashed it into a post), a Mini Mustang (crashed and tail came off), a Mini Corsair (utterly overpowered and unflyable) and a P40 (crashed with half wing and tail coming off). Although some of the crashes were pretty violent, actually all planes have been fully restored and fly as nothing ever happened. Foamboard is great!
Now I always envied the Spitfire for its great appearance and when I saw the Master Series, I knew, this is it. To make things a bit more complicated, I wanted to add retracts and flaps.
As a base for my mods served the article by Scotti from whom I got a lot of inspiration. The article can be found here.
I started with the flaps as for the inspiration I decided to hide the two servos in the optional radiators. The flaps required to move the radiators slightly (about 2 cm) to the front as otherwise the space would have been to little. When I did the cut outs for the servos, I draw the radiator first on the inside of the wing, pinched the lower wing next to the long spar and then turned everything around, draw the radiator from the other side made the cutout, got overly excited and glued in the Servo. Only then I realised that I Had fixed the servo straight to the foam spar and that I still need to enter the wooden spar. So I got the servos back out, made the cutout a bit longer and added the piece on the front (does not look great but will be hidden in the radiator anyway. No harm done).
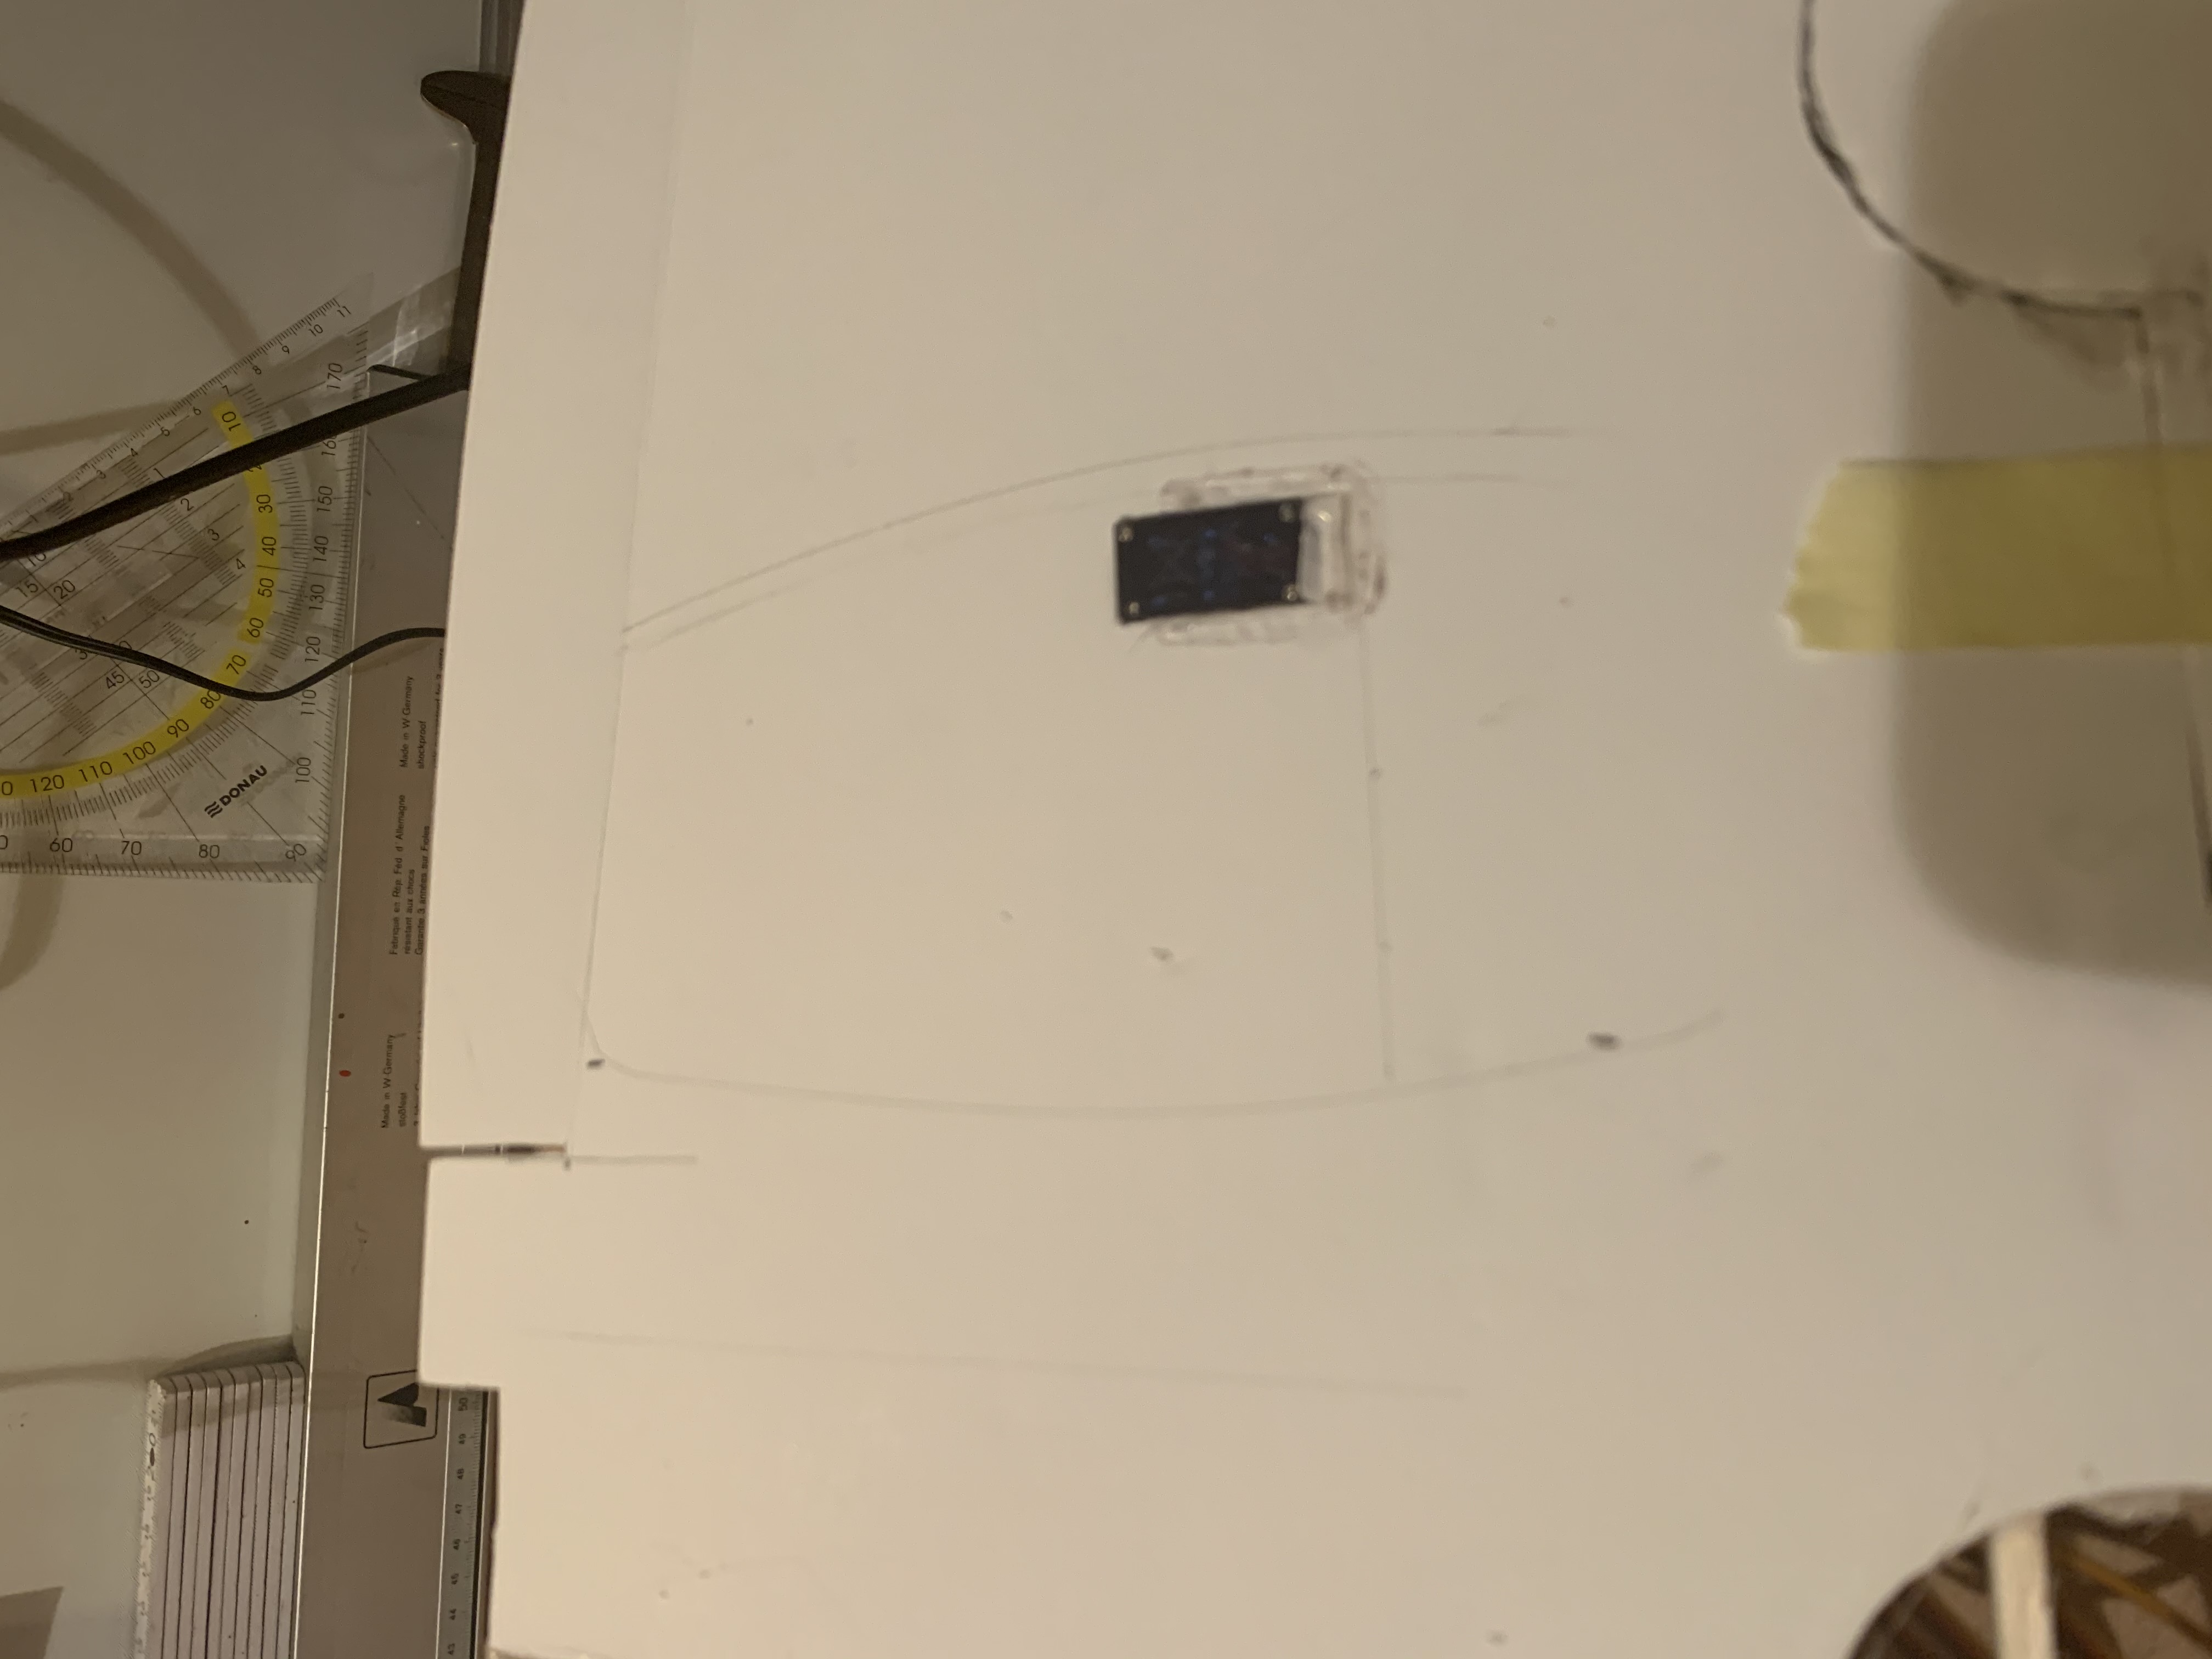
 On the size of the flaps I deviated from the inspiration. I studied a few pictures and plans of Spitfires and decided to do a long flap. The dimensions of the flaps are roughly 3 cm on each side and almost 24 cm in length. Did a bevel on the inside and strengthened that with a bit of hotglue. Made the control horns from an old credit card.
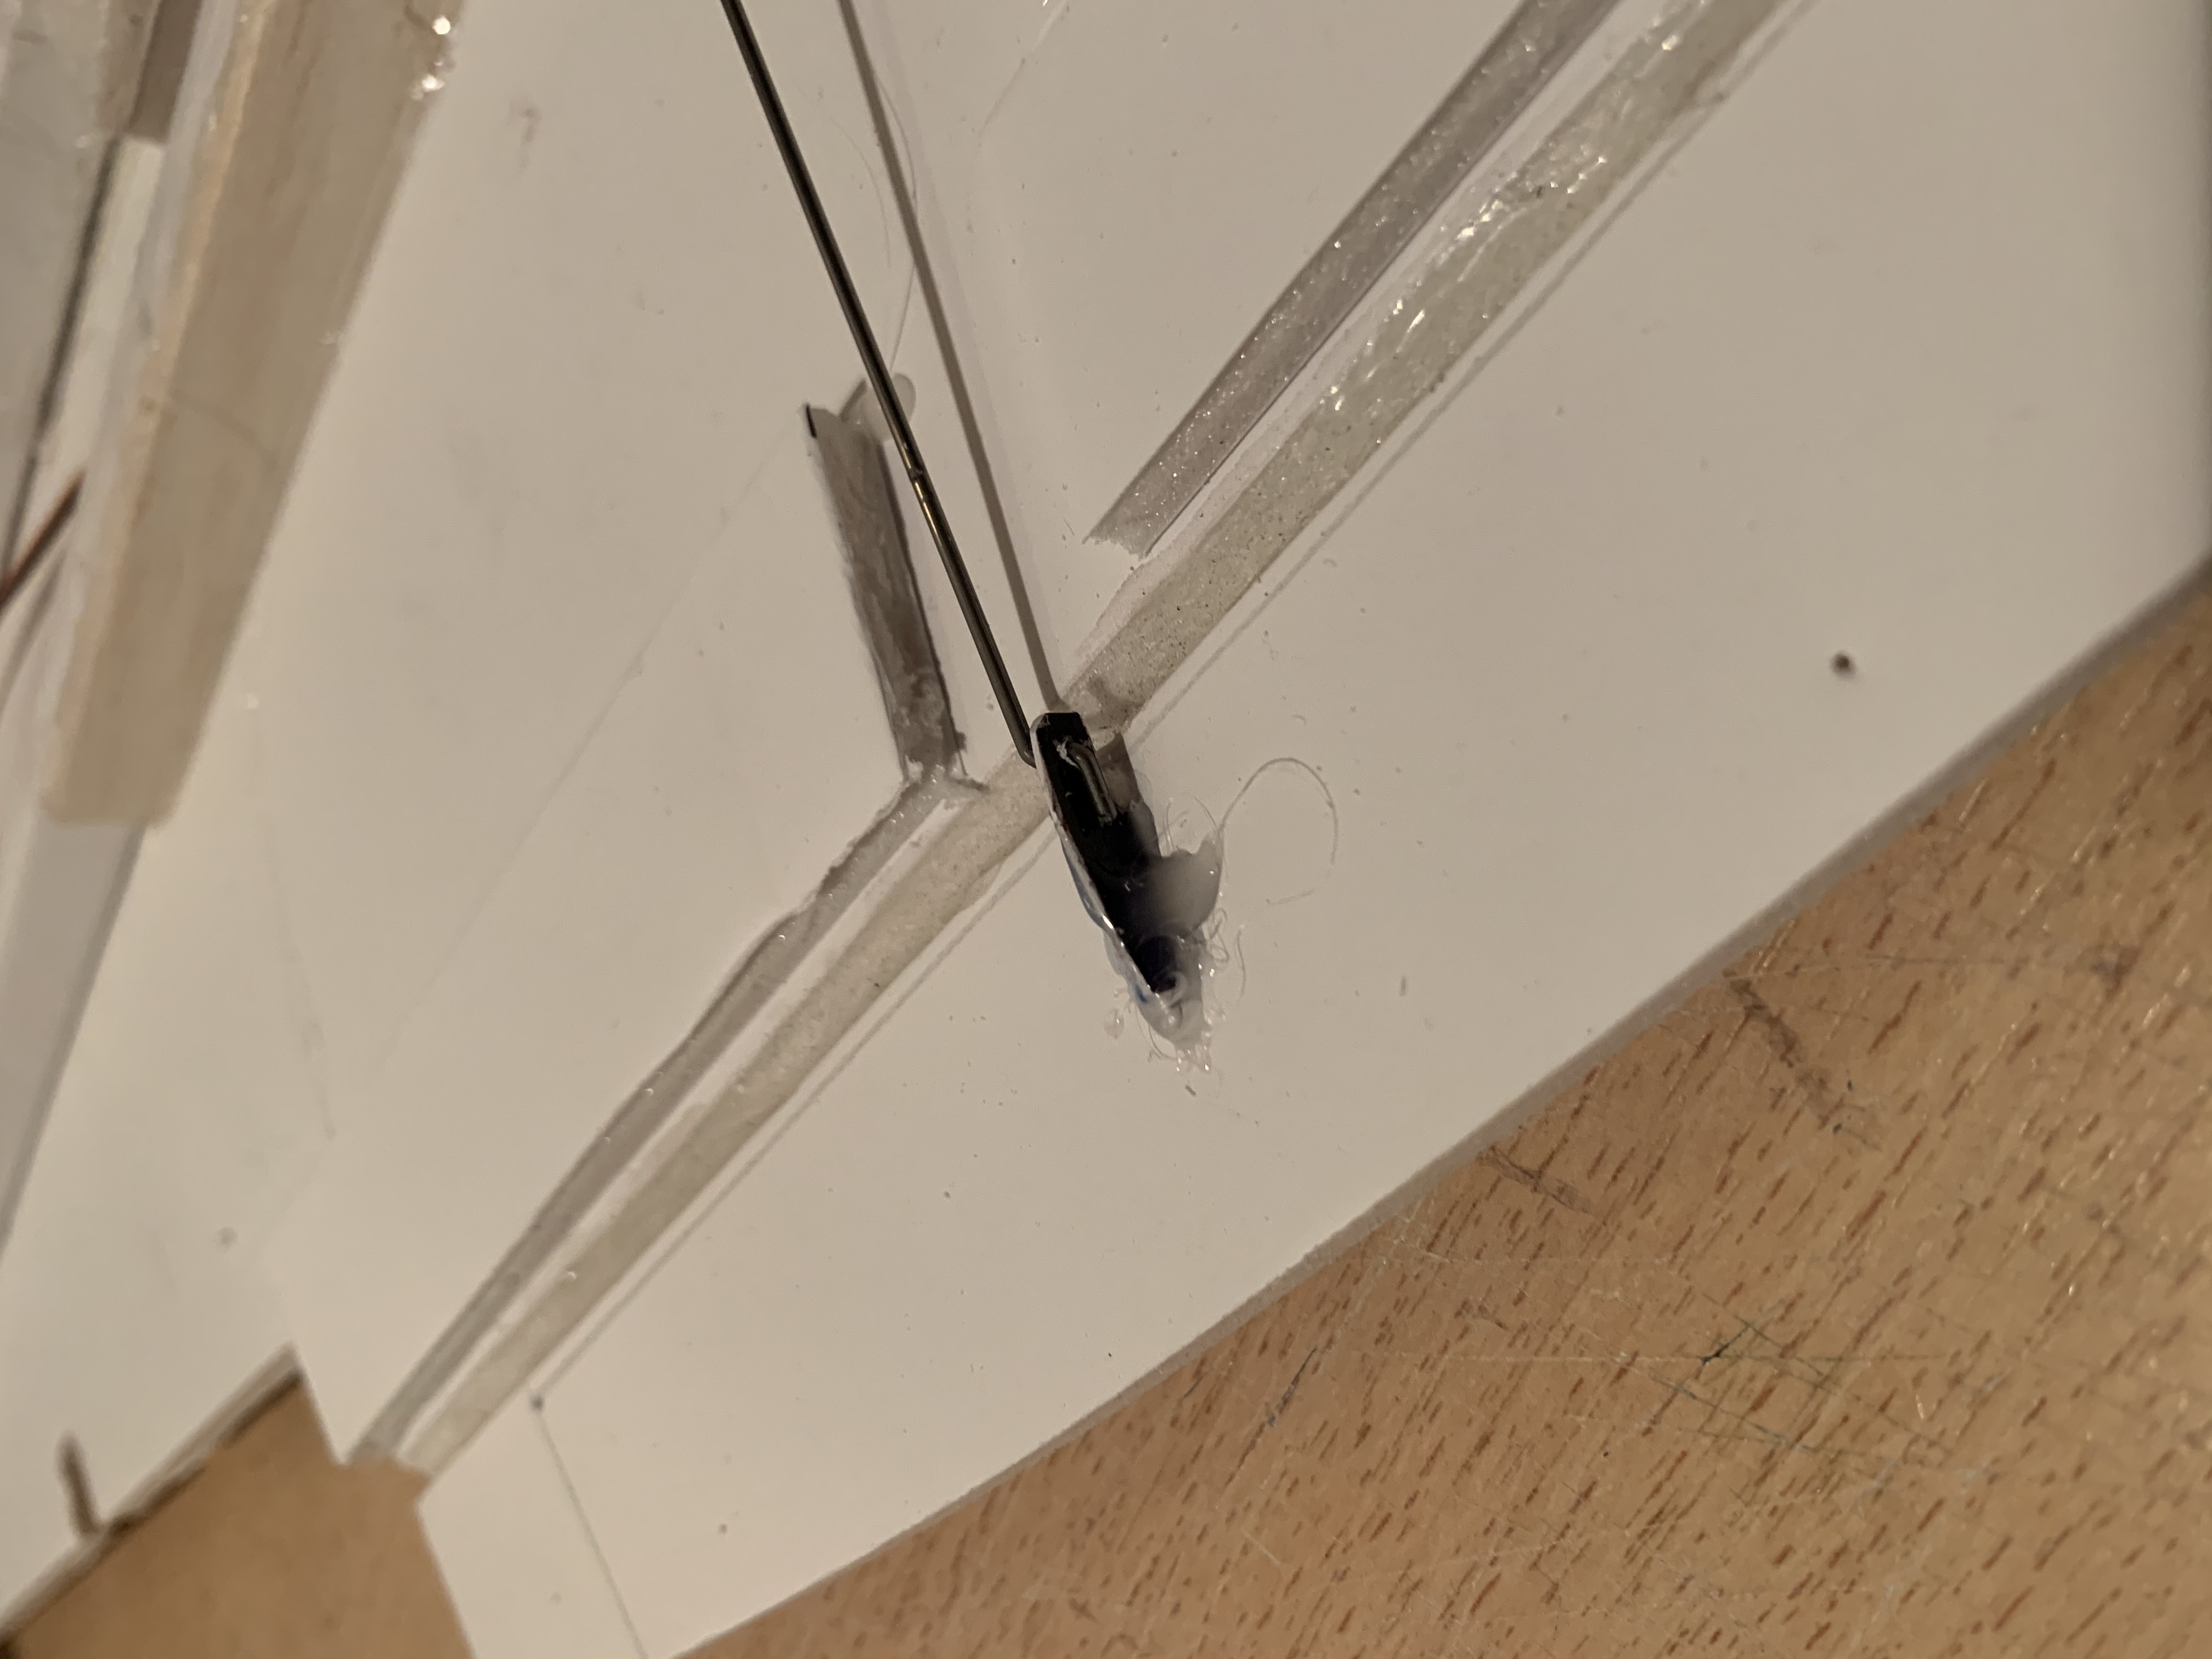
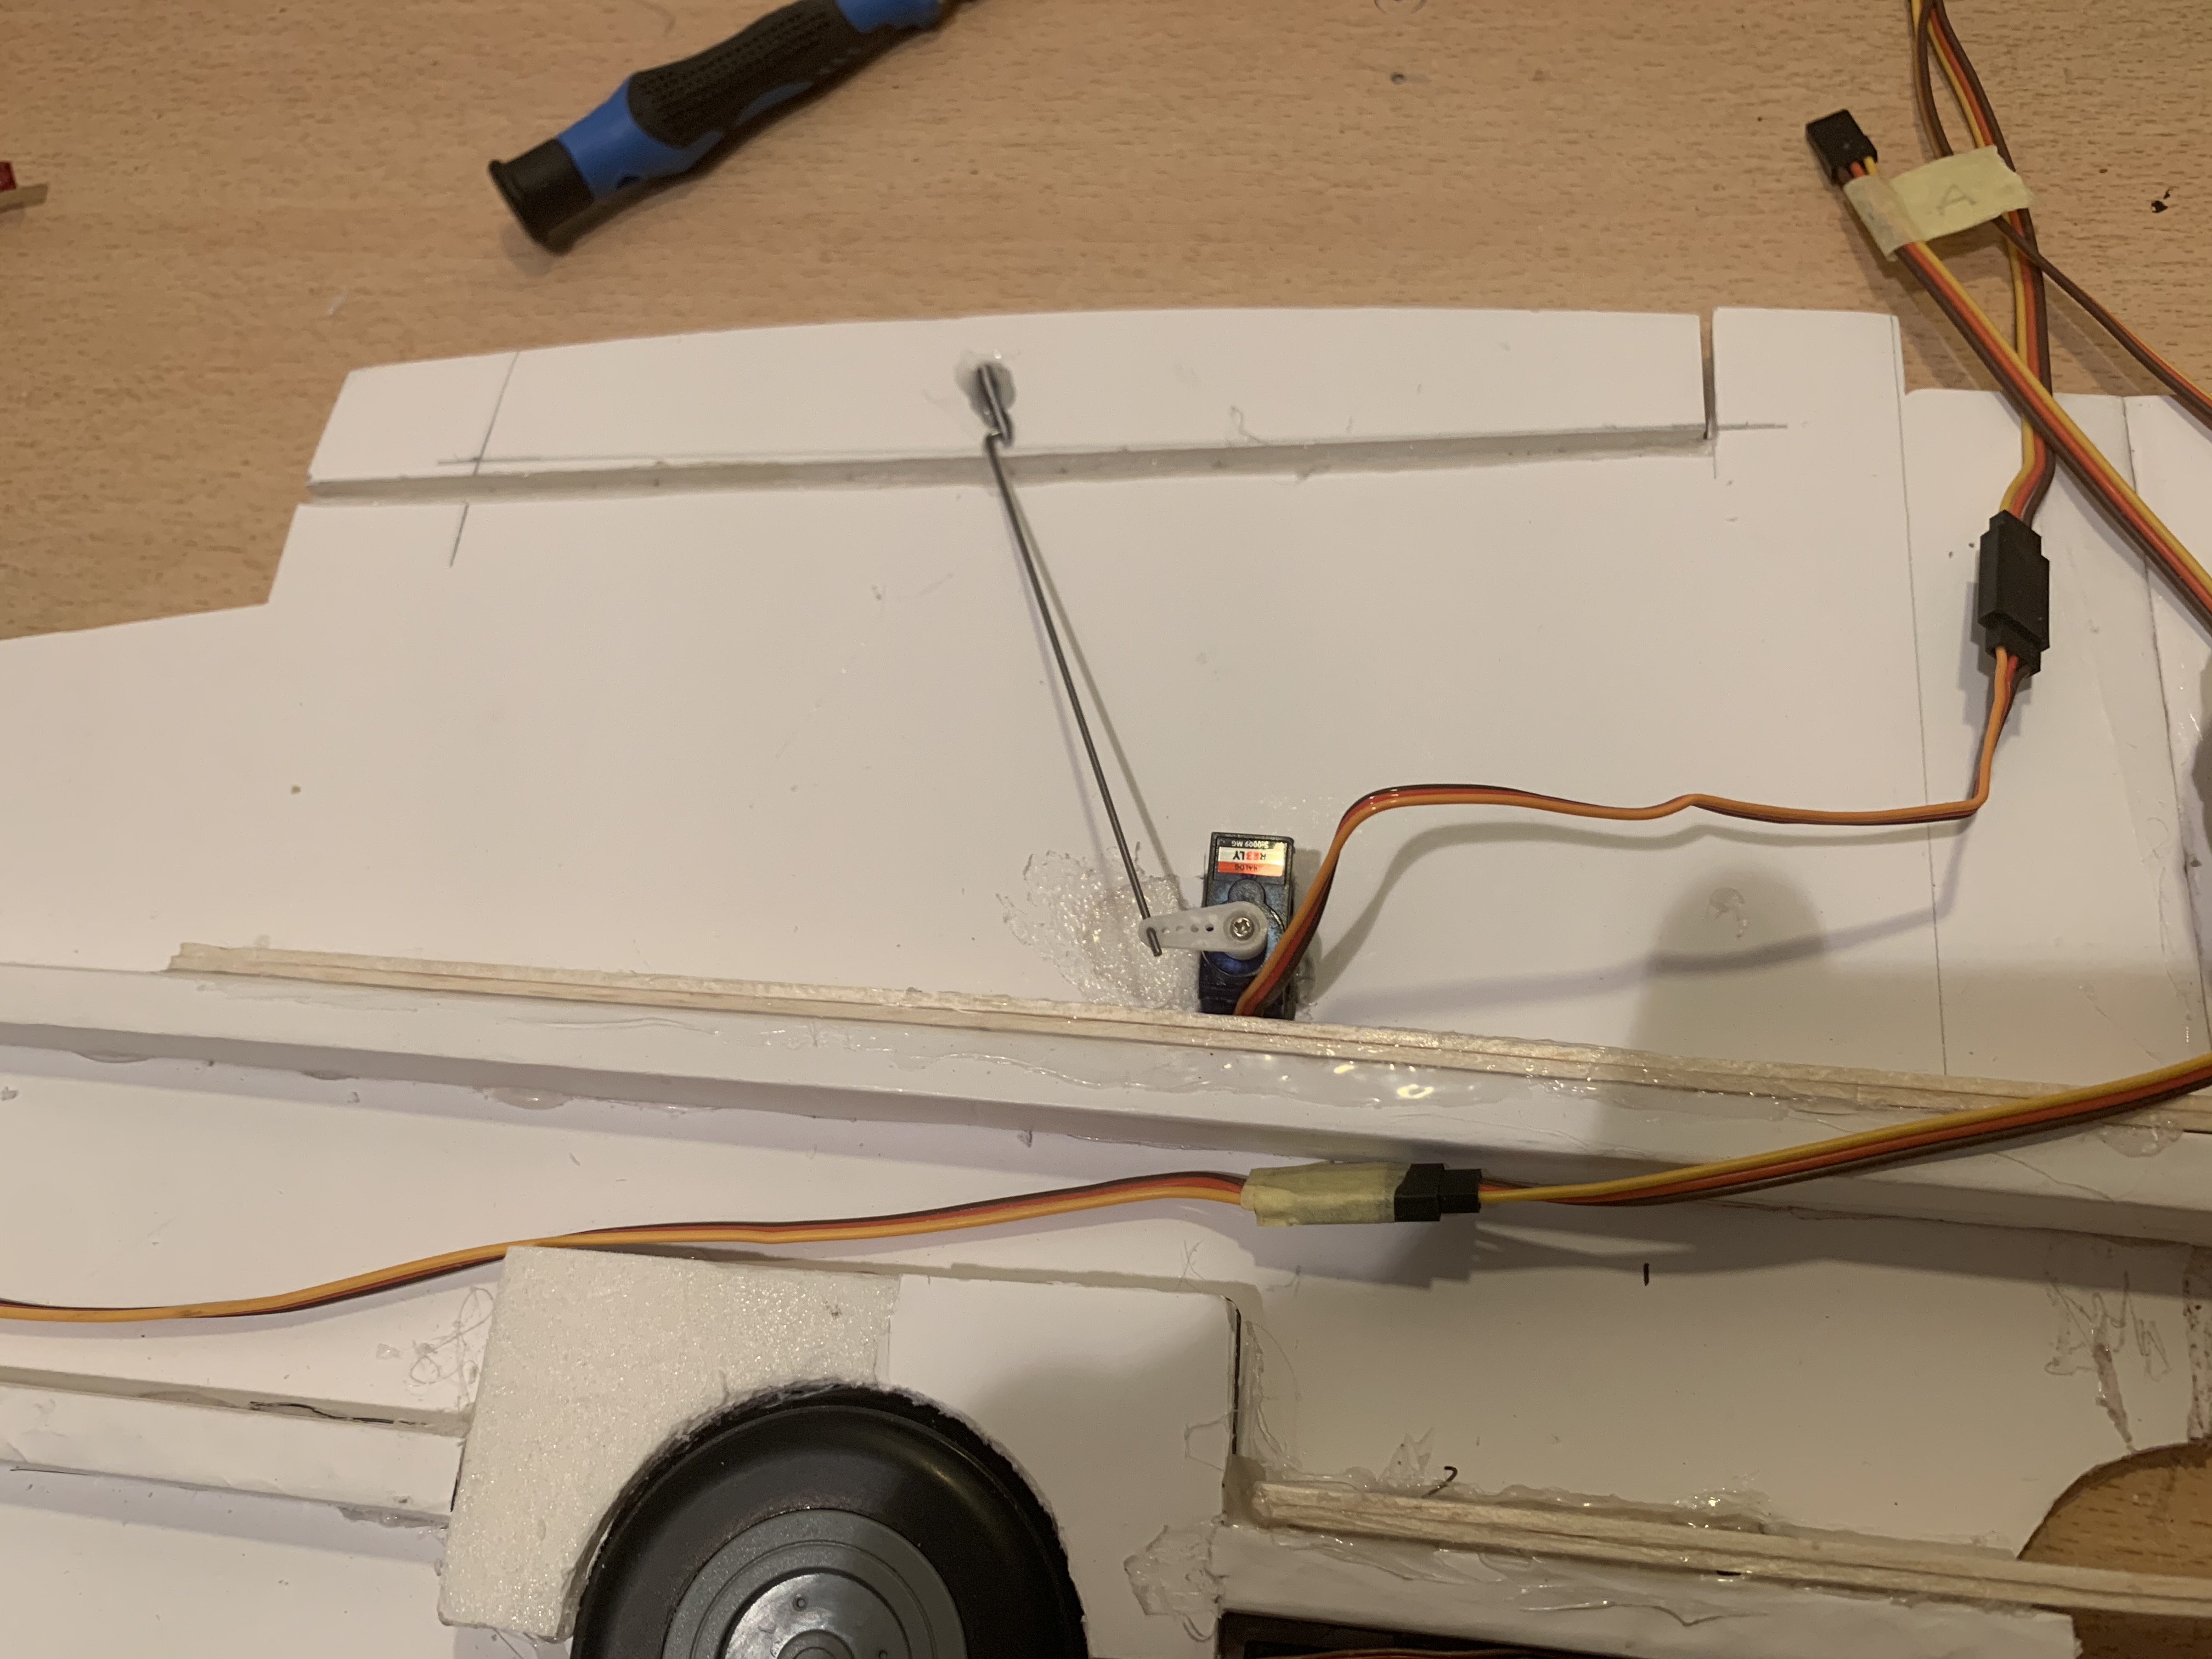
When I test connected the servos (which are both connected to the same channel), I realised that these do act like ailerons (in opposite directions). First I considered fixing the servo arm of one servo on the same side like the other servo but that would have resulted in a very strange angle of the servo to the control horn to the flap. Eventually I figured that there are servo reversers available and I also came accross a tutorial which explained how to reverse a servo. I am using Reely analogue micro servos with a metal gear. These have nice long internal cables. Was a bit sceptical whether my soldering skills would be sufficient for that but reversing the one servo was actually quite easy and worked out well.
With the two servos in place, I made a testfit of the upper wing skin and decided to add one strip of foam on the inside of the wing before the flap to create a bit more stability.
With the retracts I first started studying the inspiration and because of my tendency to get too excited and cut too quickly, started with a piece of scrap to get an idea on how the final piece would look like. After that I created a modell of the front part of the lower wing to experiment with that. It was pretty obvious that I will need to cut the short spar but I was a bit uncertain where to place the retracts.

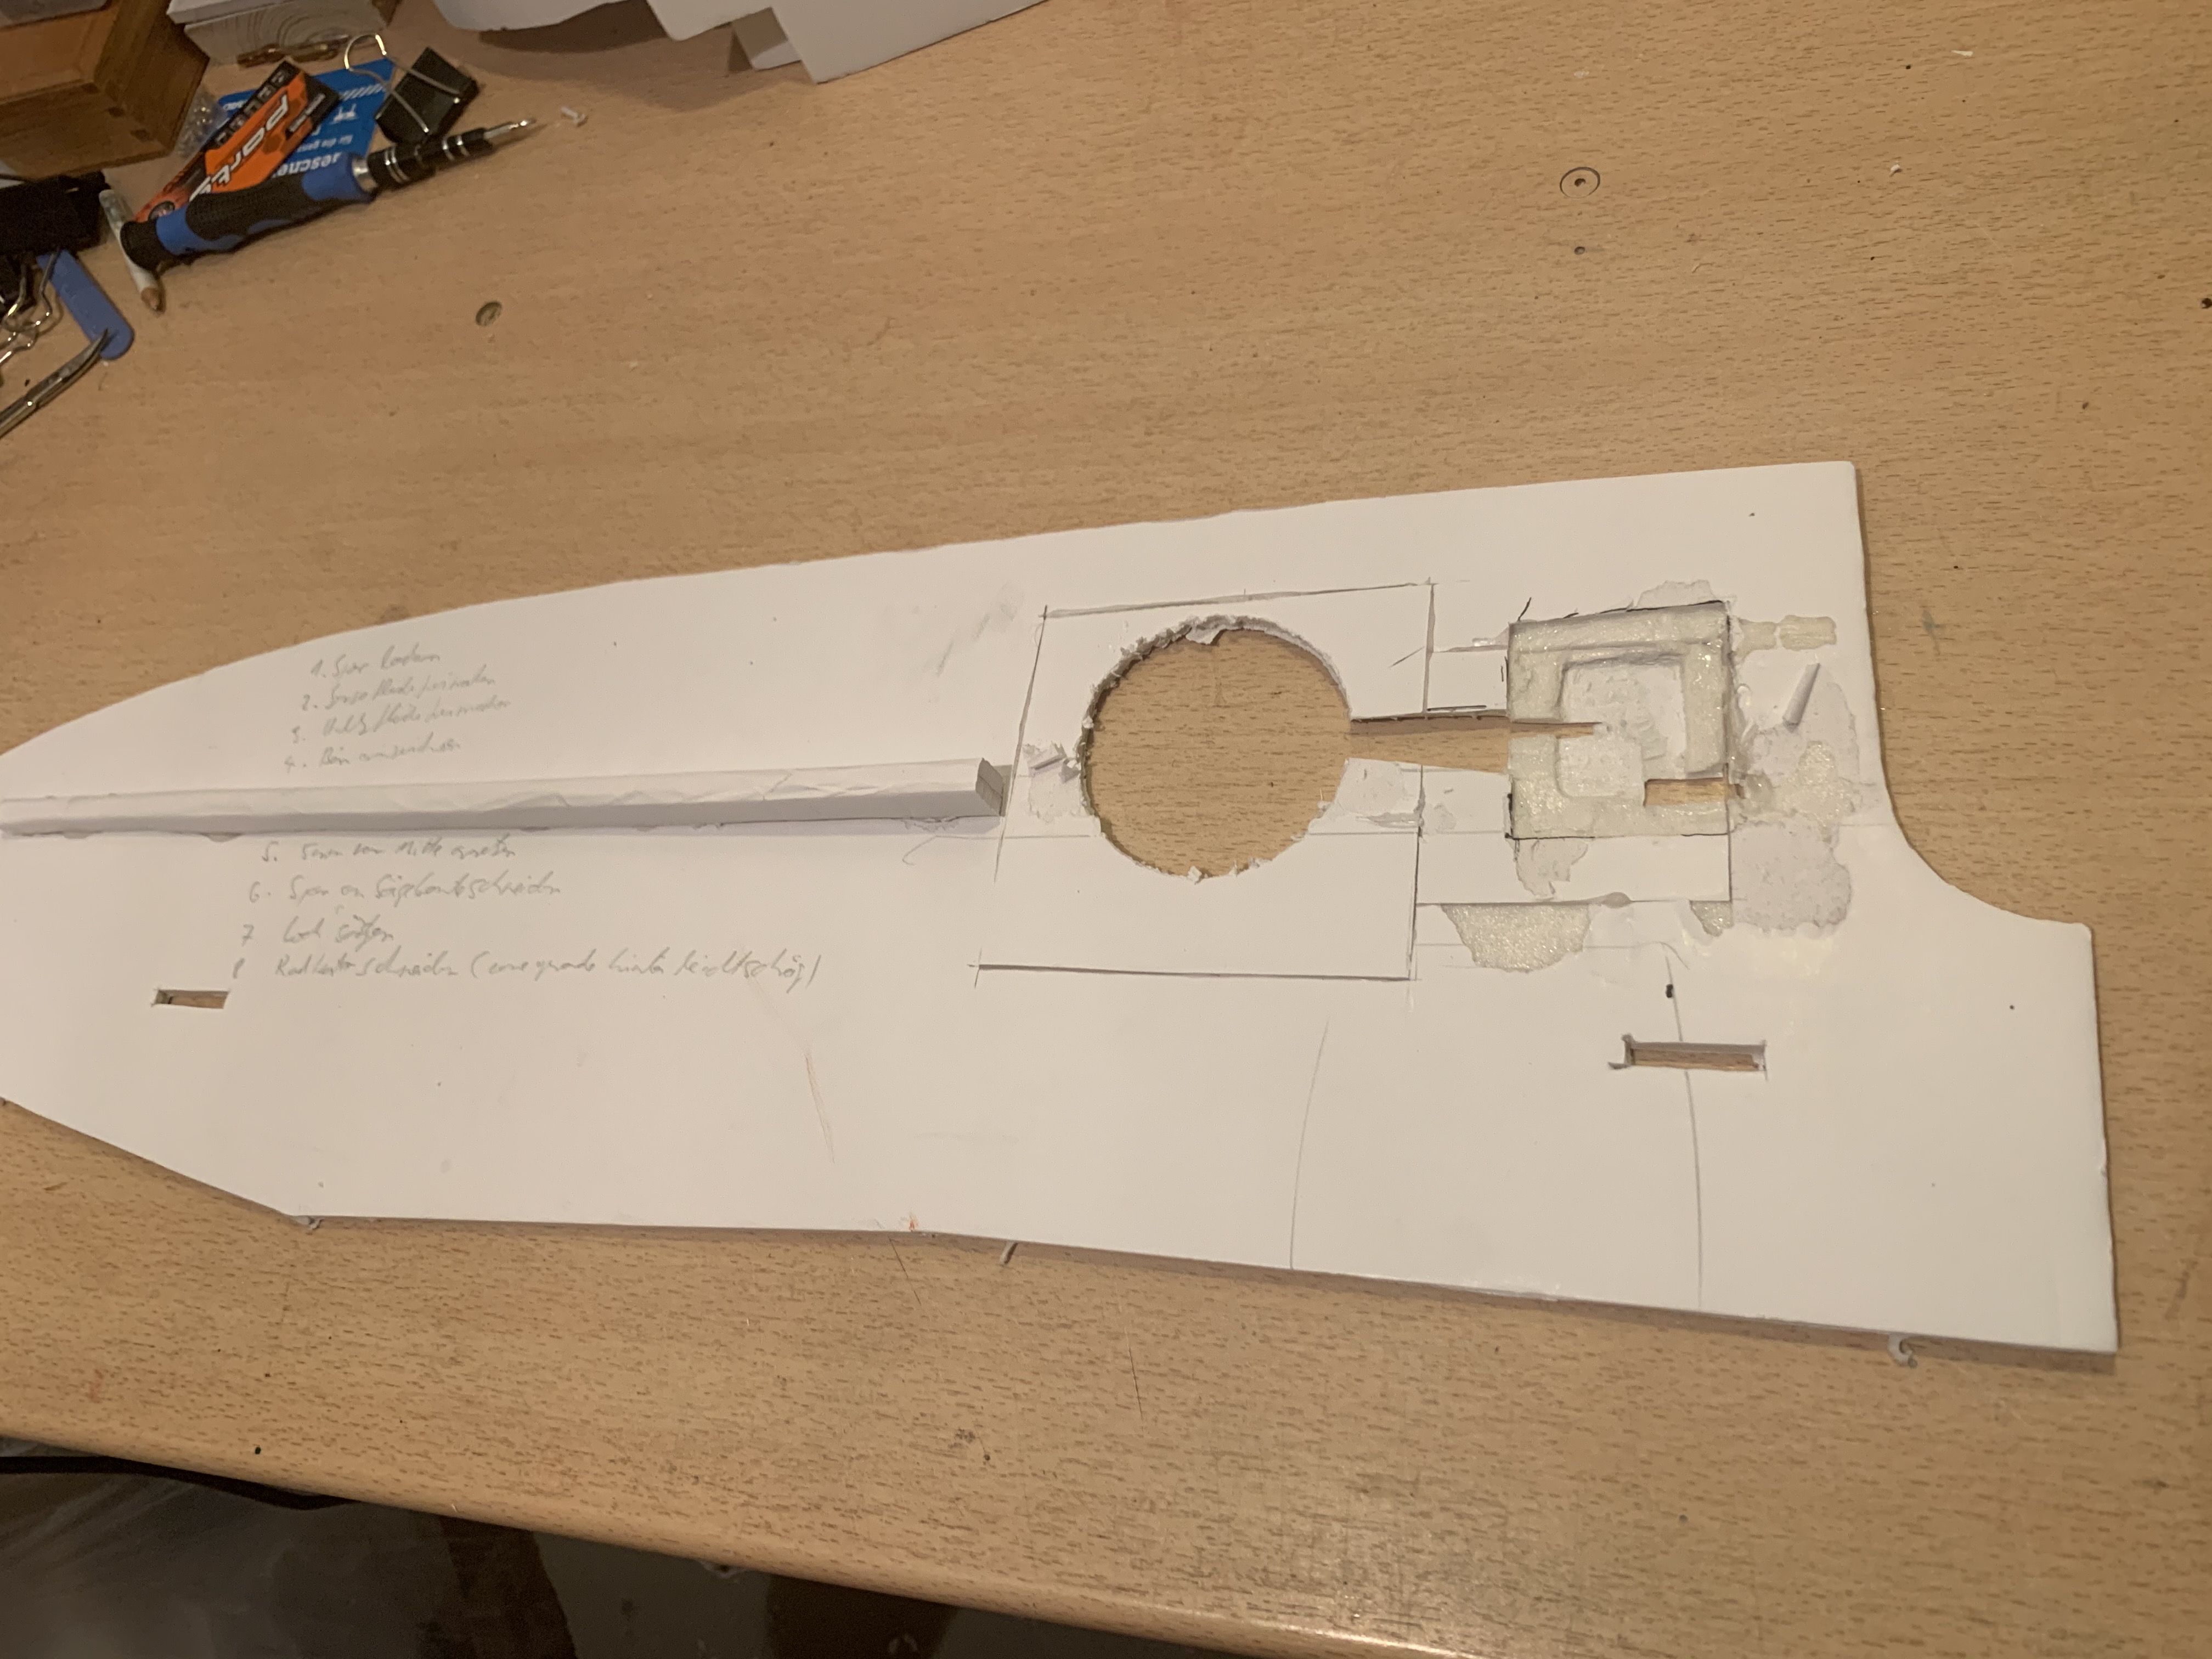
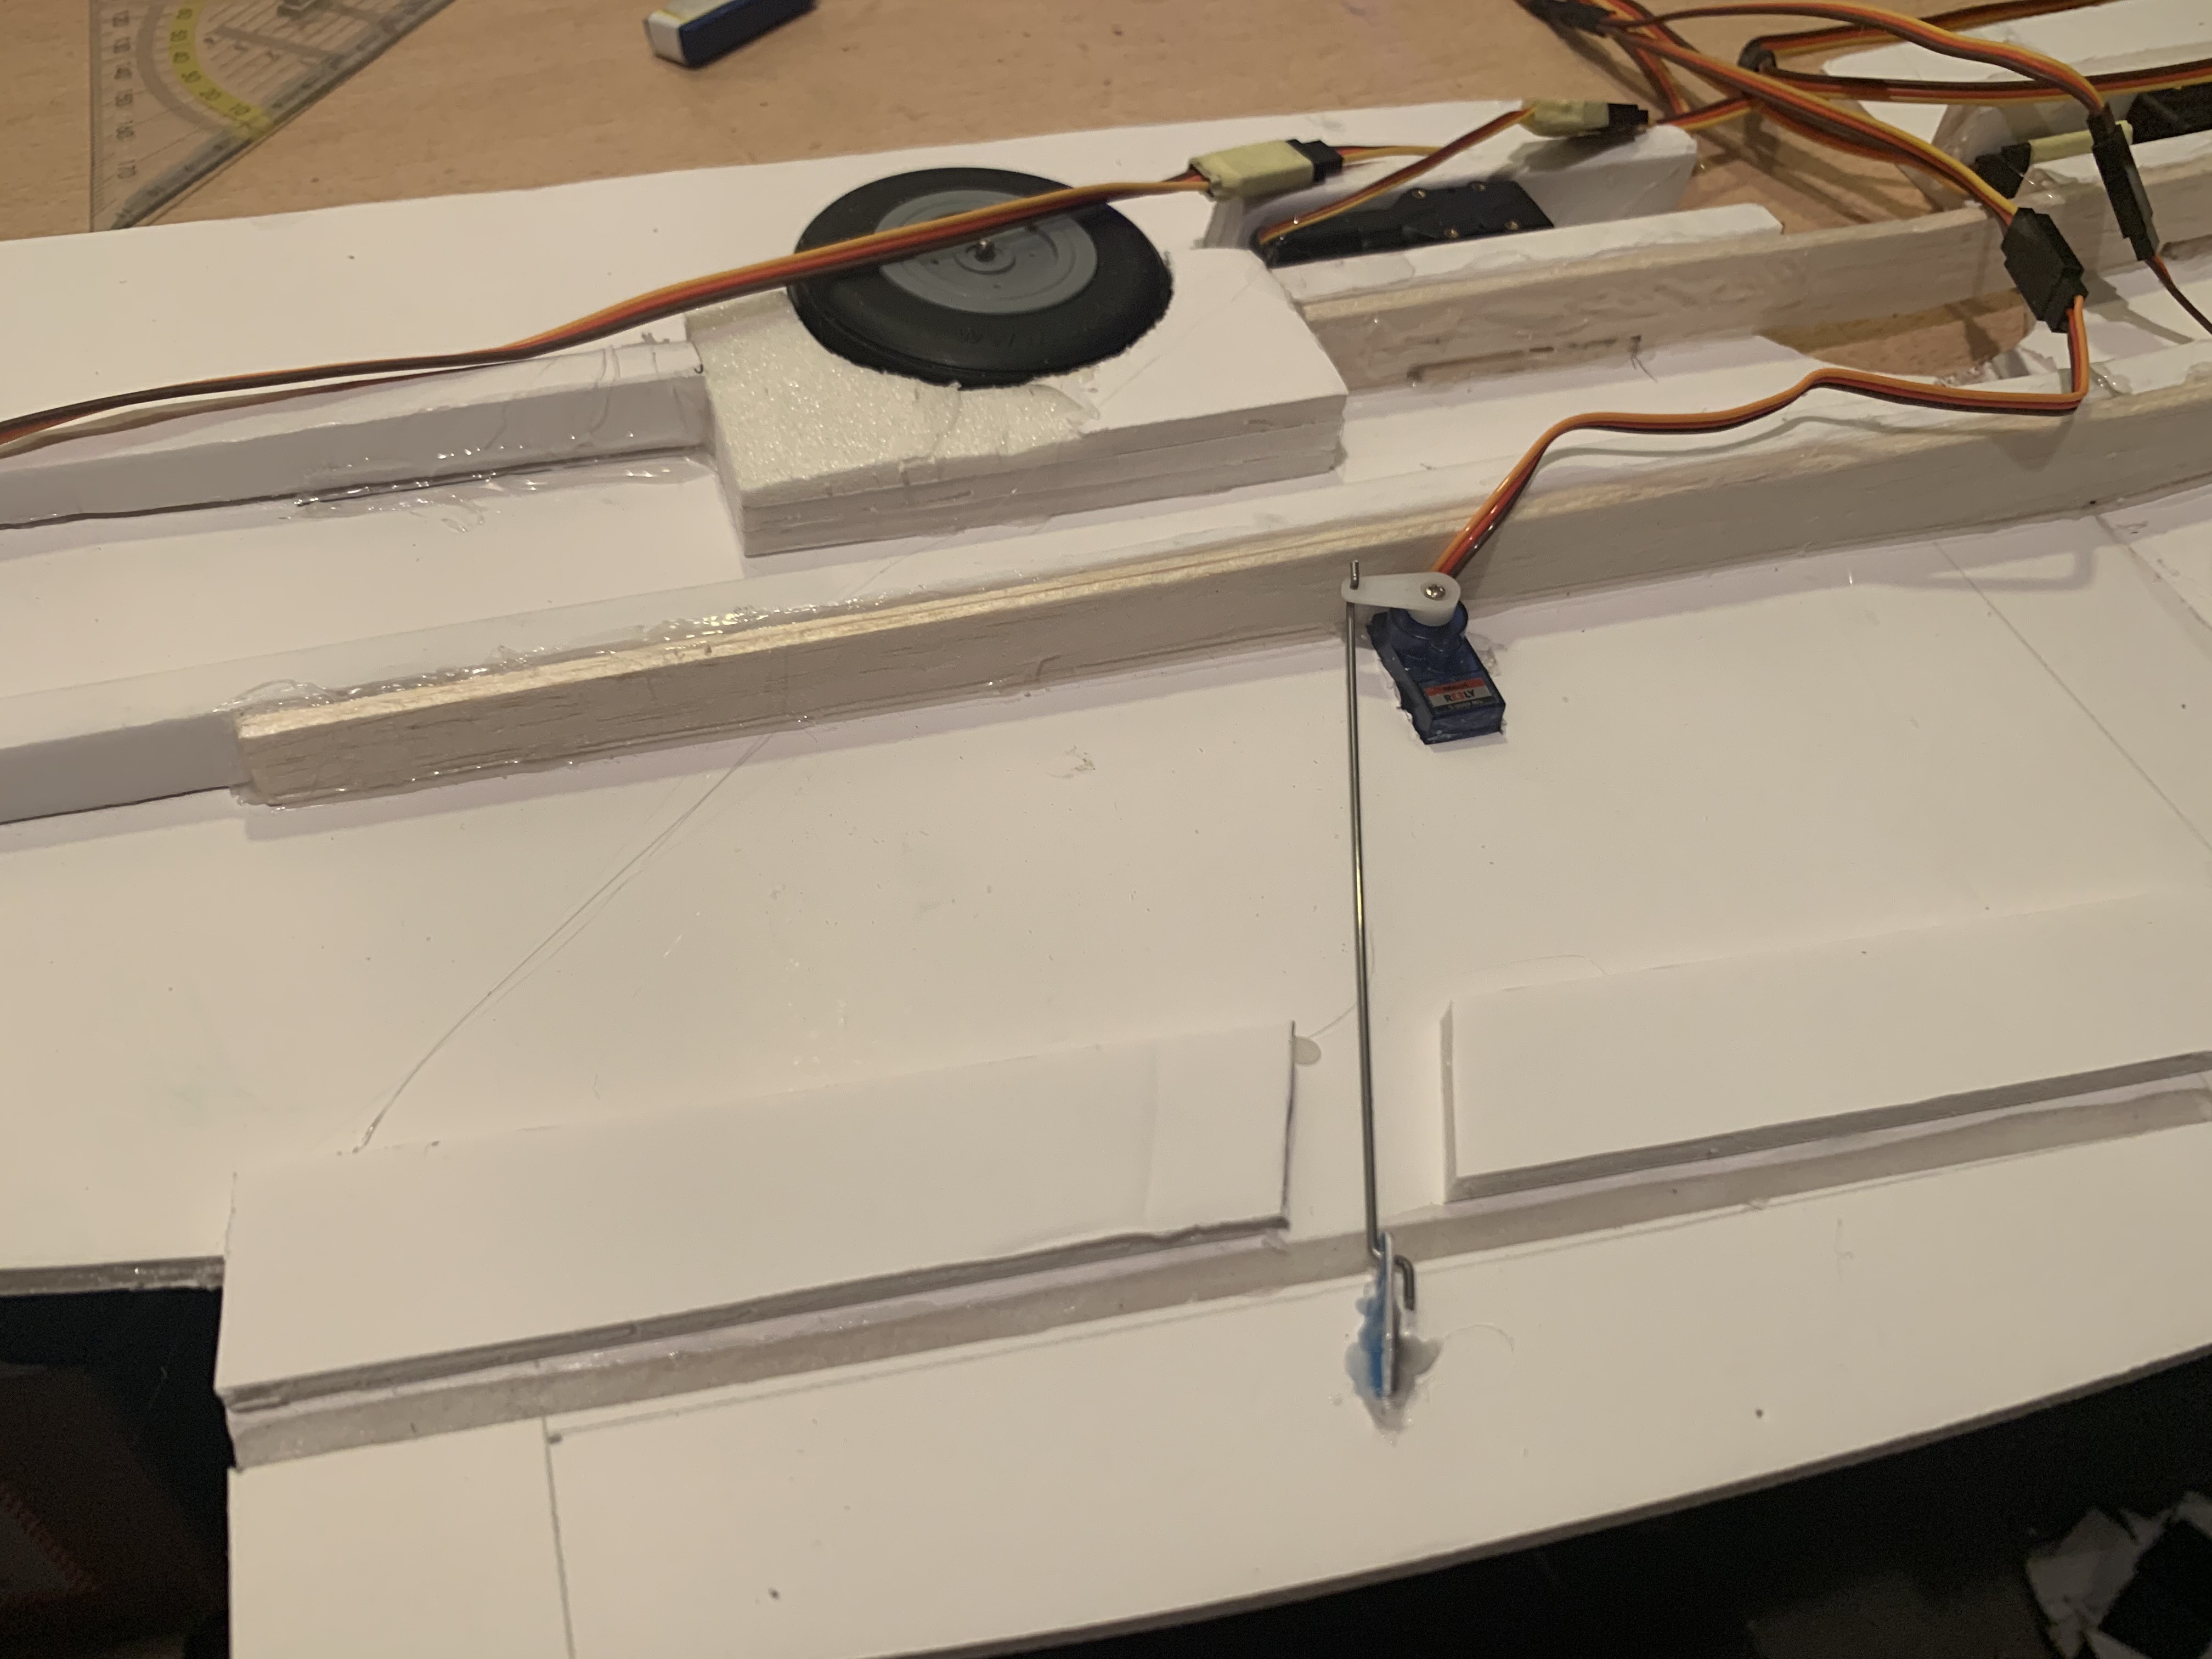
I decided that the base of the retract would need to go under the spar so that the servo part would sit tight next to the spar towards the leading edge of the wing. The final position would be 3.5 cm from the hatch cutout which is about in a line with the inner side of the radiator.
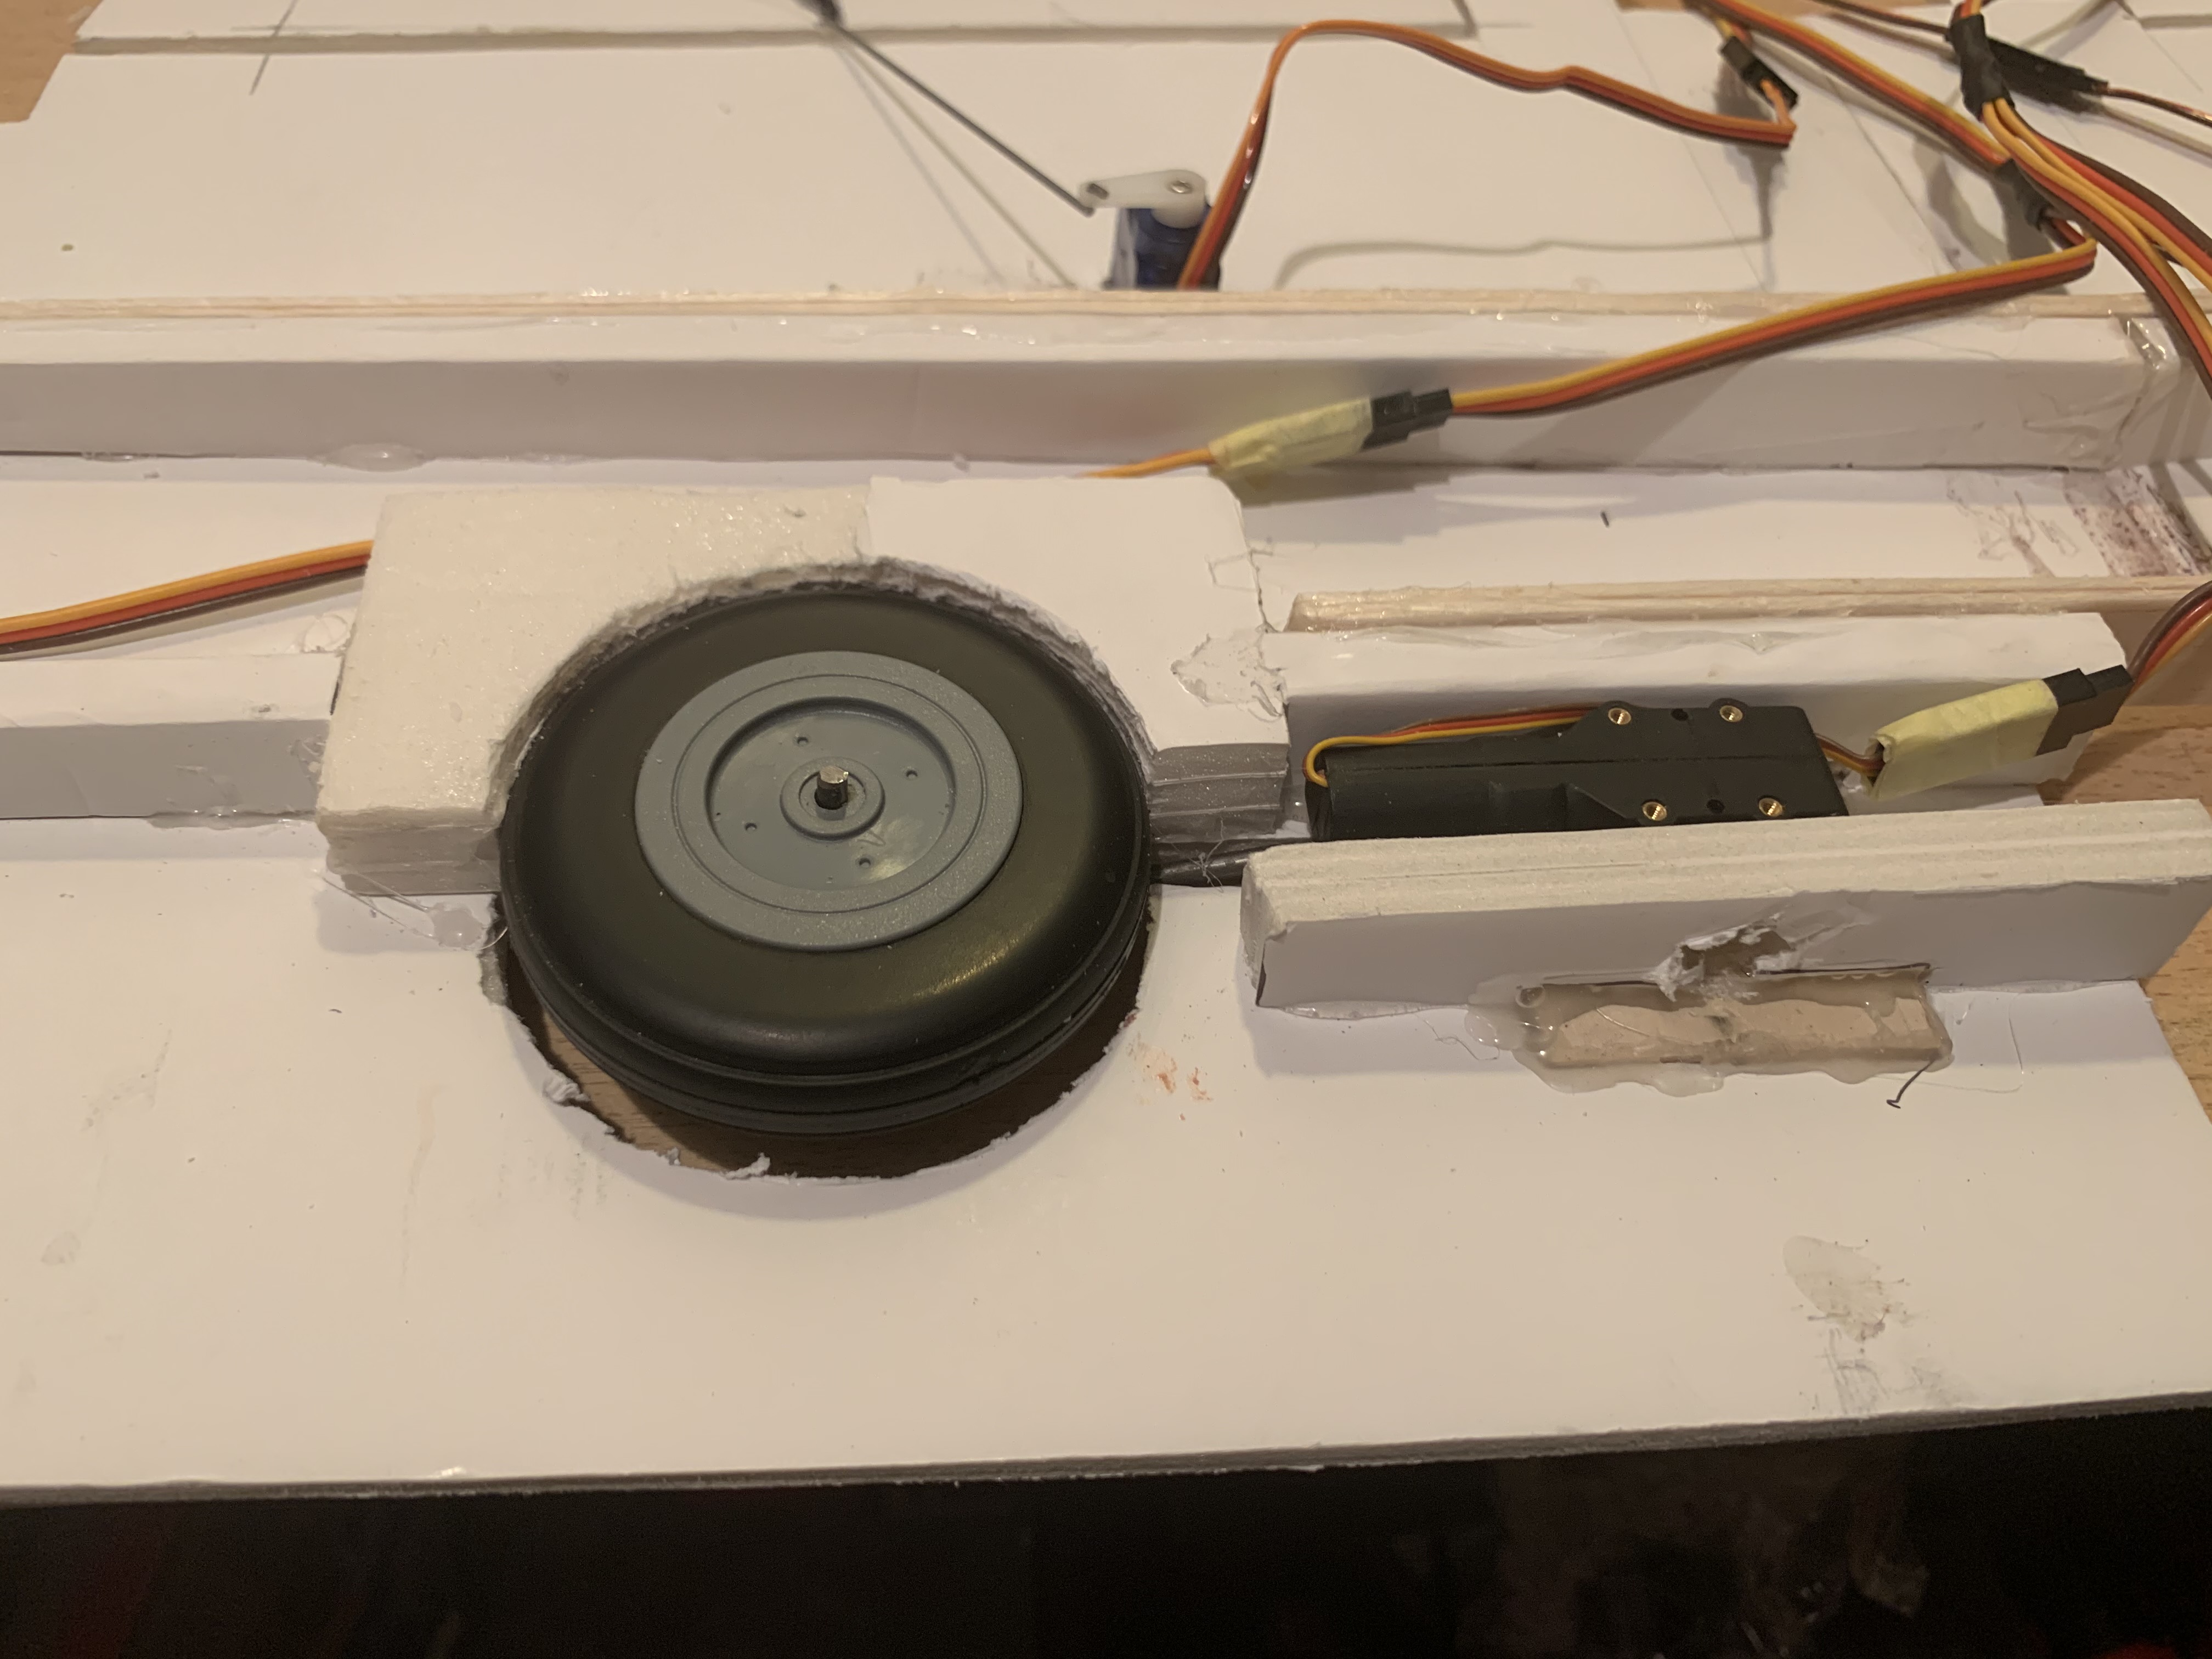
For the cut out for the wheel (6.5 cm in diameter) I used a 7cm cut out. Was not a piece of art but worked. The actual electric retracts are from Banggood (and I also got similar/ the same ones from a local hobby store) dimensions are 54.4 x 32.0 x 20.76 mm. Took me a while to figure how to bent the wire for the wheels (the electric retracts came with legs and wheels but these were to tiny to look good so I had to start from scratch) and eventually I got there. I took the general dimensions from the fixed P40 landing gear.
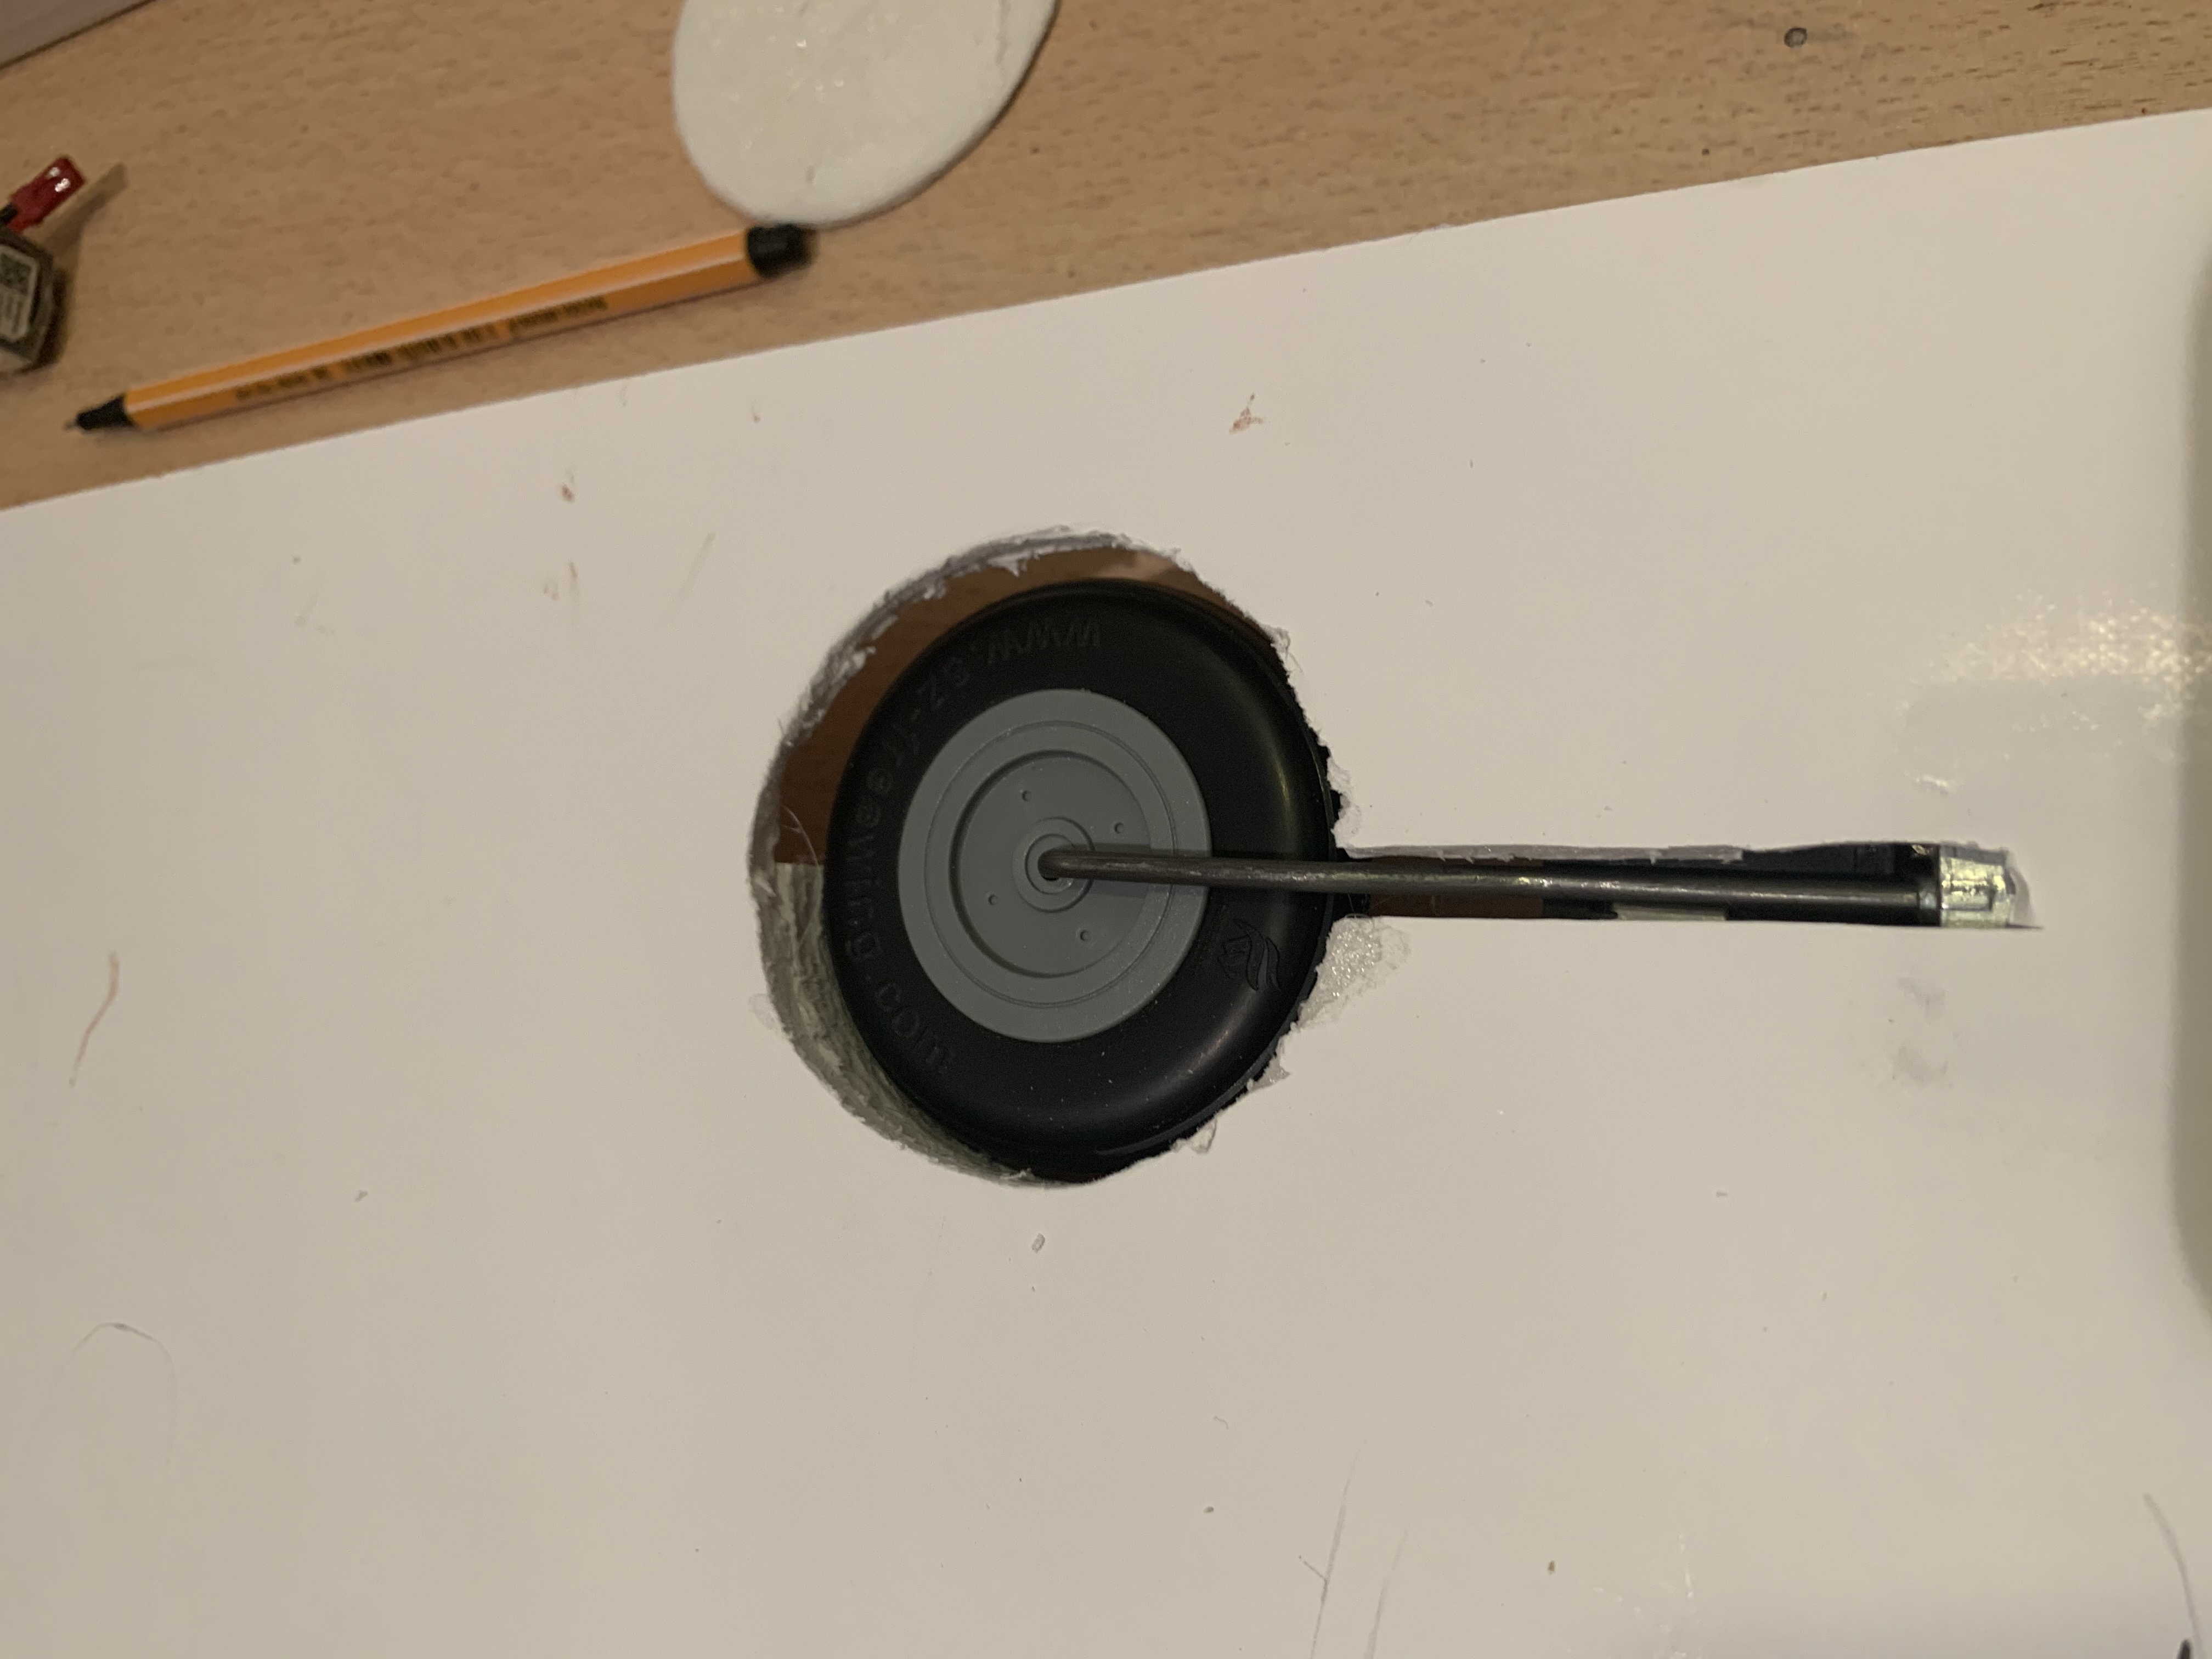
When I did a testfit of the wheels I realised that these are to thick to fit into the wing. After half a day of research I found a store who had what I was looking for. The final wheels are 16 mm thick while the ones I started with are 24 mm thick. These 8 mm make quite a difference.

After everything fitted quite nicely on my model wing, I made the first cuts into the real wing. The previous testing was absolutely worth it. Making the cutouts and fitting everything in the real wing went pretty smoothly.
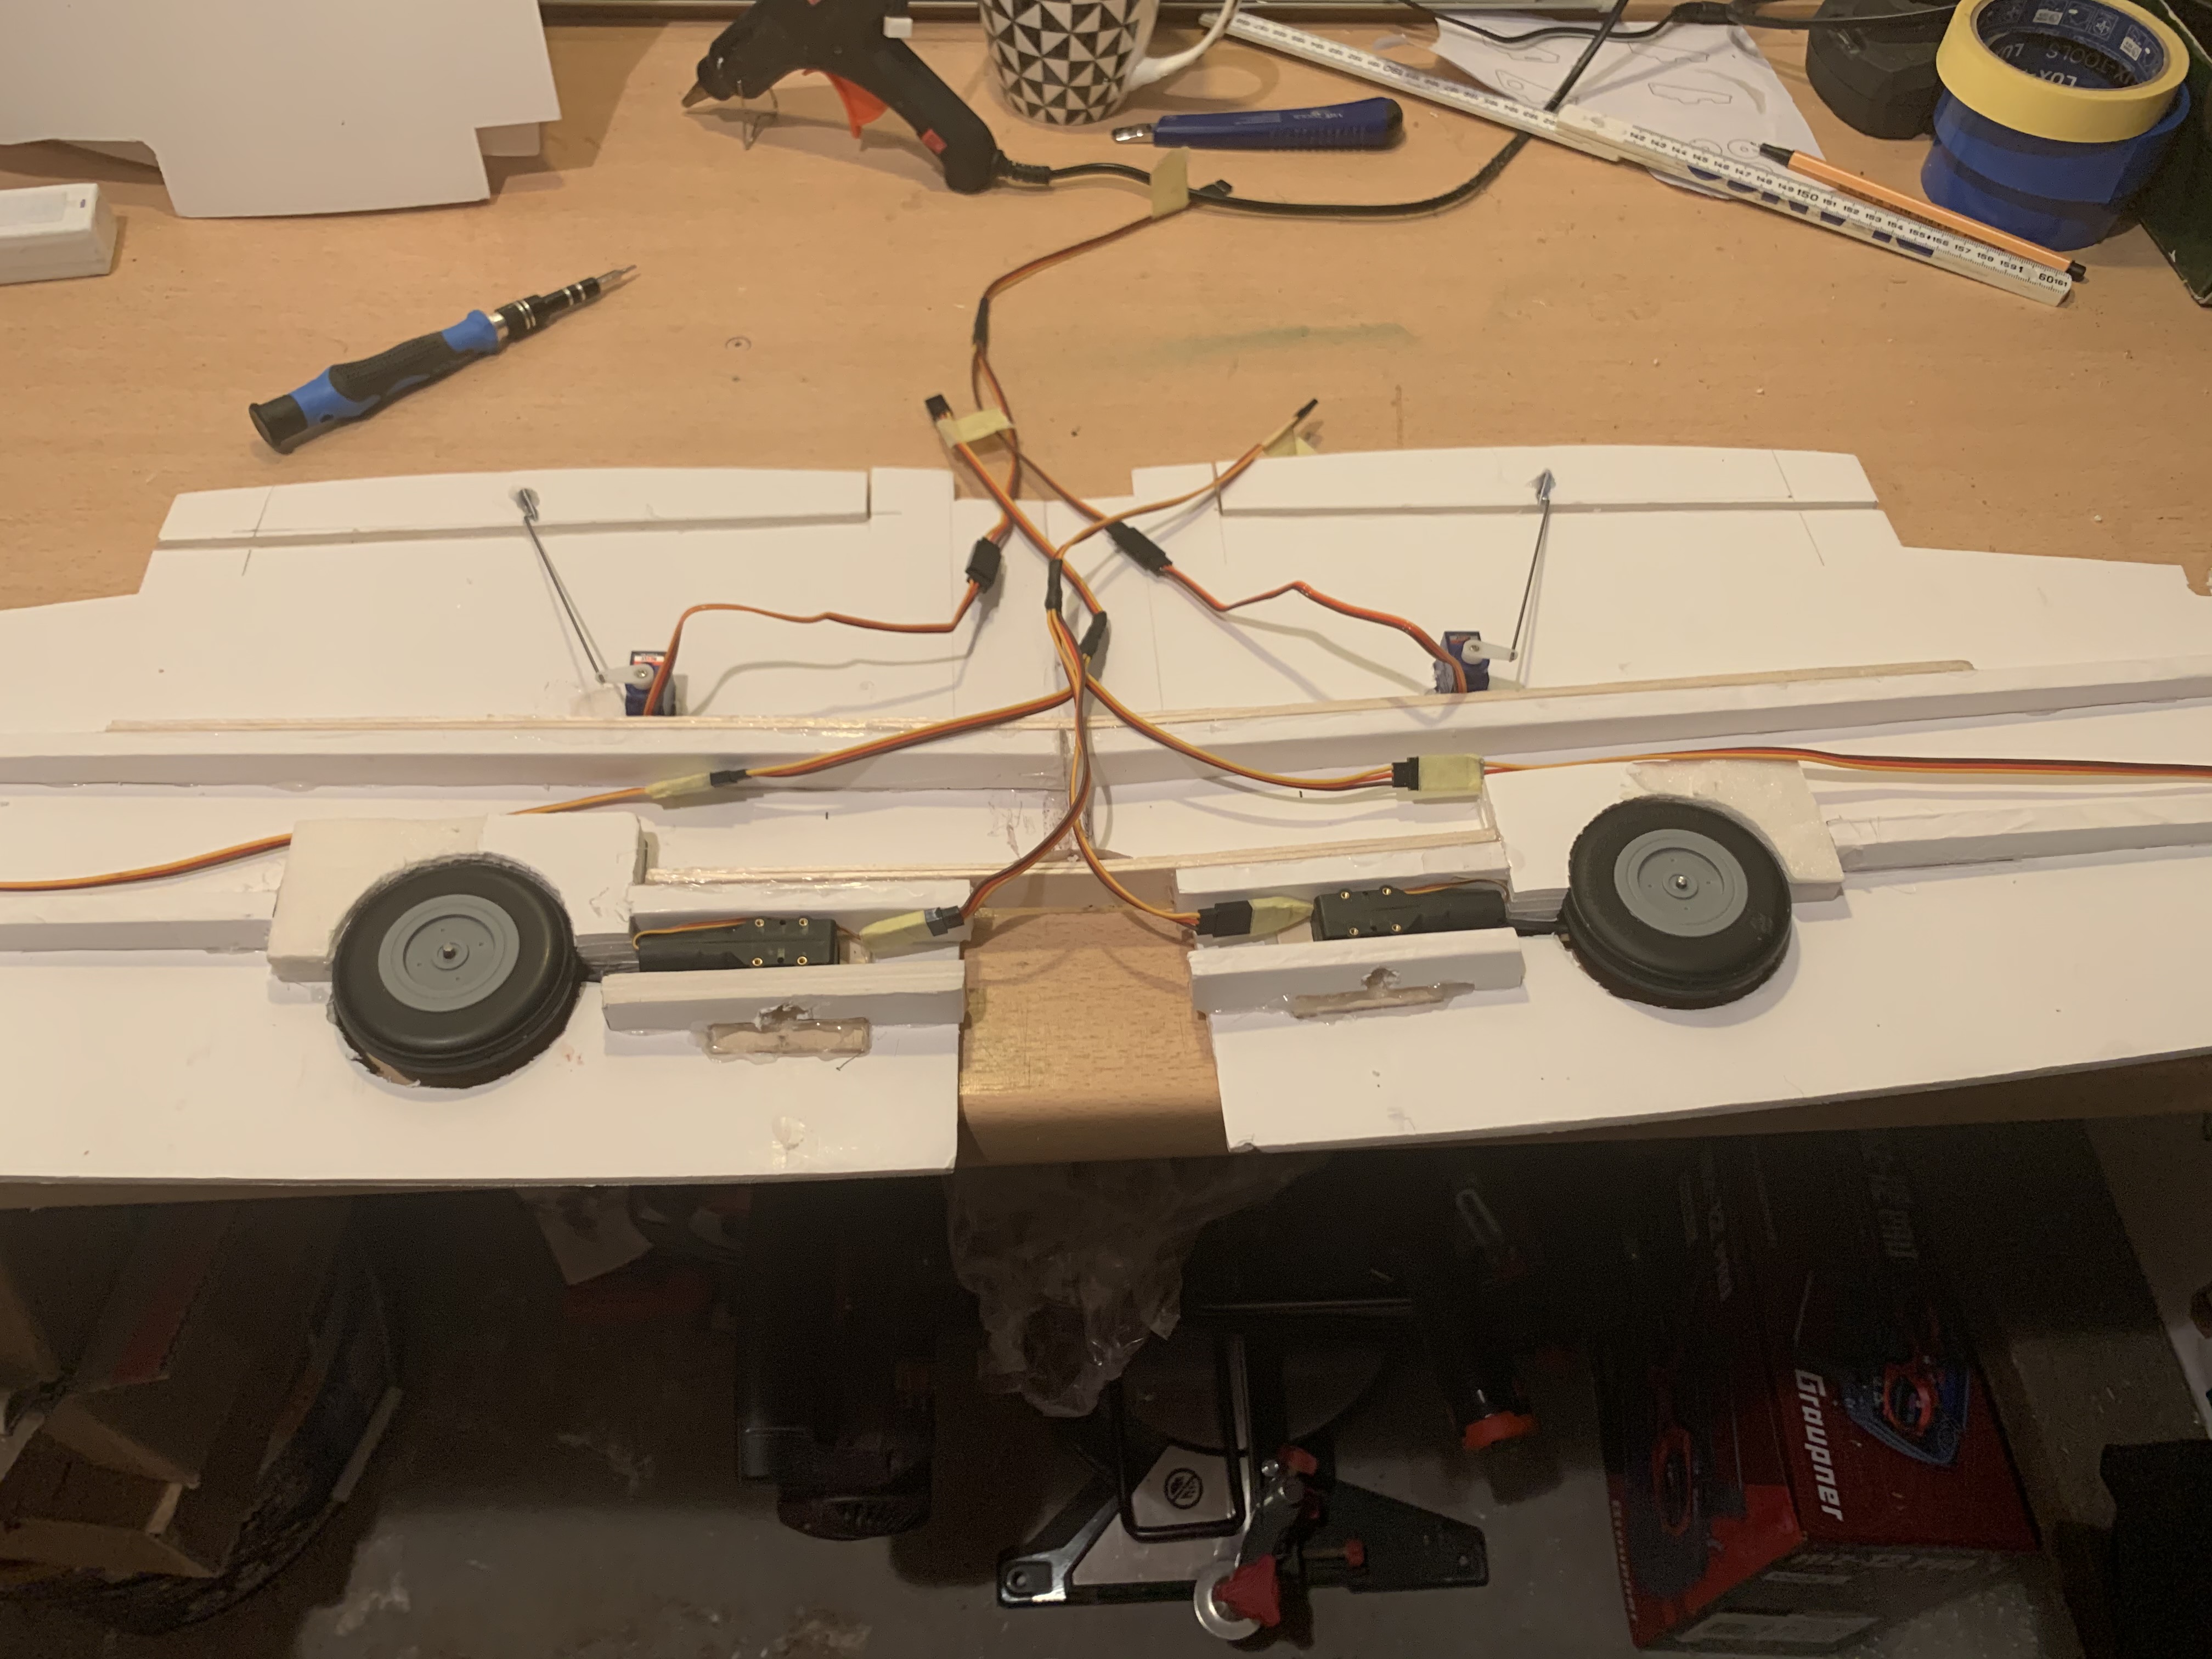
You may notice the hole in the front short spar. When I had glued everything together it dawned me that I was not sure that I appropriately fixed the legs of the gear. In addition it bugged me that it seemed that I would never get back to the retracts if these ever got a harder hit. So I cut a hole where the screw for the leg is located and tightened that screw. Than I noticed that I have a long Allen key so I drilled a tiny hole through the leading edge at the upper wing skin and now can tighten and loosen the screws of the leg in the retracts.

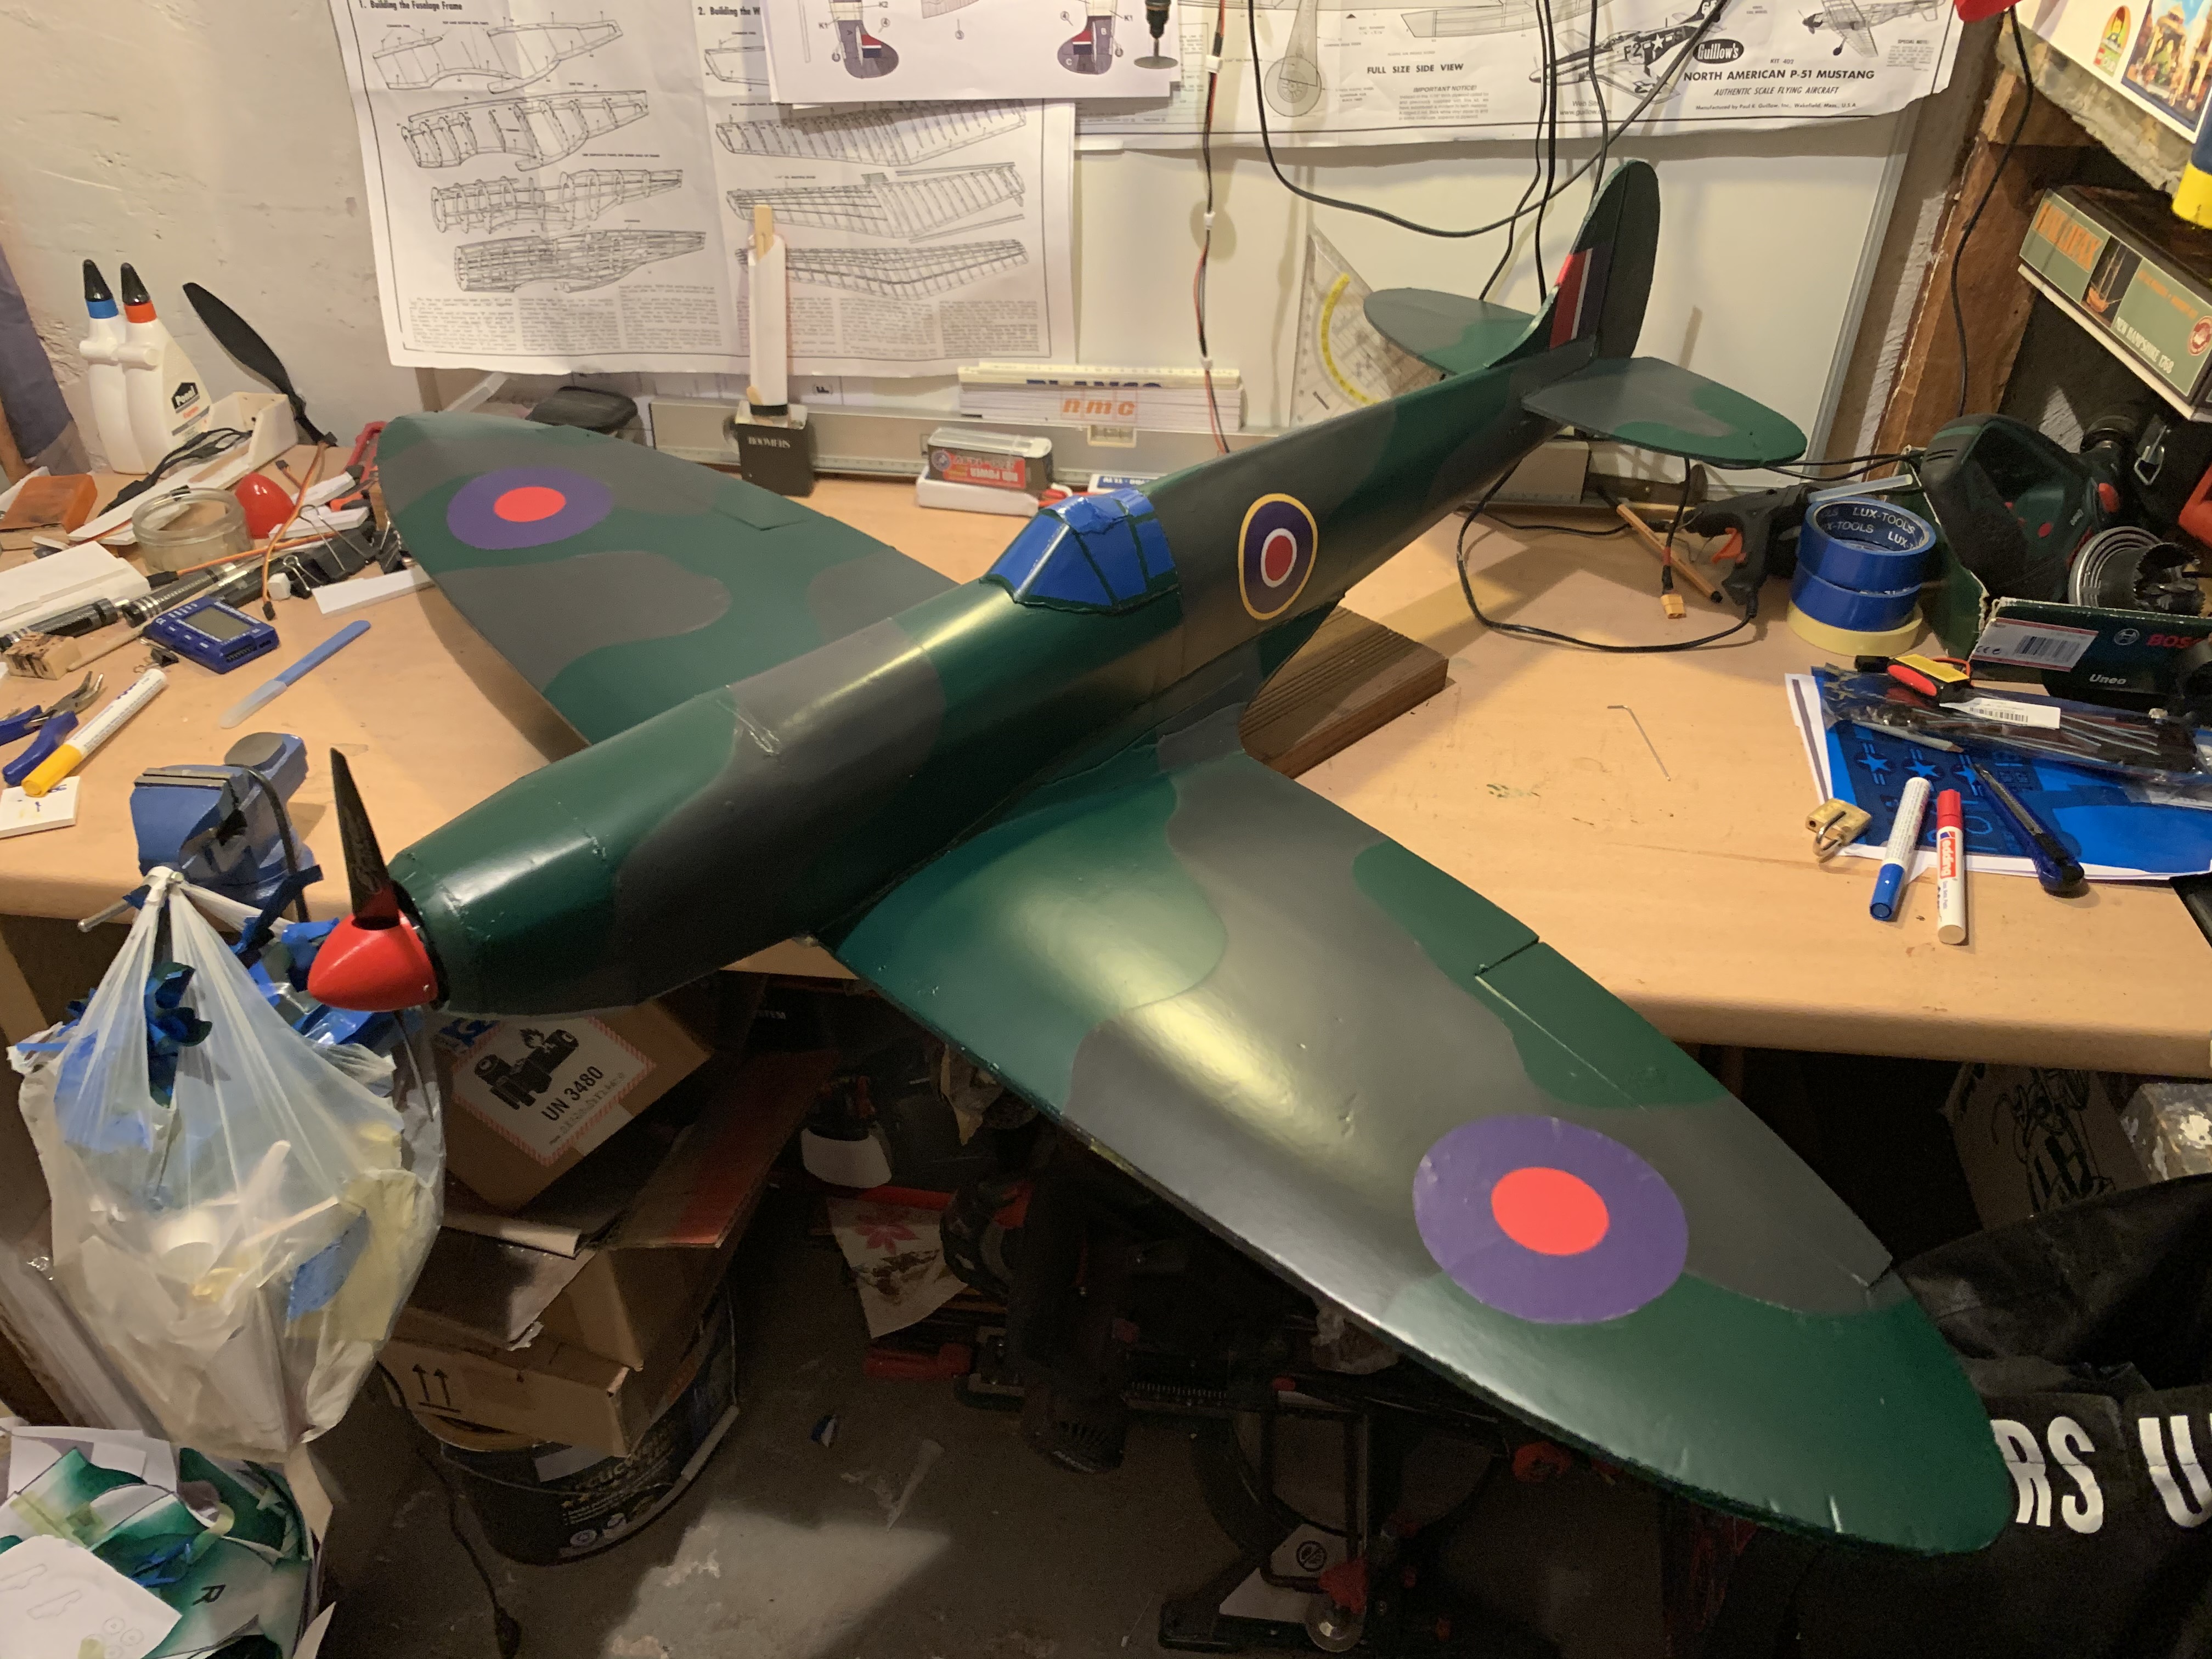
From there it went quite quickly. I had already built the fuselage. Glued everything together, painted it and here we are.

Hope you enjoyed the read!


Good job :D
Log In to reply
Log In to reply
Log In to reply
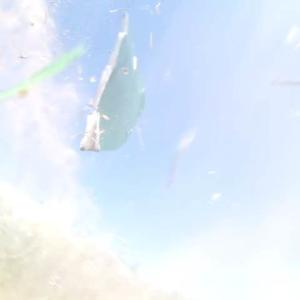
Second maiden lasted slightly longer but did not turn out too well either. The Spit was hardly controllable (felt like a lot of torque and I was not able to get into a real glide). Eventually the spinner with the prop came of but I managed to sail it to the ground without any further issues.
I am now trying to go through the possible issues. 1. The master series design results in a leading edge that is rather flat which could cause stall issues . I am considering adding a balsa finish to the leading edge to get a more round airfoil at the leading edge. However this does not explain why I was able to sail in once the prop was gone.
2. There also seems to be a CG issue. The Spit seems to be rather tail heavy. Will try to move the CG a bit more to the front (somewhere I read about 2 inch (5 cm) from the leading edge, can anybody confirm?).
3. Any suggestions on the torque issue? I heard that this can be countered with a bit of rudder. Is that a trimming issue?
Log In to reply
Log In to reply
Log In to reply
Log In to reply