Over the winter I decided to scratch build a BF-109. 7 months later I finished it. Much credit goes to localfiend for his up-scaled plans. These were the basis for my build although I ended up experimenting a great deal with the firewall, nose, and internals.
Resources:
Electronics Used:
- RC Timer 3530 1100kv motor $13.99
- 40A ESC (skywalker etc..)
- 4 servos
- An old 6 channel RX
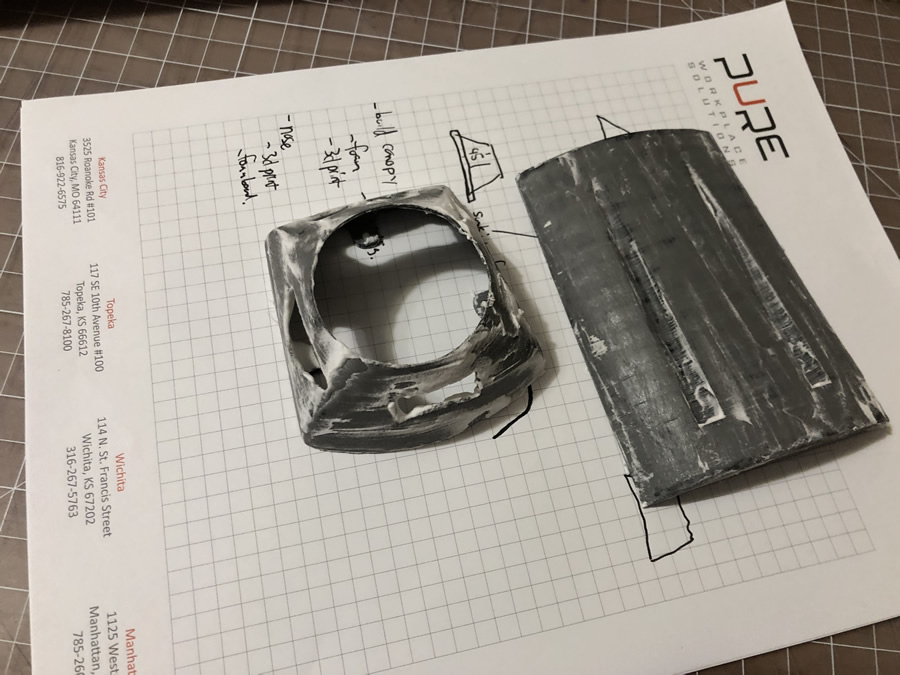
3D Printed Custom Designs:
While my fuselage design began as the 39" plans. It ended up warped and molded to the shape I desired. My 3d printed parts are heavily customized to the exact measurements of my front-end. I have made every attempt to build with variables that will make it easy to reverse-engineer or modify the dimensions to fit other builds.
- Firewall / Motor Mount
- Cowl
- Gun Deck
- Cockpit Frame
3D Printed Parts from Other People(inspiration & some used):
- 2 and 3 blade spinners. Printed at 75%
- BF 109 Parts
- More BF 109 Parts
- BF109 Guns. Printed at 50%
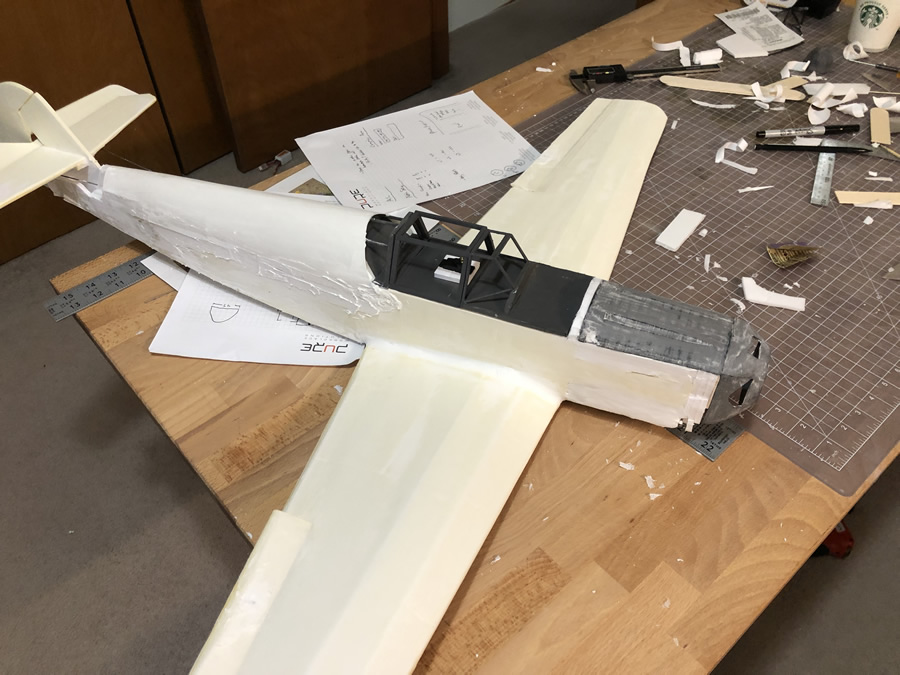
The build started off just like any other with the basic plans and cutouts. The first deviation from the stock plans was the firewall. I skipped the "power pod" approach constructed a firewall made up of hot-glue and foamboard blocks. Glued together vertically and then glue smoothed over the surface it created an incredibly hard surface.
To the firewall I attached a 3d printed firewall / motor mount. True to the FT Spitfire and 109 plans I used 2 skewers at the top to line everything up and stick it in place. It is hot-glued onto the firewall only - after 4 test flights there were no issues so I'm leaving it for now.
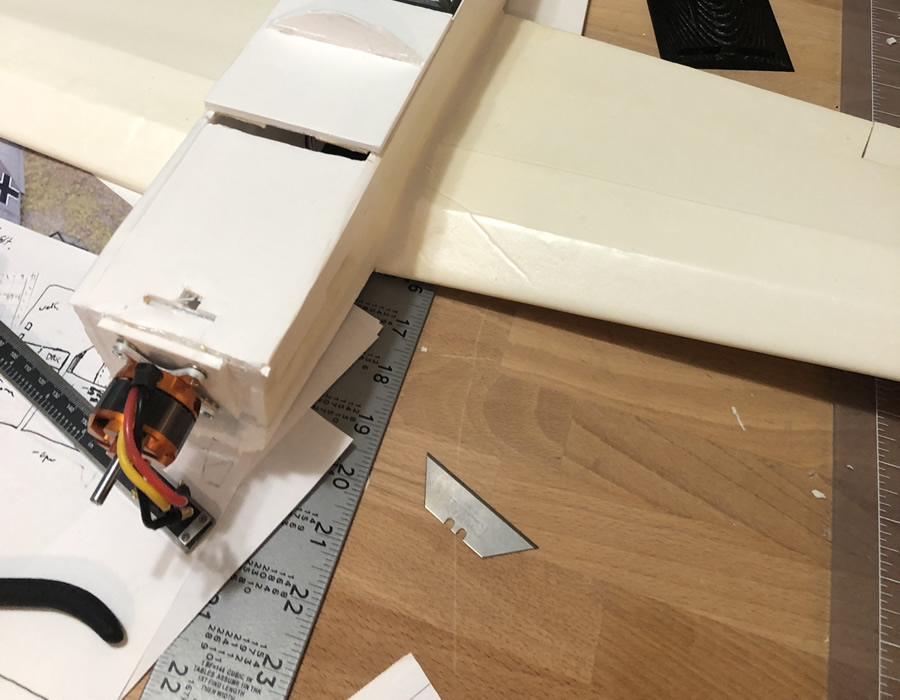
Once the basic air frame was completed I installed electronics I decided to throw it in the air and see if it flew before investing more time.
I printed out a "canopy" on some transparent overhead paper and hot glued it to the hatch. I added a paper gun deck complete with Sharpie gun mounts. In the 2nd picture you will notice I used lightweight spackle to create the rounded surface on the hatch. The final build used paper and while it is lighter, the texture of the spackle looks a bit better IMO.
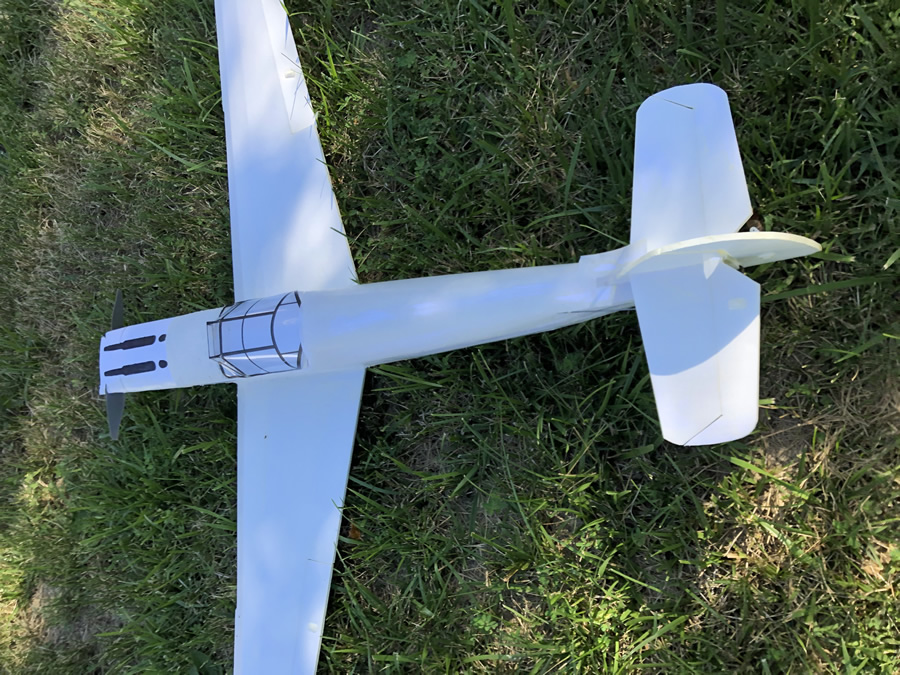

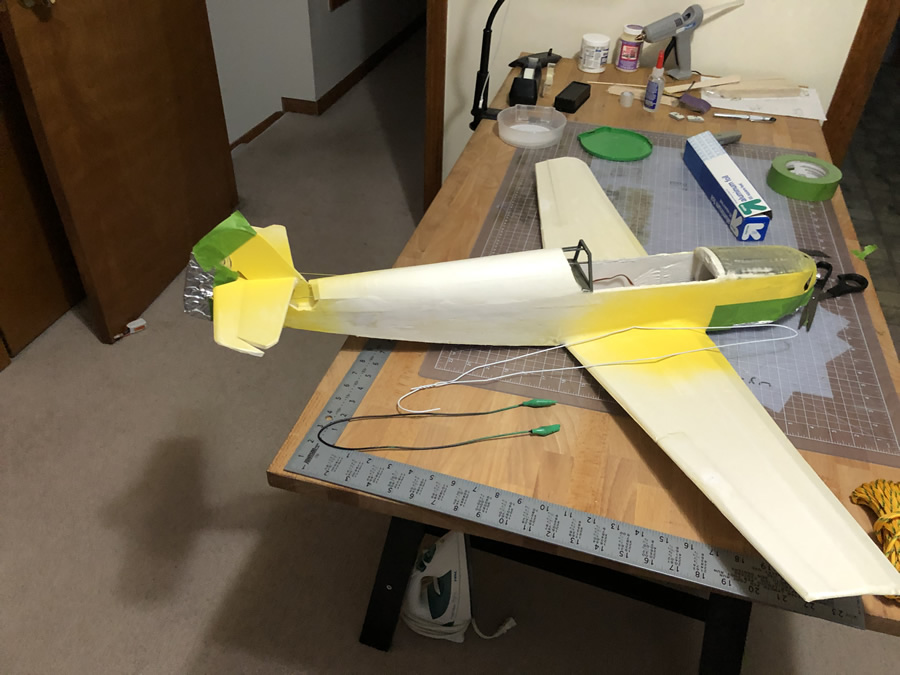
For the test flight, I used a 3S 2200 battery pushed all the way forward to get the CG "in-range". I also adjusted the aileron rate to 50%. At full they were really big and especially for a maiden I wanted to dial it back a ton.
The short version, it flew perfect. Smooth and level. Handling was very easy with the low rates and she flew calmly around the field at 80% power. Perfect for a test-flight but this plane is made for 4S.
After 3 x 5 min test flights she passed the test. Back to the workshop to make her look better.
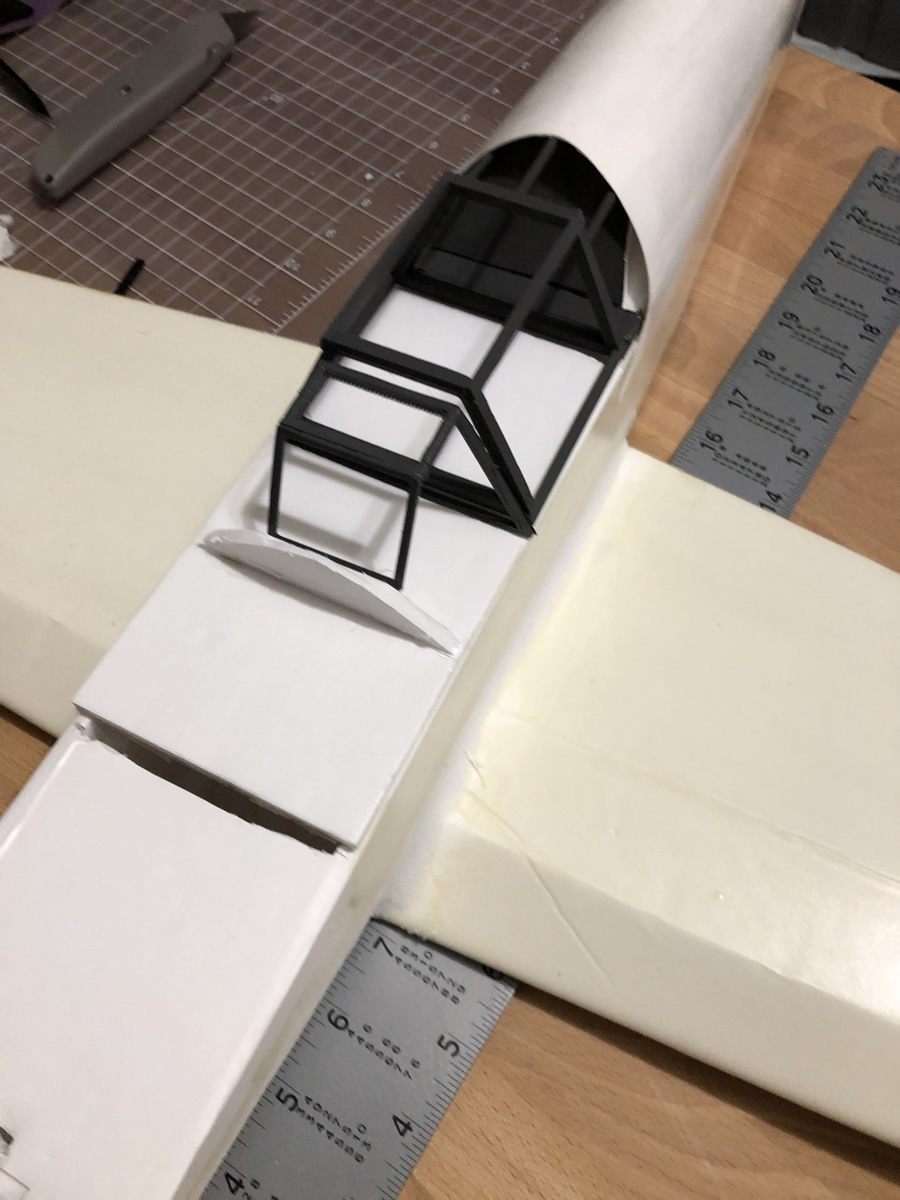
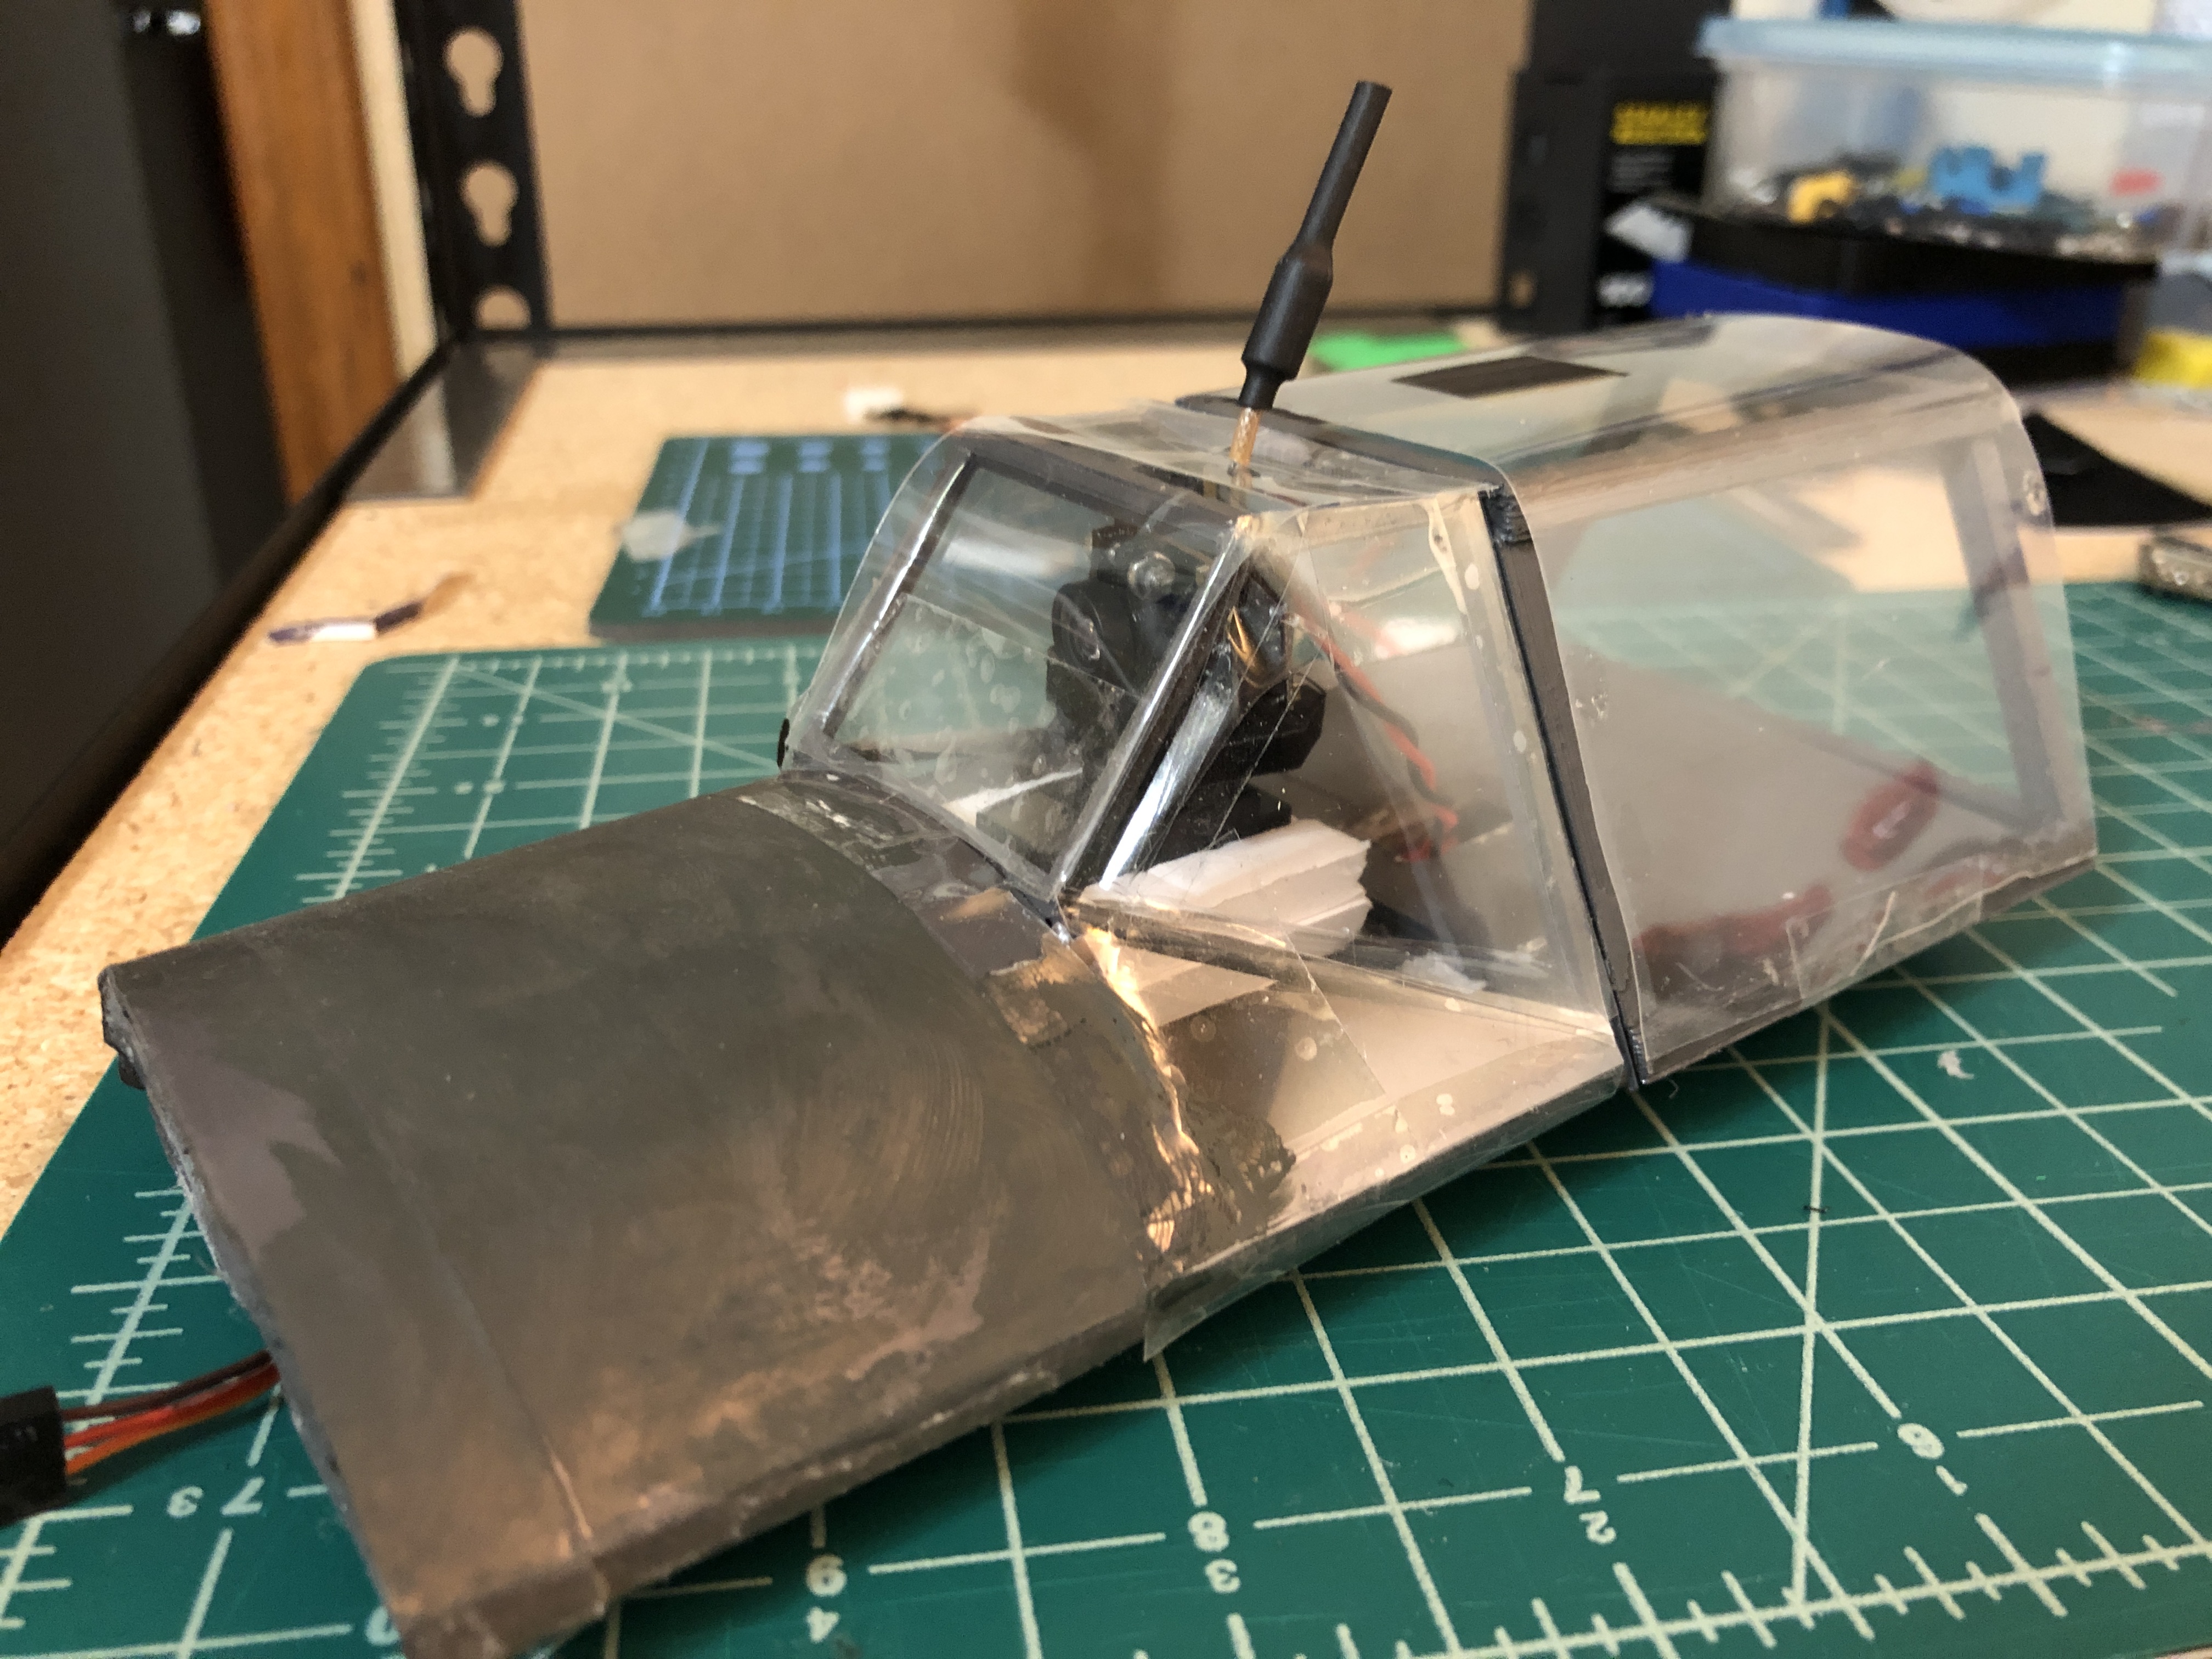
Hatch & Canopy
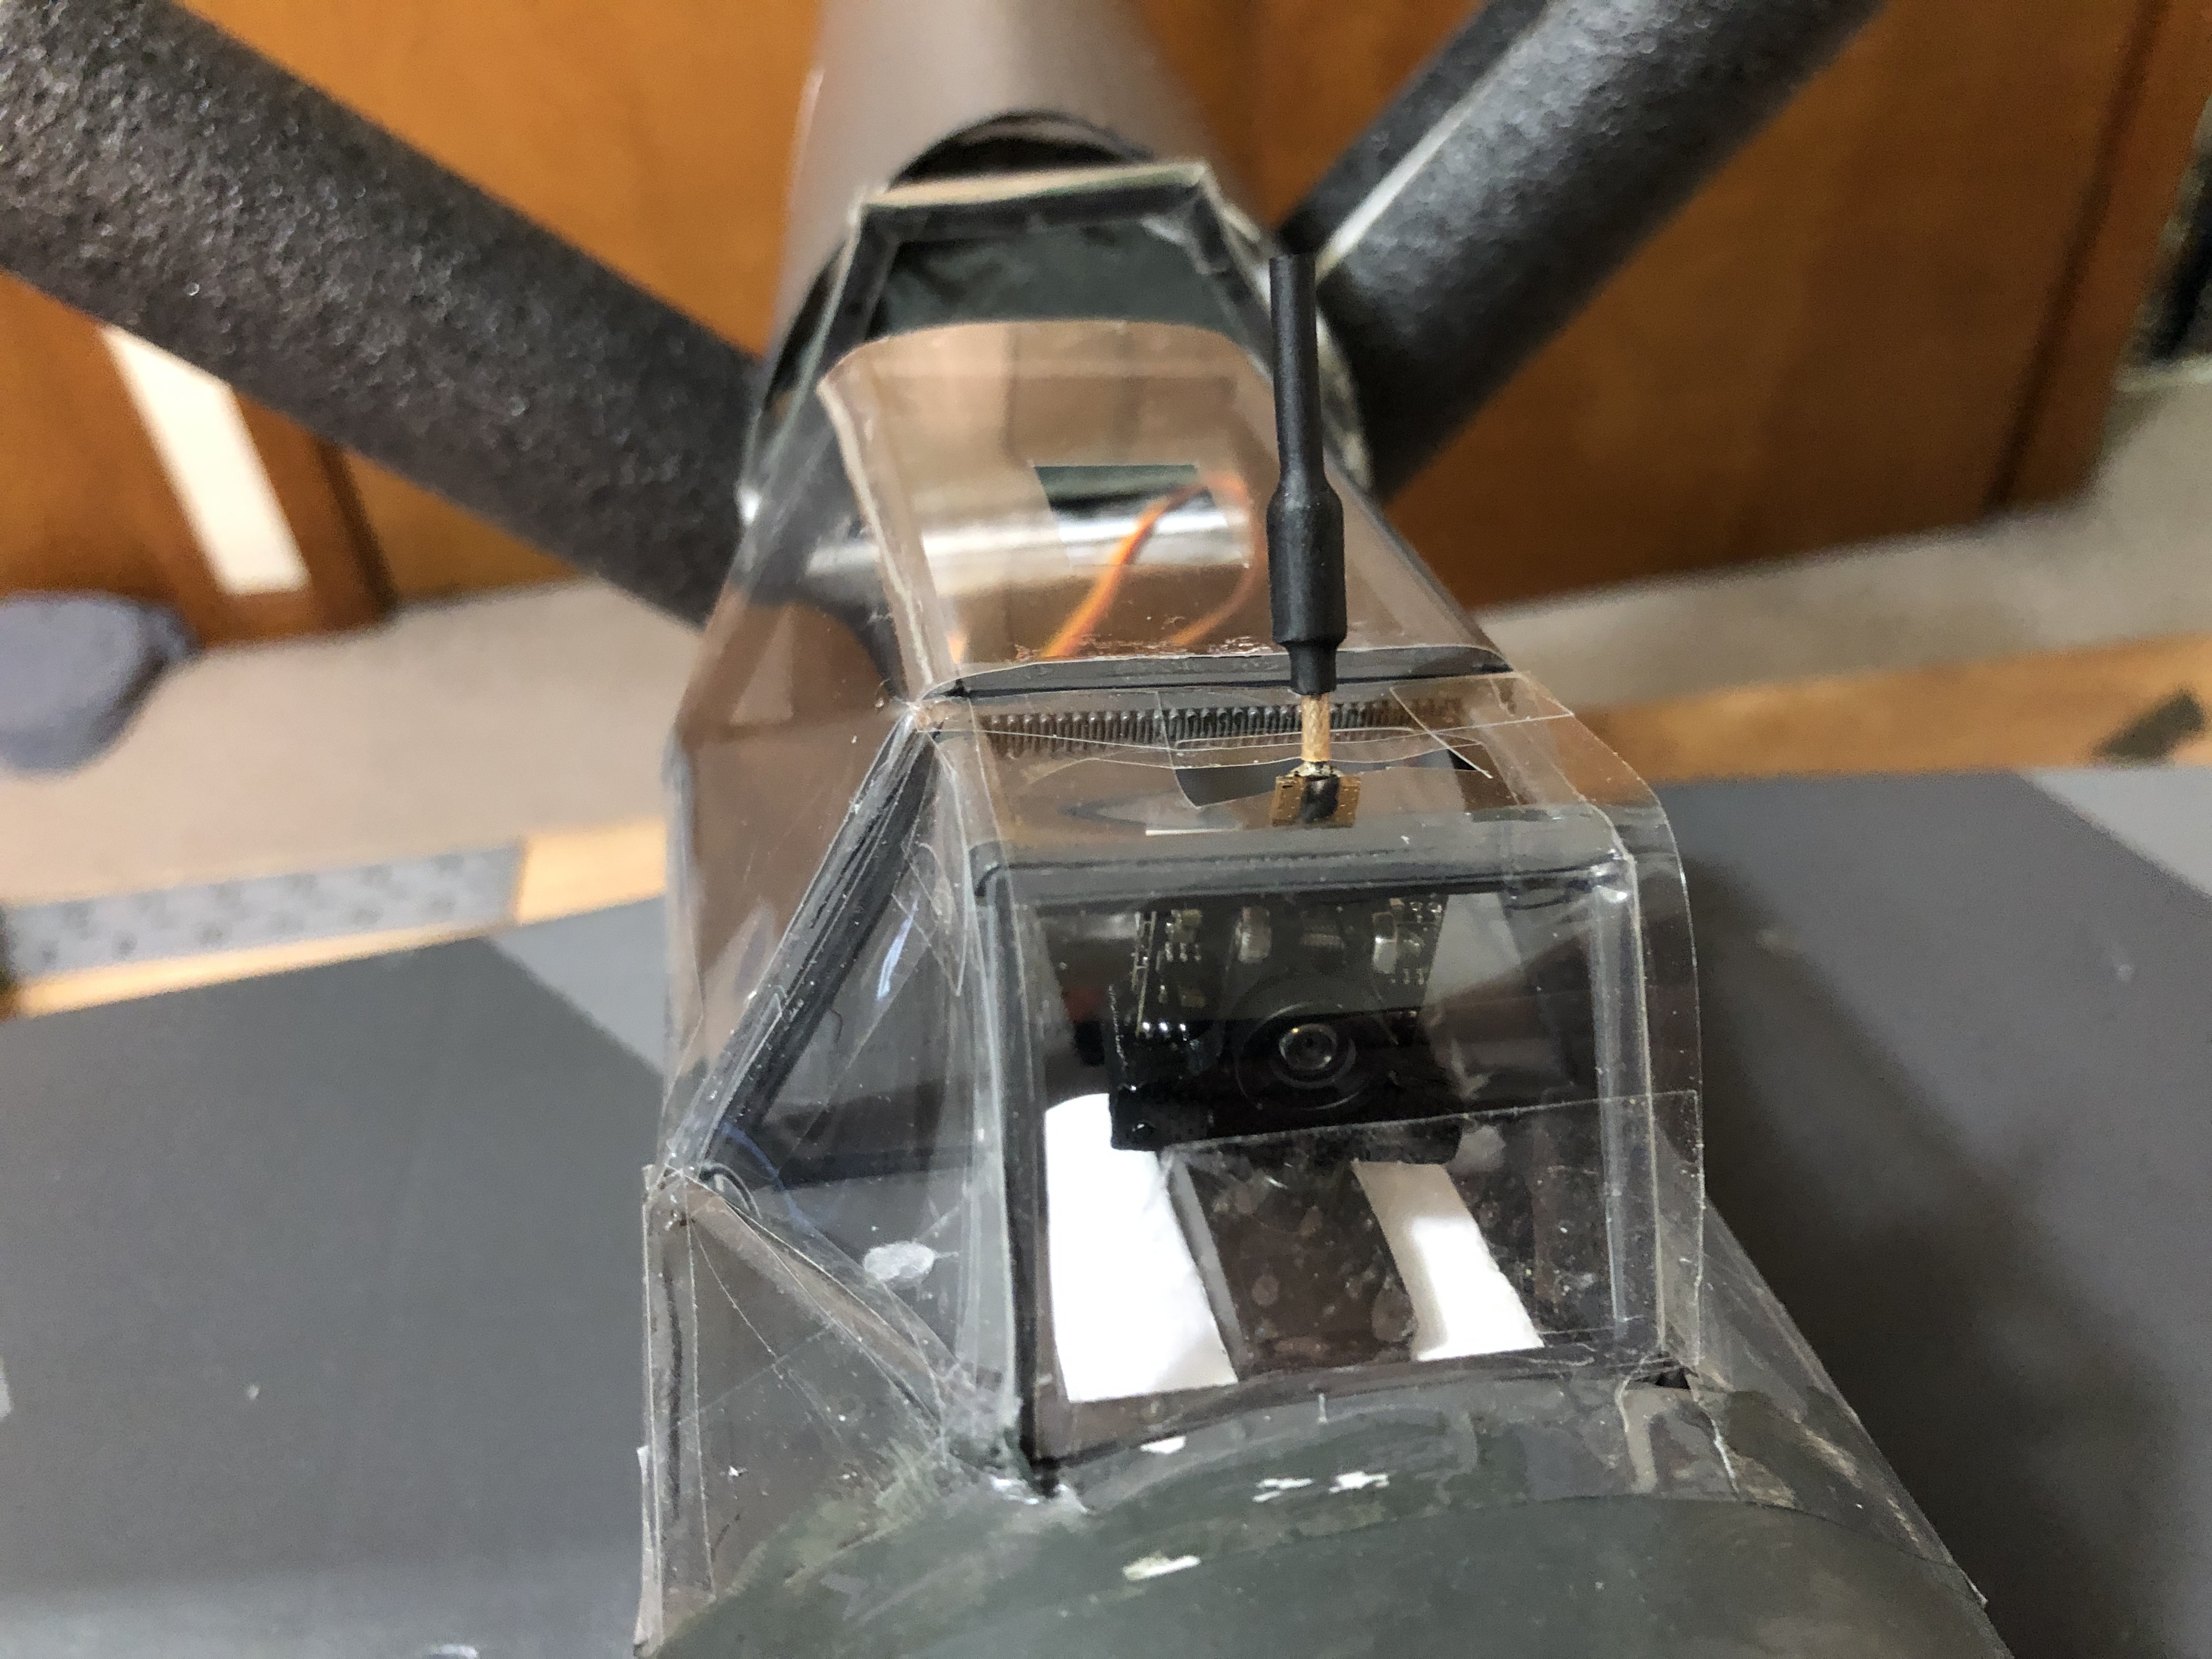
The transparency cockpit never looked quite right so I spent a weekend in OnShape trying different 3d printed designs. I settled on printing a series of trapezoids and connecting beams. These are all glued together with CA and surprisingly strong. The plan is to take clear plastic from a soda bottle and use a heat-gun to shape it over the frame bits to finalize. The cockpit has a 180 degree servo mount for a FPV camera I will use with a head tracking module.

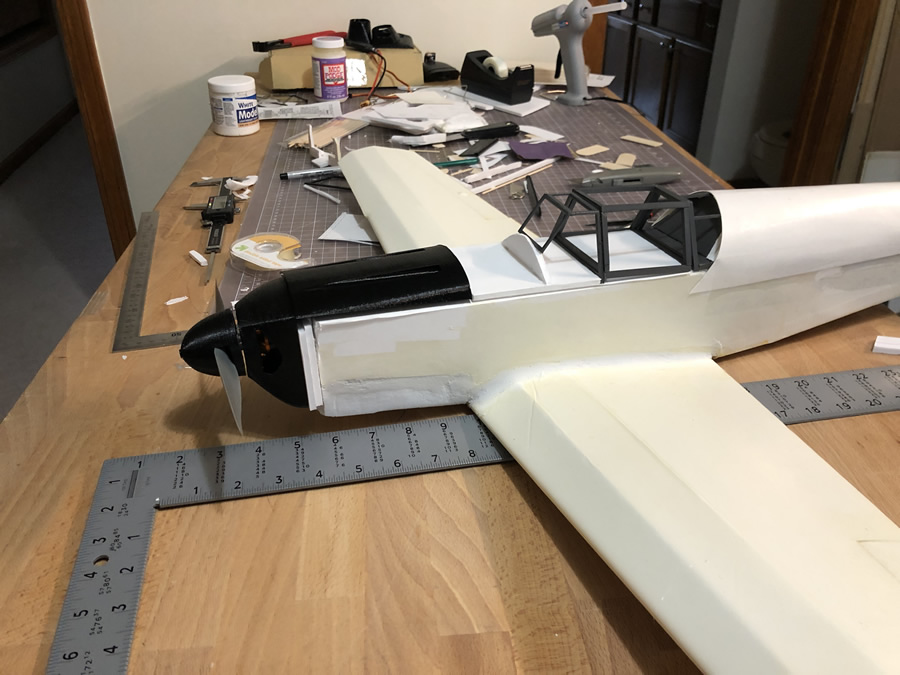
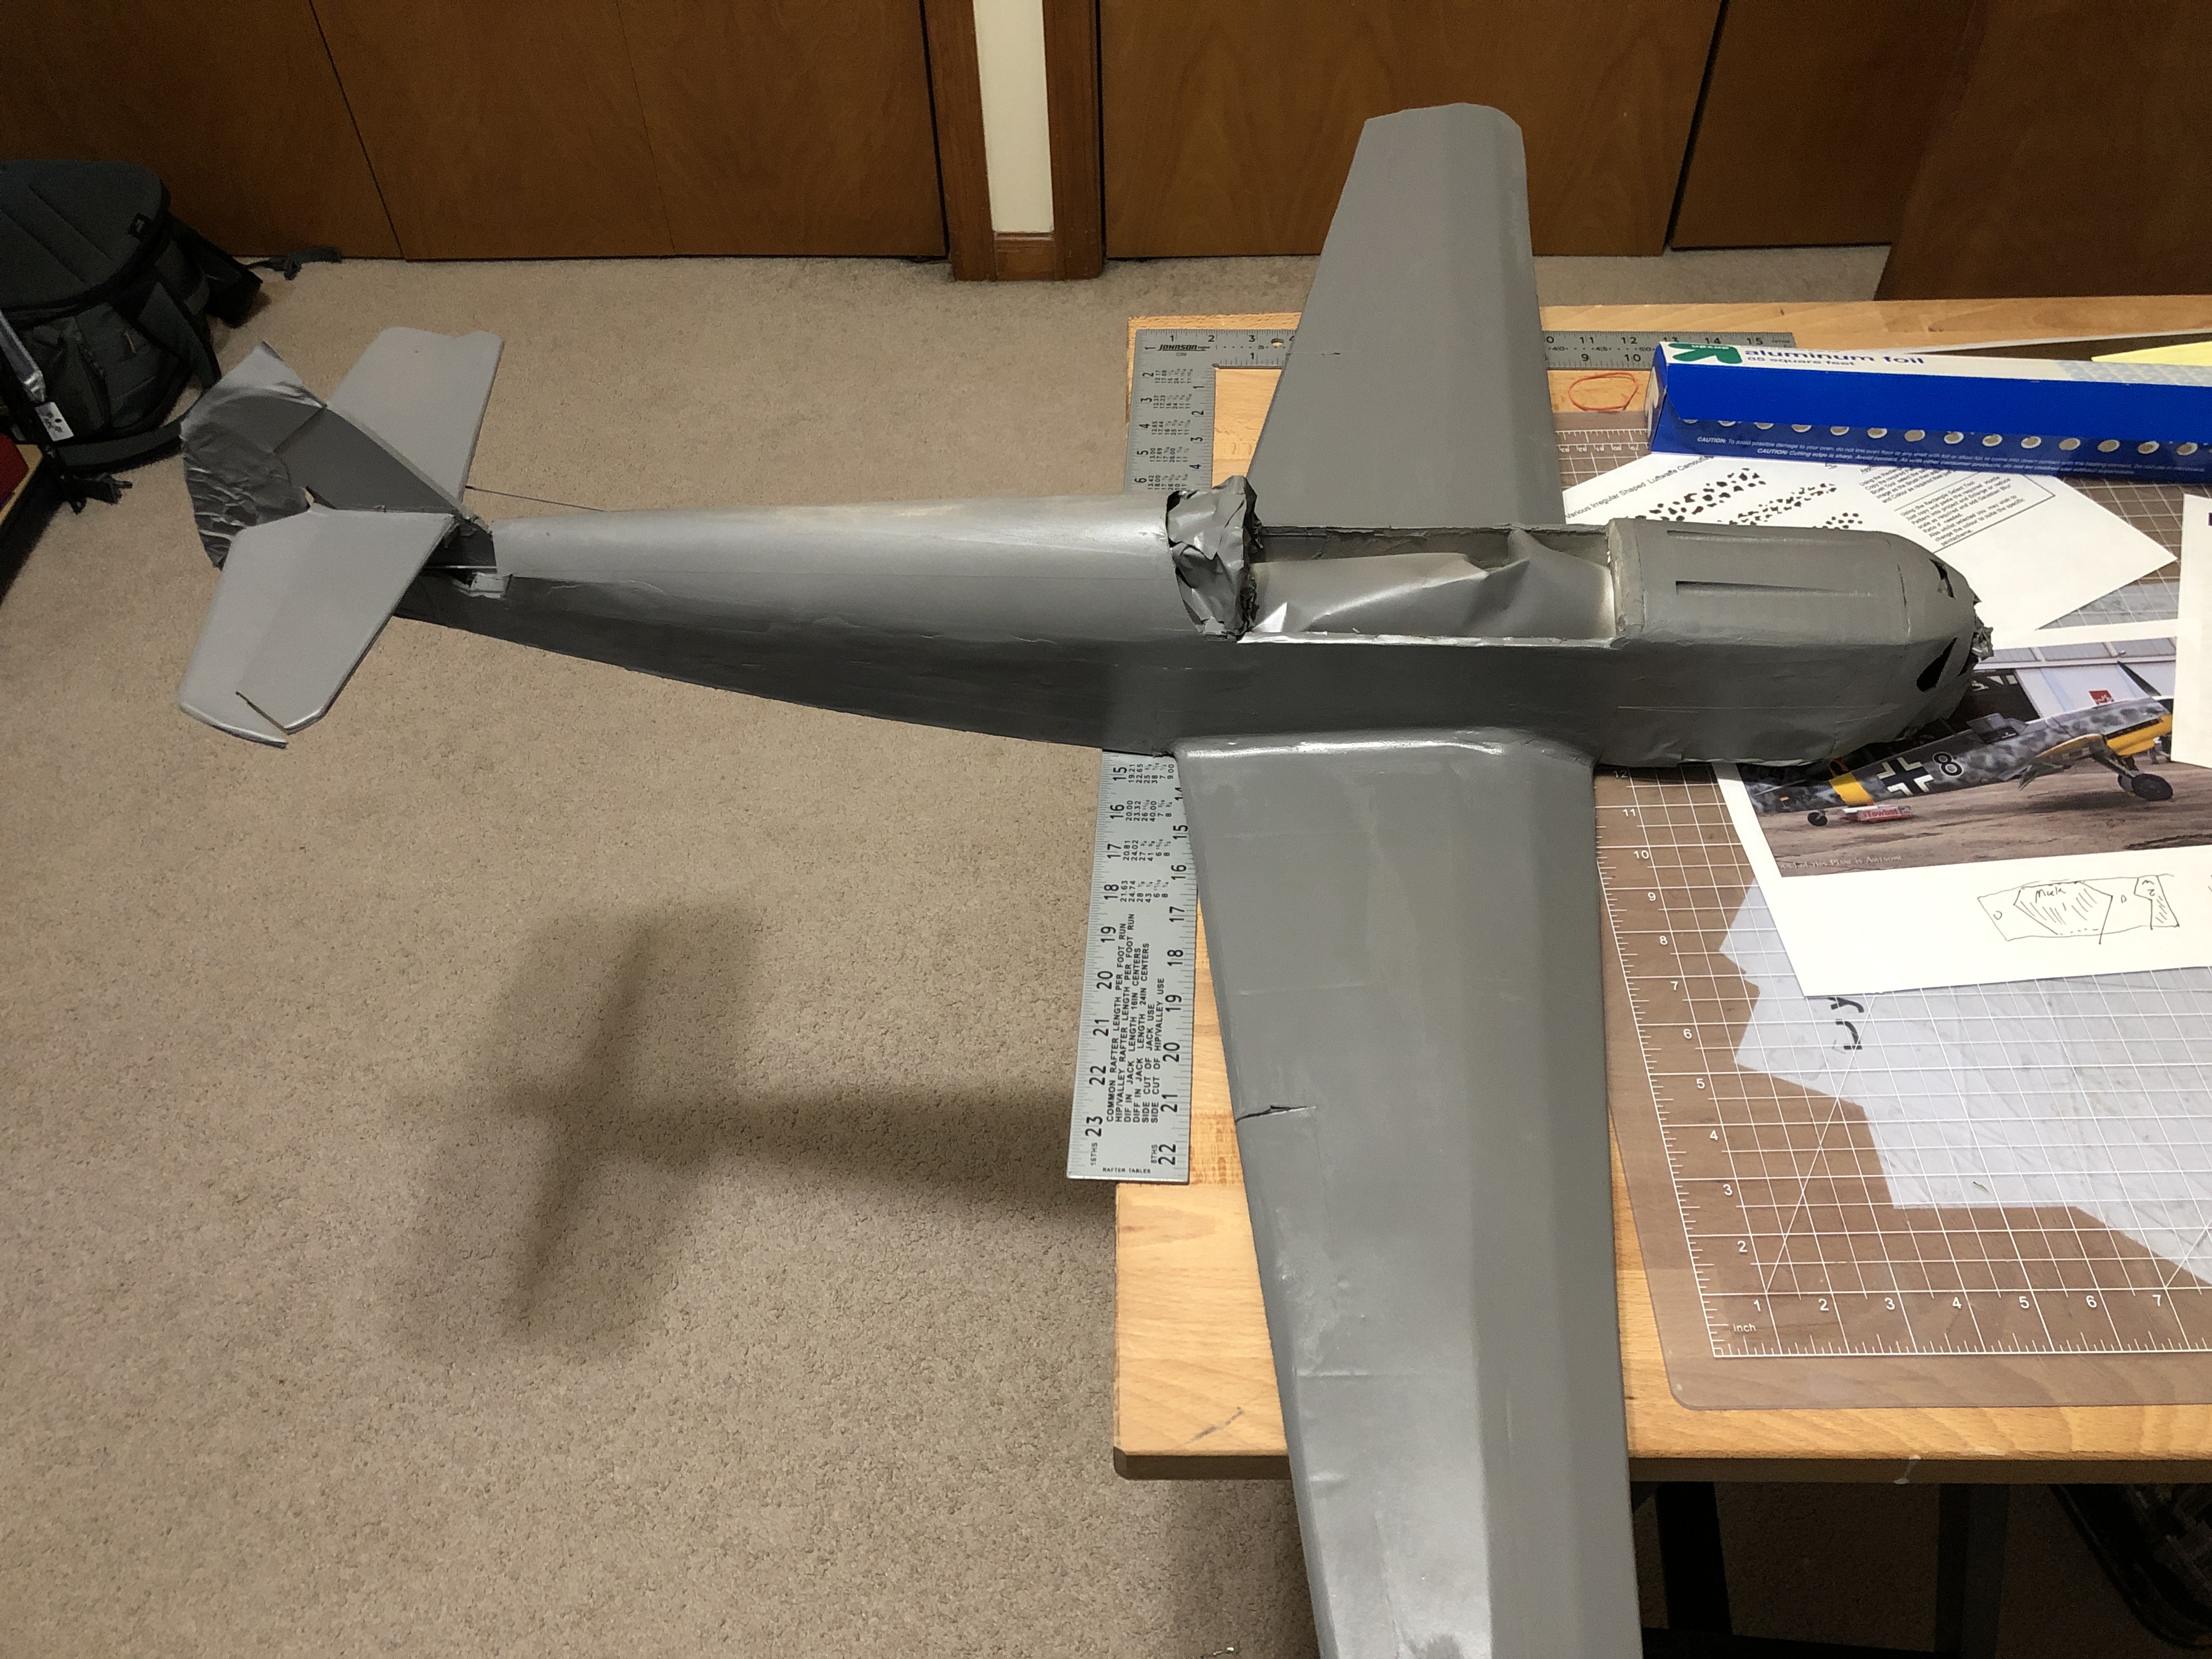
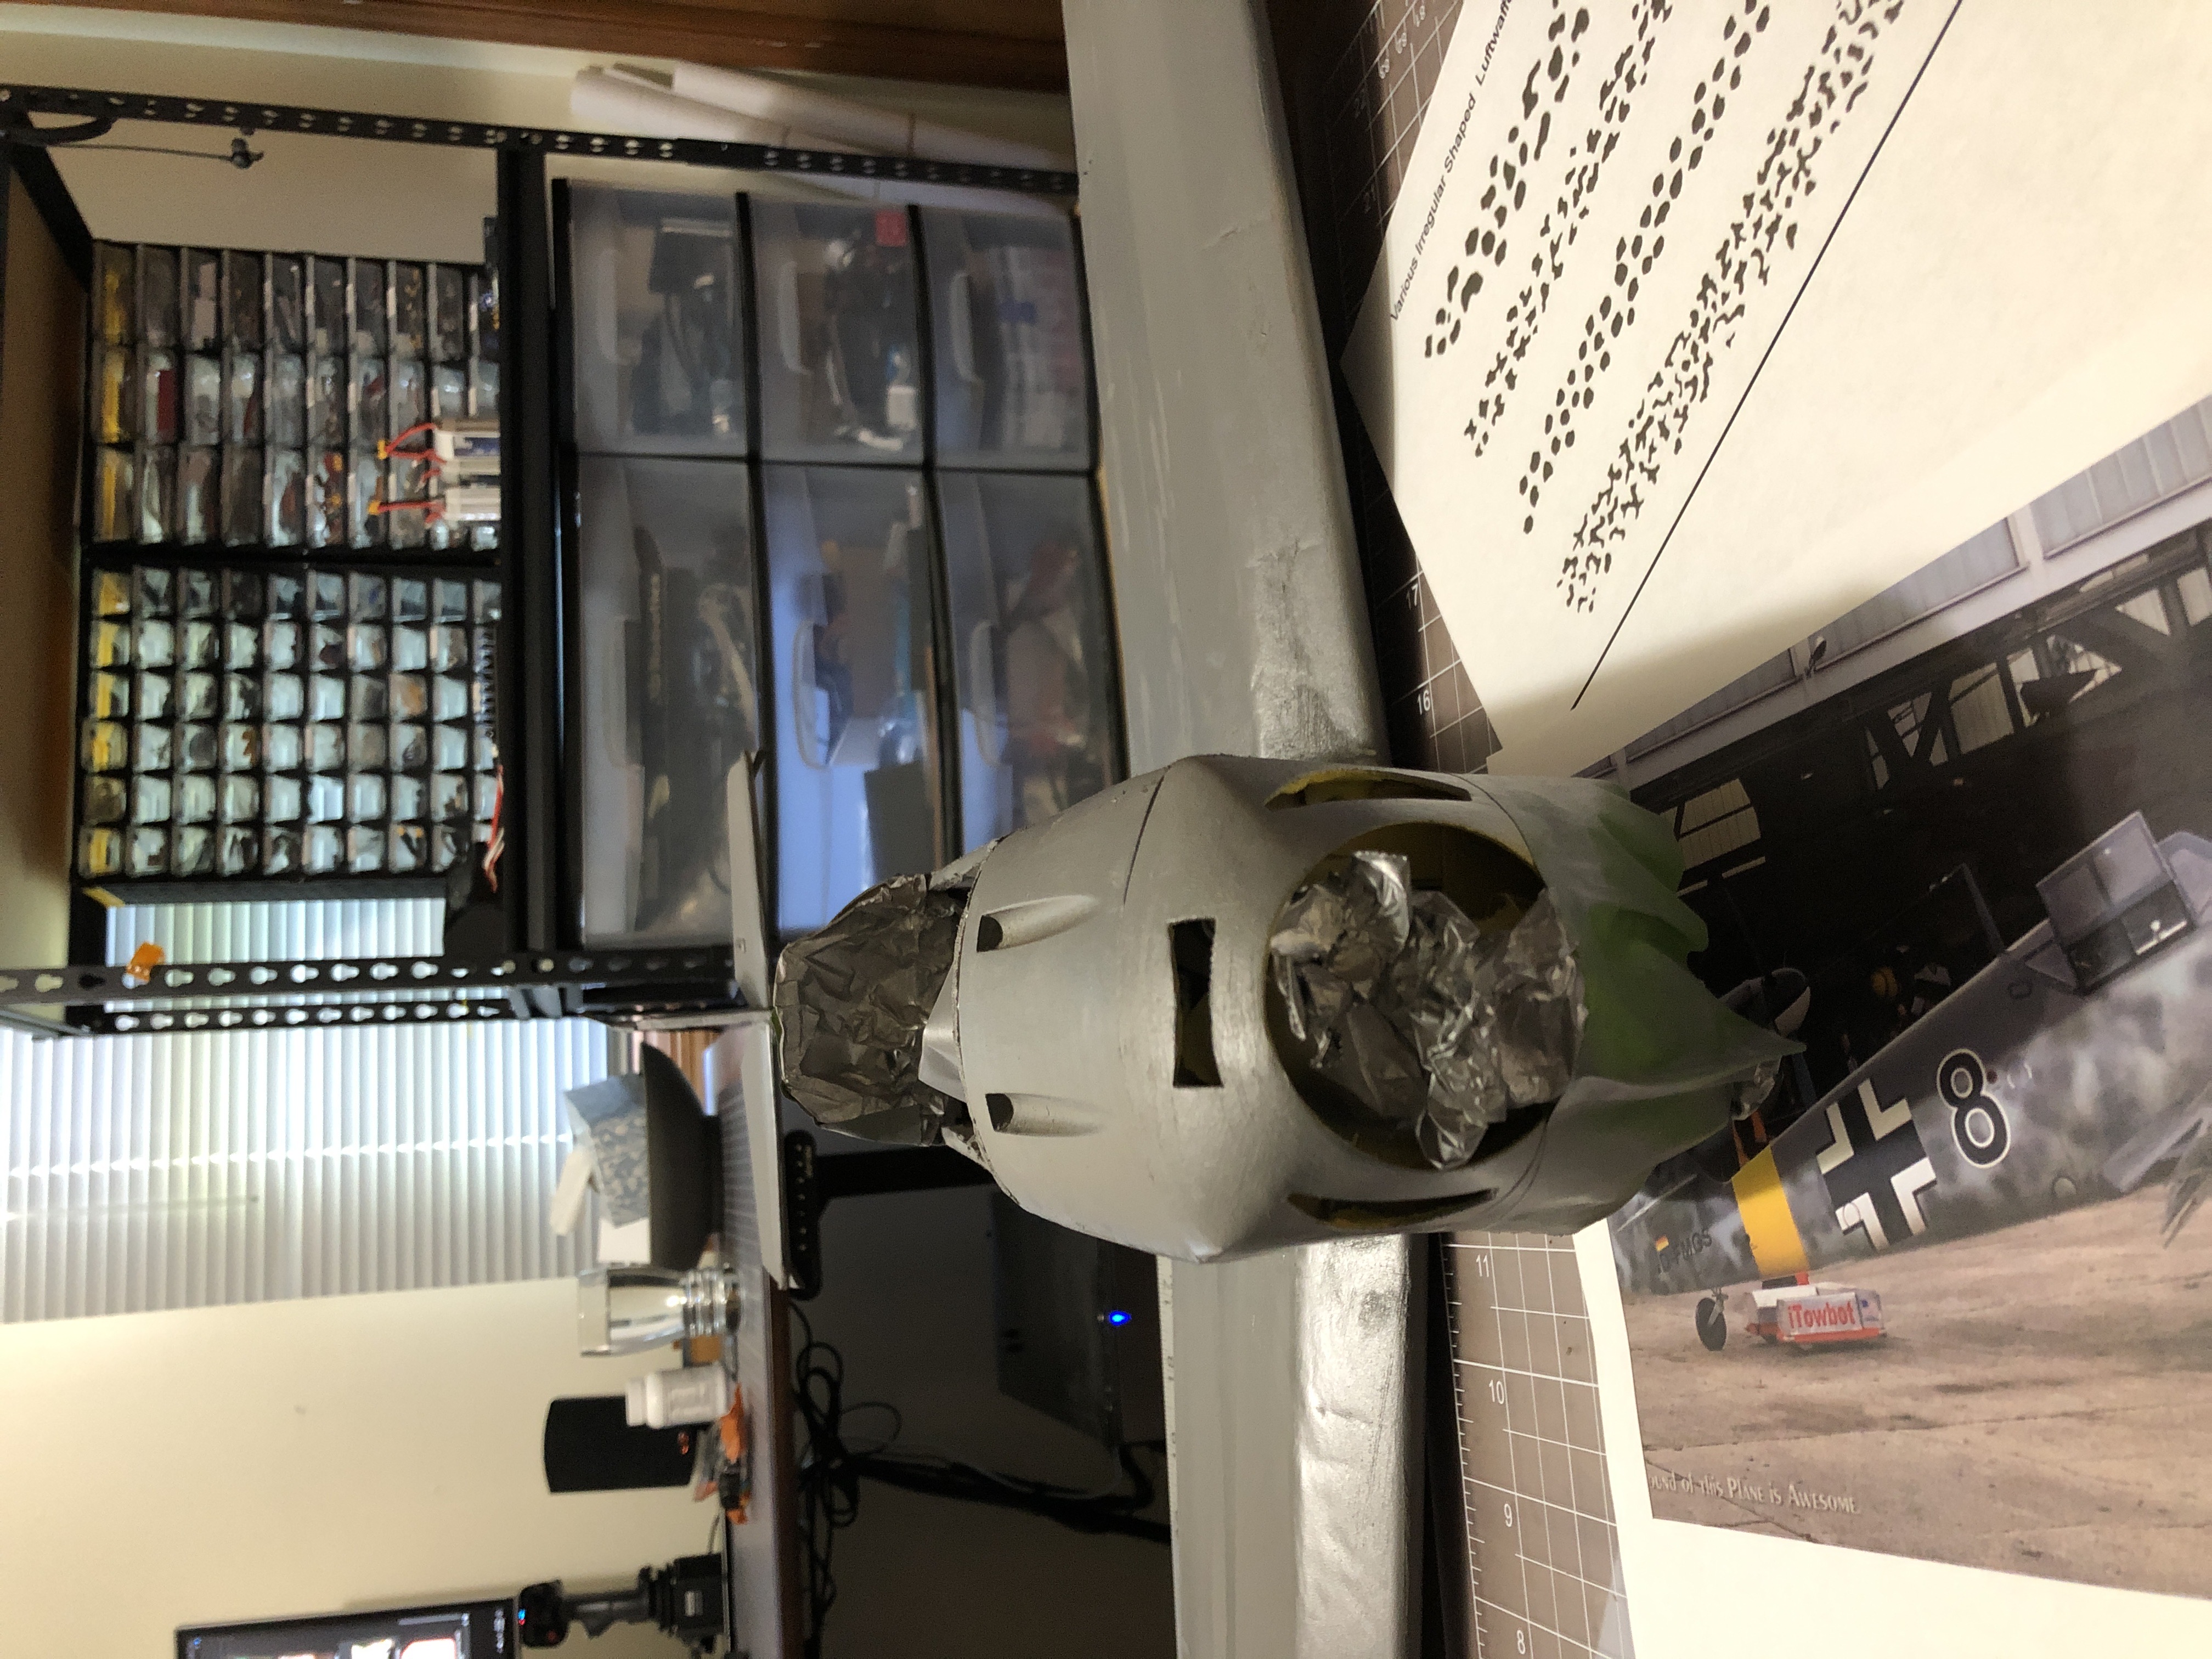
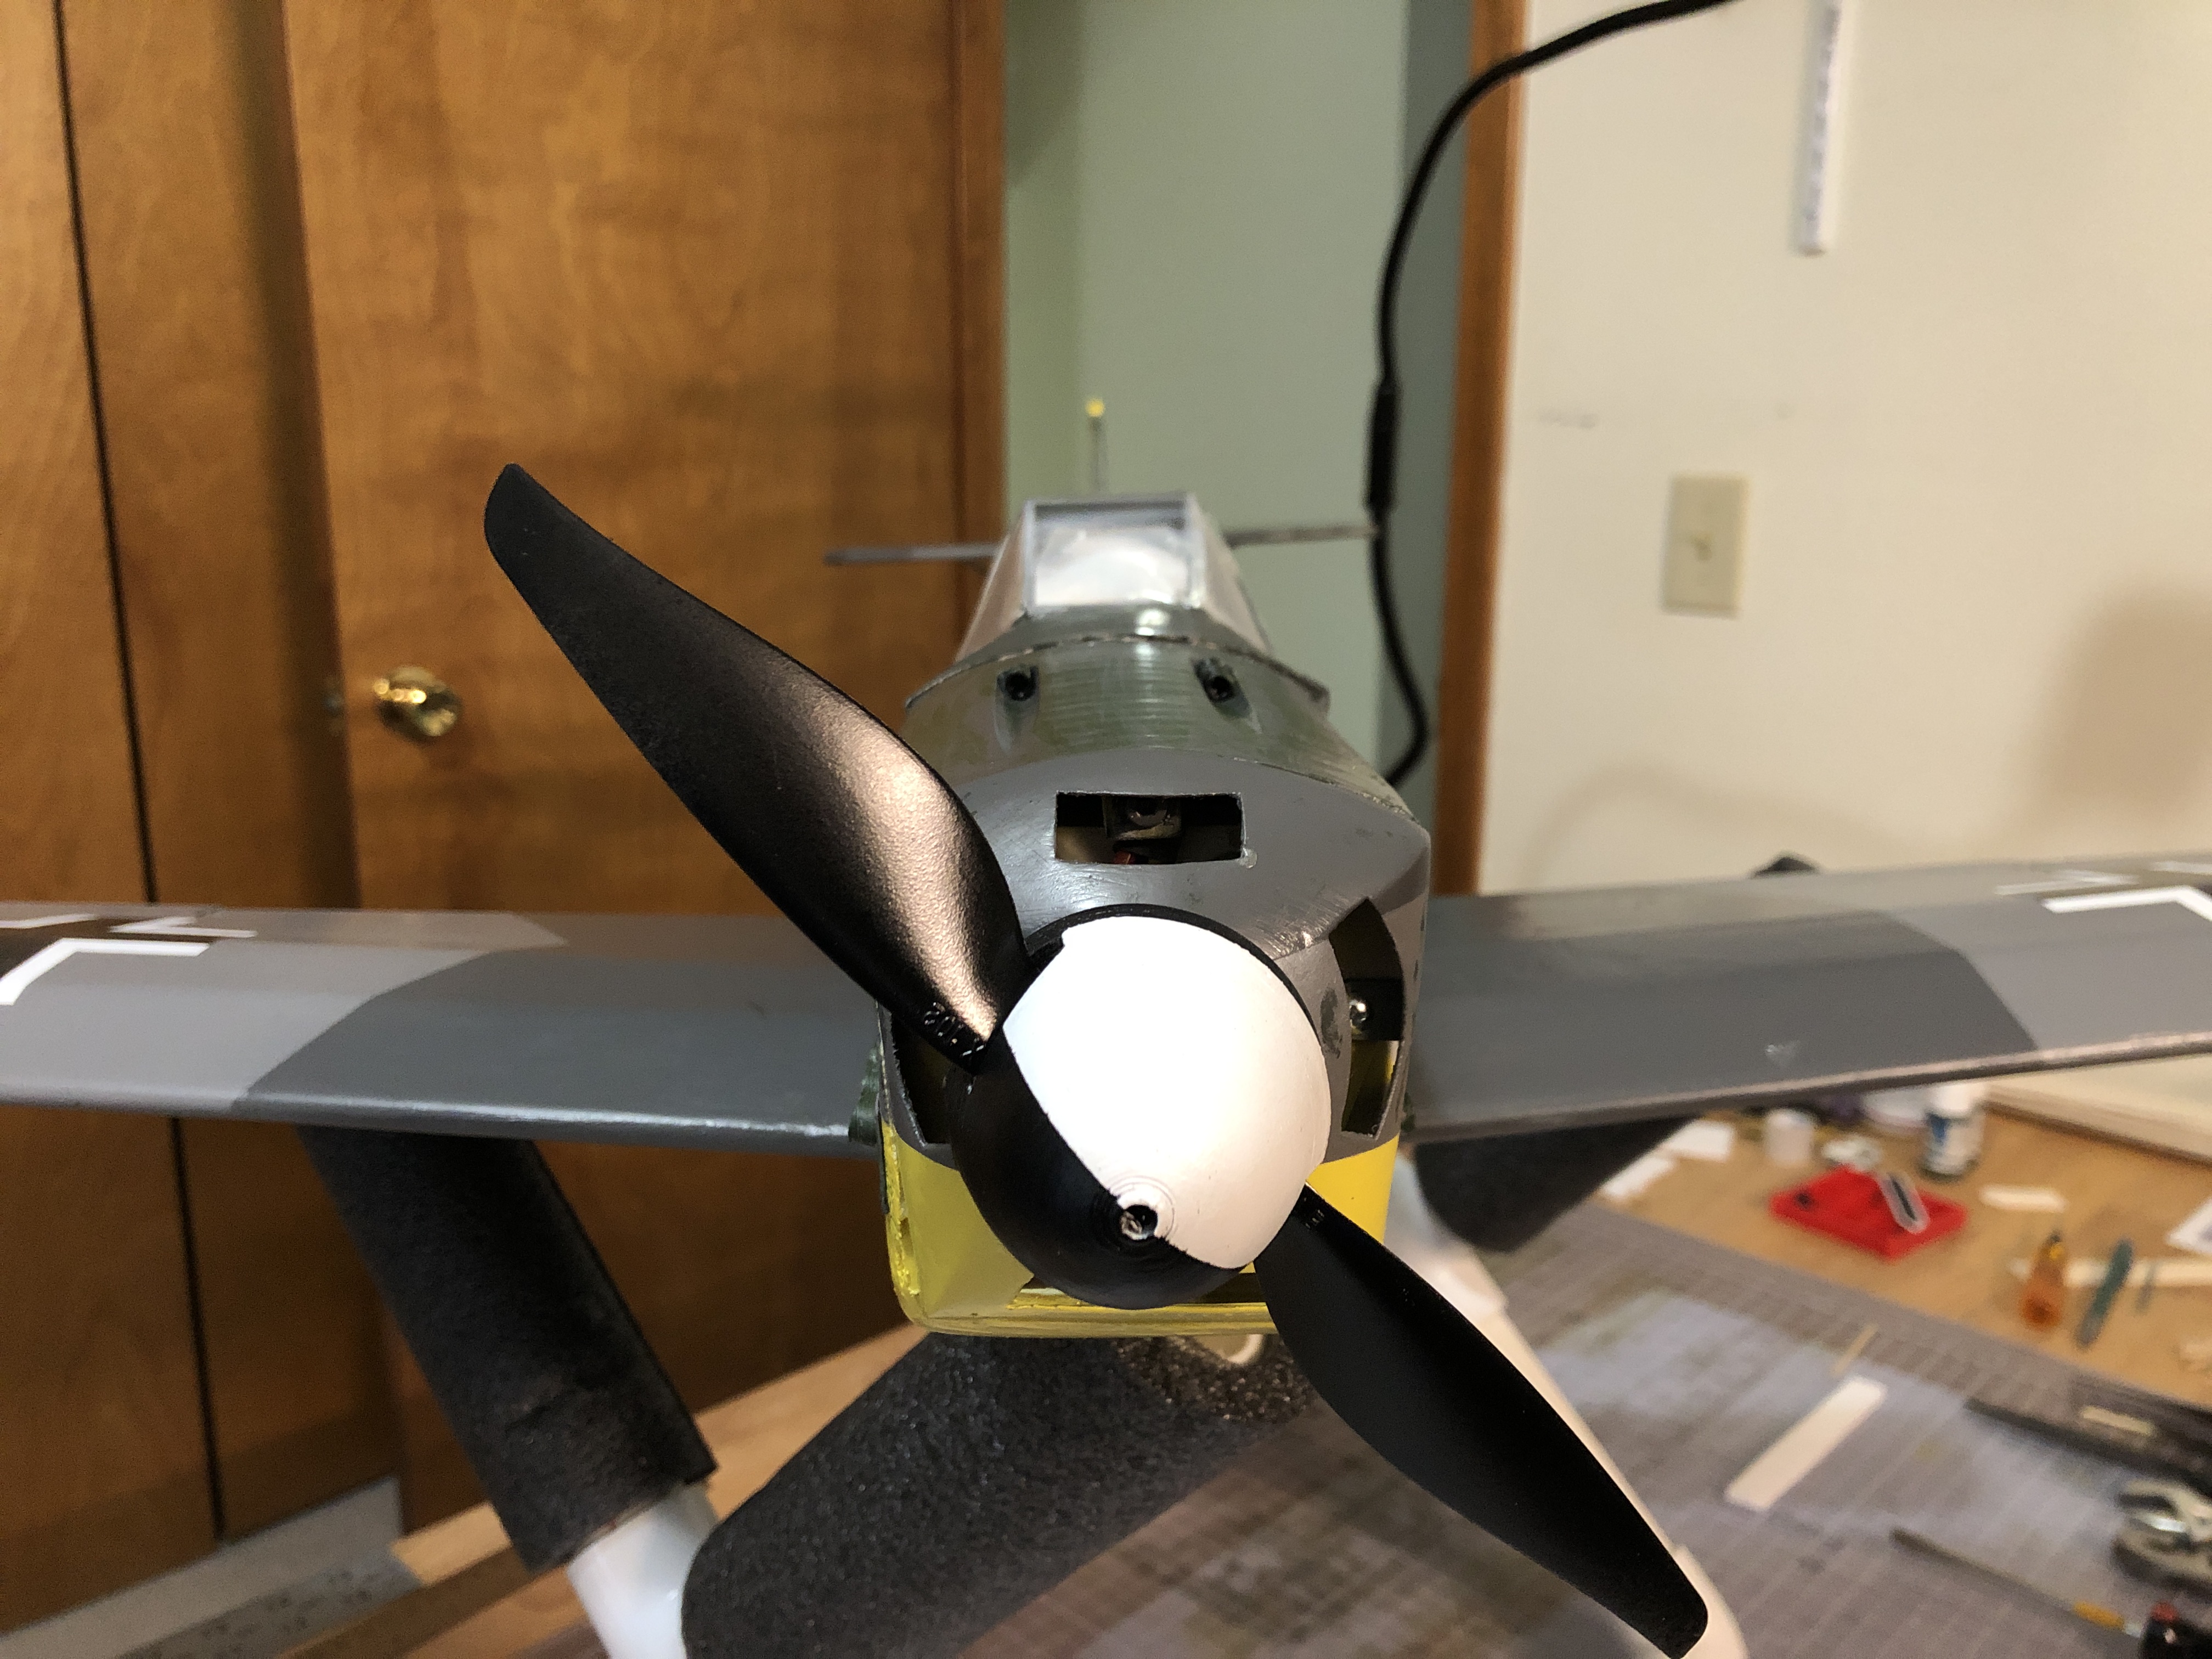
The next major design change was creating a 3d printed nose cowl. I hate the square front on the FT planes. If I was to build a new BF109 I would use rounded formers and a more traditional construction technique but I had already built the plane body and decided to do what I could with off the shelf foam, lightweight filler, and 3d printing.
I printed 3-4 iterations of the cowl to get the sizing right and line up the mounting holes. It was surprisingly easy to create a nice looking nose with extensive use of the "LOFT" command. At this point I was sticking foam bits here and there mixed with hot glue to create a nice surface for the cowl to screw into. I ended up building a foamboard box around the motor and then gluing popsicle sticks around it to create a solid surface for attaching the cowl via several small wood screws.
I also created a 3d printed gundeck. Both pieces are shelled to about 1mm of thickness. They print great using PETG and while heavier than paper are not too bad. Based on my test flights I knew I had around 50g of weight that could be added up front without issue.
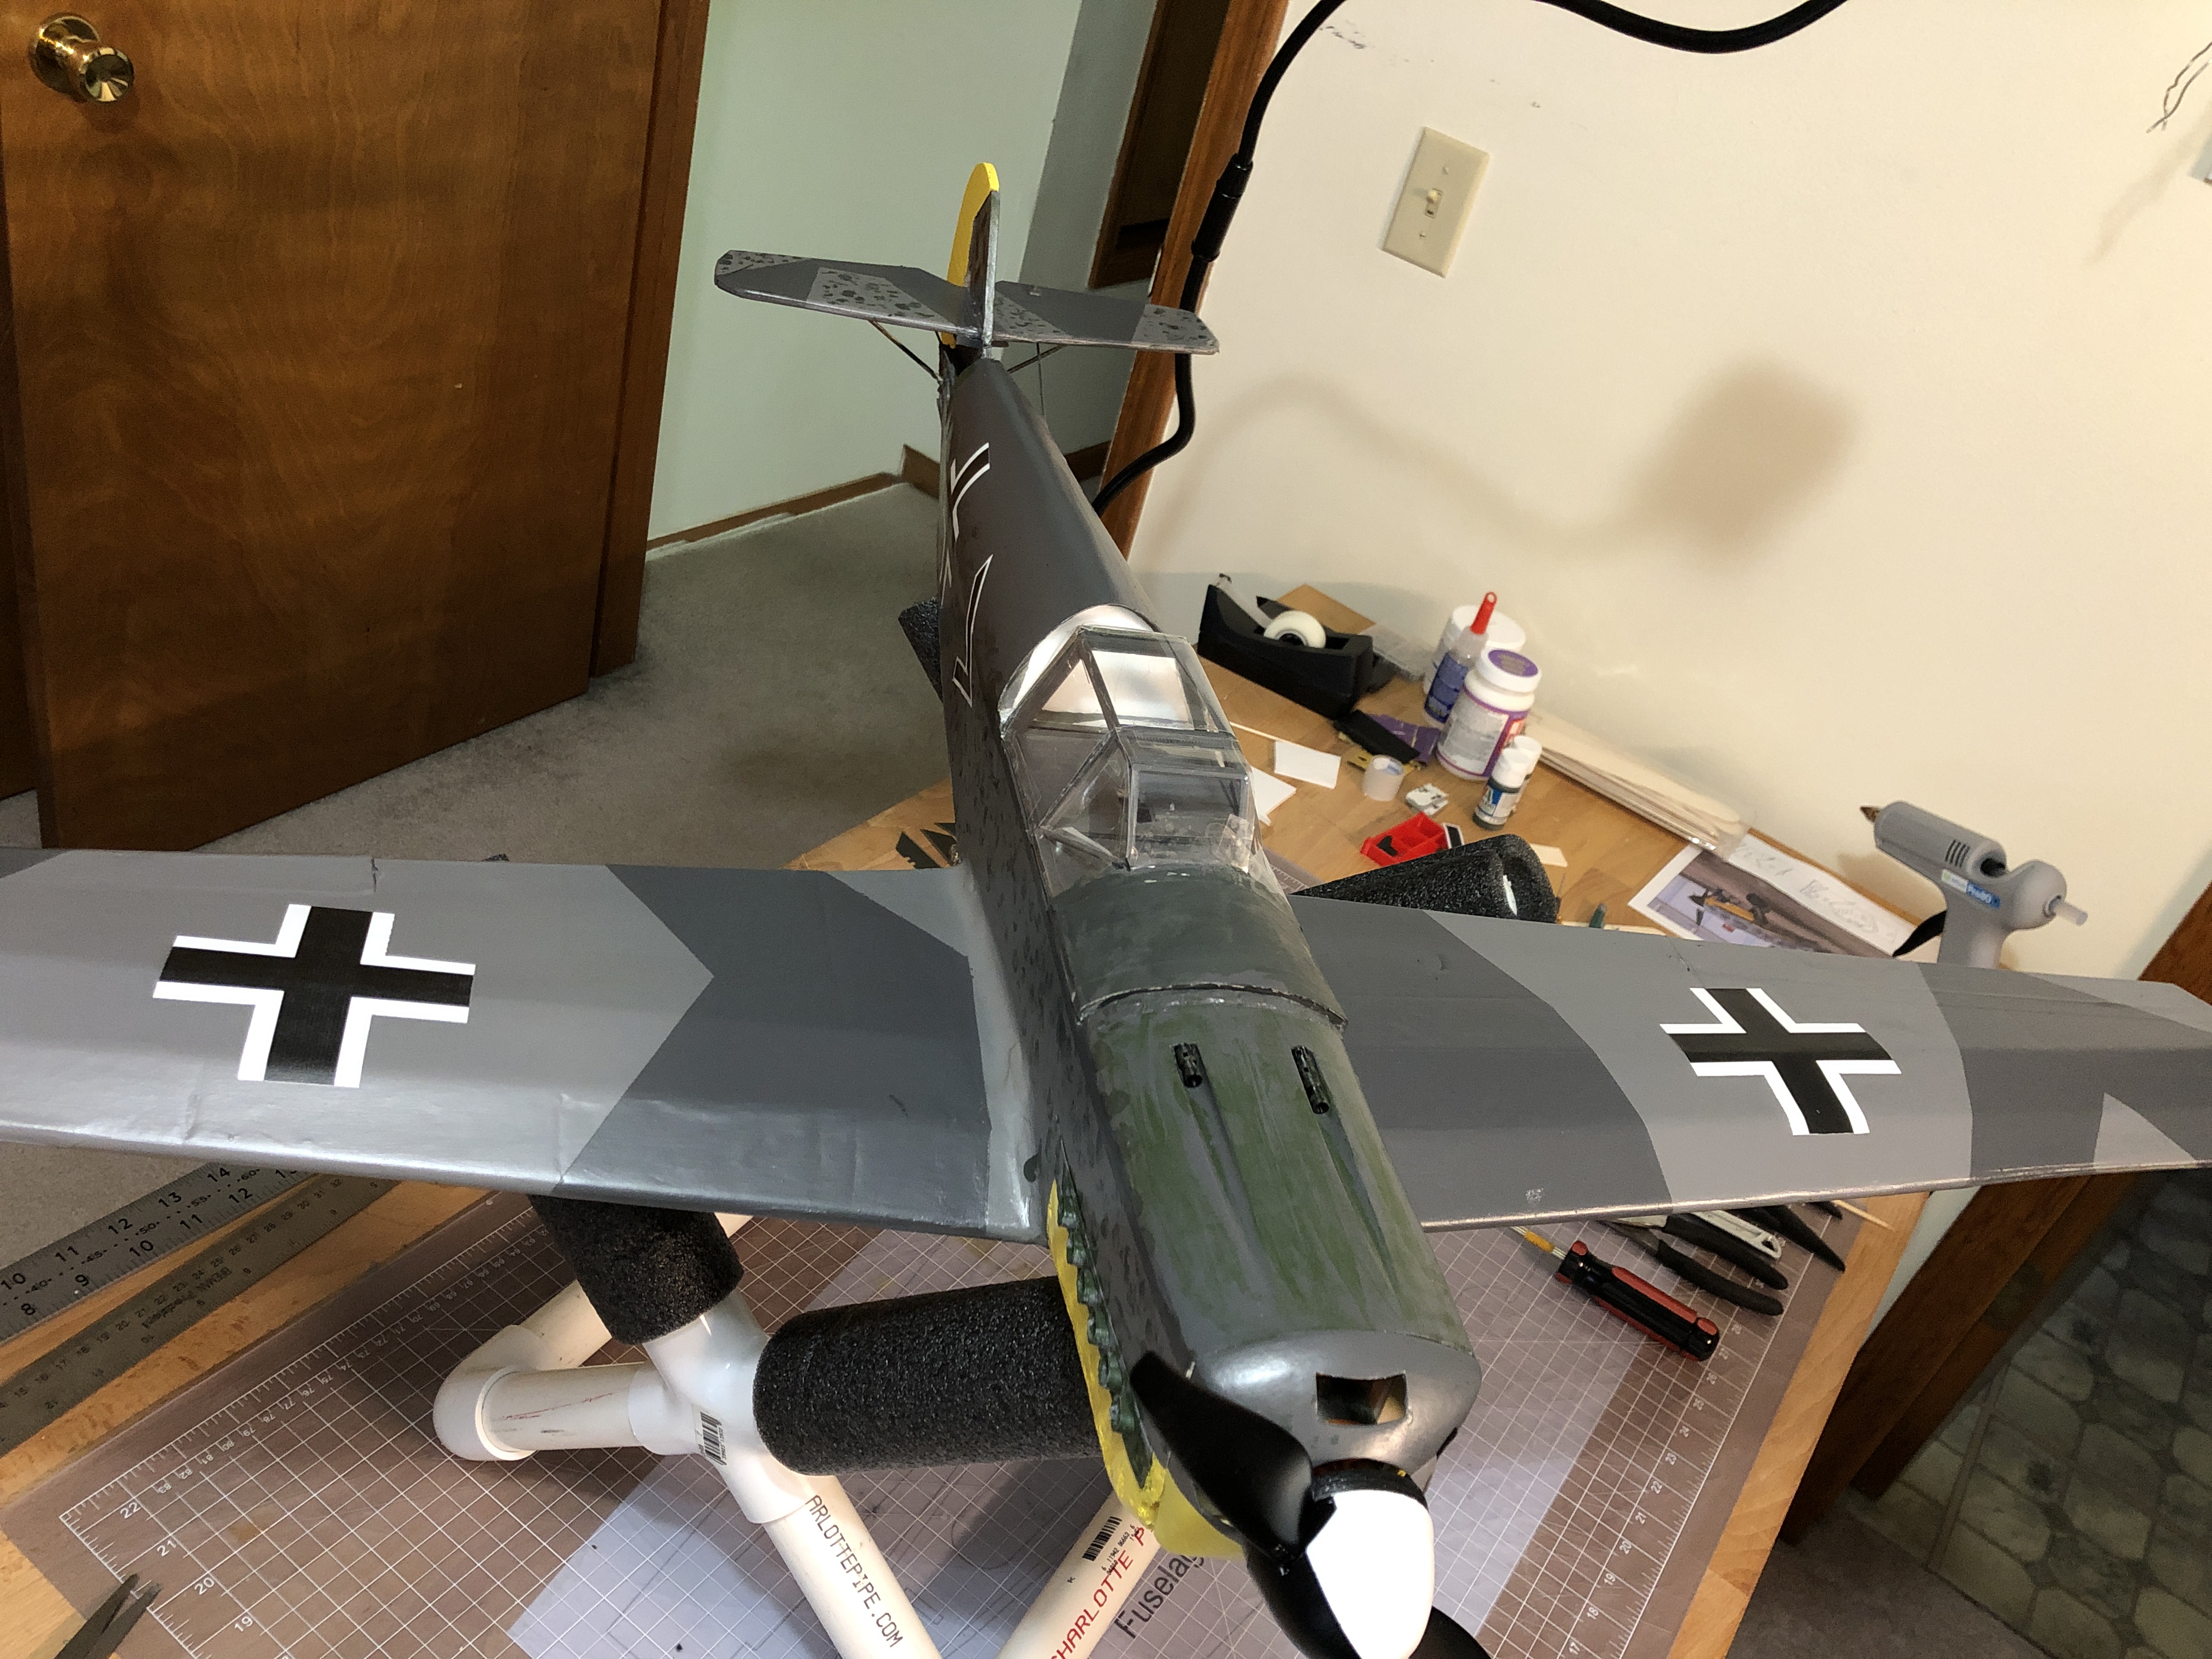
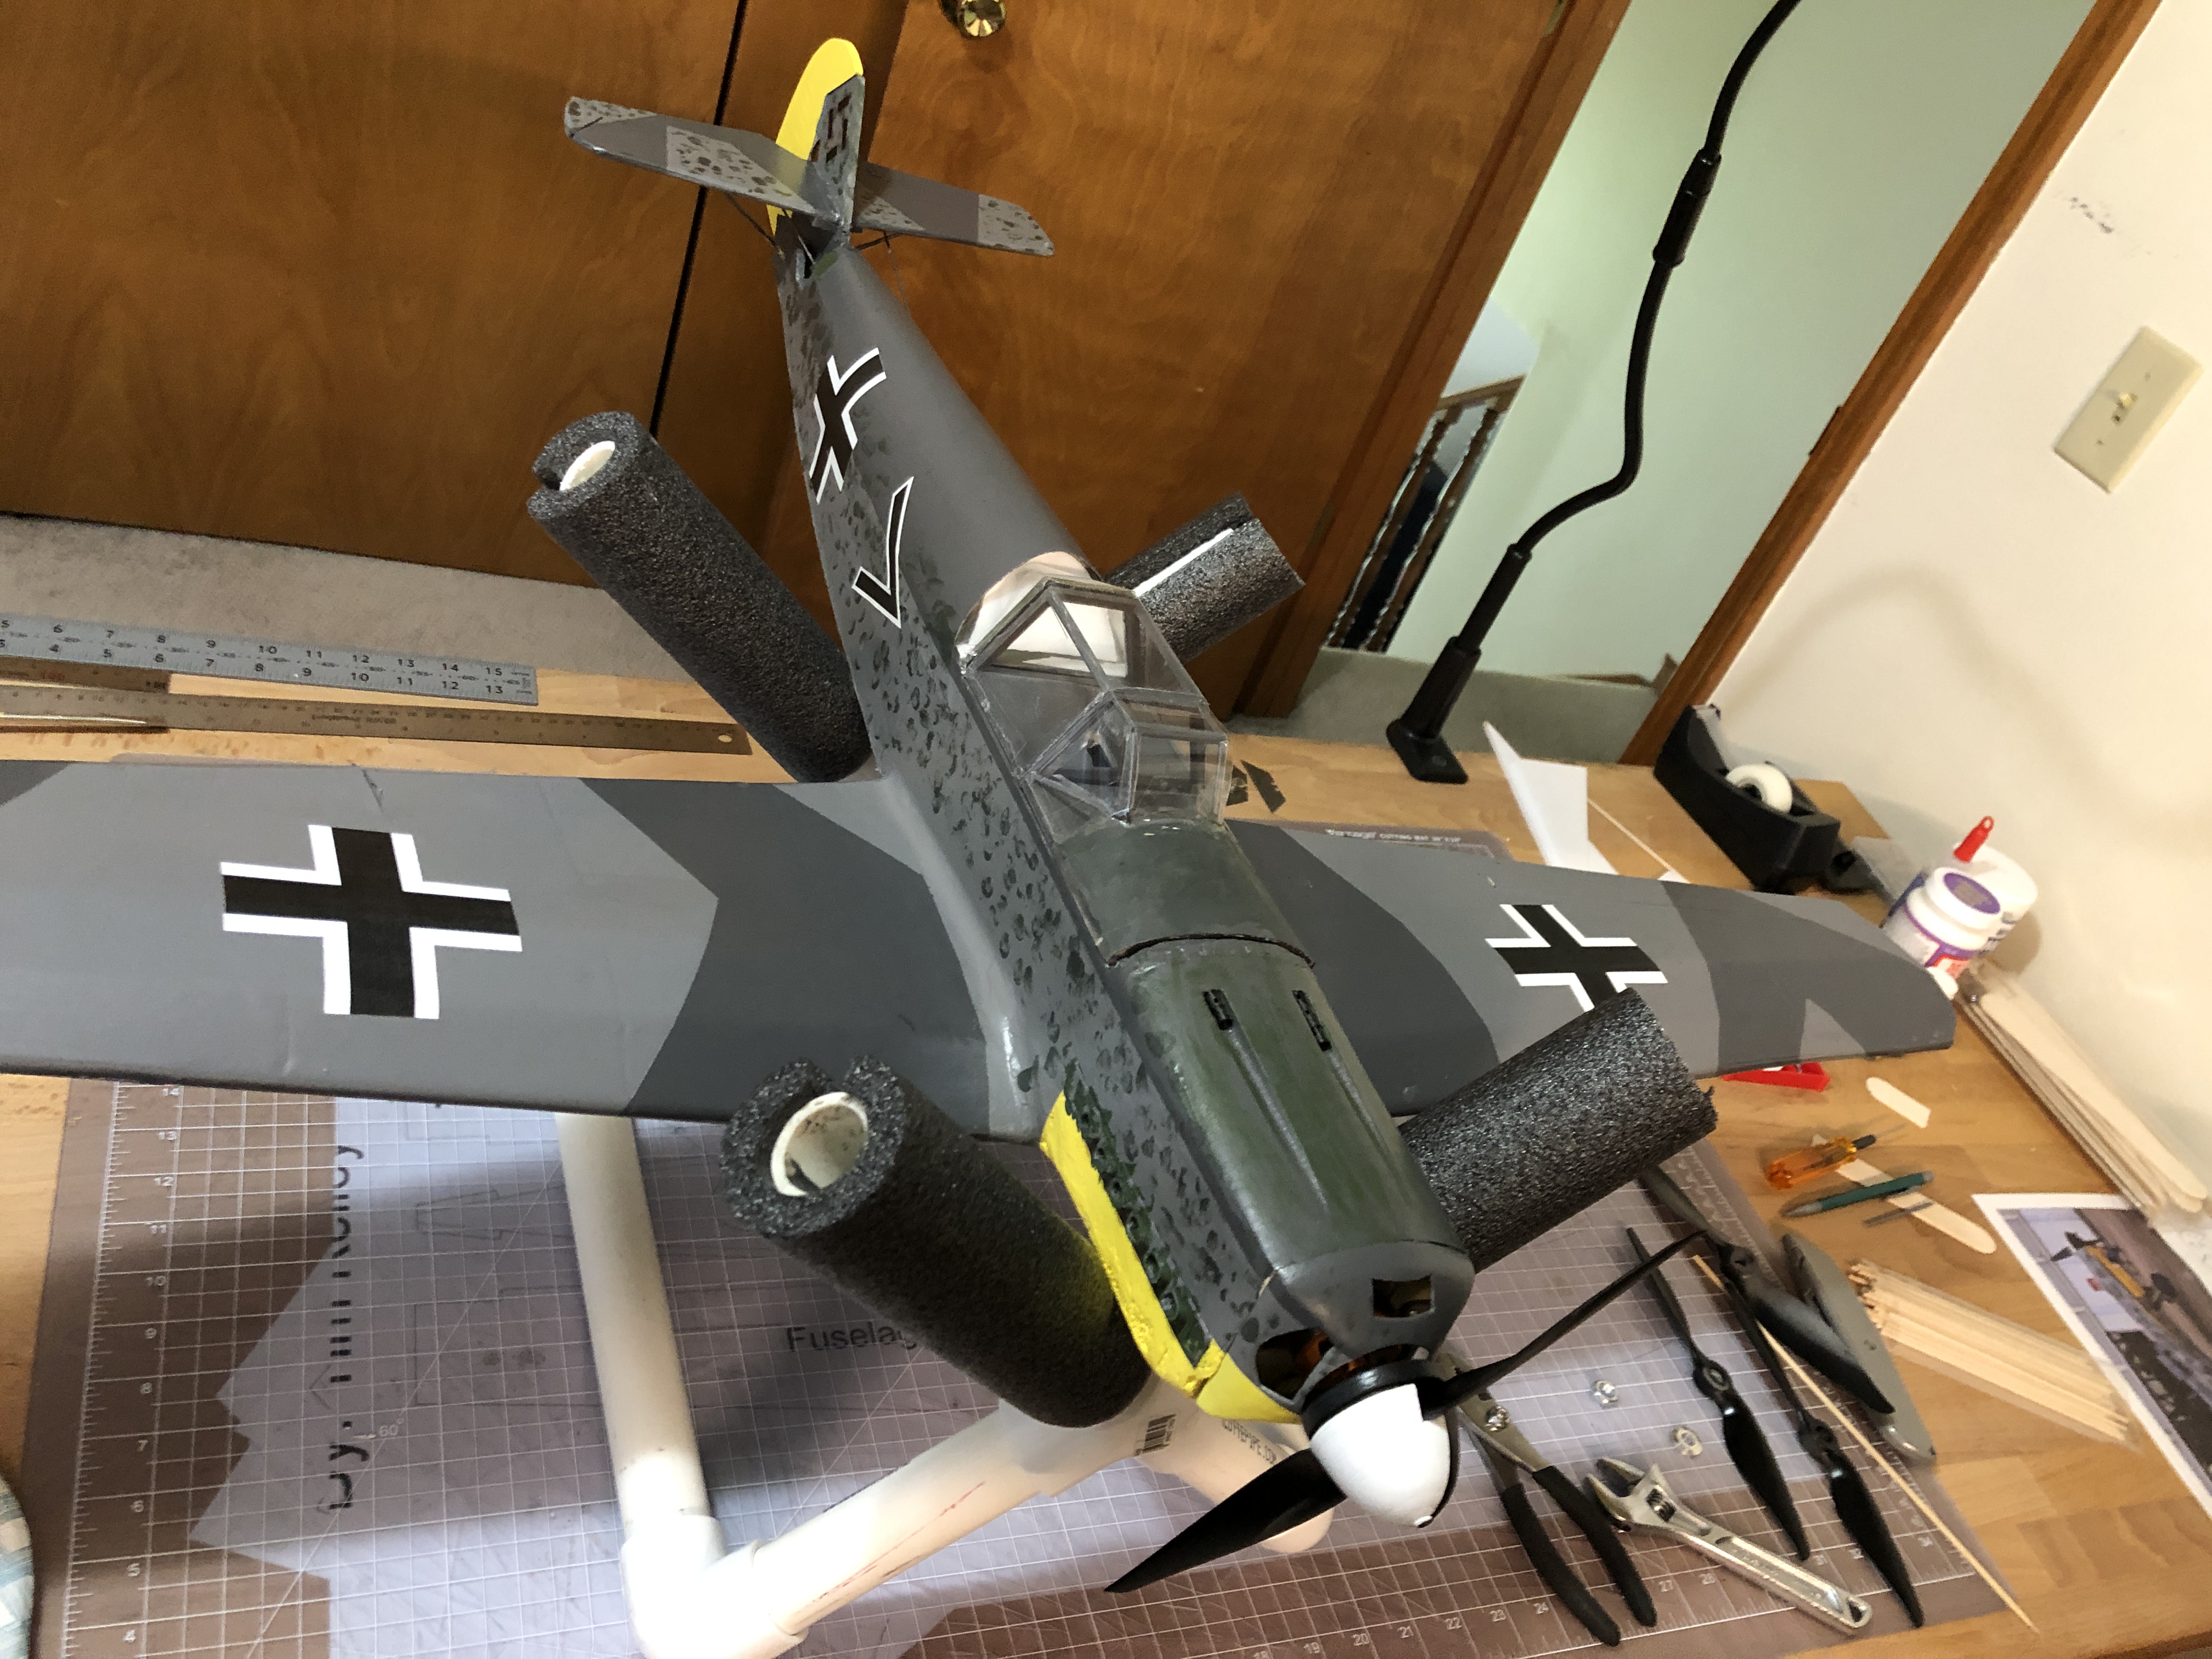
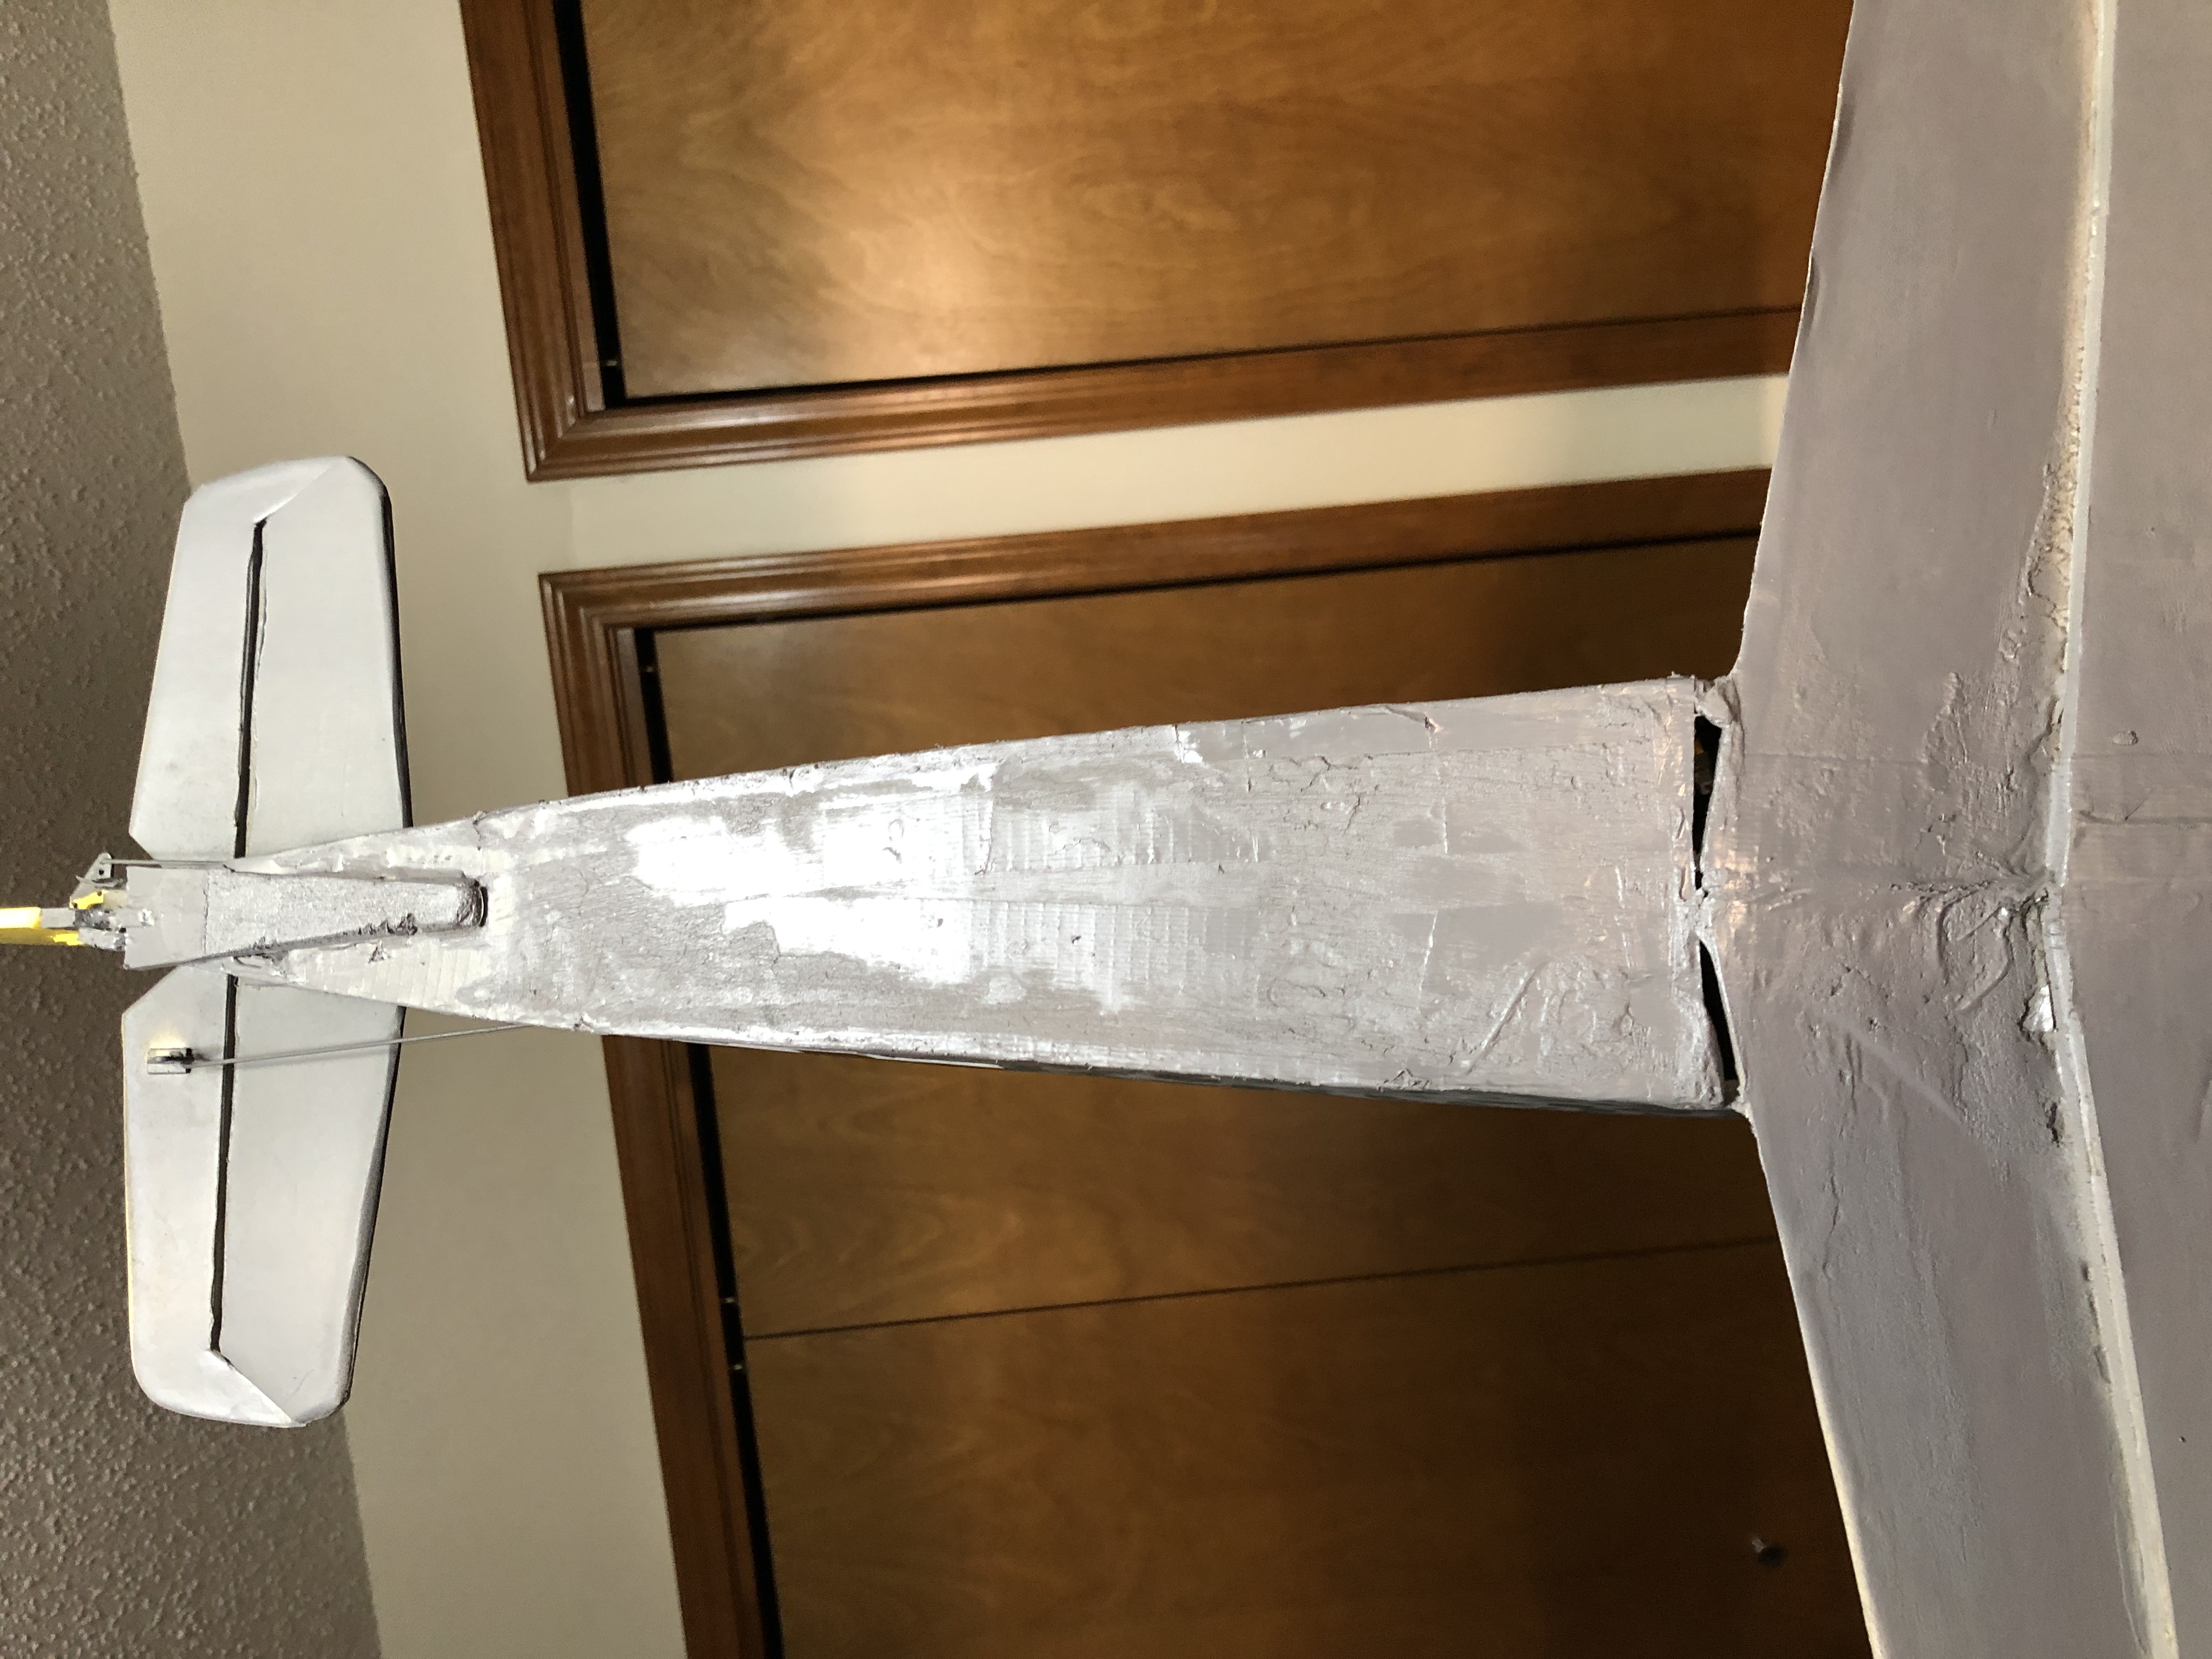
At this point the plane is 100% a "Messyschmitt"... I've taped, glued, and improvised the entire nose section. The hatch and back deck use completely custom formers to improve the shape vs. actual. I also pasted on Model Lite filler to smooth out the lines on the turtledeck between the paper and fuselage and heavily around the nose. I used a combination of sanding and filler to smooth out the 3d printed surfaces -to some degree.
After 3 rounds of filler, sand, filler. I'm ready to paint. Here's my painting process HUGELY inspired by Jon's great tutorial here:
1. Lightly sand all surfaces with 600 paper
2. Wipe down with alcohol rag
3. Paint YELLOW using Rustoleum 2x Sunrise. Rudder, Lower-half of nose, edge of under wings. 4 coats of this until the yellow really looked solid
4. Using Jon's tinfoil and green frog tape approach I masked off the yellow
5. Applied 3 coats of 2x Granite Grey Satin to the entire body. I did lightly sand the surface between coat 2-3 to remove a few glaring scuffs
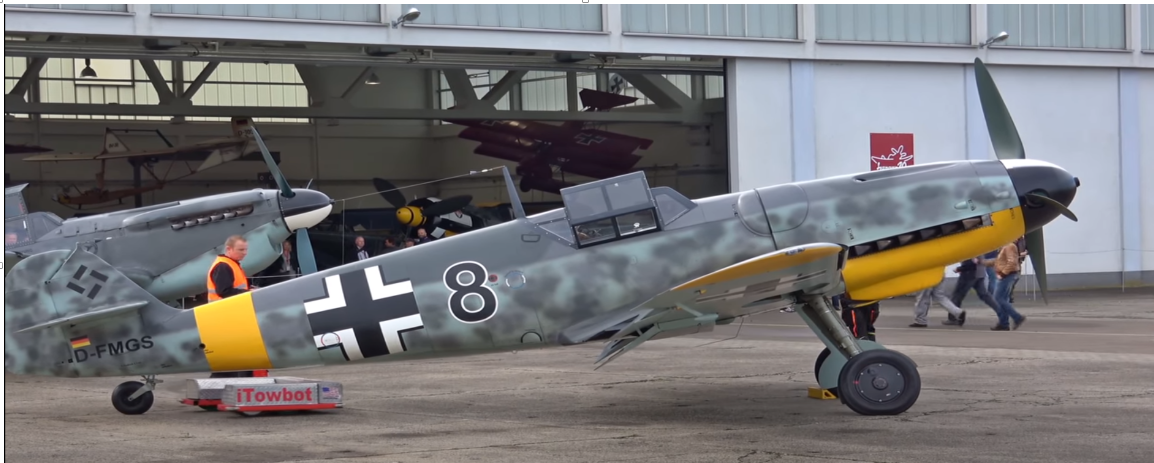
I let the grey dry overnight while I decided how to mask and apply the dark grey top coat. I knew I wanted a design similar to this BF109e variant. In hindsight I would rather have the yellow stripe in the back vs. the yellow tail but I'll live.
Next, I masked off the top deck and some random angles for the wings. I used green Frog Tape, name brand and a bunch of post-it notes for the full mask.. Pretty rough but hey "war-time production". Sprayed the 2x Dark Grey all over, waited 15m and put a second coat on.
Let that sit for another 15 minutes and then removed the masking to reveal:
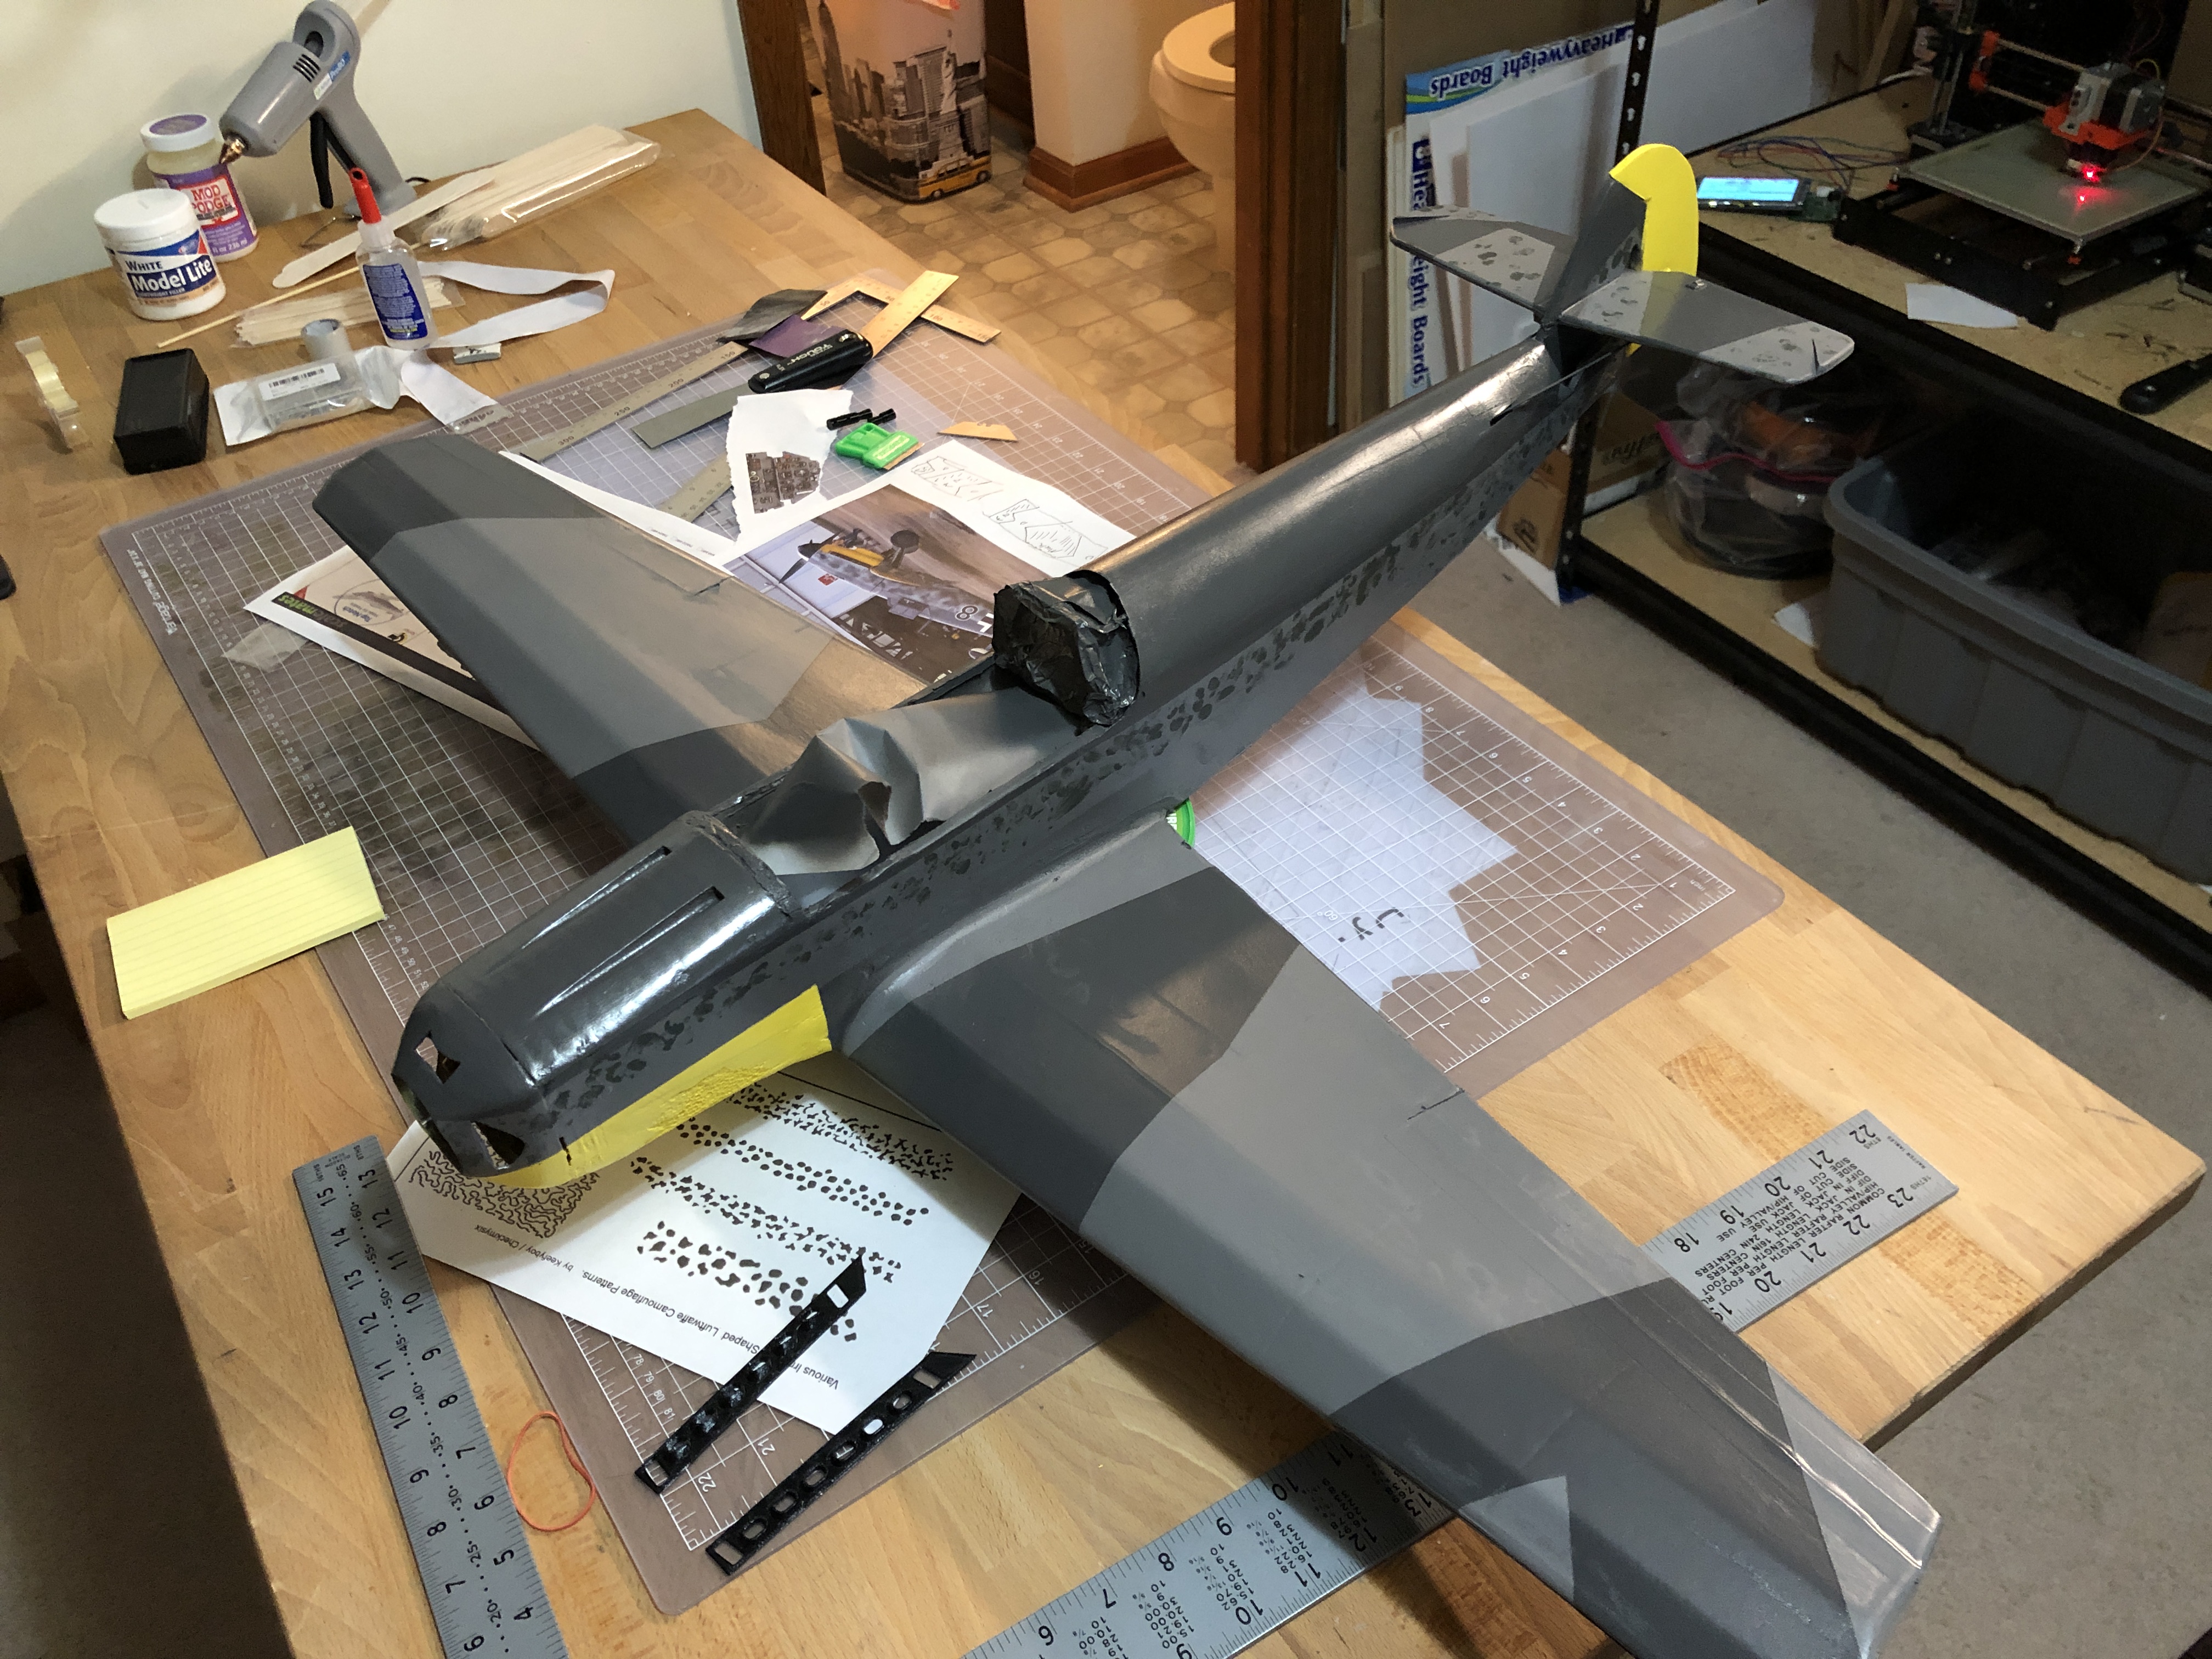
I was pleasantly surprised by the outcome... The Green Frog Tape = worth every penny. Not a single rip pull or tear of the yellow or base light grey paint. The yellow parts were masked for 2 days and the last coat of light grey went on 6 hours before masking and adding the dark grey. The lines are perfect all over.
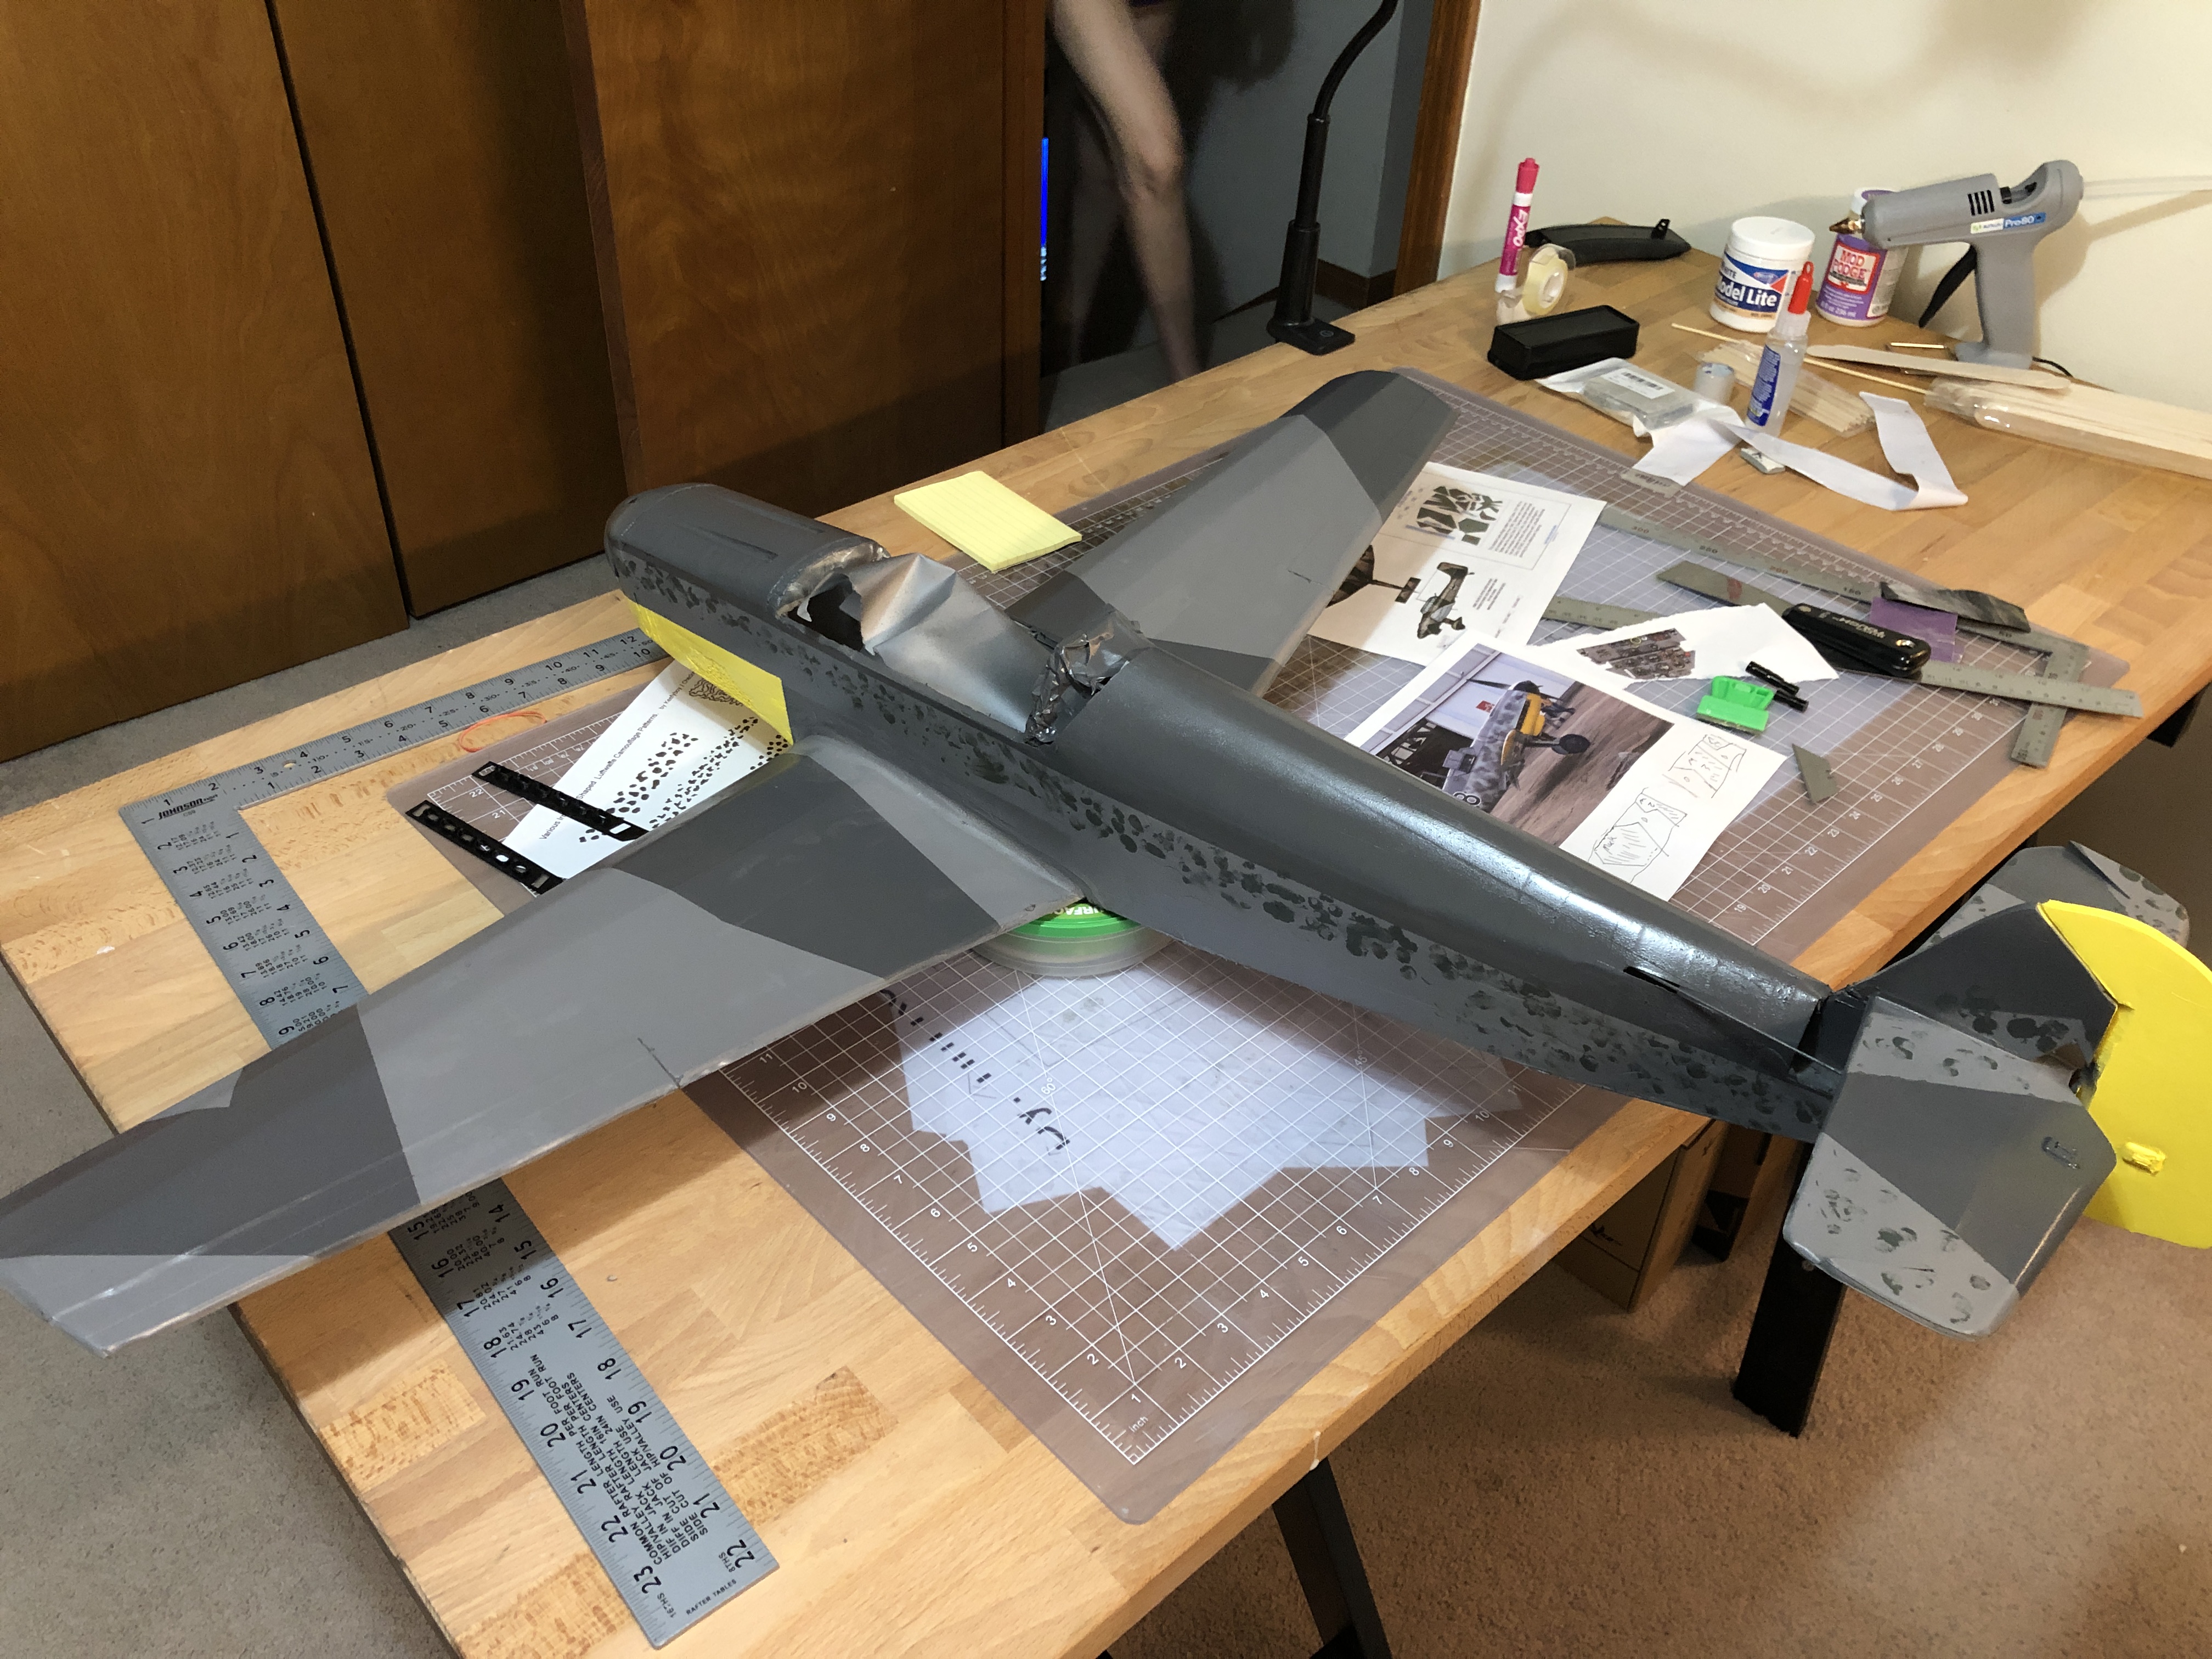
Things were looking so good I decided to push my luck and tap on some RLM 70 Acrylic paint camouflage. I lightly dabbed multiple fingertips in the paint and tapped up and down the body to do what you see in the picture. Overall I think it worked really well. I will let it sit for a day or two and perhaps extend the camo down the entire body.

After another week of finishing touches I completed the canopy. I ended up using transparency printer paper and packaging tape.. It's less awesome than I had hoped for but it looks just fine even from the FPV view.
I also layered on 3 coats of BLUE MinWax Polycrylic. I did some testing between this, spray Valspar, and Mod Podge Heavy. The spray ruined the stickers and the Mod Podge and Poly both looked great. Decided to use the Poly and see how things shape up.
The Painted Maiden

Achievements For Me
Paint and overall look of the plane. I am not an artist.. I rush, I get bored. Somehow this plane ended up looking awesome. I'm going to give most of the credit to Jon's video and the rest to Frog Tape for making those effort-free lines. Finger tapping the camo on so nicely must have been luck. But overall, I proved to myself I could make a plane look pretty nice.
Mistake 1:
The overall fuselage and wing construction is pretty shoddy. There are angles at which the plane looks uneven and crooked. To my amazement it flies great and does not seem to matter. Still, I continue to try and improve precision while cutting, folding, and gluing.
Mistake 2:
I used some common Styrofoam to fill the nose of the plane. It was super-dense but despite having a light coat of spackle the paint ate into it.


Log In to reply
Log In to reply
Log In to reply
Log In to reply