Formica-Quad
DIY Quadcopter frame using formica with FPV Setup
HilldaFlyer June 2015

Formica has proven to be a great material for the construction of DIY multirotor frames as previously demonstrated with the Formica-Tri and Formica-Tri Stubby. Pushing the envelope a little further I’ve built a 430 size quadcopter with the formica body for an FPV rig.
Making the body.
The body of the quad (top and bottom plates), as well as the battery/camera tray, is made of 2-ply formica. This overall design follows those of commercial rigs that have a “dirty” and “clean” frame system.
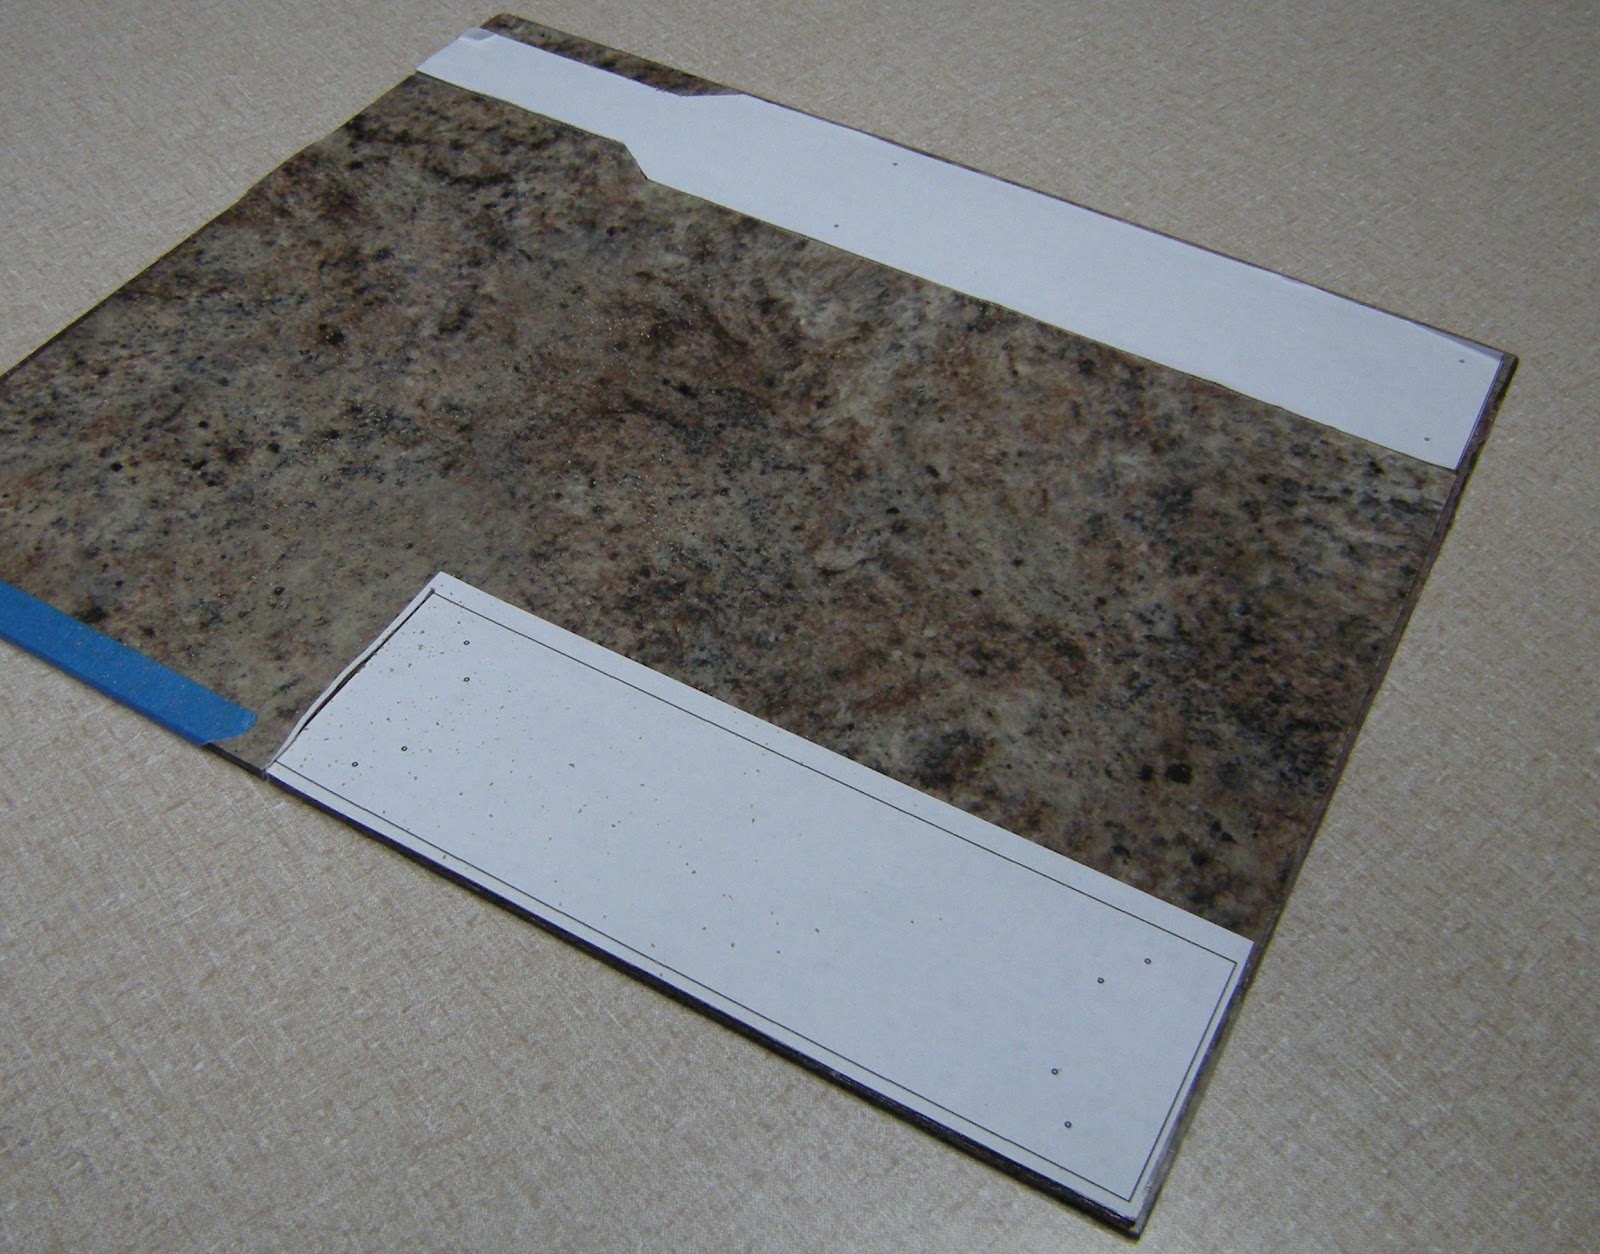
To make the 2-ply formica, glue two sheets back-to-back with epoxy (I use epoxy resin from US Composites Thin 635 with medium hardener, the formica is post form at 0.84mm thick). Use lots of weight or vacuum bagging to hold the sheets together while curing overnight.
The next step is to cut out the body parts. The most important part of this step is to ensure that the holes used to attach the booms on the top and bottom body plates match. To achieve this, I hot glue 2 of the 2 ply formica sheets together and then cut and drill while they are together. To keep the orientation of the two plates, I put two non-symmetrical marks on the formica plates so that no matter what happens I will be able to align the plates in the same orientation as they were cut and drilled. The paper plans can be attached to the formica with glue stick, Elmer's or something water soluble.
I used a scroll saw with blades having 15 to 20 points per inch to cut out the plans. Drill the 7/32” holes for the boom supports. I use a punch to put a dent in the formica to help guide the drill bit and to prevent it from skittering around on the formica surface.

If you don’t have a saw, no problem! Formica is pretty easy to cut with a good utility knife. Before making the 2-ply formica, cut each piece using a straightedge, score along the line a couple of times and then bend (for best results, score both sides of the formica). The formica will break along the score. Then glue the formica together with epoxy as above to make the 2 ply. Once glued into 2 ply, joint the two plates together with hot glue taking care to align them as best as possible. The purpose of hot gluing the top and bottom plates together is ensure that the holes in the top plate and bottom plate that are completely aligned. Drill the 7/32” holes for the boom supports.
After the holes are drilled, separate the two pieces of 2-ply formica. I use a bit of alcohol to detached the hot glue from the formica. If you don’t have any alcohol (isopropanol, ethanol, methanol) hanging around, warm it with hair dryer for a few minutes. The glue can then be removed (scraped off) with a razor blade. The paper template can be removed by moistening it with water. I would like to make a strong recommendation here… get some alcohol. You’d be amazed at how it can be used to remove hot glue from things, like clothes, fingers, velcro, cats… although I haven’t tried the last one yet. I used to spend lots of time picking the hot glue off my fingers, but with a little alcohol, it just peels off. Ok, back to the project.
Follow the same process as above to create the battery and camera plate using 2 ply formica. You will only need one.
Making the booms.
Cut 4 booms 20 cm long from ½” square dowel. I have found it somewhat difficult to find straight ½” square dowel at the hardware store, seems like most of them come with some form of bend or twist. However, I have found that for a little more cost, you can get pieces of ½”x ¼” wood trim that are really straight.

I made square dowels by gluing two ¼” x ½” trim pieces together on a straight edge and then sanding. Not only are these booms straight, they are stronger and well worth the cost and effort to me.

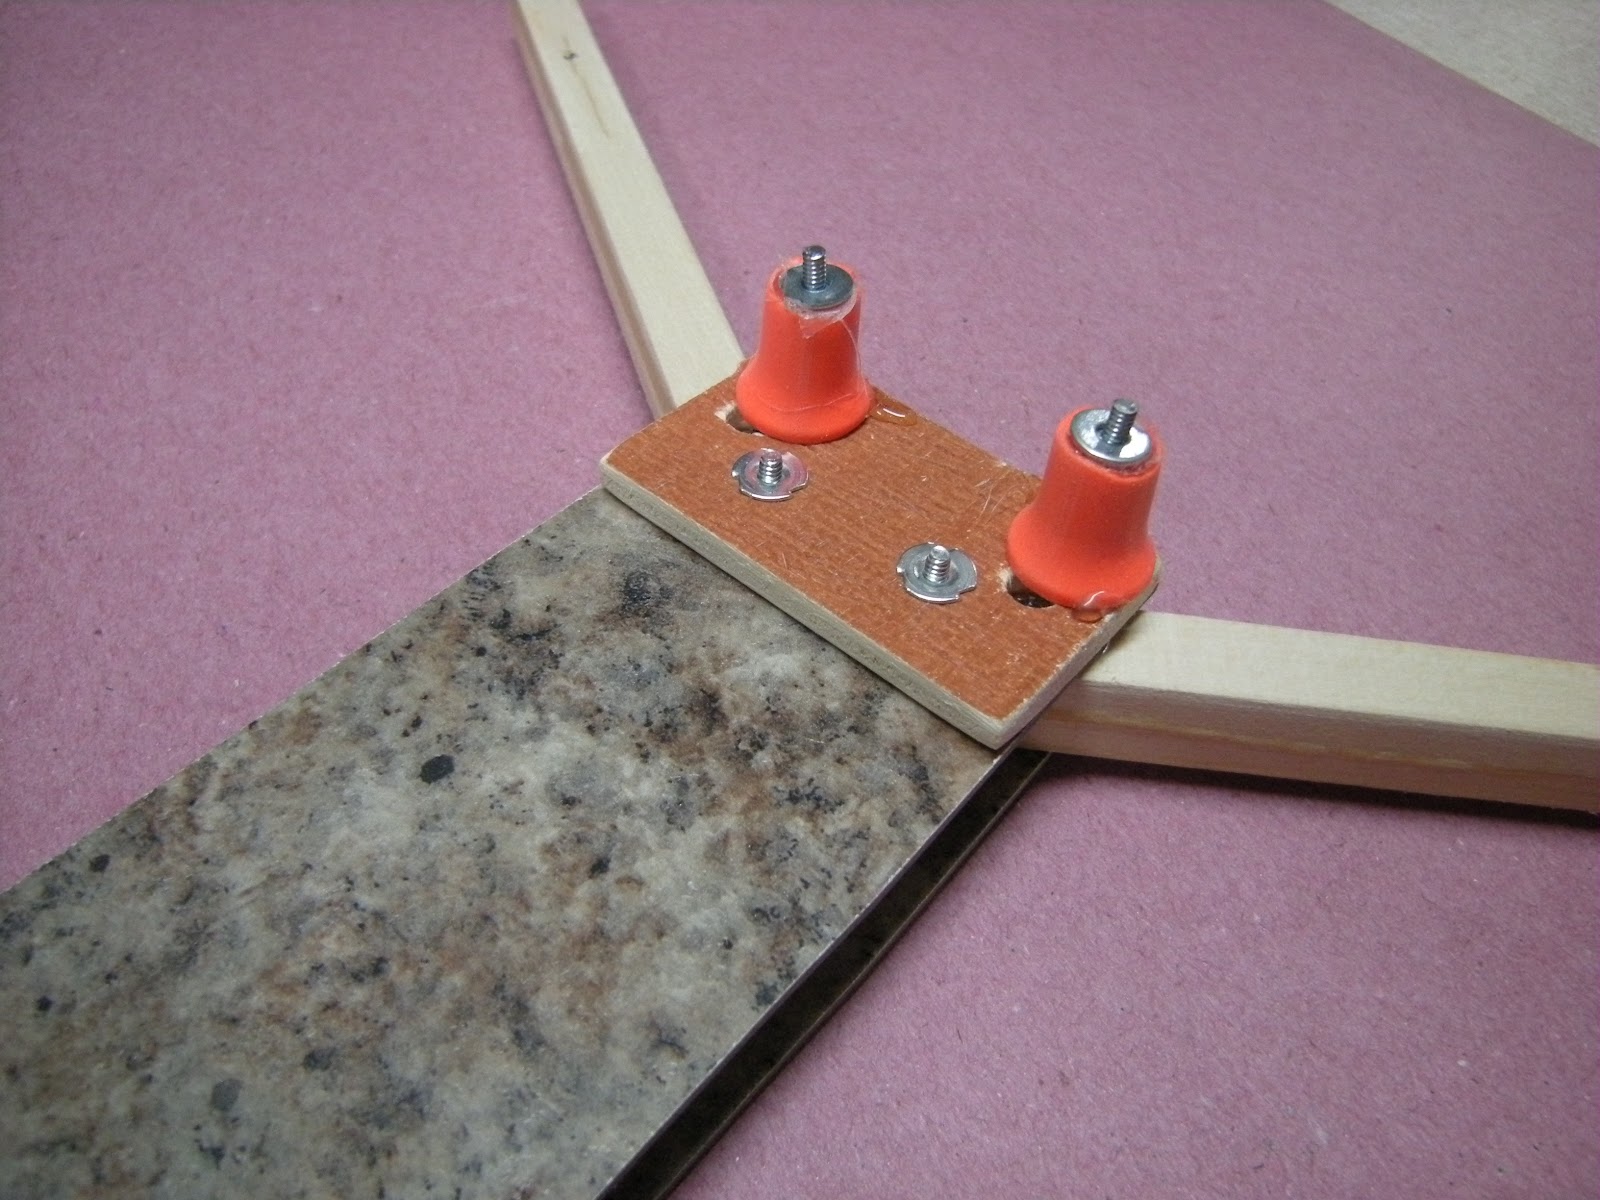
Drill a 7/32” hole through both ends, center each hole 1 cm from the end. One hole will be the attachment to the body and the other will be the outermost hole for the motor mount. Attach the booms to the frame with ½” long bolt.

Making your X-Quad “square” is a real trick. I found that just drilling the holes was just not accurate enough, although it did come very close, but not close enough for the perfectionist in me.

To ensure symmetry, I used a square and measured the distance from one arm to two others. When you can place any arm into the square and the distance to the other two arms is the same, it is square. With the angle of the booms held tight by the first screw, I drilled the other hole. I didn’t drill all the way through from one side, I drilled ½ way through and then complete the hole by drilling from the other side. Doing it this way ensures the holes meet even if my drilling aim is a bit off. Secure the boom with the second bolt. The motor to motor diagonal was 430mm.

Another way of doing this is to draw a square (this one is 20 cm) with a “X” going from corner to corner and a “+” going side to side and up to down.

Put the quadcopter body centered on the “+” and align the arms to the “X”.
Folding Quad
Sometimes, saving a bit of space is really helpful. On the second build I wanted to make the arms fold. The second bolt (inner) can be removed and the arms rotated on the outer bolt.
To make the assembly a bit easier at the field, instead of using nuts, I used blind nuts fastened into a bit of plywood.

The bolt can be removed the the arms folded on the outer bolts
Mounting the motors.
Mounting your motors to the booms will depend on the type of motors you have. The NTM motors use have the aluminum X plate.

I drill two 7/32” holes in the end of the boom with the one nearest the end being 1 cm from the end. The other hole depends on the size of your motor mount. Secure the motor with two bolts.
Battery/Camera Tray
The best DIY anti-vibration system I’ve used has been made from foam earplugs. When I first started using them, I simply trimmed off the pointy end and hot glued it between the two surfaces. This worked great until I wanted to detach the surfaces. I have seen other people built them by squeezing the earplug through holes.

For this setup I wanted to to make the vibration system removable so I wouldn’t have to replace the earplugs when I needed to make an alteration. This design is to mount a bolt to one end with hot glue (or epoxy), then at least one of the two sides can be unmounted.

I built a jig with four holes to hold the bolts in place while the epoxy cures. I line the formica jib (can be plywood, plastic or other material) with wax paper to prevent sticking. Align the earplugs with the bolts on the workbench, add a drop of epoxy to the earplug, and put the jig holding the bolts on top of the earplugs. Add a little weight and let cure. If you need a distance to stand off, longer bolts work great with a nut holding both sides of the formica.
Paint
When I’ve flown my tricopters, others at the field would approach and without asking make a statement like, you built that yourself didn’t you. Adding paint takes away the unmistakable DIY appearance.

Lightly sand the formica to give the paint a surface to adhere to. Grab your favorite color and paint away!

Looks great! Flies Great!
Electronics
Placing the electronics is pilot choice, as is which components are used. Here is a list that I used on this rig.
- Flight Controller: AMP2.5.2 (Ready to Fly Quads) $54 with pins and power module.
- GPS: uBlox 6M no mounting backplane (Ready to Fly Quads) $18
- 3DR Telemetry for APM’s Mission Planner: 915MHz (Ready to Fly Quads) $29
- OSD: MinimOSD (Ready to Fly Quads) $11
- ESC: HobbyKing 20A flashed SimonK (Hobby King) $8
- Motor: NTM 2826 1200KV (Hobby King) $16 + $2 accessory pack
- Prop: APC 9x4.5 (Radical RC) $2.59
- Video Tx: SkyZone TS353 5.8G 400mW FPV Transmitter (Hobby King) $33
- Video Rx: SkyZone RC305 (Hobby King) $16
- Camera: Mobius Lense A (ebay-eletoponline365) $69
- Receiver: FrSky D8R-XP $27
At the end of this project, I had to smile and laugh a bit - I put $380 worth of gear on a $4 frame, and that doesn’t include the FPV goggles.
But here is what you get...

HilldaFlyer - June 2015


Log In to reply